maintenance reset DODGE HORNET 2023 Owners Manual
[x] Cancel search | Manufacturer: DODGE, Model Year: 2023, Model line: HORNET, Model: DODGE HORNET 2023Pages: 288, PDF Size: 14.2 MB
Page 5 of 288
3
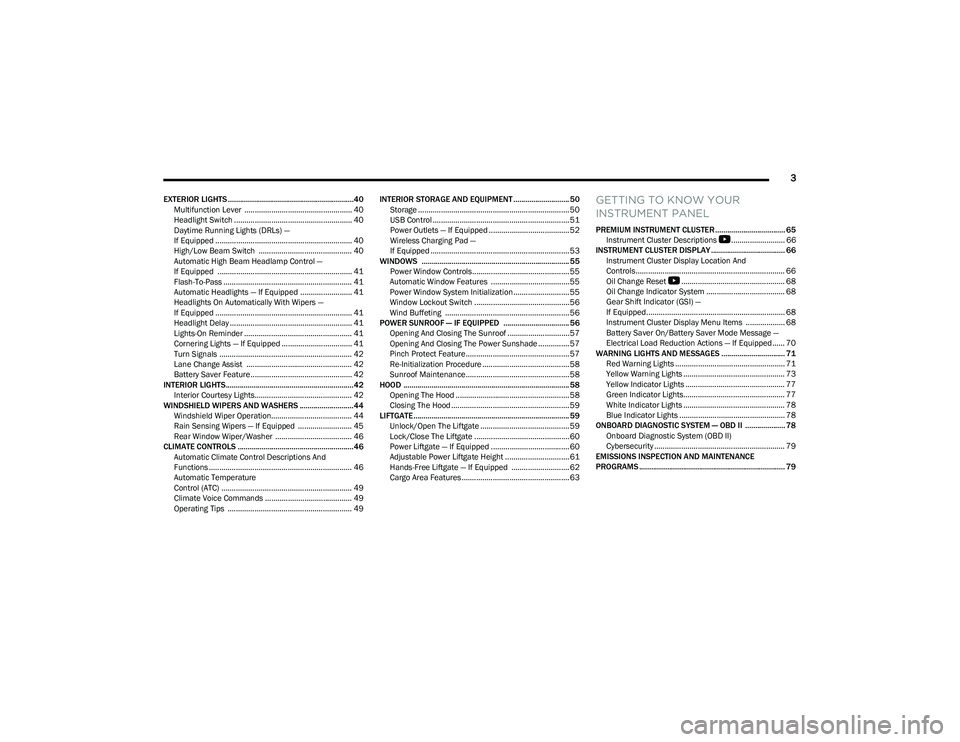
EXTERIOR LIGHTS ...............................................................40Multifunction Lever .................................................... 40
Headlight Switch ......................................................... 40
Daytime Running Lights (DRLs) —
If Equipped .................................................................. 40
High/Low Beam Switch ............................................. 40
Automatic High Beam Headlamp Control —
If Equipped ................................................................. 41
Flash-To-Pass .............................................................. 41
Automatic Headlights — If Equipped ......................... 41
Headlights On Automatically With Wipers —
If Equipped .................................................................. 41
Headlight Delay ........................................................... 41
Lights-On Reminder .................................................... 41
Cornering Lights — If Equipped .................................. 41
Turn Signals ................................................................ 42
Lane Change Assist ................................................... 42
Battery Saver Feature................................................. 42
INTERIOR LIGHTS................................................................42 Interior Courtesy Lights............................................... 42
WINDSHIELD WIPERS AND WASHERS ........................... 44 Windshield Wiper Operation....................................... 44
Rain Sensing Wipers — If Equipped .......................... 45
Rear Window Wiper/Washer ..................................... 46
CLIMATE CONTROLS ..........................................................46 Automatic Climate Control Descriptions And
Functions ..................................................................... 46
Automatic Temperature
Control (ATC) ............................................................... 49
Climate Voice Commands .......................................... 49
Operating Tips ............................................................ 49 INTERIOR STORAGE AND EQUIPMENT ............................ 50
Storage ......................................................................... 50
USB Control .................................................................. 51
Power Outlets — If Equipped ....................................... 52
Wireless Charging Pad —
If Equipped ................................................................... 53
WINDOWS .......................................................................... 55 Power Window Controls............................................... 55
Automatic Window Features ......................................55
Power Window System Initialization........................... 55
Window Lockout Switch ..............................................56
Wind Buffeting ............................................................ 56
POWER SUNROOF — IF EQUIPPED ................................. 56 Opening And Closing The Sunroof ..............................57
Opening And Closing The Power Sunshade ............... 57
Pinch Protect Feature.................................................. 57
Re-Initialization Procedure .......................................... 58
Sunroof Maintenance.................................................. 58
HOOD ................................................................................... 58 Opening The Hood .......................................................58
Closing The Hood ......................................................... 59
LIFTGATE .............................................................................. 59 Unlock/Open The Liftgate ........................................... 59
Lock/Close The Liftgate ..............................................60
Power Liftgate — If Equipped ......................................60
Adjustable Power Liftgate Height ............................... 61
Hands-Free Liftgate — If Equipped ............................ 62
Cargo Area Features.................................................... 63GETTING TO KNOW YOUR
INSTRUMENT PANEL
PREMIUM INSTRUMENT CLUSTER................................... 65 Instrument Cluster Descriptions
b
.......................... 66
INSTRUMENT CLUSTER DISPLAY ..................................... 66 Instrument Cluster Display Location And
Controls........................................................................ 66
Oil Change Reset
b
.................................................. 68
Oil Change Indicator System ...................................... 68
Gear Shift Indicator (GSI) —
If Equipped................................................................... 68
Instrument Cluster Display Menu Items ................... 68
Battery Saver On/Battery Saver Mode Message —
Electrical Load Reduction Actions — If Equipped ...... 70
WARNING LIGHTS AND MESSAGES ................................ 71 Red Warning Lights ..................................................... 71
Yellow Warning Lights ................................................. 73
Yellow Indicator Lights ................................................ 77
Green Indicator Lights................................................. 77
White Indicator Lights ................................................. 78
Blue Indicator Lights ................................................... 78
ONBOARD DIAGNOSTIC SYSTEM — OBD II .................... 78 Onboard Diagnostic System (OBD II)
Cybersecurity ............................................................... 79
EMISSIONS INSPECTION AND MAINTENANCE
PROGRAMS ......................................................................... 79
23_GG_OM_EN_USC_t.book Page 3
Page 70 of 288
68GETTING TO KNOW YOUR INSTRUMENT PANEL
Unstored Messages
This message type is displayed indefinitely or until the
condition that activated the message is cleared. Exam -
ples of this message type are “Turn Signal On” (if a turn
signal is left on) and “Lights On” (if driver leaves the
vehicle with the lights on).
Unstored Messages Until RUN
These messages deal primarily with the Remote Start
feature. This message type is displayed until the igni -
tion is in the RUN state. Examples of this message type
are “Remote Start Canceled - Door Ajar” and
“Press Brake Pedal and Push Button to Start.”
Five Second Unstored Messages
When the appropriate conditions occur, this type of
message takes control of the main display area for
five seconds and then returns to the previous screen.
An example of this message type is “Automatic High
Beams On.”
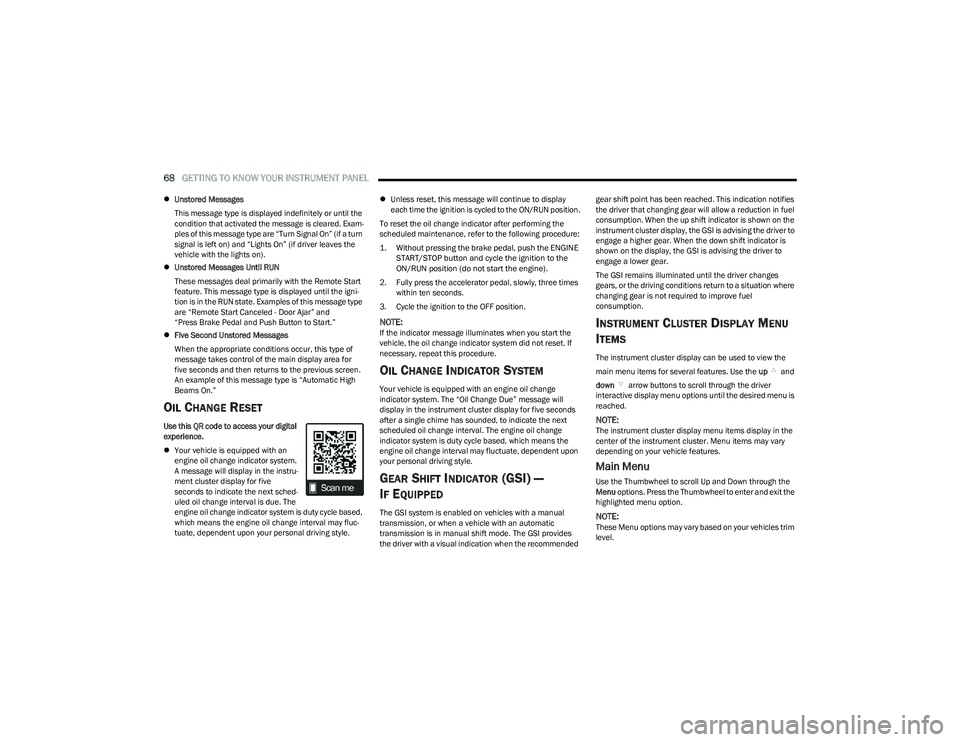
OIL CHANGE RESET
Use this QR code to access your digital
experience.
Your vehicle is equipped with an
engine oil change indicator system.
A message will display in the instru -
ment cluster display for five
seconds to indicate the next sched -
uled oil change interval is due. The
engine oil change indicator system is duty cycle based,
which means the engine oil change interval may fluc -
tuate, dependent upon your personal driving style.
Unless reset, this message will continue to display
each time the ignition is cycled to the ON/RUN position.
To reset the oil change indicator after performing the
scheduled maintenance, refer to the following procedure:
1. Without pressing the brake pedal, push the ENGINE START/STOP button and cycle the ignition to the
ON/RUN position (do not start the engine).
2. Fully press the accelerator pedal, slowly, three times within ten seconds.
3. Cycle the ignition to the OFF position.
NOTE:If the indicator message illuminates when you start the
vehicle, the oil change indicator system did not reset. If
necessary, repeat this procedure.
OIL CHANGE INDICATOR SYSTEM
Your vehicle is equipped with an engine oil change
indicator system. The “Oil Change Due” message will
display in the instrument cluster display for five seconds
after a single chime has sounded, to indicate the next
scheduled oil change interval. The engine oil change
indicator system is duty cycle based, which means the
engine oil change interval may fluctuate, dependent upon
your personal driving style.
GEAR SHIFT INDICATOR (GSI) —
I
F EQUIPPED
The GSI system is enabled on vehicles with a manual
transmission, or when a vehicle with an automatic
transmission is in manual shift mode. The GSI provides
the driver with a visual indication when the recommended gear shift point has been reached. This indication notifies
the driver that changing gear will allow a reduction in fuel
consumption. When the up shift indicator is shown on the
instrument cluster display, the GSI is advising the driver to
engage a higher gear. When the down shift indicator is
shown on the display, the GSI is advising the driver to
engage a lower gear.
The GSI remains illuminated until the driver changes
gears, or the driving conditions return to a situation where
changing gear is not required to improve fuel
consumption.
INSTRUMENT CLUSTER DISPLAY MENU
I
TEMS
The instrument cluster display can be used to view the
main menu items for several features. Use the up and
down arrow buttons to scroll through the driver
interactive display menu options until the desired menu is
reached.
NOTE:The instrument cluster display menu items display in the
center of the instrument cluster. Menu items may vary
depending on your vehicle features.
Main Menu
Use the Thumbwheel to scroll Up and Down through the
Menu options. Press the Thumbwheel to enter and exit the
highlighted menu option.
NOTE:These Menu options may vary based on your vehicles trim
level.
23_GG_OM_EN_USC_t.book Page 68
Page 225 of 288
223
SERVICING AND MAINTENANCE
SCHEDULED SERVICING
Your vehicle is equipped with an automatic oil change
indicator system. The oil change indicator system will
remind you that it is time to take your vehicle in for
scheduled maintenance.
Based on engine operation conditions, the oil change
indicator message will illuminate in the instrument cluster.
This means that service is required for your vehicle.
Operating conditions such as frequent short-trips, trailer
towing, and extremely hot or cold ambient temperatures
will influence when the “Change Oil” or “Oil Change
Required” message is displayed. Have your vehicle
serviced as soon as possible, within the next 500 miles
(805 km).An authorized dealer will reset the oil change indicator
message after completing the scheduled oil change. If a
scheduled oil change is performed by someone other than
an authorized dealer, the message can be reset by
referring to the steps described under Instrument Cluster
Display
Úpage 66.
NOTE:Under no circumstances should oil change intervals
exceed 10,000 miles (16,000 km), one year or 350 hours
of engine run time, whichever comes first. The 350 hours
of engine run or idle time is generally only a concern for
fleet customers.
Once A Month Or Before A Long Trip:
Check engine oil level.
Check windshield washer fluid level.
Check the tire inflation pressures and look for unusual
wear or damage. Rotate tires at the first sign of irreg -
ular wear, even if it occurs before the oil indicator
system turns on.
Check the fluid levels of the coolant reservoir, and
brake master cylinder reservoir, and fill as needed.
Check function of all interior and exterior lights.
8
23_GG_OM_EN_USC_t.book Page 223
Page 233 of 288
SERVICING AND MAINTENANCE231
Service Position Strategy
The Service Position Strategy places the wiper blades in a
position that allows them to be easily changed.
To enable the Service Position Strategy, the wipers must
be in the park position before placing the ignition in the
OFF position. The Service Position Strategy must be
activated within two minutes after the ignition is placed in
the OFF position. To correctly activate the Service Position
command, move the wiper lever upward for at least half a
second. At every valid activation of the Service Position
command, the wiper blades are activated for 250 ms. The
Service Position command can be repeated several times
to bring the blades into the desired position, up to a
maximum of three times. After three subsequent
activations the strategy is disabled. Function Deactivation And Reset:
The ignition is placed in the ON/RUN position.
There are three subsequent activations.
The two minute timer has expired after turning the
ignition OFF.
NOTE:When turning the ignition ON, the blades go into the
park position.
Front Wiper Blade Removal/Installation
1. Lift the front wiper arm upward to raise the wiper
blade off of the windshield.
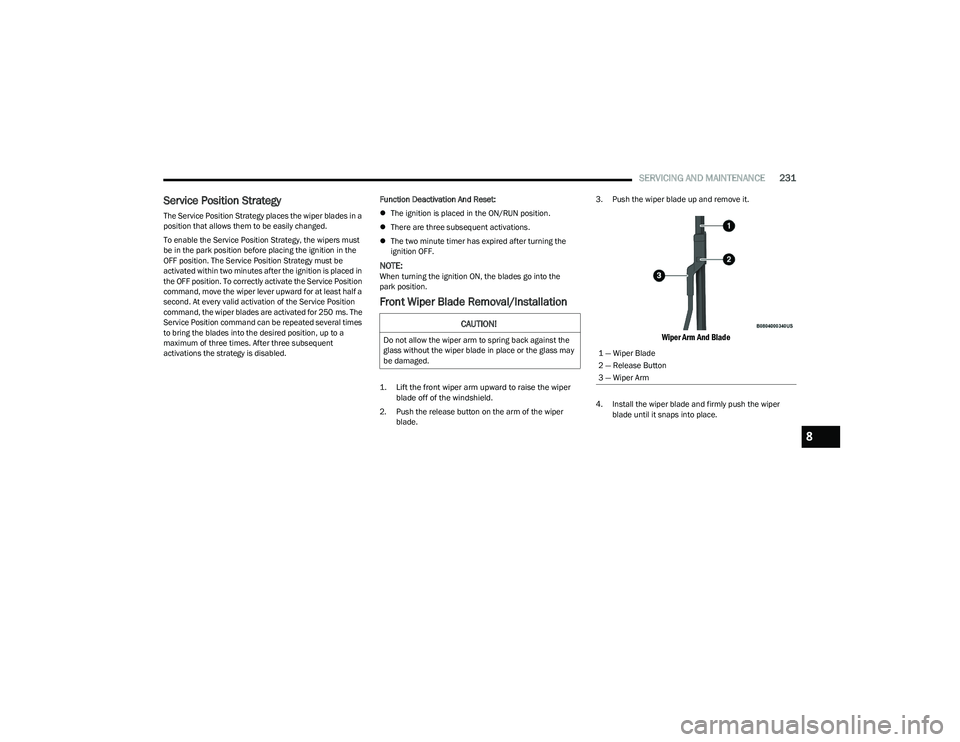
2. Push the release button on the arm of the wiper blade. 3. Push the wiper blade up and remove it.
Wiper Arm And Blade
4. Install the wiper blade and firmly push the wiper
blade until it snaps into place.
CAUTION!
Do not allow the wiper arm to spring back against the
glass without the wiper blade in place or the glass may
be damaged.
1 — Wiper Blade
2 — Release Button
3 — Wiper Arm
8
23_GG_OM_EN_USC_t.book Page 231
Page 238 of 288
236SERVICING AND MAINTENANCE
BRAKE SYSTEM
In order to ensure brake system performance, all brake
system components should be inspected periodically.
For the proper maintenance intervals
Úpage 224.
Brake Master Cylinder
The fluid in the master cylinder should be checked when
performing under hood services or immediately if the
Brake Warning Light is illuminated.
Be sure to clean the top of the master cylinder area before
removing the cap. If necessary, add fluid to bring the fluid
level up to the requirements described on the brake fluid
reservoir. With disc brakes, fluid level can be expected to
fall as the brake pads wear. Brake fluid level should be
checked when pads are replaced. However, low fluid level
may be caused by a leak and a checkup may be needed.
Use only the manufacturer recommended brake fluid
Úpage 269.
AUTOMATIC TRANSMISSION —
I
F EQUIPPED
Special Additives
It is strongly recommended against using any special
additives in the transmission. Automatic Transmission
Fluid (ATF) is an engineered product and its performance
may be impaired by supplemental additives. Therefore, do
not add any fluid additives to the transmission. Avoid
using transmission sealers as they may adversely affect
seals.
Fluid Level Check
The fluid level is preset at the factory and does not require
adjustment under normal operating conditions. Routine
fluid level checks are not required; therefore the
transmission has no dipstick. An authorized dealer can
check your transmission fluid level using special service
tools. If you notice fluid leakage or transmission
malfunction, visit an authorized dealer immediately to
have the transmission fluid level checked. Operating the
vehicle with an improper fluid level can cause severe
transmission damage.
WARNING!
Riding the brakes can lead to brake failure and possibly
a collision. Driving with your foot resting or riding on the
brake pedal can result in abnormally high brake
temperatures, excessive lining wear, and possible brake
damage. You would not have your full braking capacity
in an emergency.
WARNING!
Use only the manufacturer recommended brake fluid Úpage 269. Using the wrong type of brake fluid can
severely damage your brake system and/or impair its
performance. The proper type of brake fluid for your
vehicle is also identified on the original factory
installed hydraulic master cylinder reservoir.
To avoid contamination from foreign matter or
moisture, use only new brake fluid or fluid that has
been in a tightly closed container. Keep the master
cylinder reservoir cap secured at all times. Brake
fluid in an open container absorbs moisture from the
air resulting in a lower boiling point. This may cause
it to boil unexpectedly during hard or prolonged
braking, resulting in sudden brake failure.
This could result in a collision.
Overfilling the brake fluid reservoir can result in
spilling brake fluid on hot engine parts, causing the
brake fluid to catch fire. Brake fluid can also damage
painted and vinyl surfaces, care should be taken to
avoid its contact with these surfaces.
Do not allow petroleum-based fluid to contaminate
the brake fluid. Brake seal components could be
damaged, causing partial or complete brake failure.
This could result in a collision.
CAUTION!
Do not use chemical flushes in your transmission as the
chemicals can damage your transmission components.
Such damage is not covered by the New Vehicle Limited
Warranty.
23_GG_OM_EN_USC_t.book Page 236
Page 283 of 288
281
Headlight Switch ........................................................40
Headlights ..................................................................40
Headlights On With Wipers .......................................41
High Beam...........................................................40
, 78
High Beam/Low Beam Select ...................................40
Hood Open .................................................................73
Intensity Control ..................................................42
, 43
Interior ........................................................................42
LaneSense .................................................................75
Liftgate Open.............................................................. 73
Lights On Reminder ...................................................41
Low Fuel .....................................................................75
Malfunction Indicator (Check Engine) ...................... 75
Oil Pressure ................................................................73
Oil Temperature .........................................................73
Park ............................................................................77
Passing ....................................................................... 41
Seat Belt Reminder ...................................................73
Security Alarm ............................................................73
Service ..................................................................... 246
Service Forward Collision Warning ...........................75
Service Stop Start ...................................................... 75
Stop Start Active ........................................................77
Tire Pressure Monitoring (TPMS) .................... 75
, 165
Towing Hook Breakdown...........................................76
Traction Control ...................................................... 157
Transmission Temperature .......................................76
Turn Signals ....................................... 40
, 42, 77, 201
Vanity Mirror............................................................... 34
Loading Vehicle ............................................................ 120 Tires ......................................................................... 251
Locks Auto Unlock ................................................................25
Child Protection .........................................................25
Power Door .................................................................22 Low Tire Pressure System ............................................165
Lubrication, Body .......................................................... 230
Lug Nuts/Bolts .............................................................. 265
MMaintenance ................................................................... 58
Maintenance Free Battery ...........................................227
Maintenance Schedule ................................................ 223
Malfunction Indicator Light (Check Engine) .................. 75Manual Service .....................................................................274
Memory Feature (Memory Seats) .................................. 27
Memory Seat ................................................................... 27 Memory Settings............................................................. 27
Methanol ....................................................................... 266
Mirrors ............................................................................. 34 Automatic Dimming................................................... 34
Heated................................................................. 34
, 36
Outside ................................................................ 34, 35
Rearview ...........................................................34, 203
Vanity.......................................................................... 34
Modifications/Alterations Vehicle.......................................................................... 8
Monitor, Tire Pressure System..................................... 165
Mopar Parts .................................................................. 273
Multi-Function Control Lever .......................................... 40
NNew Vehicle Break-In Period .......................................... 82
OOccupant Restraints ..................................................... 168
Octane Rating, Gasoline (Fuel) .......................... 266, 269
Oil Change Reset
b
...................................................... 68 Oil Filter, Change .......................................................... 228
Oil Filter, Selection ....................................................... 228
Oil Pressure Light ........................................................... 73
Oil, Engine ............................................................ 228
, 269
Capacity ................................................................... 268
Checking .................................................................. 227
Dipstick .................................................................... 227
Disposal ................................................................... 228
Filter ......................................................................... 228
Filter Disposal.......................................................... 228
Identification Logo .................................................. 228
Materials Added To ................................................. 228 Pressure Warning Light ............................................ 73
Recommendation...........................................228
, 268
Synthetic .................................................................. 228
Viscosity ................................................................... 268
Onboard Diagnostic System .......................................... 78
Operator Manual Owner's Manual ...................................................... 274
Outlet Power ......................................................................... 52
Outside Rearview Mirrors ....................................... 34
, 35
Overheating, Engine ..................................................... 218
PPaint Care ..................................................................... 262
Panic Alarm ..................................................................... 13 Parking Brake ................................................................. 82
ParkSense Front And Rear ........................................................ 105
ParkSense Active Park Assist ...................................... 108
ParkSense System ....................................................... 105
Pedestrian Warning System ........................................ 164
Performance .......................................................... 69
, 152
11
23_GG_OM_EN_USC_t.book Page 281