headlight DODGE JOURNEY 2010 1.G User Guide
[x] Cancel search | Manufacturer: DODGE, Model Year: 2010, Model line: JOURNEY, Model: DODGE JOURNEY 2010 1.GPages: 512
Page 125 of 512
If you turn the headlights, or parking lights, or ignition
switch ON again, the system will cancel the delay.
If you turn the headlights off before the ignition, they will
turn off in the normal manner.
The headlight delay time is programmable on vehicles
equipped with the EVIC. Refer to “Electronic Vehicle
Information Center (EVIC)/Customer-Programmable
Features” in “Understanding Your Instrument Panel” for
further information.
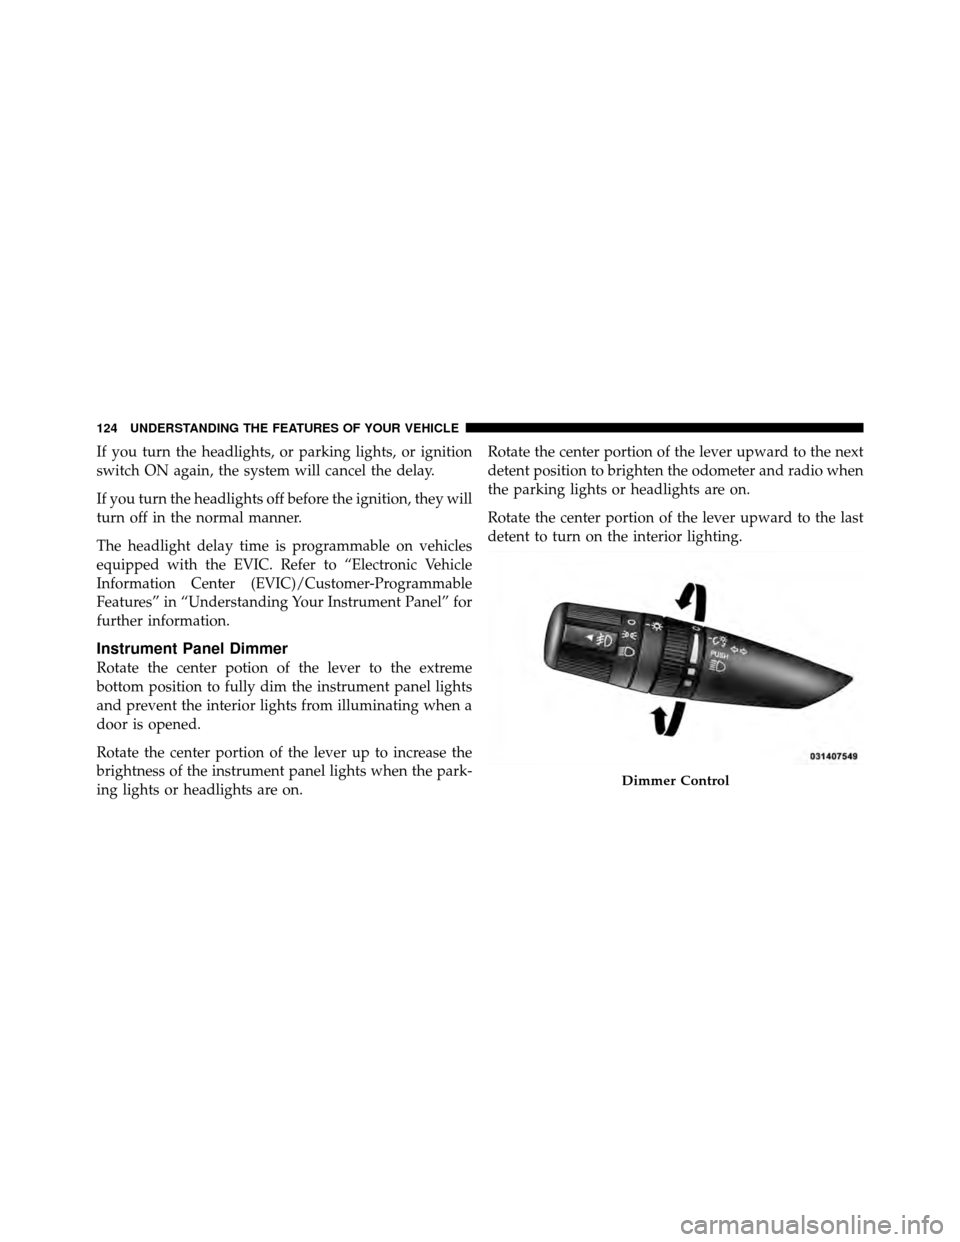
Instrument Panel Dimmer
Rotate the center potion of the lever to the extreme
bottom position to fully dim the instrument panel lights
and prevent the interior lights from illuminating when a
door is opened.
Rotate the center portion of the lever up to increase the
brightness of the instrument panel lights when the park-
ing lights or headlights are on.Rotate the center portion of the lever upward to the next
detent position to brighten the odometer and radio when
the parking lights or headlights are on.
Rotate the center portion of the lever upward to the last
detent to turn on the interior lighting.
Dimmer Control
124 UNDERSTANDING THE FEATURES OF YOUR VEHICLE
Page 126 of 512
Daytime Running Lights — If Equipped
The high beam headlights will turn on as Daytime
Running Lights (DRL) and operate at DRL (lower) inten-
sity, whenever the ignition is ON, the engine is running,
the headlight switch is off, the parking brake is off, the
turn signal is off, and the shift lever is in any position
except PARK.
NOTE:The DRL’s will turn off automatically when the
turn signal is in operation and turn on again when the
turn signal is not operating.
Lights-On Reminder
If the headlights or parking lights are on after the ignition
is turned to the LOCK position, a continuous chime will
sound to alert the driver when the driver’s door is
opened.
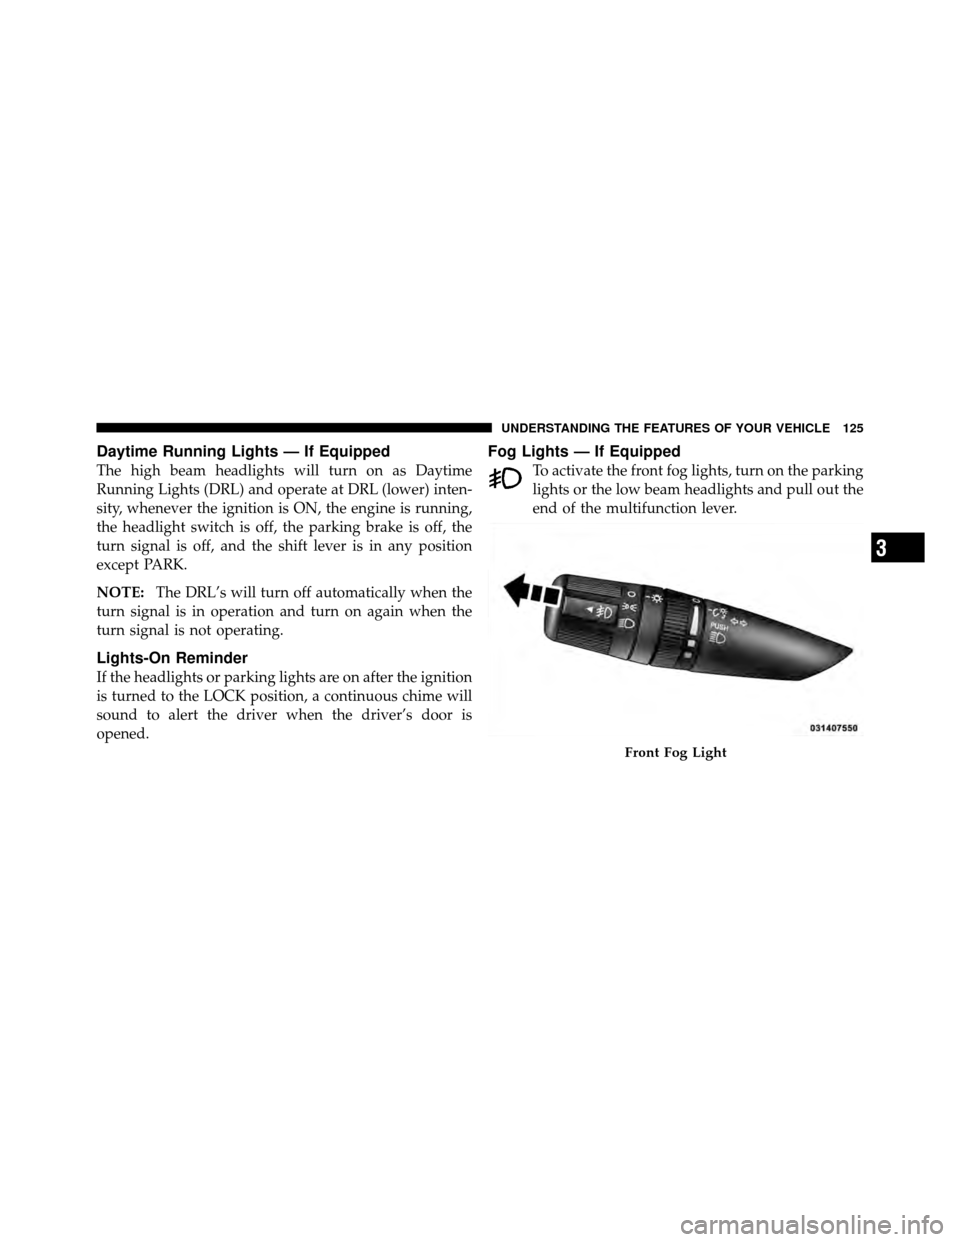
Fog Lights — If Equipped
To activate the front fog lights, turn on the parking
lights or the low beam headlights and pull out the
end of the multifunction lever.
Front Fog Light
3
UNDERSTANDING THE FEATURES OF YOUR VEHICLE 125
Page 127 of 512
NOTE:The front fog lights will only operate with the
headlights on low beam. Selecting high beam headlights
will turn off the front fog lights.
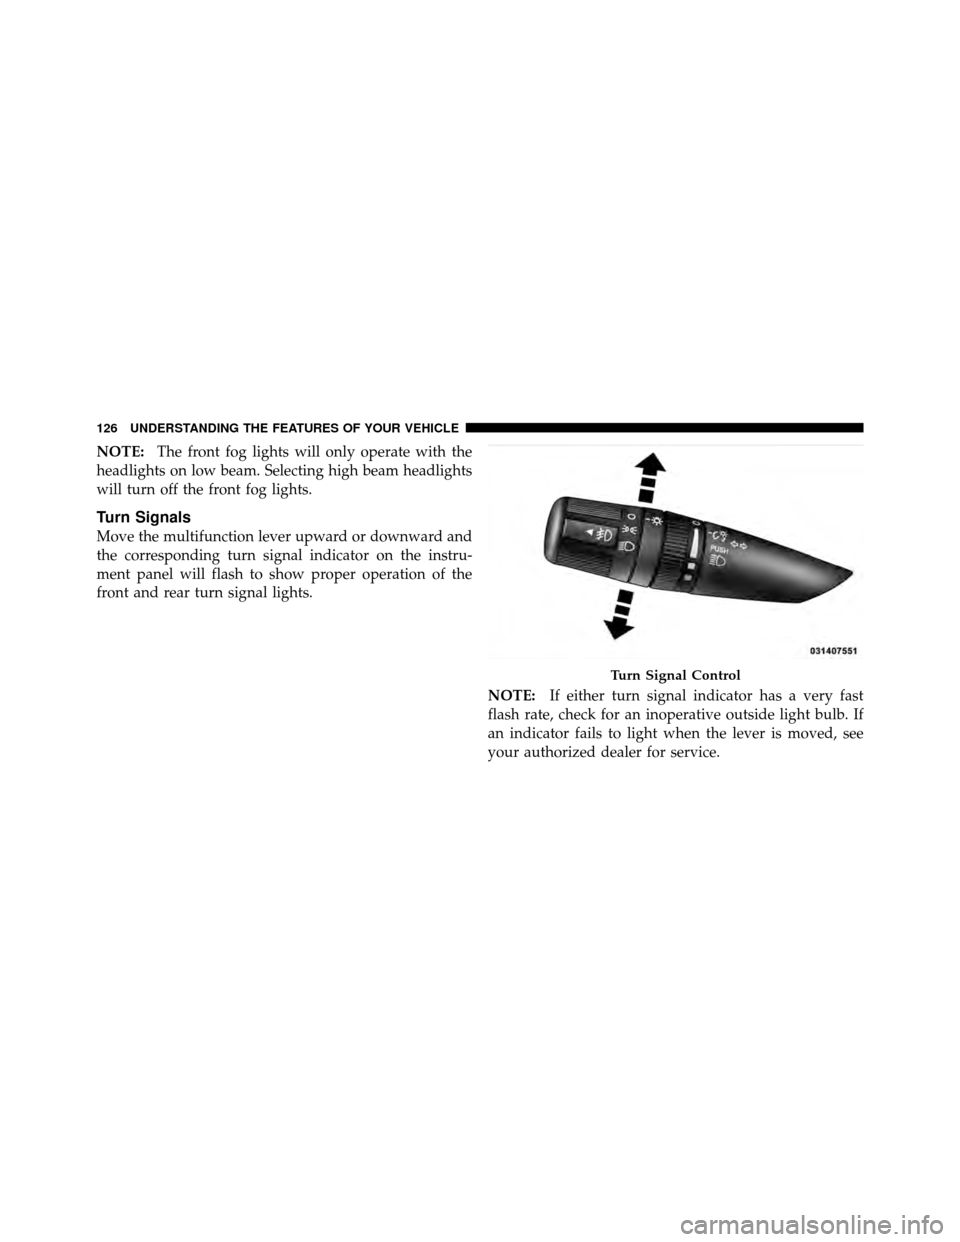
Turn Signals
Move the multifunction lever upward or downward and
the corresponding turn signal indicator on the instru-
ment panel will flash to show proper operation of the
front and rear turn signal lights.
NOTE:If either turn signal indicator has a very fast
flash rate, check for an inoperative outside light bulb. If
an indicator fails to light when the lever is moved, see
your authorized dealer for service.
Turn Signal Control
126 UNDERSTANDING THE FEATURES OF YOUR VEHICLE
Page 128 of 512
Lane Change Assist
Tap the lever up or down once, without moving beyond
the detent, and the turn signal (right or left) will flash
three times then automatically turn off.
High/Low Beam Switch
Push the multifunction lever away from you to switch
the headlights to high beam. Pull the lever toward you, to
switch the headlights back to low beam.
Flash-to-Pass
You can signal another vehicle with your headlights by
lightly pulling the multifunction lever toward you. This
will turn on the high beam headlights until the lever is
released.
NOTE:If the multifunction lever is held in the flash-to-
pass position for more than 15 seconds, the high beams
will shut off. If this occurs, wait 30 seconds before
activating the flash-to-pass function again.
Interior Lights
Courtesy/Reading Lights
Models with Overhead Console
These lights are mounted in the overhead console be-
tween the sun visors. They are also located in the
headliner above the second row passenger seats. Press
and release the lens to turn ON or turn OFF the light
manually. These lights also turn on when you press the
UNLOCK button on the Remote Keyless Entry (RKE)
transmitter, open a door or the liftgate, or turn the
Dimmer Control completely upward to the second de-
tent. For models equipped with LED lighting, you can
swivel the lens socket to direct the light as desired.
Models without Overhead Console
There are two courtesy/reading lights mounted in the
headliner between the sun visors. Press and release the
button next to the lens to turn the lights on or off
3
UNDERSTANDING THE FEATURES OF YOUR VEHICLE 127
Page 133 of 512
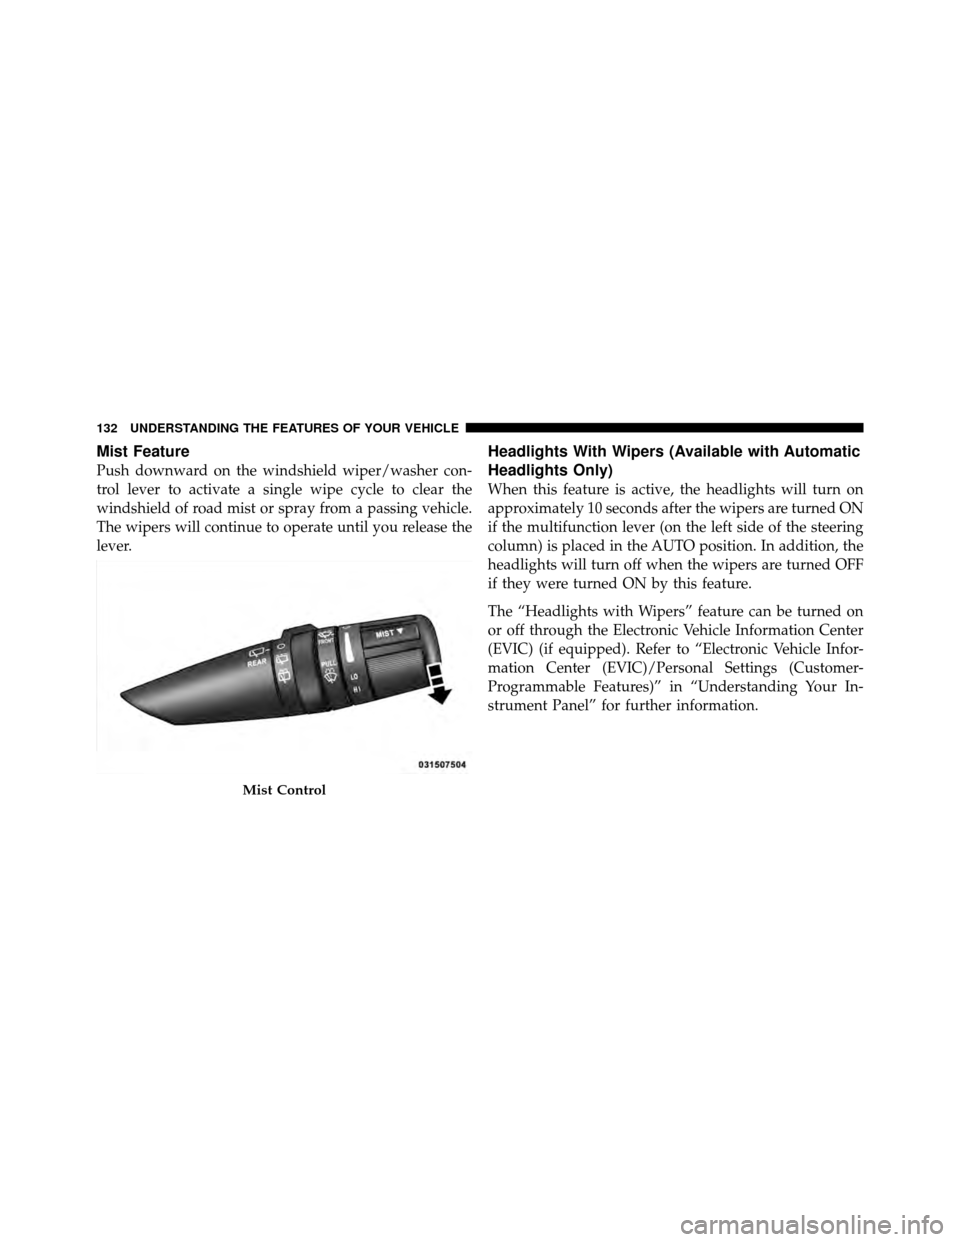
Mist Feature
Push downward on the windshield wiper/washer con-
trol lever to activate a single wipe cycle to clear the
windshield of road mist or spray from a passing vehicle.
The wipers will continue to operate until you release the
lever.
Headlights With Wipers (Available with Automatic
Headlights Only)
When this feature is active, the headlights will turn on
approximately 10 seconds after the wipers are turned ON
if the multifunction lever (on the left side of the steering
column) is placed in the AUTO position. In addition, the
headlights will turn off when the wipers are turned OFF
if they were turned ON by this feature.
The “Headlights with Wipers” feature can be turned on
or off through the Electronic Vehicle Information Center
(EVIC) (if equipped). Refer to “Electronic Vehicle Infor-
mation Center (EVIC)/Personal Settings (Customer-
Programmable Features)” in “Understanding Your In-
strument Panel” for further information.
Mist Control
132 UNDERSTANDING THE FEATURES OF YOUR VEHICLE
Page 186 of 512
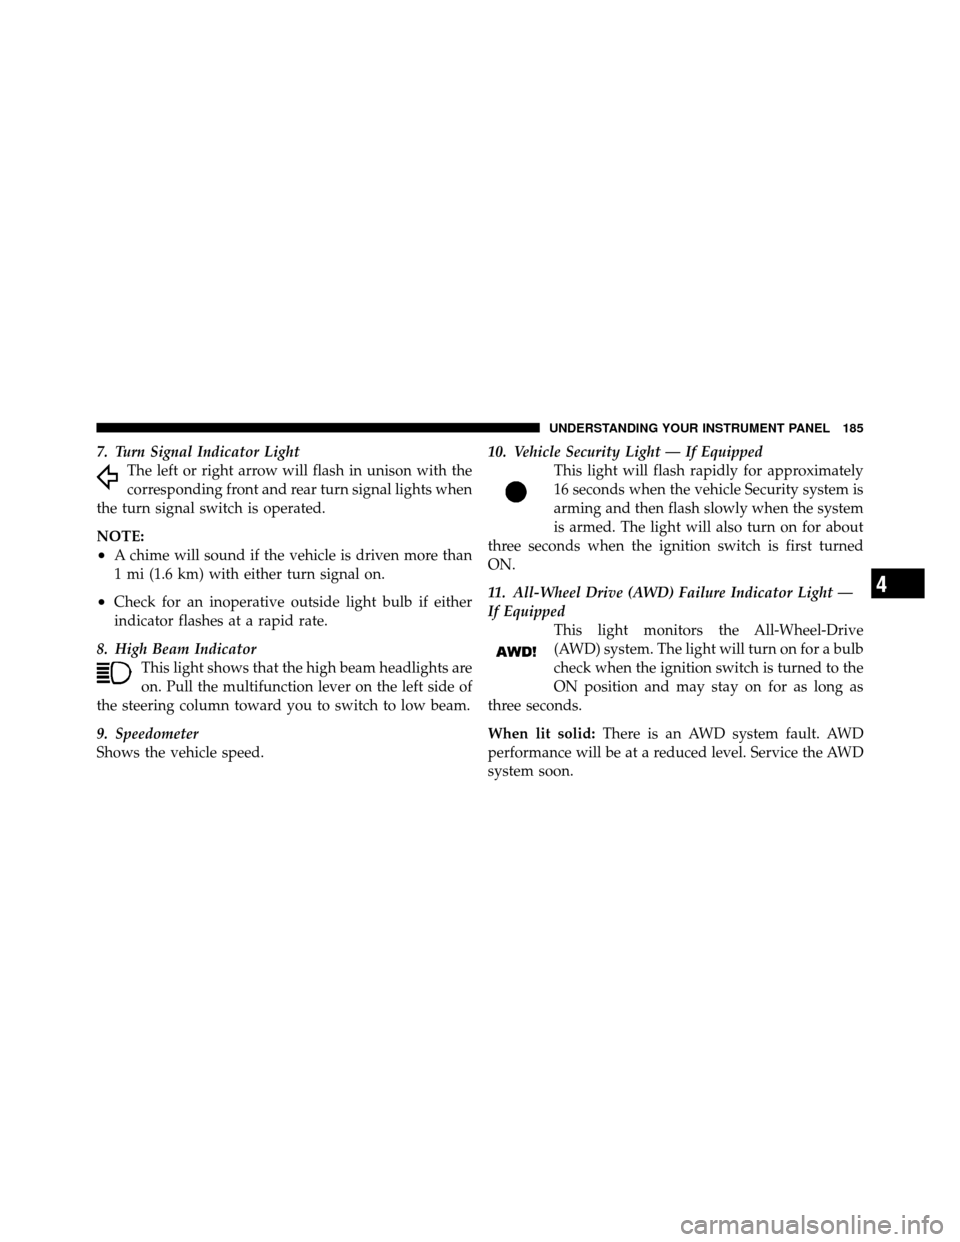
7. Turn Signal Indicator LightThe left or right arrow will flash in unison with the
corresponding front and rear turn signal lights when
the turn signal switch is operated.
NOTE:
•A chime will sound if the vehicle is driven more than
1 mi (1.6 km) with either turn signal on.
•Check for an inoperative outside light bulb if either
indicator flashes at a rapid rate.
8. High Beam Indicator This light shows that the high beam headlights are
on. Pull the multifunction lever on the left side of
the steering column toward you to switch to low beam.
9. Speedometer
Shows the vehicle speed. 10. Vehicle Security Light — If Equipped
This light will flash rapidly for approximately
16 seconds when the vehicle Security system is
arming and then flash slowly when the system
is armed. The light will also turn on for about
three seconds when the ignition switch is first turned
ON.
11. All-Wheel Drive (AWD) Failure Indicator Light —
If Equipped This light monitors the All-Wheel-Drive
(AWD) system. The light will turn on for a bulb
check when the ignition switch is turned to the
ON position and may stay on for as long as
three seconds.
When lit solid: There is an AWD system fault. AWD
performance will be at a reduced level. Service the AWD
system soon.4
UNDERSTANDING YOUR INSTRUMENT PANEL 185
Page 213 of 512
“Flash Lamp With Lock”
When ON is selected, the front and rear turn signals will
flash when the doors are locked or unlocked with the
RKE transmitter. This feature may be selected with or
without the sound horn on lock feature selected. To make
your selection, press and release the RESET button until
“ON” or “OFF” appears.
“Headlamp Off Delay”
When this feature is selected, the driver can choose to
have the headlights remain on for 0, 30, 60, or 90 seconds
after turning the ignition to the LOCK position. To make
your selection, press and release the RESET button until
“0,” “30,” “60,” or “90” appears.
“Headlamps With Wipers” (Available with Auto
Headlights Only)
When ON is selected, and the multifunction lever is
placed in the AUTO position, the headlights will turn on
approximately 10 seconds after the wipers are turnedON. The headlights will also turn off when the wipers are
turned OFF if they were turned ON by this feature. To
make your selection, press and release the RESET button
until “ON” or “OFF” appears.
“Key-Off Power Delay”
When this feature is selected, the power window
switches, radio, Uconnect™ Phone (if equipped), DVD
video system (if equipped), power sunroof (if equipped),
and ignition powered outlets will remain active for up to
10 minutes after the ignition switch is turned OFF.
Opening a vehicle door will cancel this feature. To make
your selection, press and release the RESET button until
“Off,” “45 sec.,” “5 min.,” or “10 min.” appears.
212 UNDERSTANDING YOUR INSTRUMENT PANEL
Page 214 of 512
“ILLUMIN Approach”
When this feature is selected, the headlights will activate
and remain on for up to 90 seconds when the doors are
unlocked with the RKE transmitter. To make your selec-
tion, press and hold the RESET button until “Off,”
“30 sec,” “60 sec,” or “90 sec” appears.
Display ECO — If Equipped
The “ECO” message can be turned on or off. To make
your selection, press and release the FUNCTION SE-
LECT button until “ON” or “OFF” appears.
“Display Units In”
The EVIC, odometer, and navigation system (if
equipped) can be changed between English and Metric
units of measure. To make your selection, press andrelease the RESET button until “ENGLISH” or “MET-
RIC” appears.
“NAV Turn By Turn” — If Equipped
When ON is selected, the Turn-by-Turn directions will
appear in the display as the vehicle approaches a desig-
nated turn within a programmed route. To make your
selection, press and release the RESET button until “ON”
or “OFF” appears.
Compass Variance
Refer to “Compass Variance” under “Compass Display.”
Calibrate Compass
Refer to “Manual Compass Calibration” under “Com-
pass Display.”
4
UNDERSTANDING YOUR INSTRUMENT PANEL 213
Page 299 of 512
The engine block heater cord is bundled under the hood
between the headlight assembly and the Totally Inte-
grated Power Module (Fuse Box) on the driver’s side of
the vehicle.
WARNING!
Remember to disconnect the cord before driving.
Damage to the 110-115 Volt electrical cord could cause
electrocution.
AUTOMATIC TRANSMISSION
CAUTION!
Damage to the transmission may occur if the follow-
ing precautions are not observed:
•Shift into PARK only after the vehicle has come to
a complete stop.(Continued)
CAUTION! (Continued)
•Shift into or out of REVERSE only after the
vehicle has come to a complete stop and the engine
is at idle speed.
•Do not shift from REVERSE, PARK, or NEUTRAL
into any forward gear when the engine is above
idle speed.
•Before shifting into any gear, make sure your foot
is firmly on the brake pedal.
NOTE: You must press and hold the brake pedal down
while shifting out of PARK.
298 STARTING AND OPERATING
Page 394 of 512
WARNING!
Do not attempt jump-starting if the battery is frozen.
It could rupture or explode and cause personal injury.
Preparations for Jump-Start
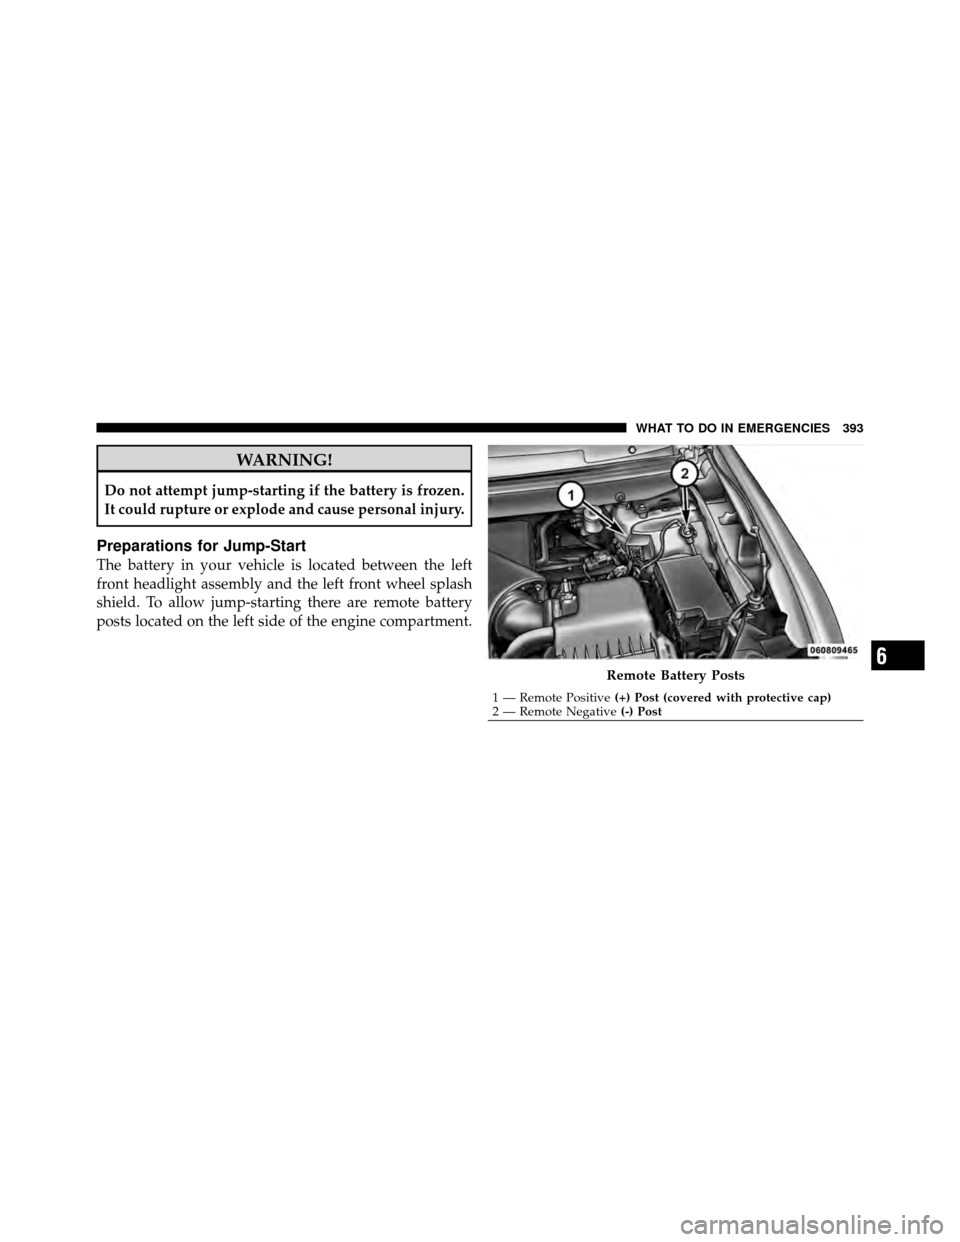
The battery in your vehicle is located between the left
front headlight assembly and the left front wheel splash
shield. To allow jump-starting there are remote battery
posts located on the left side of the engine compartment.
Remote Battery Posts
1 — Remote Positive(+) Post (covered with protective cap)
2 — Remote Negative (-) Post
6
WHAT TO DO IN EMERGENCIES 393