center console DODGE JOURNEY 2011 1.G User Guide
[x] Cancel search | Manufacturer: DODGE, Model Year: 2011, Model line: JOURNEY, Model: DODGE JOURNEY 2011 1.GPages: 108, PDF Size: 4.41 MB
Page 58 of 108

Operation Of The Touch-Screen Radio
• To view a DVD video, press the OPEN/CLOSE or LOAD hard-key and insert the disc.Playback will begin automatically after the DVD is recognized by the disc drive. If
playback does not begin automatically, follow these steps:
• Press the MENU hard-key, then touch the Rear VES™ soft-key. If a chapter list
appears on the right side of the screen touch the HIDE LIST soft-key to display
the Rear VES™ Control screen.
• Touch the 1 soft-key to select an audio channel, then touch the DISC soft-key in the MEDIA column.
Operation Of The Remote
• The remote control operates similarly to any DVD remote you have used before andallows the rear seat passengers to change stations, tracks, discs and audio/video
modes.
• The remote control is designed to control either channel by using the selector switch located on the right side of the remote.
• Pressing the power button will turn the VES™ system ON/OFF.
• Pressing the MODE button causes the Mode Selection menu to appear on the VES™ screen. Use the remote control arrow buttons to scroll through the available
modes, then press ENTER to select the desired mode.
Auxiliary Audio/Video Input Jacks
• The Aux jacks are located on the rear of the center console.
• Connect the video game or other external media devices to the AUX jacks followingthe color coding for VES™ jacks.
• Using either the touch-screen radio or remote control, select AUX from the Rear VES™ Control or Mode Selection screen.
• Refer to “Uconnect™ Multimedia – Video Entertainment System (VES)™” in the Uconnect™ User's Manual on the DVD for further details.
ELECTRONICS
56
Page 63 of 108

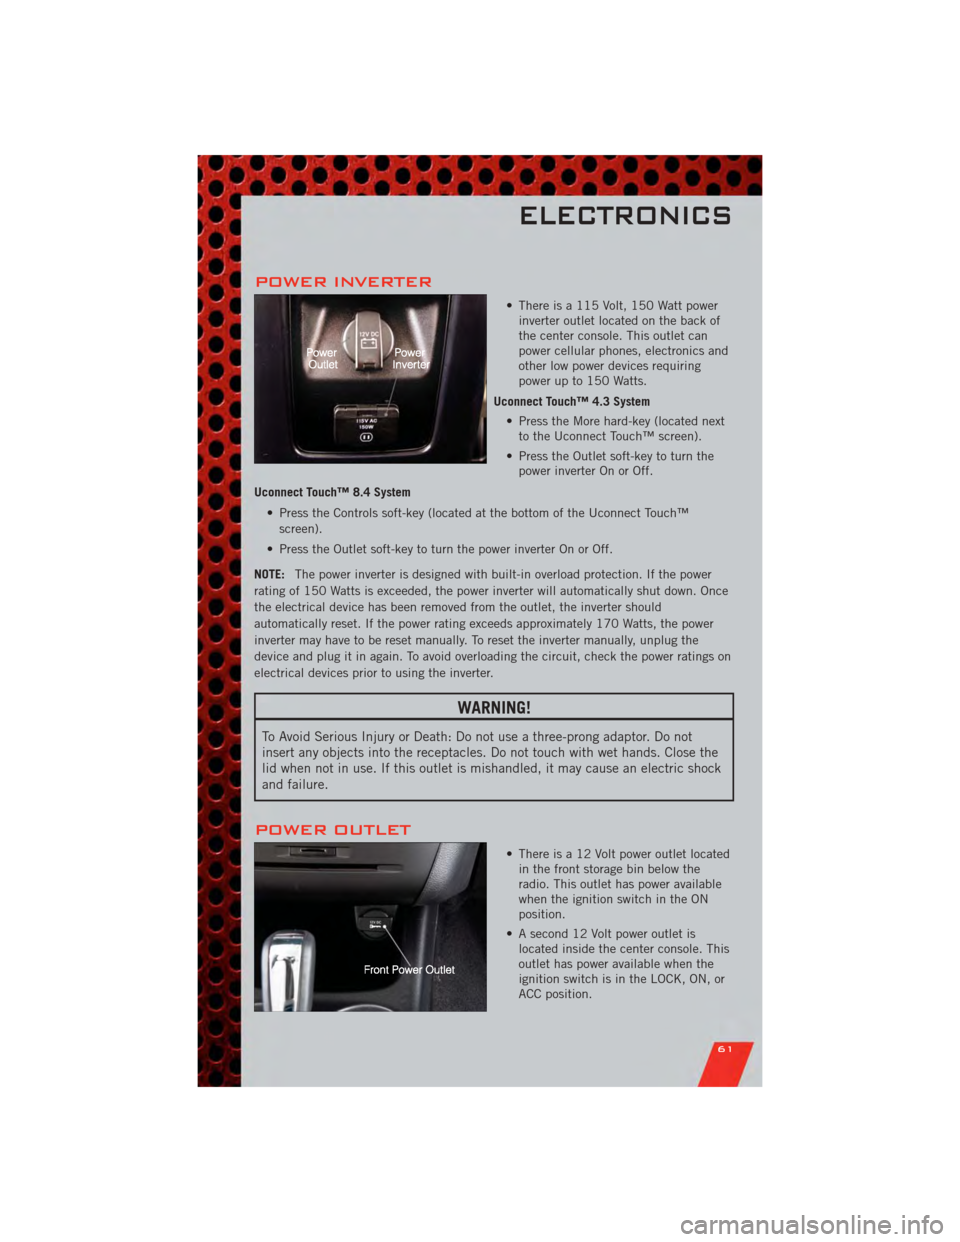
POWER INVERTER
• There is a 115 Volt, 150 Watt powerinverter outlet located on the back of
the center console. This outlet can
power cellular phones, electronics and
other low power devices requiring
power up to 150 Watts.
Uconnect Touch™ 4.3 System • Press the More hard-key (located nextto the Uconnect Touch™ screen).
• Press the Outlet soft-key to turn the power inverter On or Off.
Uconnect Touch™ 8.4 System • Press the Controls soft-key (located at the bottom of the Uconnect Touch™screen).
• Press the Outlet soft-key to turn the power inverter On or Off.
NOTE: The power inverter is designed with built-in overload protection. If the power
rating of 150 Watts is exceeded, the power inverter will automatically shut down. Once
the electrical device has been removed from the outlet, the inverter should
automatically reset. If the power rating exceeds approximately 170 Watts, the power
inverter may have to be reset manually. To reset the inverter manually, unplug the
device and plug it in again. To avoid overloading the circuit, check the power ratings on
electrical devices prior to using the inverter.
WARNING!
To Avoid Serious Injury or Death: Do not use a three-prong adaptor. Do not
insert any objects into the receptacles. Do not touch with wet hands. Close the
lid when not in use. If this outlet is mishandled, it may cause an electric shock
and failure.
POWER OUTLET
• There is a 12 Volt power outlet located in the front storage bin below the
radio. This outlet has power available
when the ignition switch in the ON
position.
• A second 12 Volt power outlet is located inside the center console. This
outlet has power available when the
ignition switch is in the LOCK, ON, or
ACC position.
ELECTRONICS
61
Page 64 of 108

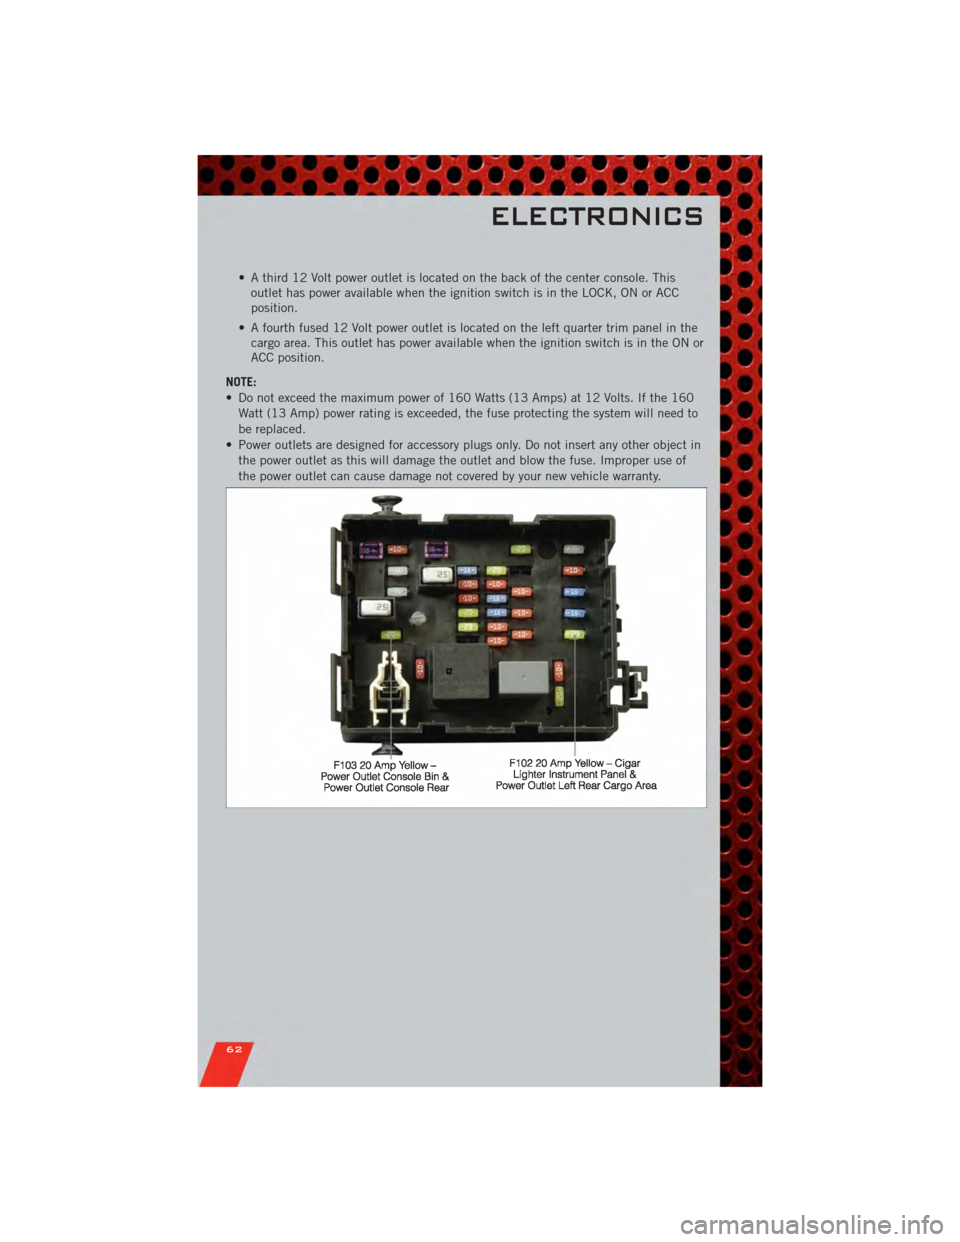
• A third 12 Volt power outlet is located on the back of the center console. Thisoutlet has power available when the ignition switch is in the LOCK, ON or ACC
position.
• A fourth fused 12 Volt power outlet is located on the left quarter trim panel in the cargo area. This outlet has power available when the ignition switch is in the ON or
ACC position.
NOTE:
• Do not exceed the maximum power of 160 Watts (13 Amps) at 12 Volts. If the 160 Watt (13 Amp) power rating is exceeded, the fuse protecting the system will need to
be replaced.
• Power outlets are designed for accessory plugs only. Do not insert any other object in the power outlet as this will damage the outlet and blow the fuse. Improper use of
the power outlet can cause damage not covered by your new vehicle warranty.
ELECTRONICS
62
Page 78 of 108

SHIFT LEVER OVERRIDE
• If a malfunction occurs and the shift lever cannot be moved out of the PARKposition, you can use the following procedure to temporarily move the shift lever:
• To access the shift lever override, remove the cubby bin liner located in the
center console behind the shift lever. The override access port is at the front of
the cubby bin.
• Firmly set the parking brake.
• Turn the ignition switch to the ACC or ON position without starting the engine.
• Press and maintain firm pressure on the brake pedal.
• Using a screwdriver or similar tool, press and hold the override tab through the access port on the center console.
• Move the shift lever into the NEUTRAL position.
• The vehicle may then be started in NEUTRAL.
• Reinstall the override cover.
WHAT TO DO IN EMERGENCIES
76