ad blue DODGE JOURNEY 2012 1.G User Guide
[x] Cancel search | Manufacturer: DODGE, Model Year: 2012, Model line: JOURNEY, Model: DODGE JOURNEY 2012 1.GPages: 108, PDF Size: 3 MB
Page 3 of 108
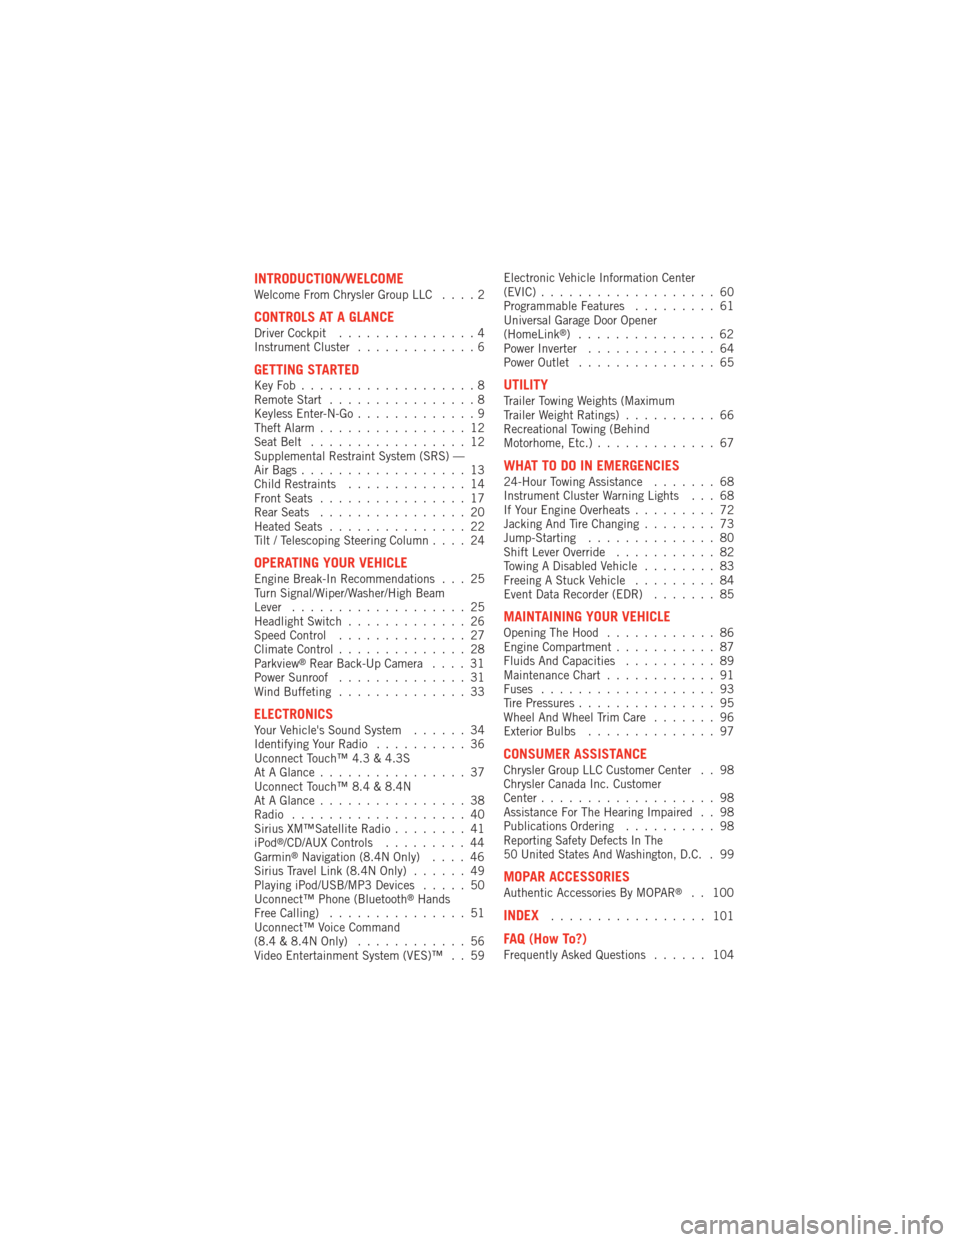
INTRODUCTION/WELCOMEWelcome From Chrysler Group LLC....2
CONTROLS AT A GLANCEDriver Cockpit...............4
Instrument Cluster .............6
GETTING STARTEDKeyFob...................8
Remote Start................8
Keyless Enter-N-Go .............9
Theft Alarm ................12
Seat Belt .................12
Supplemental Restraint System (SRS) —
Air Bags ..................13
Child Restraints .............14
Front Seats ................17
Rear Seats ................20
Heated Seats ...............22
Tilt / Telescoping Steering Column ....24
OPERATING YOUR VEHICLEEngine Break-In Recommendations . . . 25
Turn Signal/Wiper/Washer/High Beam
Lever...................25
Headlight Switch .............26
Speed Control ..............27
Climate Control ..............28
Parkview
®Rear Back-Up Camera ....31
Power Sunroof ..............31
Wind Buffeting ..............33
ELECTRONICSYour Vehicle's Sound System ......34
Identifying Your Radio ..........36
Uconnect Touch™ 4.3 & 4.3S
At A Glance ................37
Uconnect Touch™ 8.4 & 8.4N
At A Glance ................38
Radio ...................40
Sirius XM™Satellite Radio ........41
iPod
®/CD/AUX Controls .........44
Garmin®Navigation (8.4N Only) ....46
Sirius Travel Link (8.4N Only) ......49
Playing iPod/USB/MP3 Devices .....50
Uconnect™ Phone (Bluetooth
®Hands
Free Calling) ...............51
Uconnect™ Voice Command
(8.4 & 8.4N Only) ............56
Video Entertainment System (VES)™ . . 59 Electronic Vehicle Information Center
(EVIC)
...................60
Programmable Features .........61
Universal Garage Door Opener
(HomeLink
®) ...............62
Power Inverter ..............64
Power Outlet ...............65
UTILITYTrailer Towing Weights (Maximum
Trailer Weight Ratings) ..........66
Recreational Towing (Behind
Motorhome, Etc.) .............67
WHAT TO DO IN EMERGENCIES24-Hour Towing Assistance .......68
Instrument Cluster Warning Lights . . . 68
If Your Engine Overheats .........72
Jacking And Tire Changing ........73
Jump-Starting ..............80
Shift Lever Override ...........82
Towing A Disabled Vehicle ........83
Freeing A Stuck Vehicle .........84
Event Data Recorder (EDR) .......85
MAINTAINING YOUR VEHICLEOpening The Hood............86
Engine Compartment ...........87
Fluids And Capacities ..........89
Maintenance Chart ............91
Fuses ...................93
Tire Pressures ...............95
Wheel And Wheel Trim Care .......96
Exterior Bulbs ..............97
CONSUMER ASSISTANCEChrysler Group LLC Customer Center . . 98
Chrysler Canada Inc. Customer
Center...................98
Assistance For The Hearing Impaired . . 98
Publications Ordering ..........98
Reporting Safety Defects In The
50 United States And Washington, D.C..99
MOPAR ACCESSORIESAuthentic Accessories By MOPAR®. . 100
INDEX................. 101
FAQ (How To?)Frequently Asked Questions ...... 104
TABLE OF CONTENTS
Page 46 of 108
iPod®/CD/AUX CONTROLS
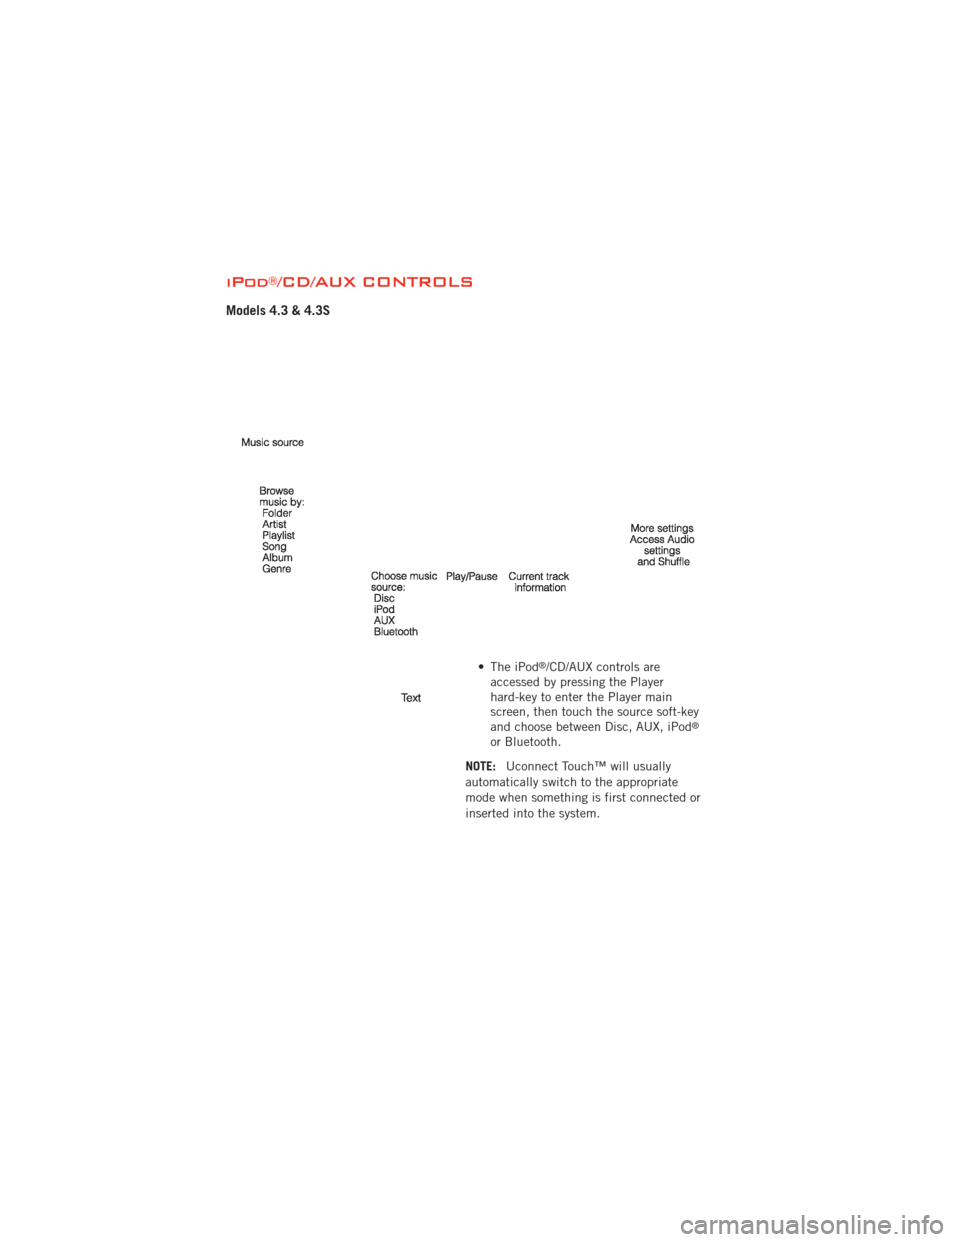
Models 4.3 & 4.3S
• The iPod®/CD/AUX controls are
accessed by pressing the Player
hard-key to enter the Player main
screen, then touch the source soft-key
and choose between Disc, AUX, iPod
®
or Bluetooth.
NOTE: Uconnect Touch™ will usually
automatically switch to the appropriate
mode when something is first connected or
inserted into the system.
ELECTRONICS
44
Page 47 of 108
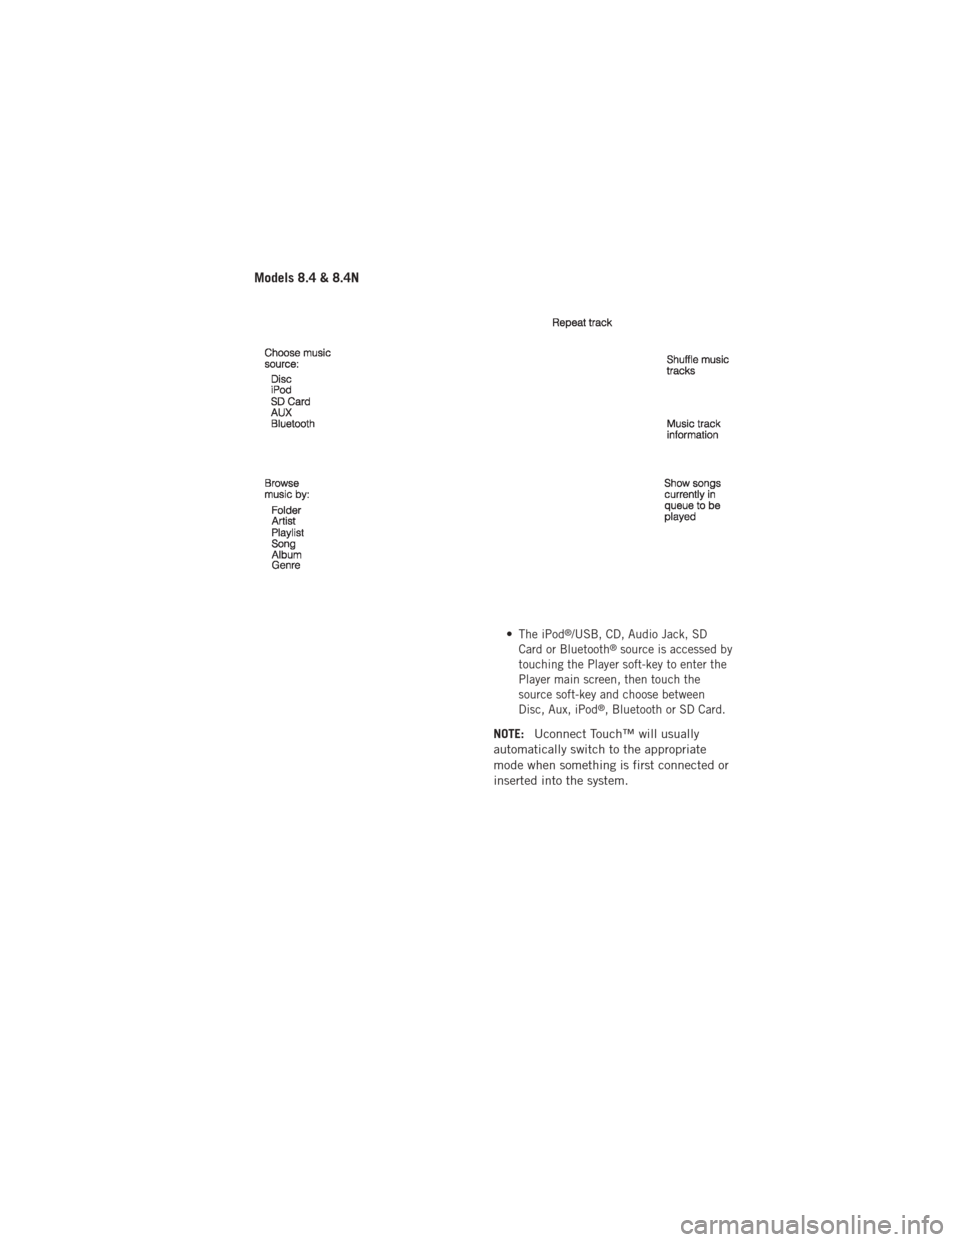
Models 8.4 & 8.4N
•The iPod®/USB, CD, Audio Jack, SD
Card or Bluetooth®source is accessed by
touching the Player soft-key to enter the
Player main screen, then touch the
source soft-key and choose between
Disc, Aux, iPod
®, Bluetooth or SD Card.
NOTE: Uconnect Touch™ will usually
automatically switch to the appropriate
mode when something is first connected or
inserted into the system.
ELECTRONICS
45
Page 53 of 108
• The iPod®battery charges when plugged into the USB port (if supported by the
specific device).
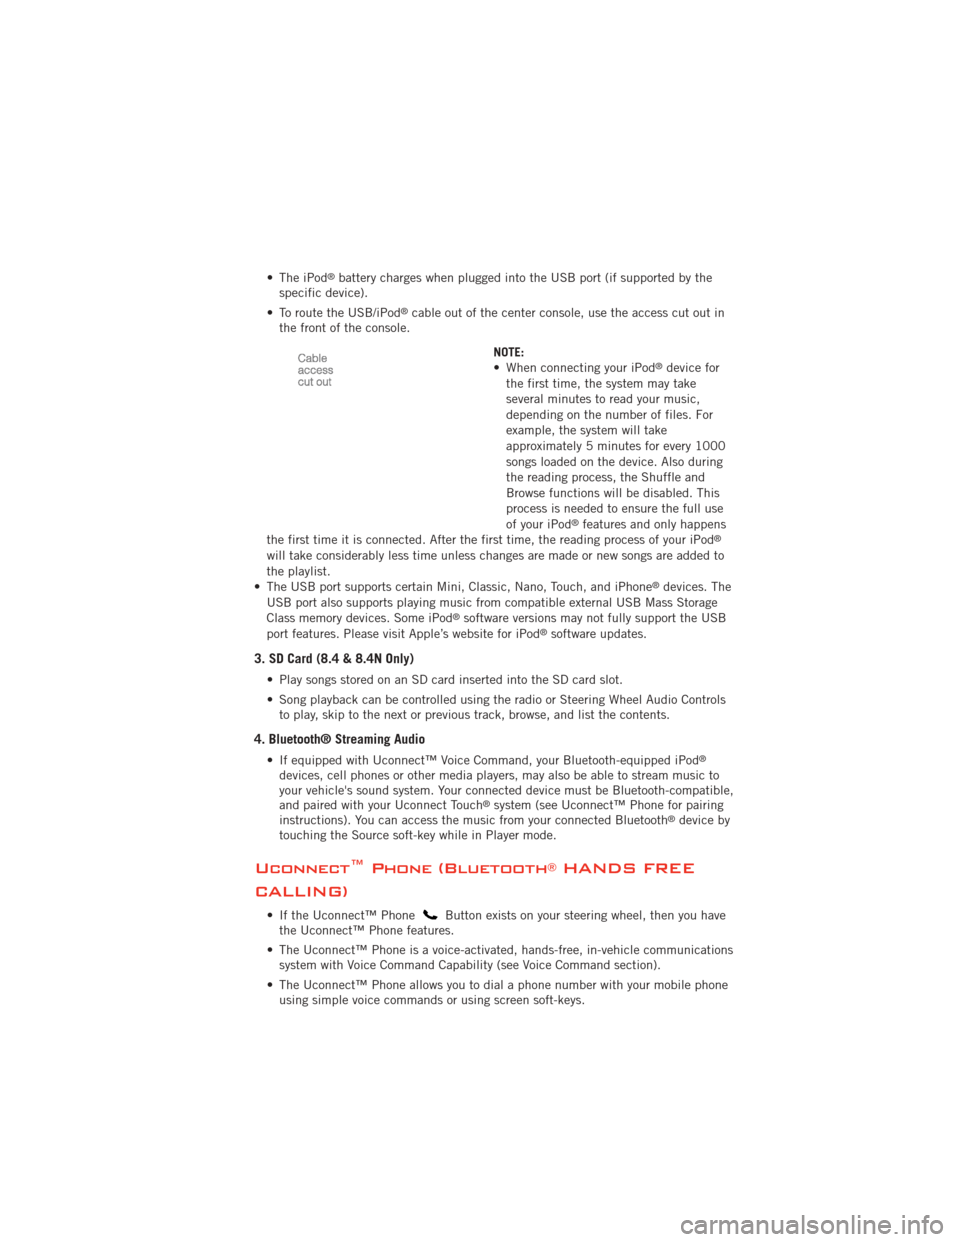
• To route the USB/iPod
®cable out of the center console, use the access cut out in
the front of the console.
NOTE:
• When connecting your iPod
®device for
the first time, the system may take
several minutes to read your music,
depending on the number of files. For
example, the system will take
approximately 5 minutes for every 1000
songs loaded on the device. Also during
the reading process, the Shuffle and
Browse functions will be disabled. This
process is needed to ensure the full use
of your iPod
®features and only happens
the first time it is connected. After the first time, the reading process of your iPod®
will take considerably less time unless changes are made or new songs are added to
the playlist.
• The USB port supports certain Mini, Classic, Nano, Touch, and iPhone
®devices. The
USB port also supports playing music from compatible external USB Mass Storage
Class memory devices. Some iPod
®software versions may not fully support the USB
port features. Please visit Apple’s website for iPod®software updates.
3. SD Card (8.4 & 8.4N Only)
• Play songs stored on an SD card inserted into the SD card slot.
• Song playback can be controlled using the radio or Steering Wheel Audio Controls to play, skip to the next or previous track, browse, and list the contents.
4. Bluetooth® Streaming Audio
• If equipped with Uconnect™ Voice Command, your Bluetooth-equipped iPod®
devices, cell phones or other media players, may also be able to stream music to
your vehicle's sound system. Your connected device must be Bluetooth-compatible,
and paired with your Uconnect Touch
®system (see Uconnect™ Phone for pairing
instructions). You can access the music from your connected Bluetooth®device by
touching the Source soft-key while in Player mode.
Uconnect™ Phone (Bluetooth®HANDS FREE
CALLING)
• If the Uconnect™ PhoneButton exists on your steering wheel, then you have
the Uconnect™ Phone features.
• The Uconnect™ Phone is a voice-activated, hands-free, in-vehicle communications system with Voice Command Capability (see Voice Command section).
• The Uconnect™ Phone allows you to dial a phone number with your mobile phone using simple voice commands or using screen soft-keys.
ELECTRONICS
51
Page 54 of 108
• Refer to the Understand The Features Of Your Vehicle section of your vehicle'sOwner's Manual on the DVD for further details.
NOTE: The Uconnect™ Phone requires a mobile phone equipped with the Bluetooth
®
Hands-Free Profile, Version 1.0 or higher. For Uconnect™ customer support, call
1–877–855–8400 or visit www.UconnectPhone.com.
Pairing a Phone
• To use the Uconnect™ Phone feature, you must first pair your bluetooth phone
with the Uconnect™ system.
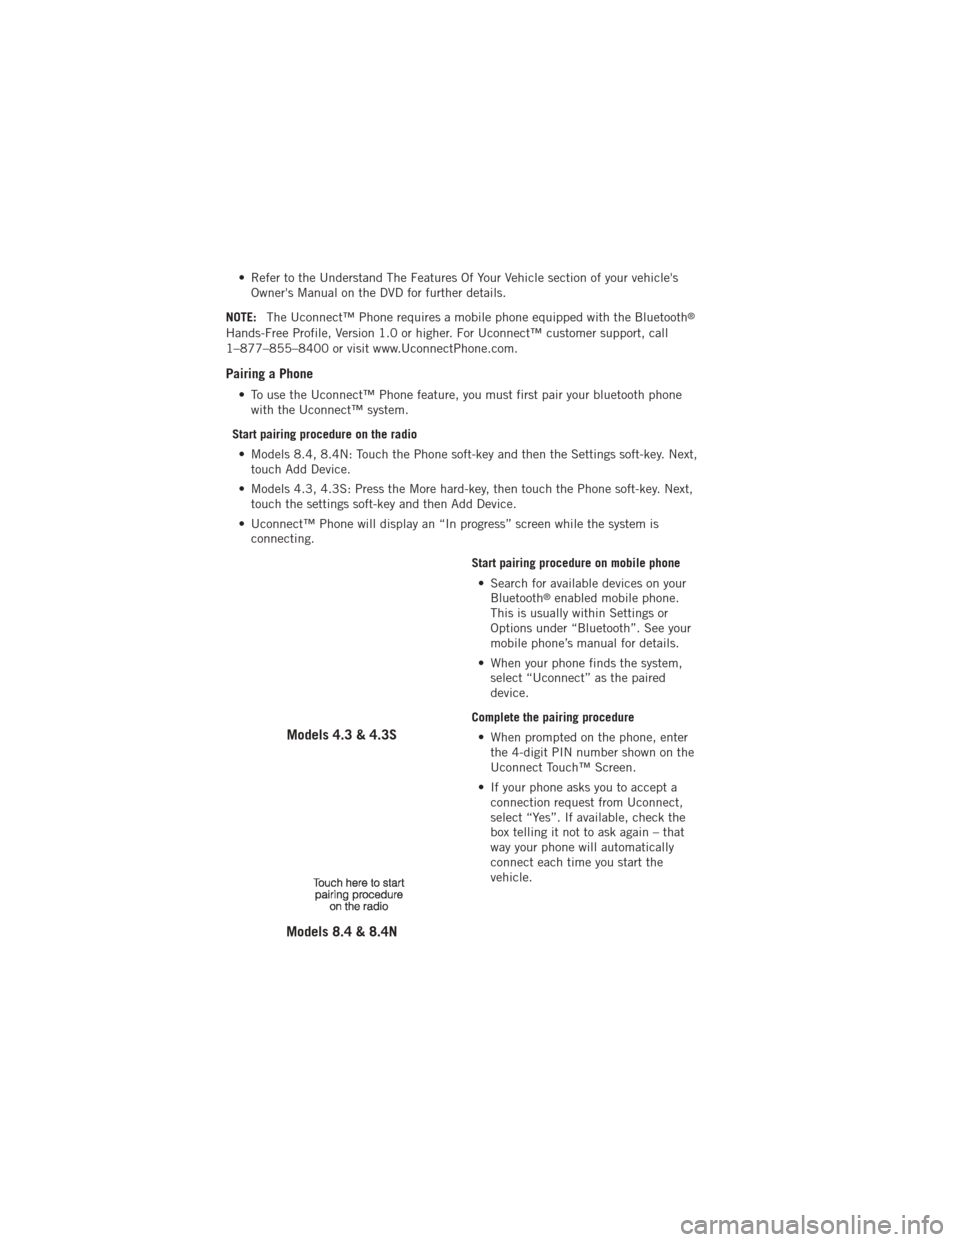
Start pairing procedure on the radio • Models 8.4, 8.4N: Touch the Phone soft-key and then the Settings soft-key. Next, touch Add Device.
• Models 4.3, 4.3S: Press the More hard-key, then touch the Phone soft-key. Next, touch the settings soft-key and then Add Device.
• Uconnect™ Phone will display an “In progress” screen while the system is connecting.
Start pairing procedure on mobile phone• Search for available devices on your Bluetooth
®enabled mobile phone.
This is usually within Settings or
Options under “Bluetooth”. See your
mobile phone’s manual for details.
• When your phone finds the system, select “Uconnect” as the paired
device.
Complete the pairing procedure • When prompted on the phone, enter the 4-digit PIN number shown on the
Uconnect Touch™ Screen.
• If your phone asks you to accept a connection request from Uconnect,
select “Yes”. If available, check the
box telling it not to ask again – that
way your phone will automatically
connect each time you start the
vehicle.
Models 4.3 & 4.3S
Models 8.4 & 8.4N
ELECTRONICS
52
Page 58 of 108
Changing The Volume
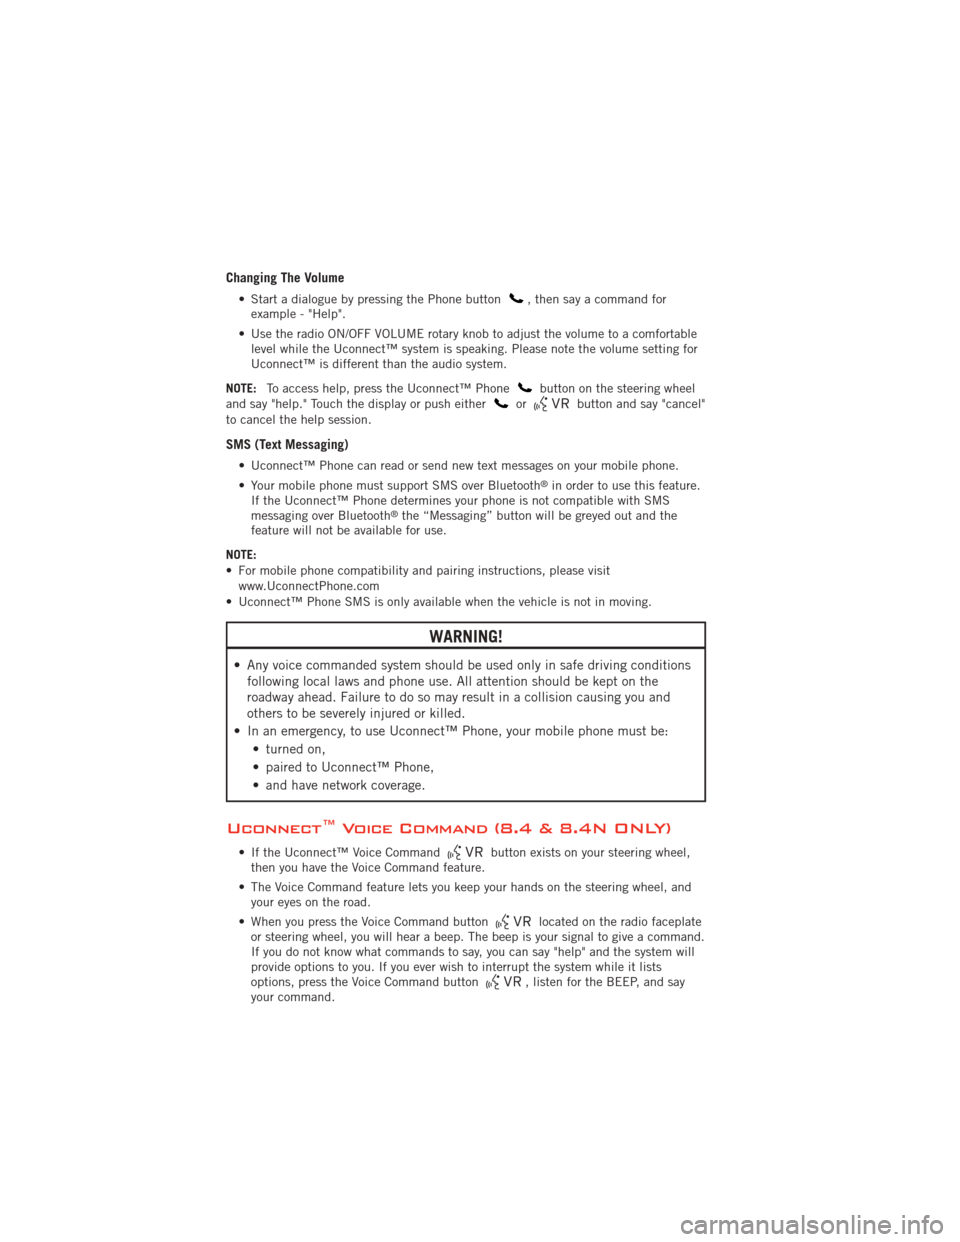
• Start a dialogue by pressing the Phone button, then say a command for
example - "Help".
• Use the radio ON/OFF VOLUME rotary knob to adjust the volume to a comfortable level while the Uconnect™ system is speaking. Please note the volume setting for
Uconnect™ is different than the audio system.
NOTE: To access help, press the Uconnect™ Phone
button on the steering wheel
and say "help." Touch the display or push eitherorbutton and say "cancel"
to cancel the help session.
SMS (Text Messaging)
• Uconnect™ Phone can read or send new text messages on your mobile phone.
• Your mobile phone must support SMS over Bluetooth
®in order to use this feature.
If the Uconnect™ Phone determines your phone is not compatible with SMS
messaging over Bluetooth
®the “Messaging” button will be greyed out and the
feature will not be available for use.
NOTE:
• For mobile phone compatibility and pairing instructions, please visit www.UconnectPhone.com
• Uconnect™ Phone SMS is only available when the vehicle is not in moving.
WARNING!
• Any voice commanded system should be used only in safe driving conditions following local laws and phone use. All attention should be kept on the
roadway ahead. Failure to do so may result in a collision causing you and
others to be severely injured or killed.
• In an emergency, to use Uconnect™ Phone, your mobile phone must be: • turned on,
• paired to Uconnect™ Phone,
• and have network coverage.
Uconnect™ Voice Command (8.4 & 8.4N ONLY)
• If the Uconnect™ Voice Commandbutton exists on your steering wheel,
then you have the Voice Command feature.
• The Voice Command feature lets you keep your hands on the steering wheel, and your eyes on the road.
• When you press the Voice Command button
located on the radio faceplate
or steering wheel, you will hear a beep. The beep is your signal to give a command.
If you do not know what commands to say, you can say "help" and the system will
provide options to you. If you ever wish to interrupt the system while it lists
options, press the Voice Command button
, listen for the BEEP, and say
your command.
ELECTRONICS
56
Page 63 of 108
PROGRAMMABLE FEATURES
Electronic Vehicle Information Center (EVIC)
• The EVIC can be used to view or change the following settings. Press the UPor DOWNbutton until System Setup displays, then press the SELECTbutton. Scroll through the settings using the UP or DOWN buttons. Press the
SELECTbutton to change the setting. Press the BACK button to scroll back to
a previous menu or sub menu.
• Fuel Economy: • Average Fuel Economy
• Distance To Empty (DTE)
• Miles Per Gallon (MPG) • Trip Info
• Trip A
• Trip B
• Elapsed Time
• Vehicle Speed • Units
• To Reset The Display • Vehicle Info (Customer Information Features)
Uconnect Touch™ 4.3 Customer Programmable Features
• The Uconnect Touch™ 4.3 system allows you to access Customer Programmable
feature settings such as Display, Clock, Safety/Assistance, Lights, Doors & Locks,
Heated Seats, Engine Off Operation, Compass Settings, Audio, Phone/ Bluetooth
and SIRIUS Setup through hard-keys and soft-keys.
• Press the Settings hard-key to on the right side of the unit to access the Settings screen, use the Page Up/Down soft-keys to scroll through the following settings.
The following feature settings are available:
• Display • Engine Off Options
• Clock • Compass Settings
• Safety / Assistance • Audio
• Lights • Phone / Bluetooth
• Doors & Locks • SIRIUS Setup
• Heated Seats
Uconnect Touch™ 8.4 Customer Programmable Features
• The Uconnect Touch™ 8.4 system allows you to access Customer Programmable feature settings such as Display, Clock, Safety/Assistance, Lights, Doors & Locks,
Heated Seats, Engine Off Operation, Compass Settings, Audio, Phone/ Bluetooth
and SIRIUS Setup through soft-keys.
• Touch the Settings soft-key to on the bottom of the screen, then touch the Settings soft-key to access the Settings screen. When making a selection, scroll up or down
until the preferred setting is highlighted, then press and release the preferred
setting until a check-mark appears next to the setting, showing that setting has
been selected. The following feature settings are available:
• Display • Engine Off Options
• Clock • Compass Settings
• Safety / Assistance • Audio
ELECTRONICS
61
Page 64 of 108
• Lights• Phone / Bluetooth
• Doors & Locks • SIRIUS Setup
• Heated Seats
UNIVERSAL GARAGE DOOR OPENER
(HomeLink
®)
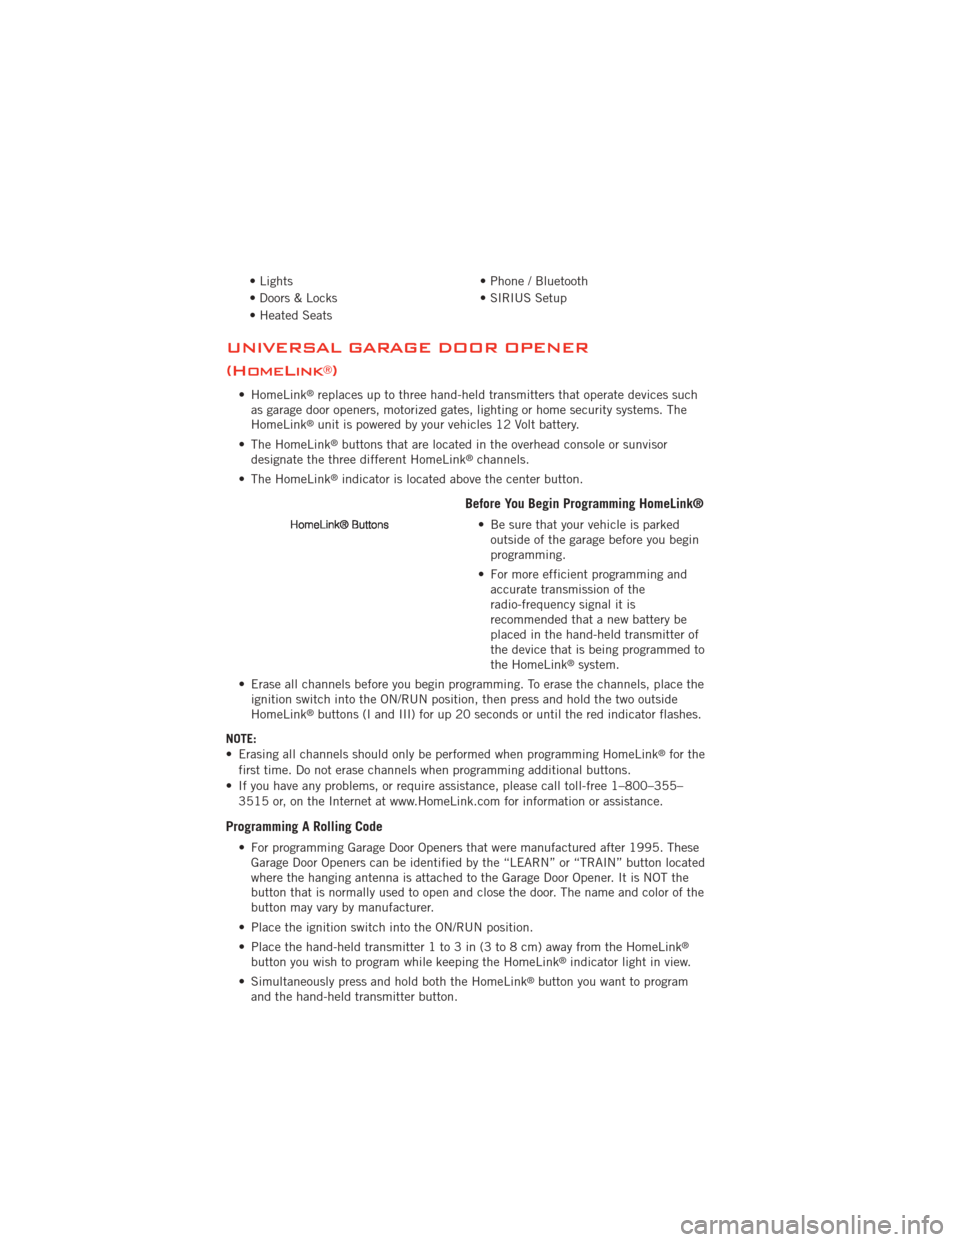
• HomeLink®replaces up to three hand-held transmitters that operate devices such
as garage door openers, motorized gates, lighting or home security systems. The
HomeLink
®unit is powered by your vehicles 12 Volt battery.
• The HomeLink
®buttons that are located in the overhead console or sunvisor
designate the three different HomeLink®channels.
• The HomeLink
®indicator is located above the center button.
Before You Begin Programming HomeLink®
• Be sure that your vehicle is parked outside of the garage before you begin
programming.
• For more efficient programming and accurate transmission of the
radio-frequency signal it is
recommended that a new battery be
placed in the hand-held transmitter of
the device that is being programmed to
the HomeLink
®system.
• Erase all channels before you begin programming. To erase the channels, place the ignition switch into the ON/RUN position, then press and hold the two outside
HomeLink
®buttons (I and III) for up 20 seconds or until the red indicator flashes.
NOTE:
• Erasing all channels should only be performed when programming HomeLink
®for the
first time. Do not erase channels when programming additional buttons.
• If you have any problems, or require assistance, please call toll-free 1–800–355– 3515 or, on the Internet at www.HomeLink.com for information or assistance.
Programming A Rolling Code
• For programming Garage Door Openers that were manufactured after 1995. TheseGarage Door Openers can be identified by the “LEARN” or “TRAIN” button located
where the hanging antenna is attached to the Garage Door Opener. It is NOT the
button that is normally used to open and close the door. The name and color of the
button may vary by manufacturer.
• Place the ignition switch into the ON/RUN position.
• Place the hand-held transmitter 1 to 3 in (3 to 8 cm) away from the HomeLink
®
button you wish to program while keeping the HomeLink®indicator light in view.
• Simultaneously press and hold both the HomeLink
®button you want to program
and the hand-held transmitter button.
ELECTRONICS
62
Page 95 of 108
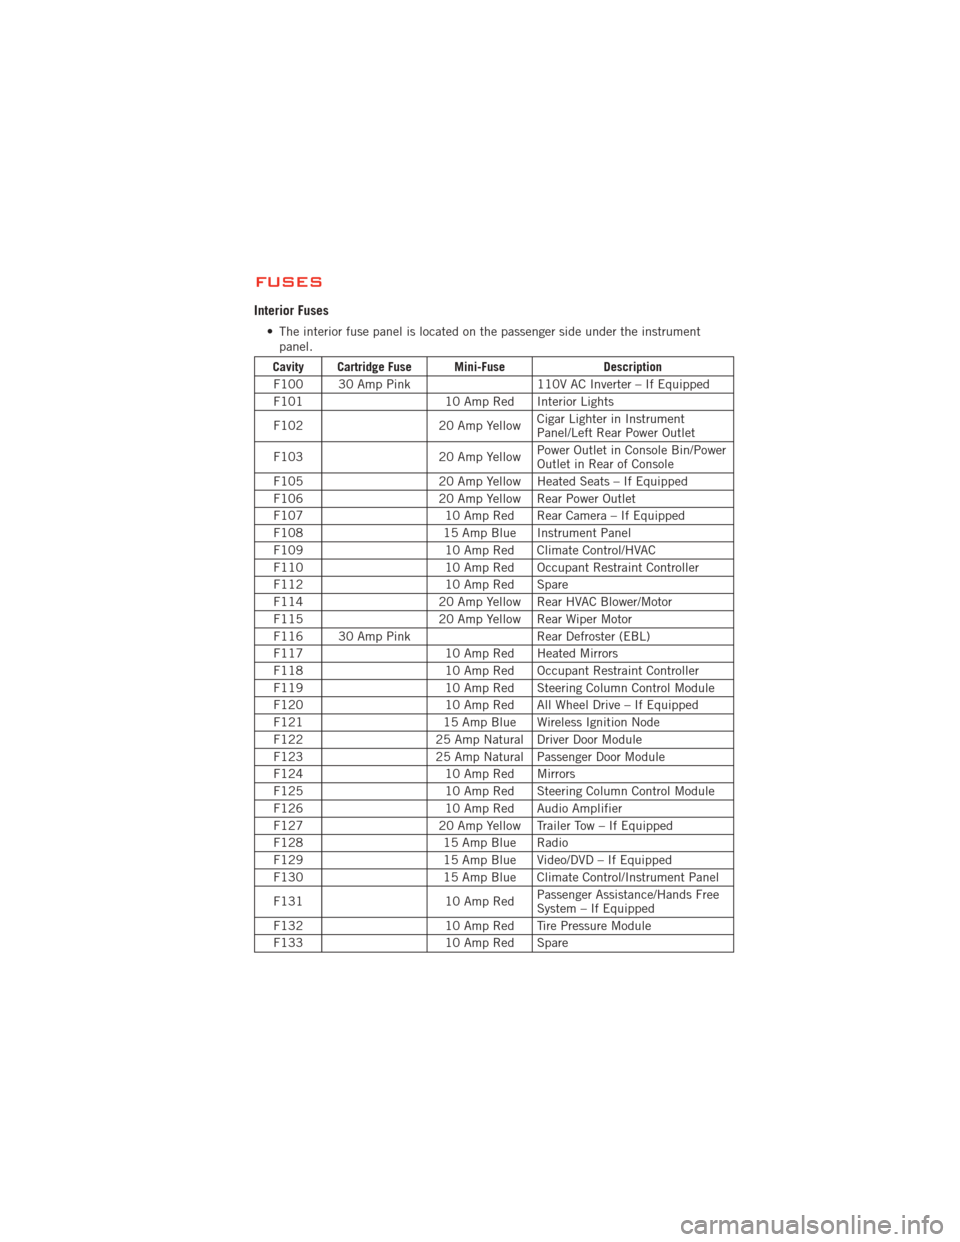
FUSES
Interior Fuses
• The interior fuse panel is located on the passenger side under the instrumentpanel.
Cavity Cartridge Fuse Mini-Fuse Description
F100 30 Amp Pink 110V AC Inverter – If Equipped
F101 10 Amp Red Interior Lights
F102 20 Amp YellowCigar Lighter in Instrument
Panel/Left Rear Power Outlet
F103 20 Amp YellowPower Outlet in Console Bin/Power
Outlet in Rear of Console
F105 20 Amp Yellow Heated Seats – If Equipped
F106 20 Amp Yellow Rear Power Outlet
F107 10 Amp Red Rear Camera – If Equipped
F108 15 Amp Blue Instrument Panel
F109 10 Amp Red Climate Control/HVAC
F110 10 Amp Red Occupant Restraint Controller
F112 10 Amp Red Spare
F114 20 Amp Yellow Rear HVAC Blower/Motor
F115 20 Amp Yellow Rear Wiper Motor
F116 30 Amp Pink Rear Defroster (EBL)
F117 10 Amp Red Heated Mirrors
F118 10 Amp Red Occupant Restraint Controller
F119 10 Amp Red Steering Column Control Module
F120 10 Amp Red All Wheel Drive – If Equipped
F121 15 Amp Blue Wireless Ignition Node
F122 25 Amp Natural Driver Door Module
F123 25 Amp Natural Passenger Door Module
F124 10 Amp Red Mirrors
F125 10 Amp Red Steering Column Control Module
F126 10 Amp Red Audio Amplifier
F127 20 Amp Yellow Trailer Tow – If Equipped
F128 15 Amp Blue Radio
F129 15 Amp Blue Video/DVD – If Equipped
F130 15 Amp Blue Climate Control/Instrument Panel
F131 10 Amp RedPassenger Assistance/Hands Free
System – If Equipped
F132 10 Amp Red Tire Pressure Module
F133 10 Amp Red Spare
MAINTAINING YOUR VEHICLE
93
Page 97 of 108
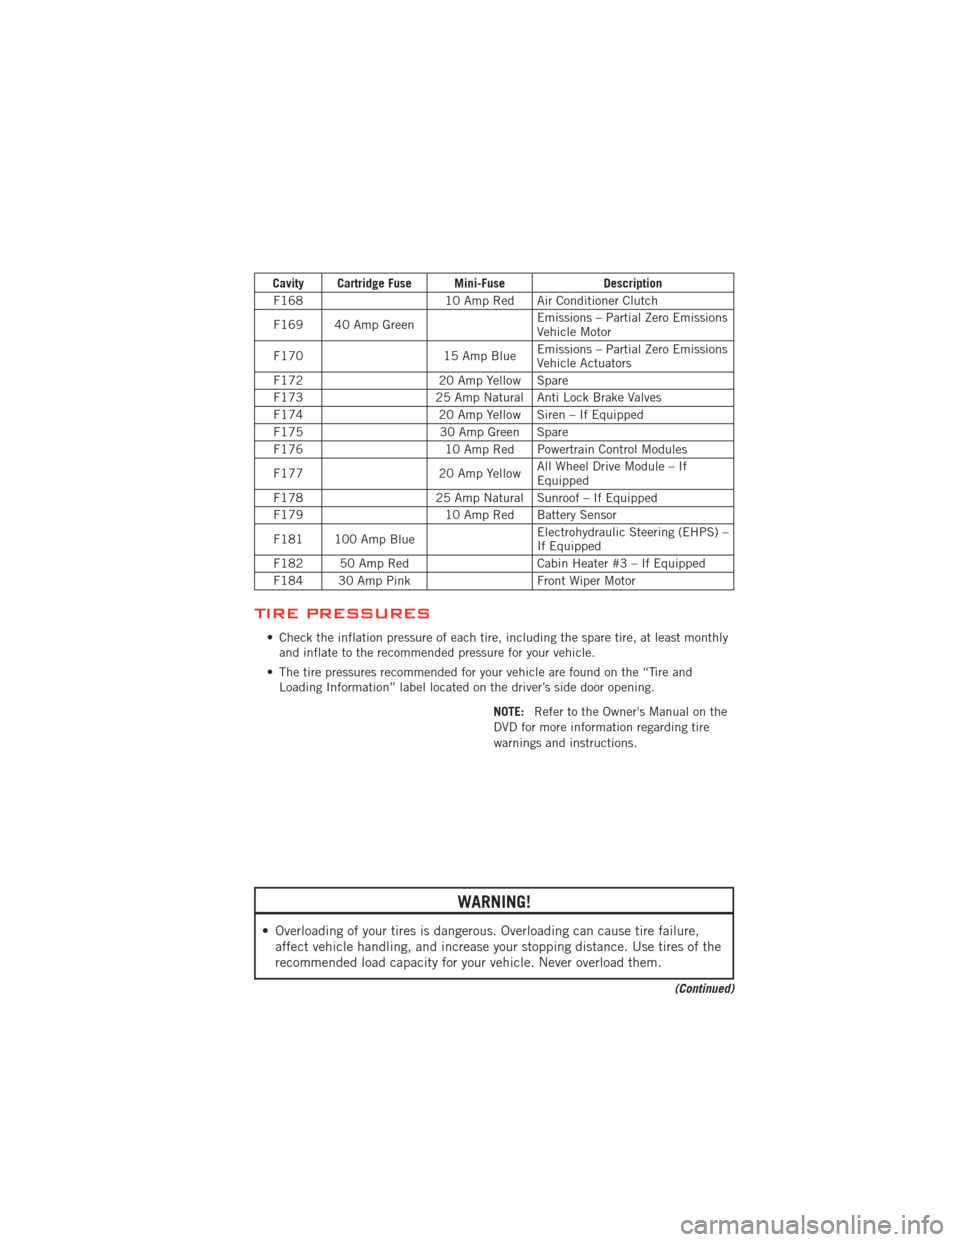
Cavity Cartridge Fuse Mini-FuseDescription
F168 10 Amp Red Air Conditioner Clutch
F169 40 Amp Green Emissions – Partial Zero Emissions
Vehicle Motor
F170 15 Amp BlueEmissions – Partial Zero Emissions
Vehicle Actuators
F172 20 Amp Yellow Spare
F173 25 Amp Natural Anti Lock Brake Valves
F174 20 Amp Yellow Siren – If Equipped
F175 30 Amp Green Spare
F176 10 Amp Red Powertrain Control Modules
F177 20 Amp YellowAll Wheel Drive Module – If
Equipped
F178 25 Amp Natural Sunroof – If Equipped
F179 10 Amp Red Battery Sensor
F181 100 Amp Blue Electrohydraulic Steering (EHPS) –
If Equipped
F182 50 Amp Red Cabin Heater #3 – If Equipped
F184 30 Amp Pink Front Wiper Motor
TIRE PRESSURES
• Check the inflation pressure of each tire, including the spare tire, at least monthly
and inflate to the recommended pressure for your vehicle.
• The tire pressures recommended for your vehicle are found on the “Tire and Loading Information” label located on the driver’s side door opening.
NOTE:Refer to the Owner's Manual on the
DVD for more information regarding tire
warnings and instructions.
WARNING!
• Overloading of your tires is dangerous. Overloading can cause tire failure, affect vehicle handling, and increase your stopping distance. Use tires of the
recommended load capacity for your vehicle. Never overload them.
(Continued)
MAINTAINING YOUR VEHICLE
95