engine oil DODGE JOURNEY 2014 1.G User Guide
[x] Cancel search | Manufacturer: DODGE, Model Year: 2014, Model line: JOURNEY, Model: DODGE JOURNEY 2014 1.GPages: 124, PDF Size: 3.37 MB
Page 8 of 124
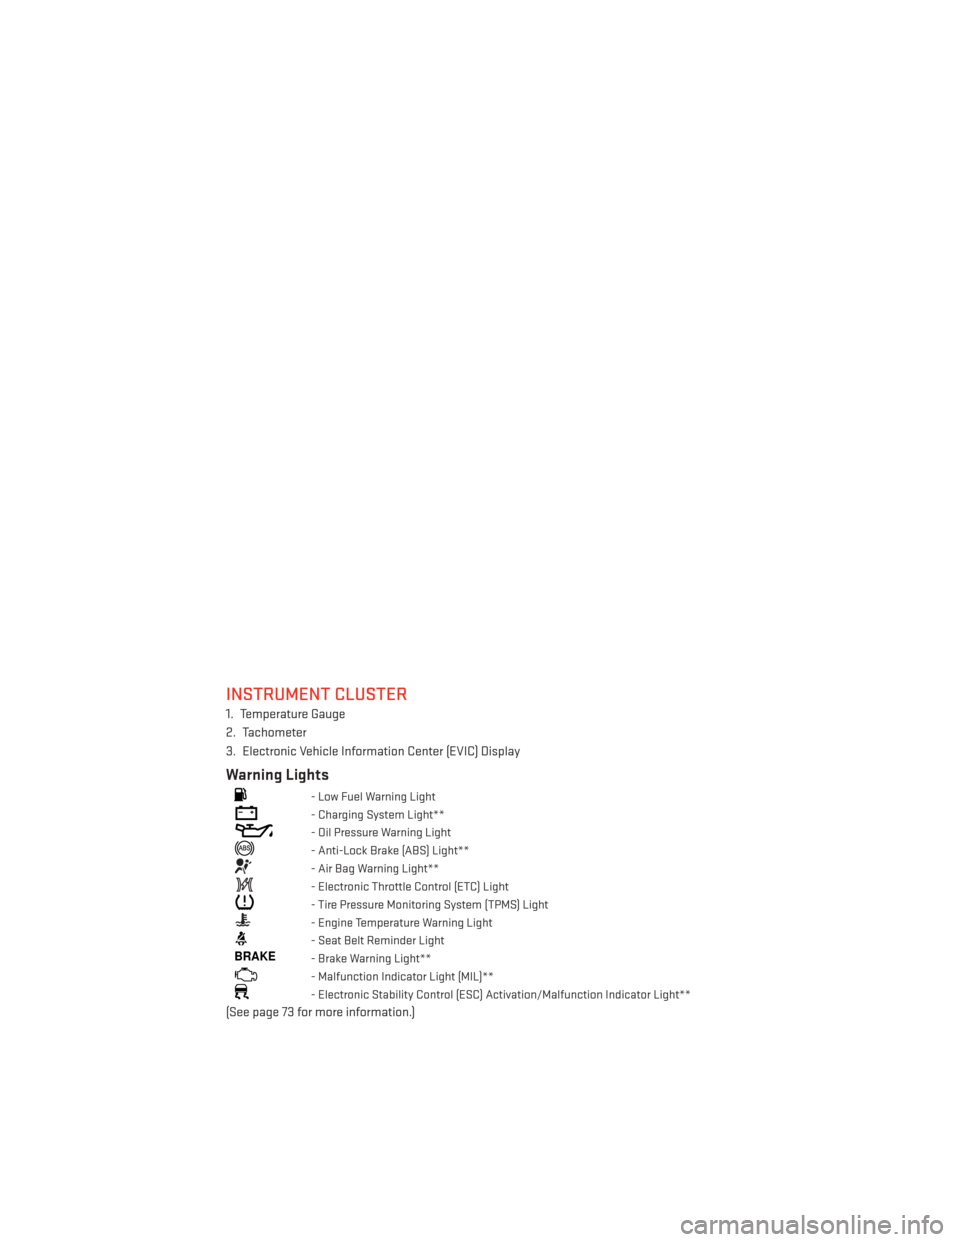
INSTRUMENT CLUSTER
1. Temperature Gauge
2. Tachometer
3. Electronic Vehicle Information Center (EVIC) Display
Warning Lights
- Low Fuel Warning Light
- Charging System Light**
- Oil Pressure Warning Light
- Anti-Lock Brake (ABS) Light**
- Air Bag Warning Light**
- Electronic Throttle Control (ETC) Light
- Tire Pressure Monitoring System (TPMS) Light
- Engine Temperature Warning Light
- Seat Belt Reminder Light
BRAKE- Brake Warning Light**
- Malfunction Indicator Light (MIL)**
- Electronic Stability Control (ESC) Activation/Malfunction Indicator Light**
(See page 73 for more information.)
CONTROLS AT A GLANCE
6
Page 30 of 124
ENGINE BREAK-IN RECOMMENDATIONS
A long break-in period is not required for the engine and drivetrain (transmission and axle)
in your vehicle.
Drive moderately during the first 300 miles (500 km). After the initial 60 miles (100 km),
speeds up to 50 or 55 mph (80 or 90 km/h) are desirable.
While cruising, brief full-throttle acceleration within the limits of local traffic laws contrib-
utes to a good break-in. Wide-open throttle acceleration in low gear can be detrimental and
should be avoided.
The engine oil installed in the engine at the factory is a high-quality energy conserving type
lubricant. Oil changes should be consistent with anticipated climate conditions under
which vehicle operations will occur. For the recommended viscosity and quality grades,
refer to “Maintaining Your Vehicle.”
NOTE:
A new engine may consume some oil during its first few thousand miles (kilometers) of
operation. This should be considered a normal part of the break-in and not interpreted as an
indication of an engine problem or malfunction.
CAUTION!
Never use Non-Detergent Oil or Straight Mineral Oil in the engine or damage may result.
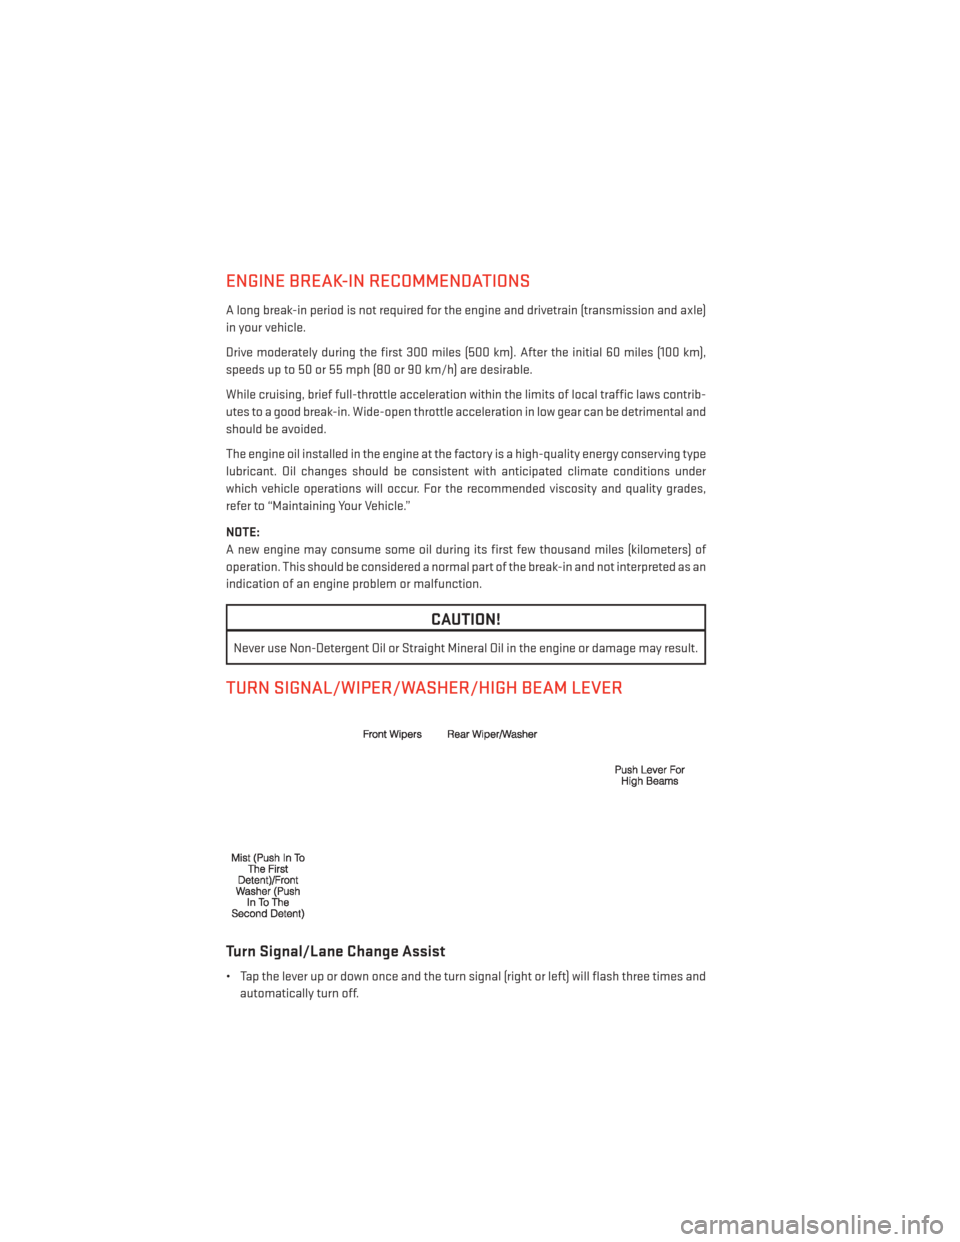
TURN SIGNAL/WIPER/WASHER/HIGH BEAM LEVER
Turn Signal/Lane Change Assist
• Tap the lever up or down once and the turn signal (right or left) will flash three times andautomatically turn off.
OPERATING YOUR VEHICLE
28
Page 75 of 124
ROADSIDE ASSISTANCE
Dial toll-free 1-800-521-2779 for U.S. Residents or 1-800-363-4869 for Canadian Residents.
• Provide your name, vehicle identification number, license plate number, and your loca-tion, including the telephone number from which you are calling.
• Briefly describe the nature of the problem and answer a few simple questions.
• You will be given the name of the service provider and an estimated time of arrival. If you feel you are in an “unsafe situation”, please let us know. With your consent, we will
contact local police or safety authorities.
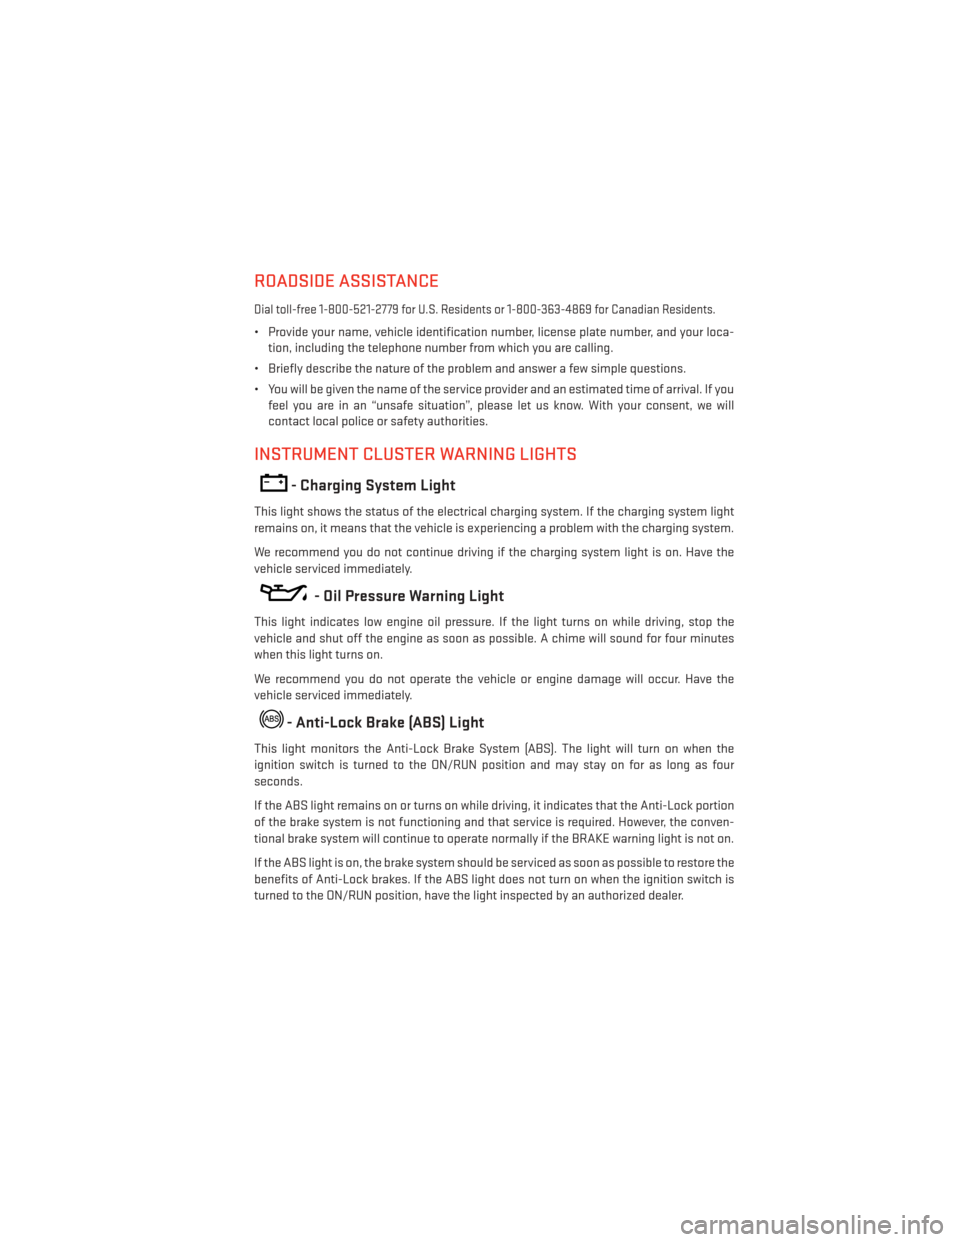
INSTRUMENT CLUSTER WARNING LIGHTS
- Charging System Light
This light shows the status of the electrical charging system. If the charging system light
remains on, it means that the vehicle is experiencing a problem with the charging system.
We recommend you do not continue driving if the charging system light is on. Have the
vehicle serviced immediately.
- Oil Pressure Warning Light
This light indicates low engine oil pressure. If the light turns on while driving, stop the
vehicle and shut off the engine as soon as possible. A chime will sound for four minutes
when this light turns on.
We recommend you do not operate the vehicle or engine damage will occur. Have the
vehicle serviced immediately.
- Anti-Lock Brake (ABS) Light
This light monitors the Anti-Lock Brake System (ABS). The light will turn on when the
ignition switch is turned to the ON/RUN position and may stay on for as long as four
seconds.
If the ABS light remains on or turns on while driving, it indicates that the Anti-Lock portion
of the brake system is not functioning and that service is required. However, the conven-
tional brake system will continue to operate normally if the BRAKE warning light is not on.
If the ABS light is on, the brake system should be serviced as soon as possible to restore the
benefits of Anti-Lock brakes. If the ABS light does not turn on when the ignition switch is
turned to the ON/RUN position, have the light inspected by an authorized dealer.
WHAT TO DO IN EMERGENCIES
73
Page 77 of 124
Please note that the TPMS is not a substitute for proper tire maintenance, and it is the
driver’s responsibility to maintain correct tire pressure, even if under-inflation has not
reached the level to trigger illumination of the TPMS low EVIC display.
Your vehicle has also been equipped with a TPMS malfunction indicator to indicate when
the system is not operating properly. The TPMS malfunction indicator is combined with the
low tire pressure telltale. When the system detects a malfunction, the telltale will flash for
approximately one minute and then remain continuously illuminated. This sequence will
continue each time the vehicle is restarted as long as the malfunction exists.
When the malfunction indicator is illuminated, the system may not be able to detect or
signal low tire pressure as intended. TPMS malfunctions may occur for a variety of reasons,
including the installation of replacement or alternate tires or wheels on the vehicle that
prevent the TPMS from functioning properly. Always check the TPMS malfunction telltale
after replacing one or more tires or wheels on your vehicle, to ensure that the replacement
or alternate tires and wheels allow the TPMS to continue to function properly.
NOTE:
Tire pressures change by approximately 1 psi (7 kPa) per 12° F (7° C) of air temperature
change. Keep this in mind when checking tire pressure inside a garage, especially in the
Winter. Example: If garage temperature is 68°F (20°C) and the outside temperature is 32°F
(0°C), then the cold tire inflation pressure should be increased by 3 psi (21 kPa), which equals
1 psi (7 kPa) for every 12°F (7°C) for this outside temperature condition.
CAUTION!
The TPMS has been optimized for the original equipment tires and wheels. TPMS
pressures and warning have been established for the tire size equipped on your vehicle.
Undesirable system operation or sensor damage may result when using replacement
equipment that is not of the same size, type, and/or style. Aftermarket wheels can cause
sensor damage. Do not use tire sealant from a can, or balance beads if your vehicle is
equipped with a TPMS, as damage to the sensors may result.
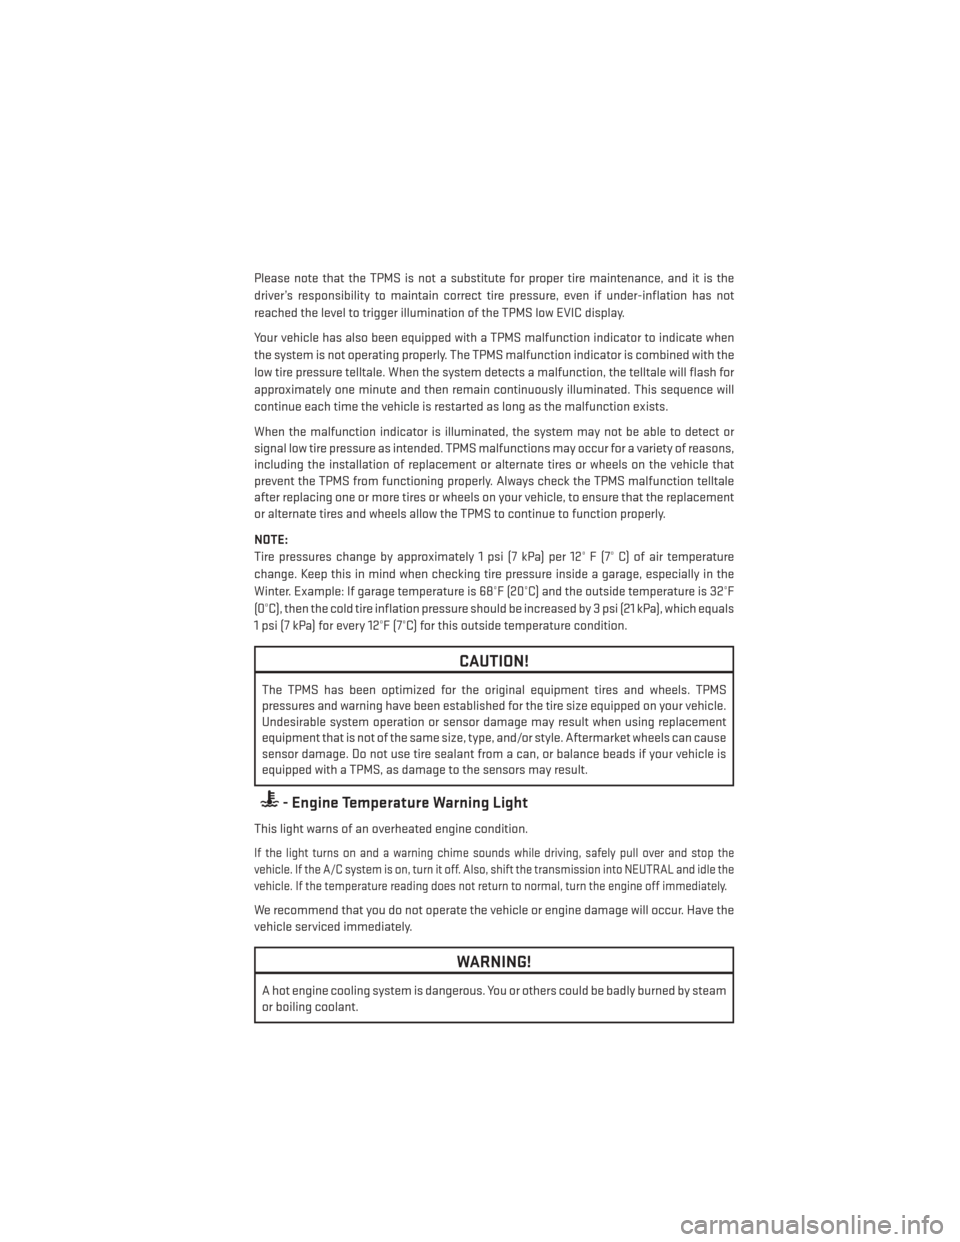
- Engine Temperature Warning Light
This light warns of an overheated engine condition.
If the light turns on and a warning chime sounds while driving, safely pull over and stop the
vehicle. If the A/C system is on, turn it off. Also, shift the transmission into NEUTRAL and idle the
vehicle. If the temperature reading does not return to normal, turn the engine off immediately.
We recommend that you do not operate the vehicle or engine damage will occur. Have the
vehicle serviced immediately.
WARNING!
A hot engine cooling system is dangerous. You or others could be badly burned by steam
or boiling coolant.
WHAT TO DO IN EMERGENCIES
75
Page 80 of 124
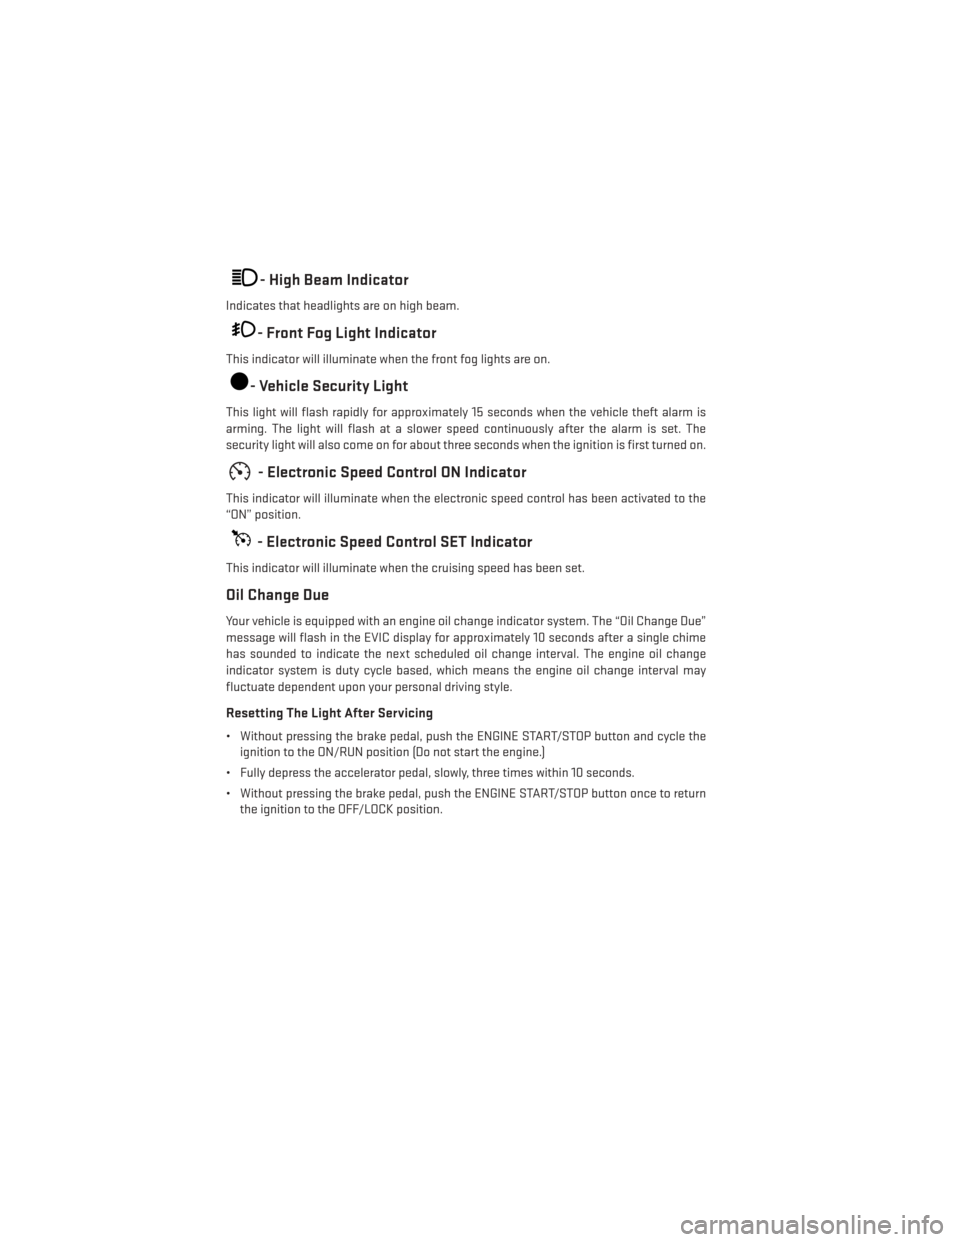
- High Beam Indicator
Indicates that headlights are on high beam.
- Front Fog Light Indicator
This indicator will illuminate when the front fog lights are on.
- Vehicle Security Light
This light will flash rapidly for approximately 15 seconds when the vehicle theft alarm is
arming. The light will flash at a slower speed continuously after the alarm is set. The
security light will also come on for about three seconds when the ignition is first turned on.
- Electronic Speed Control ON Indicator
This indicator will illuminate when the electronic speed control has been activated to the
“ON” position.
- Electronic Speed Control SET Indicator
This indicator will illuminate when the cruising speed has been set.
Oil Change Due
Your vehicle is equipped with an engine oil change indicator system. The “Oil Change Due”
message will flash in the EVIC display for approximately 10 seconds after a single chime
has sounded to indicate the next scheduled oil change interval. The engine oil change
indicator system is duty cycle based, which means the engine oil change interval may
fluctuate dependent upon your personal driving style.
Resetting The Light After Servicing
• Without pressing the brake pedal, push the ENGINE START/STOP button and cycle theignition to the ON/RUN position (Do not start the engine.)
• Fully depress the accelerator pedal, slowly, three times within 10 seconds.
• Without pressing the brake pedal, push the ENGINE START/STOP button once to return the ignition to the OFF/LOCK position.
WHAT TO DO IN EMERGENCIES
78
Page 98 of 124
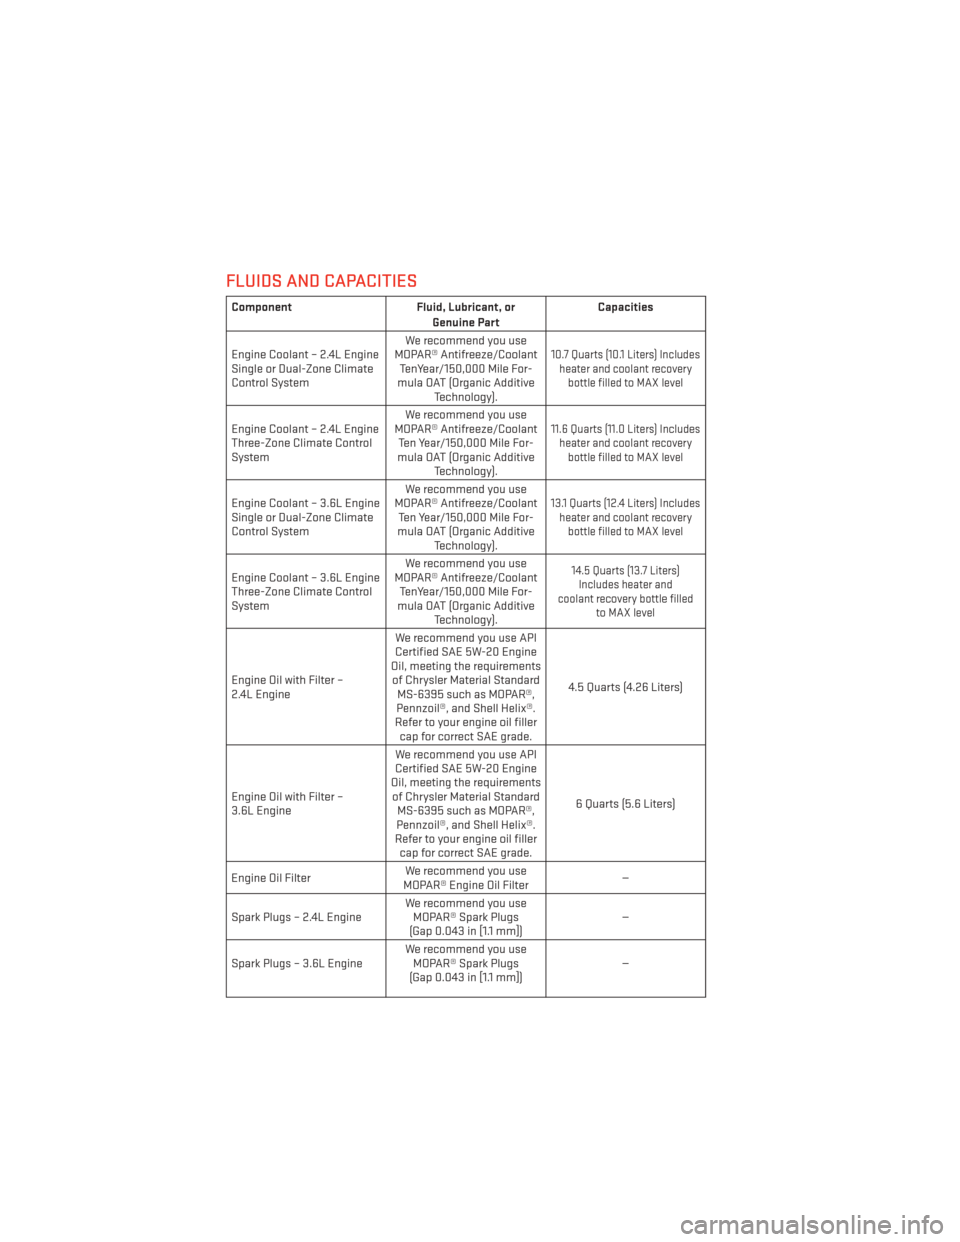
FLUIDS AND CAPACITIES
ComponentFluid, Lubricant, or
Genuine Part Capacities
Engine Coolant – 2.4L Engine
Single or Dual-Zone Climate
Control System We recommend you use
MOPAR® Antifreeze/Coolant TenYear/150,000 Mile For-
mula OAT (Organic Additive Technology).
10.7 Quarts (10.1 Liters) Includesheater and coolant recovery bottle filled to MAX level
Engine Coolant – 2.4L Engine
Three-Zone Climate Control
System We recommend you use
MOPAR® Antifreeze/Coolant Ten Year/150,000 Mile For-
mula OAT (Organic Additive Technology).11.6 Quarts (11.0 Liters) Includesheater and coolant recovery bottle filled to MAX level
Engine Coolant – 3.6L Engine
Single or Dual-Zone Climate
Control System We recommend you use
MOPAR® Antifreeze/Coolant Ten Year/150,000 Mile For-
mula OAT (Organic Additive Technology).13.1 Quarts (12.4 Liters) Includesheater and coolant recovery bottle filled to MAX level
Engine Coolant – 3.6L Engine
Three-Zone Climate Control
System We recommend you use
MOPAR® Antifreeze/Coolant TenYear/150,000 Mile For-
mula OAT (Organic Additive Technology).14.5 Quarts (13.7 Liters)Includes heater and
coolant recovery bottle filled to MAX level
Engine Oil with Filter –
2.4L Engine We recommend you use API
Certified SAE 5W-20 Engine
Oil, meeting the requirements of Chrysler Material Standard MS-6395 such as MOPAR®,
Pennzoil®, and Shell Helix®.
Refer to your engine oil filler cap for correct SAE grade. 4.5 Quarts (4.26 Liters)
Engine Oil with Filter –
3.6L Engine We recommend you use API
Certified SAE 5W-20 Engine
Oil, meeting the requirements of Chrysler Material Standard MS-6395 such as MOPAR®,
Pennzoil®, and Shell Helix®.
Refer to your engine oil filler cap for correct SAE grade. 6 Quarts (5.6 Liters)
Engine Oil Filter We recommend you use
MOPAR® Engine Oil Filter —
Spark Plugs – 2.4L Engine We recommend you use
MOPAR® Spark Plugs
(Gap 0.043 in [1.1 mm]) —
Spark Plugs – 3.6L Engine We recommend you use
MOPAR® Spark Plugs
(Gap 0.043 in [1.1 mm]) —
MAINTAINING YOUR VEHICLE
96
Page 100 of 124
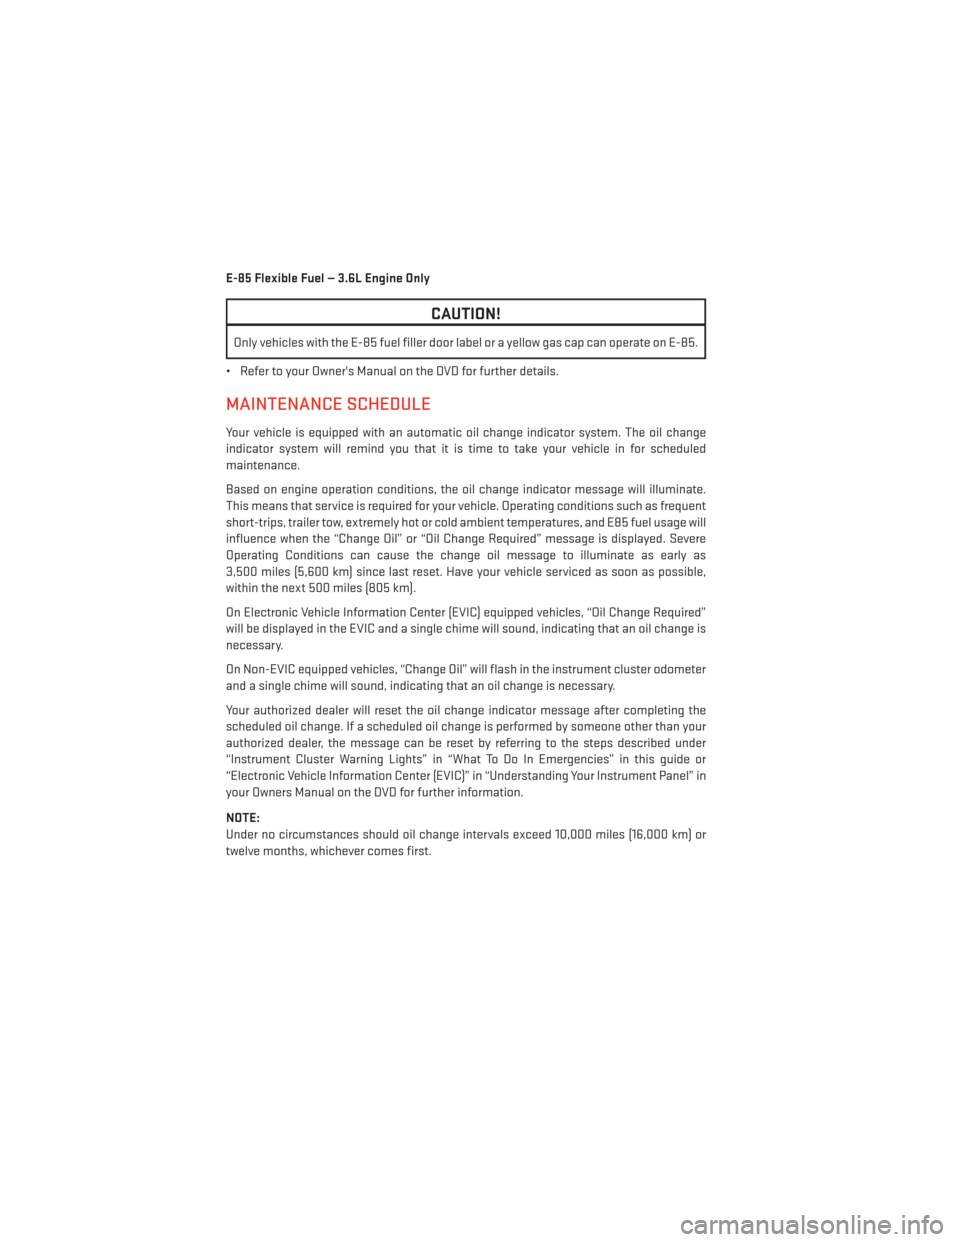
E-85 Flexible Fuel — 3.6L Engine Only
CAUTION!
Only vehicles with the E-85 fuel filler door label or a yellow gas cap can operate on E-85.
• Refer to your Owner's Manual on the DVD for further details.
MAINTENANCE SCHEDULE
Your vehicle is equipped with an automatic oil change indicator system. The oil change
indicator system will remind you that it is time to take your vehicle in for scheduled
maintenance.
Based on engine operation conditions, the oil change indicator message will illuminate.
This means that service is required for your vehicle. Operating conditions such as frequent
short-trips, trailer tow, extremely hot or cold ambient temperatures, and E85 fuel usage will
influence when the “Change Oil” or “Oil Change Required” message is displayed. Severe
Operating Conditions can cause the change oil message to illuminate as early as
3,500 miles (5,600 km) since last reset. Have your vehicle serviced as soon as possible,
within the next 500 miles (805 km).
On Electronic Vehicle Information Center (EVIC) equipped vehicles, “Oil Change Required”
will be displayed in the EVIC and a single chime will sound, indicating that an oil change is
necessary.
On Non-EVIC equipped vehicles, “Change Oil” will flash in the instrument cluster odometer
and a single chime will sound, indicating that an oil change is necessary.
Your authorized dealer will reset the oil change indicator message after completing the
scheduled oil change. If a scheduled oil change is performed by someone other than your
authorized dealer, the message can be reset by referring to the steps described under
“Instrument Cluster Warning Lights” in “What To Do In Emergencies” in this guide or
“Electronic Vehicle Information Center (EVIC)” in “Understanding Your Instrument Panel” in
your Owners Manual on the DVD for further information.
NOTE:
Under no circumstances should oil change intervals exceed 10,000 miles (16,000 km) or
twelve months, whichever comes first.
MAINTAINING YOUR VEHICLE
98
Page 101 of 124
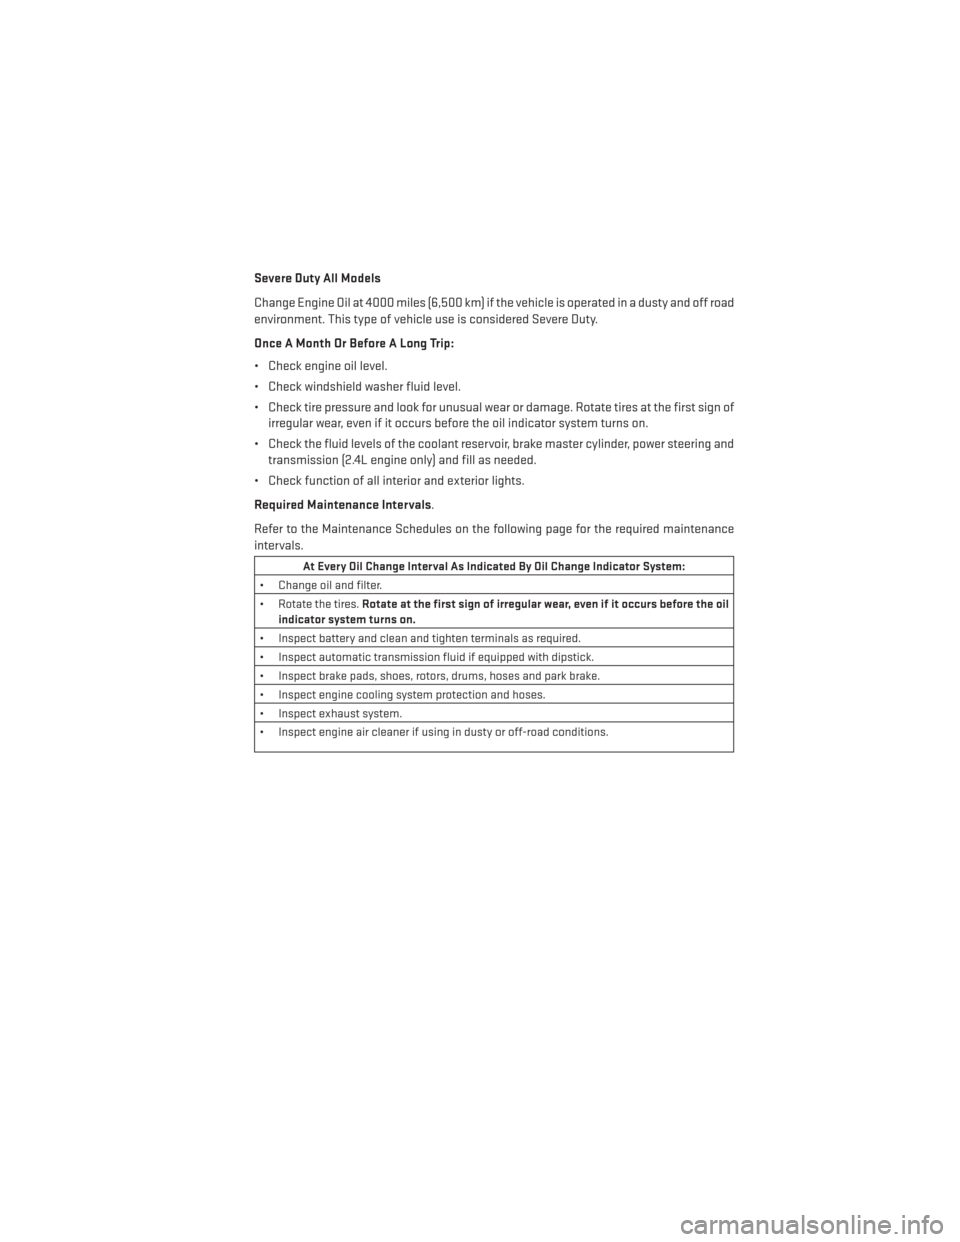
Severe Duty All Models
Change Engine Oil at 4000 miles (6,500 km) if the vehicle is operated in a dusty and off road
environment. This type of vehicle use is considered Severe Duty.
Once A Month Or Before A Long Trip:
• Check engine oil level.
• Check windshield washer fluid level.
• Check tire pressure and look for unusual wear or damage. Rotate tires at the first sign ofirregular wear, even if it occurs before the oil indicator system turns on.
• Check the fluid levels of the coolant reservoir, brake master cylinder, power steering and transmission (2.4L engine only) and fill as needed.
• Check function of all interior and exterior lights.
Required Maintenance Intervals.
Refer to the Maintenance Schedules on the following page for the required maintenance
intervals.
At Every Oil Change Interval As Indicated By Oil Change Indicator System:
• Change oil and filter.
• Rotate the tires. Rotate at the first sign of irregular wear, even if it occurs before the oil
indicator system turns on.
• Inspect battery and clean and tighten terminals as required.
• Inspect automatic transmission fluid if equipped with dipstick.
• Inspect brake pads, shoes, rotors, drums, hoses and park brake.
• Inspect engine cooling system protection and hoses.
• Inspect exhaust system.
• Inspect engine air cleaner if using in dusty or off-road conditions.
MAINTAINING YOUR VEHICLE
99
Page 113 of 124
FREQUENTLY ASKED QUESTIONS
GETTING STARTED
• How do I install my LATCH Equipped Child Seat? pg. 16
• How do I move my rear seats? pg. 23
ELECTRONICS
• How do I know which radio I have?• Uconnect® 4.3 & 4.3S pg. 41
• Uconnect® 8.4 & 8.4N pg. 42
• How do I select the AUX music source? pg. 54
• How do I set the clock on my radio?
• Uconnect® 4.3 & 4.3S pg. 41
• Uconnect® 8.4 & 8.4N pg. 42
• How do I use the Navigation feature? pg. 50
• How do I pair my cell phone via Bluetooth® with the Uconnect® Hands-Free Voice Activation System? pg. 55
• How do I hear the audio from my iPod® through the USB port using the radio?
• Uconnect® 4.3 & 4.3S pg. 54
• Uconnect® 8.4, 8.4N pg. 54
• How do I configure my Universal Garage Door Opener (HomeLink®)? pg. 66
UTILITY
• How do I know how much I can tow with my Dodge Journey? pg. 71
WHAT TO DO IN EMERGENCIES
• What do I do if my TPMS warning light is blinking? pg. 74
• How do I change a flat tire? pg. 80
• How do I Jump-Start my vehicle? pg. 87
MAINTAINING YOUR VEHICLE
• Where is my Fuse Block located?
• Interior Fuses pg. 103
• Underhood Fuses pg. 104
• What type of oil do I use? pg. 96
• How often should I change my engine’s oil? pg. 98
• What should my tire pressure be set at? pg. 105
FREQUENTLY ASKED QUESTIONS
111
Page 114 of 124
Airbag...................14
Air Bag Air Bag Warning Light .........74
Air Conditioning .............33
Alarm Vehicle Security Alarm ........13
Alarm (Security Alarm) ........13,78
Anti-Lock Brake System (ABS) ......73
Arming System (Security Alarm) .....13
Assistance Towing ............73
Automatic Headlights ..........29
Automatic Oil Change Indicator .....78
Automatic Temperature Control (ATC) . .33
Automatic Transmission Fluid Type ..............96
AxleFluid.................96
Back-UpCamera.............35
Battery Charging System Light ........73
Booster Seat ...............19
BrakeFluid................96
Brake System Warning Light .............76
Break-In Recommendations, New Vehicle .................28
Bulb Replacement ............107
Calibration, Compass ...........65
ChangingAFlatTire...........80
Charging System Light ..........73
Check Engine Light (Malfunction Indicator Light) .............77
Child Booster Seat ............19
Child Restraints CarSeat................15
Child Restraints ............15
Child Seat Installation .......17, 18
Installing Child Restraints Using
The Vehicle Seat Belt .........18
Lower Anchors And Tethers
For Children ..........15, 17, 18
Using The Top Tether Anchorage . . .18
ChildSeat.................17
ClimateControl..............33
Cluster Warning/Indicator Lights Air Bag Warning Light ........74 Brake Warning Light
.........76
Electronic Speed Control ON
Indicator ...............78
Electronic Speed Control SET
Indicator ...............78
Front Fog Light Indicator .......78
High Beam Indicator .........78
Turn Signal Indicator .........77
Vehicle Security Light .........78
Compass Calibration ...........65
Cooling System Coolant Capacity ...........96
Cruise Control (Speed Control) ......30
Cruise Light ................30
Customer Assistance ..........108
Customer Programmable Features..............65,66
Defects, Reporting ............109
Disabled Vehicle Towing .........73
Disarming, Security System .......13
DriverCockpit...............39
Electronics Your Vehicle's Sound System ....38
Electronic Speed Control (Cruise
Control)............30
Electronic Throttle Control Warning Light ..................74
Electronic Vehicle Information Center(EVIC) ...........64,65
Electronic Vehicle Information Center(EVIC)Display..........6
Emergency, In Case of Freeing Vehicle When Stuck .....91
Jacking ................80
Overheating ..............79
Towing ................73
Engine Break-In Recommendations .....28
Compartment.............94
Malfunction Indicator
(Check Engine) ............77
Oil Change Interval ..........78
Oil Selection .............96
Overheating ..............79
Event Data Recorder ...........92
INDEX
112