remote start DODGE JOURNEY 2015 1.G Owner's Manual
[x] Cancel search | Manufacturer: DODGE, Model Year: 2015, Model line: JOURNEY, Model: DODGE JOURNEY 2015 1.GPages: 648
Page 331 of 648
•Passive Entry (Keyless Enter-N-Go™)
Press the “Passive Entry” button on the touchscreen to
change this display. This feature allows you to lock and
unlock the vehicle’s door(s) without having to press the
RKE transmitter lock or unlock buttons. To make your
selection, press the “Passive Entry” button on the touch-
screen and select “ON” or “OFF.” Then press the back
arrow button on the touchscreen. Refer to “Keyless
Enter-N-Go™” in “Things To Know Before Starting Your
Vehicle”.
Auto-On Comfort & Remote Start
•Auto On Heated Seats — If Equipped
Press the “Auto On Heated Seats” button on the touch-
screen to change this display. When the temperatures are
below 40° F (4.4° C) the Driver ’s heated seat will turn on.
To make your selection, press the “Auto On Heated
Seats” button on the touchscreen and select “ON” or
“OFF.” Then press the back arrow button on the touch-
screen.
Engine Off Options
•Headlight Off Delay
Press the “Headlight Off Delay” button on the touch-
screen to change this display. When this feature is se-
lected, the driver can choose to have the headlights
remain on for 0, 30, 60, or 90 seconds when exiting the
vehicle. To change the Headlight Off Delay status, press
the “0,” “30,” “60” or “90” button on the touchscreen.
Then press the back arrow button on the touchscreen.
•Engine Off Power Delay
Press the “Engine Off Power Delay” button on the
touchscreen to change this display. When this feature is
selected, the power window switches, radio, Uconnect®
phone system (if equipped), DVD video system (if
4
UNDERSTANDING YOUR INSTRUMENT PANEL 329
Page 335 of 648
•Subscription Info
New vehicle purchasers or lessees will receive a free
limited time subscription to SIRIUS Satellite Radio with
your radio. Following the expiration of the free services,
it will be necessary to access the information on the
Subscription Information screen to re-subscribe.
Press the Subscription Info button on the touchscreen to
access the Subscription Information screen.
Write down the SIRIUS ID numbers for your receiver. To
reactivate your service, either call the number listed on
the screen or visit the provider online.
NOTE:SIRIUS Travel Link is a separate subscription.
Customer Programmable Features — Uconnect®
System 8.4 Settings
Press the “More” button on the touchscreen, then press
the “Settings” button on the touchscreen to display the
menu setting screen. In this mode the Uconnect® system
allows you to access programmable features that may be
equipped such as Display, Clock, Safety/Assistance,
Lights, Doors & Locks, Auto-On Comfort & Remote Start,
Engine Off Operation, Compass Settings, Audio, Phone/
Bluetooth® and SIRIUS Setup.
NOTE:Only one touchscreen area may be selected at a
time.
When making a selection, press the button on the touch-
screen to enter the desired mode. Once in the desired
mode, press and release the preferred setting until a
check-mark appears next to the setting, showing that
setting has been selected.
4
UNDERSTANDING YOUR INSTRUMENT PANEL 333
Page 343 of 648
Doors & Locks
After pressing the Doors & Locks button on the touch-
screen the following settings will be available.
•Auto Unlock On Exit
When this feature is selected, all doors will unlock when
the vehicle is stopped and the transmission is in the
PARK or NEUTRAL position and the driver’s door is
opened. To make your selection, press the “Auto Unlock
On Exit” button on the touchscreen, until a check-mark
appears next to setting, showing that setting has been
selected. Press the back arrow button on the touchscreen
to return to the previous menu.
•Auto Lock
When this feature is selected, all doors will lock auto-
matically when the vehicle reaches a speed of 15 mph
(24 km/h). To make your selection, press the “Auto
Lock” button on the touchscreen, until a check-mark
appears next to setting, indicating that the setting has
been selected. Press the back arrow button on the touch-
screen to return to the previous menu.
•Flash Headlights With Lock
When this feature is selected, the signal lights will flash
when the doors are locked with the Remote Keyless
Entry (RKE) transmitter. To make your selection, press
the “Flash Lights With Lock” button on the touchscreen,
until a check-mark appears next to setting, showing that
setting has been selected. Press the back arrow button on
the touchscreen to return to the previous menu.
•Sound Horn With Lock
When this feature is selected, the horn will sound when the
remote start is activated. To make your selection, press the
“Sound Horn With Lock” button on the touchscreen, until
a check-mark appears next to setting, showing that setting
has been selected. Press the back arrow button on the
touchscreen to return to the previous menu.
4
UNDERSTANDING YOUR INSTRUMENT PANEL 341
Page 344 of 648
•Sound Horn With Remote Start
When this feature is selected, the horn will sound when
the remote start is activated. To make your selection,
press the “Sound Horn With Remote Start” button on the
touchscreen, until a check-mark appears next to setting,
showing that setting has been selected. Press the back
arrow button on the touchscreen to return to the previous
menu.
•1st Press Of Key Fob Unlocks
When Unlock Driver Door Only On 1st Press is selected,
only the driver’s door will unlock on the first press of the
Remote Keyless Entry (RKE) transmitter UNLOCK but-
ton. When Driver Door 1st Press is selected, you must
press the RKE transmitter UNLOCK button twice to
unlock the passenger’s doors. When Unlock All Doors
On 1st Press is selected, all of the doors will unlock on the
first press of the RKE transmitter UNLOCK button.
NOTE:If the vehicle is programmed to Unlock All Doors
1st Press, all doors will unlock no matter which Passive
Entry equipped door handle is grasped. If Driver Door
1st Press is programmed, only the driver ’s door will
unlock when the driver ’s door is grasped. With Passive
Entry, if Driver Door 1st Press is programmed touching
the handle more than once will only result in the driver ’s
door opening. If driver door first is selected, once the
driver door is opened, the interior door lock/unlock
switch can be used to unlock all doors (or use RKE
transmitter).
•Passive Entry
This feature allows you to lock and unlock the vehicle’s
door(s) without having to press the Remote Keyless
Entry (RKE) transmitter lock or unlock buttons. To make
your selection, press the “Passive Entry” button on the
touchscreen, until a check-mark appears next to setting,
showing that setting has been selected. Press the back
342 UNDERSTANDING YOUR INSTRUMENT PANEL
Page 345 of 648
arrow button on the touchscreen to return to the previous
menu. Refer to “Keyless Enter-N-Go™” in “Things To
Know Before Starting Your Vehicle.”
Auto-On Comfort & Remote Start
After pressing the Auto-On Comfort & Remote Start
button on the touchscreen the following settings will be
available.
•Sound Horn With Remote Start
When this feature is selected, the horn will sound when
the remote start is activated. To make your selection,
press the “Sound Horn With Remote Start” button on the
touchscreen, until a check-mark appears next to setting,
showing that setting has been selected. Press the back
arrow button on the touchscreen to return to the previous
menu.
•Auto-On Driver Heated Seat With Vehicle Start — If
Equipped
When this feature is selected the driver’s heated seat will
automatically turn on when temperatures are below 40° F
(4.4° C). To make your selection, press the “Auto On
Heated Seats” button on the touchscreen, until a check-
mark appears next to setting, showing that setting has
been selected. Press the back arrow button on the touch-
screen to return to the previous menu.
Engine Off Options
After pressing the “Engine Off Options” button on the
touchscreen the following settings will be available.
•Engine Off Power Delay
When this feature is selected, the power window
switches, radio, Uconnect® system (if equipped), DVD
video system (if equipped), power sunroof (if equipped),
and power outlets will remain active for up to 10 minutes
4
UNDERSTANDING YOUR INSTRUMENT PANEL 343
Page 350 of 648
Getting Started
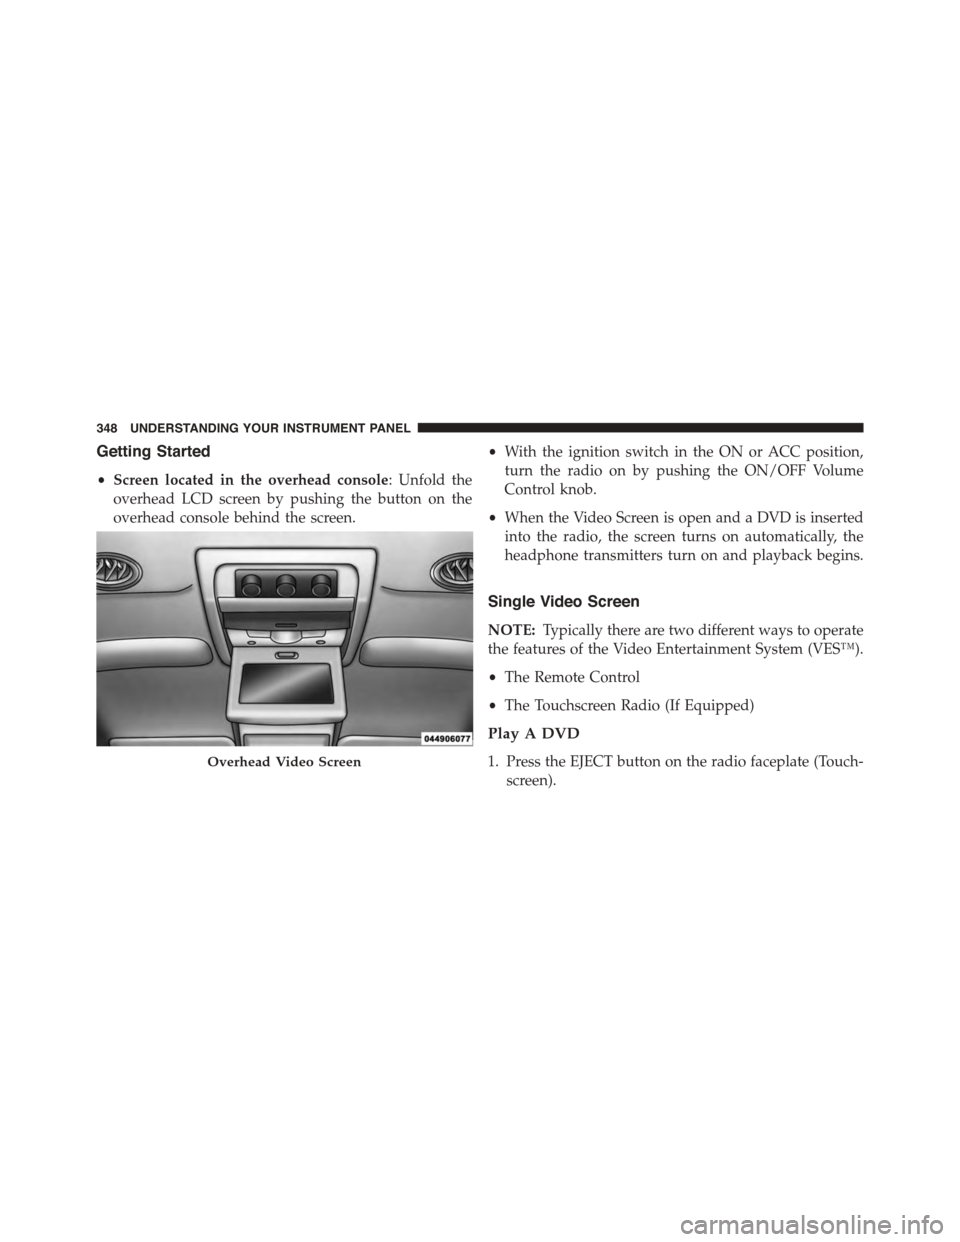
•Screen located in the overhead console: Unfold the
overhead LCD screen by pushing the button on the
overhead console behind the screen.
•With the ignition switch in the ON or ACC position,
turn the radio on by pushing the ON/OFF Volume
Control knob.
•When the Video Screen is open and a DVD is inserted
into the radio, the screen turns on automatically, the
headphone transmitters turn on and playback begins.
Single Video Screen
NOTE:Typically there are two different ways to operate
the features of the Video Entertainment System (VES™).
•The Remote Control
•The Touchscreen Radio (If Equipped)
Play A DVD
1. Press the EJECT button on the radio faceplate (Touch-
screen).
Overhead Video Screen
348 UNDERSTANDING YOUR INSTRUMENT PANEL
Page 351 of 648
2. Insert the DVD with the label facing up. The radio
automatically selects the appropriate mode after the
disc is recognized and displays the menu screen or
starts playing the first track.
3. Ensure the VES™ Remote Control and the Headphone
switch is on Channel 1.
Using The Remote Control
1. Push the MODE button on the Remote Control.
2. While looking at the video screen, highlight DISC by
either pushing Up/Down/Left/Right buttons or by
repeatedly pushing the MODE button, then push
ENTER on the Remote Control.
NOTE:The VES™ system will retain the last setting
when turned off.
Play Video Games
Connect the video game console to the Auxiliary RCA
input jacks located on the back of the center console.
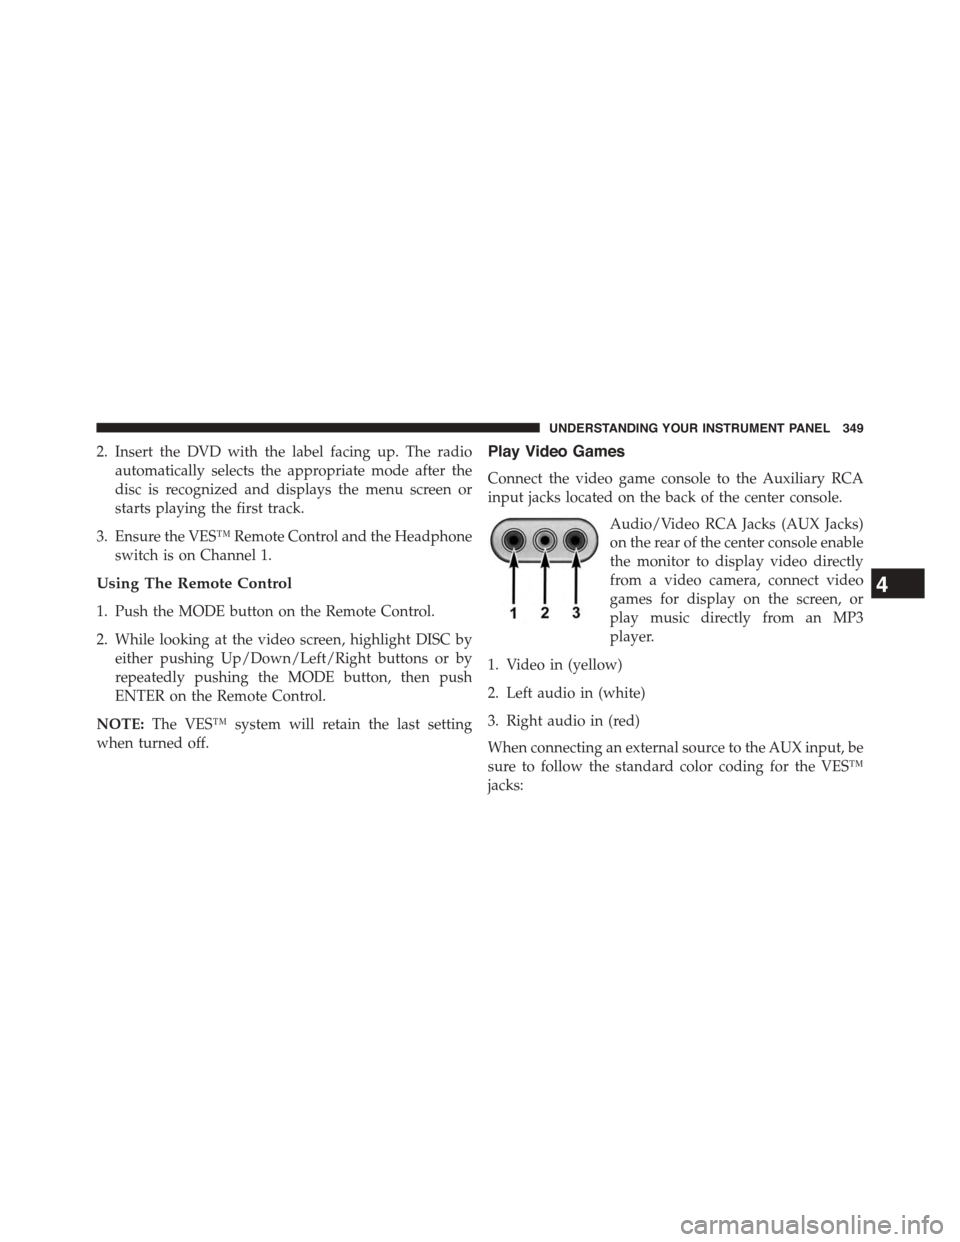
Audio/Video RCA Jacks (AUX Jacks)
on the rear of the center console enable
the monitor to display video directly
from a video camera, connect video
games for display on the screen, or
play music directly from an MP3
player.
1. Video in (yellow)
2. Left audio in (white)
3. Right audio in (red)
When connecting an external source to the AUX input, be
sure to follow the standard color coding for the VES™
jacks:
4
UNDERSTANDING YOUR INSTRUMENT PANEL 349
Page 354 of 648
Play A DVD Using The Touchscreen Radio
1. Insert the DVD with the label facing up. The radio
automatically selects the appropriate mode after the
disc is recognized and displays the menu screen or
starts playing the first track.
Using The Remote Control
1. Push the MODE button on the Remote Control.
2. While looking at the Video Screen, highlight DISC by
either pushing Up/Down/Left/Right buttons or by
repeatedly pushing the MODE button, then push
ENTER.
NOTE:
•The VES™ system will retain the last setting when
turned off.
•Viewing a DVD on the Touchscreen radio screen is not
available in some regions or locations, the vehicle must
be stopped, and the shift lever must be in the PARK
position for vehicles with automatic transmission. In
vehicles with manual transmission the parking brake
must be engaged even when the vehicle is parked.
Refer to local and state laws.
Using The Touchscreen Radio Controls
1. Press the “MORE” button on the touchscreen.
2. Press the “Rear Entertainment” button on the touch-
screen to display the Rear Entertainment Controls.
3. If the Rear Entertainment is turned off, press the
“Power” button on the touchscreen.
4. Press the “1” or “2” button on the touchscreen for the
channel desired and press the “Source” button on the
touchscreen to select the desired mode.
352 UNDERSTANDING YOUR INSTRUMENT PANEL
Page 356 of 648
switch is in the Channel 2, position the remote controls
the functionality of headphone Channel 2 (left side of
the screen).
5.!!– In radio modes, push to seek the next tunable
station. In disc modes, push and hold to fast forward
through the current audio track or video chapter. In
menu modes use to navigate in the menu.
6."/ Prev – In radio modes, push to select to the
previous station. In disc modes, push to advance to the
start of the current or previous audio track or video
chapter. In menu modes, use to navigate in the menu.
7. MENU – Push to return to the main menu of a DVD
disc, to select a satellite audio or video channel from
the Station list, or select playback modes (SCAN/
RANDOM for a CD).
8.!/$(Play/Pause) – Begin/resume or pause disc play.
9.▪(Stop) – Stops disc play.
10. PROG Up/Down – When listening to a radio mode,
pushing PROG Up selects the next preset and push-
ing PROG Down selects the previous preset stored in
the radio.
11. MUTE – Push to mute the headphone audio output
for the selected channel.
12. SLOW – Push to slow playback of a DVD disc. Push
play (!) to resume normal play.
13. STATUS – Push to display the current status.
14. MODE – Push to change the mode of the selected
channel. See the Mode Selection section of this
manual for details on changing modes.
15. SETUP – When in a video mode, push the SETUP
button to access the display settings (see the display
settings section) to access the DVD setup menu, select
the menu button on the radio. When a disc is loaded
in the DVD player (if equipped) and the VES™ mode
354 UNDERSTANDING YOUR INSTRUMENT PANEL
Page 370 of 648
Windows Media Audio) and ACC (MPEG-4 audio; sam-
pling frequencies 8 to 48 kHz; mono and stereo) audio
files with the from a CD Data disc (usually a CD-R or
CD-RW).
•The DVD player always uses the file extension to
determine the audio format, so MP3 files must always
end with the extension#.mp3#or#.MP3#, WMA files
must always end with the extension#.wma#or#WMA#,
and ACC files must end with the extensions “.acc” or
“.m4a”. To prevent incorrect playback, do not use
these extensions for any other types of files.
•For MP3 files, ID3 tag data v1, v1.1, v2 and v2.4 (such
as artist name, track title, album, etc.) are supported.
•Any file that is copy protected (such as those down-
loaded from many online music stores) will not play.
The DVD player will automatically skip the file and
begin playing the next available file.
•Other compression formats such as AAC, MP3 Pro,
Ogg Vorbis, and ATRAC3 will not play. The DVD
player will automatically skip the file and begin play-
ing the next available file.
•If you are creating your own files, the recommended
fixed bit rate for MP3 files is between 96 and 192Kbps
and the recommended fixed bit rate for WMA files is
between 64 and 192Kbps. Variable bit rates are also
supported. For both formats, the recommended
sample rate is either 44.1kHz or 48kHz.
•To change the current file, use the remote control’s or
DVD player ’s$button to advance to the next file, or
the"button to return to the start of the current or
previous file.
•To change the current directory, use the remote con-
trol’s PROG UP and Down buttons or Rewind/skip
back and fast fwd/skip forward.
368 UNDERSTANDING YOUR INSTRUMENT PANEL