remote start DODGE JOURNEY 2015 1.G User Guide
[x] Cancel search | Manufacturer: DODGE, Model Year: 2015, Model line: JOURNEY, Model: DODGE JOURNEY 2015 1.GPages: 648
Page 29 of 648
To Enter Remote Start Mode
Push and release the REMOTE START button
on the RKE transmitter twice within five sec-
onds. The vehicle doors will lock, the parking
lights will flash and the horn will chirp twice (if
programmed). Then, the engine will start and the vehicle
will remain in the Remote Start mode for a 15-minute
cycle.
NOTE:
•If an engine fault is present or fuel level is low, the
vehicle will start and then shut down in 10 seconds.
•The park lamps will turn on and remain on during
Remote Start mode.
•For security, power window and power sunroof op-
eration (if equipped) are disabled when the vehicle is
in the Remote Start mode.
•The engine can be started two consecutive times (two
15-minute cycles) with the RKE transmitter. However,
the ignition must be cycled to the RUN position before
you can repeat the start sequence for a third cycle.
To Exit Remote Start Mode Without Driving The
Vehicle
Push and release the REMOTE START button one time or
allow the engine to run for the entire 15-minute cycle.
NOTE:To avoid unintentional shutdowns, the system
will disable the one time push of the REMOTE START
button for two seconds after receiving a valid Remote
Start request.
To Exit Remote Start Mode And Drive The Vehicle
Before the end of 15-minute cycle, push and release the
UNLOCK button on the RKE transmitter to unlock the
doors and disarm the Vehicle Security Alarm (if
2
THINGS TO KNOW BEFORE STARTING YOUR VEHICLE 27
Page 30 of 648
equipped). Then, prior to the end of the 15-minute cycle,
push and release the START/STOP button.
NOTE:The message “Push Start Button” will display in
the EVIC until you push the START button.
Remote Start Comfort Systems — If Equipped
When remote start is activated, the driver heated seat
feature will automatically turn on in cold weather. This
feature will stay on through the duration of remote start
or until the ignition switch is turned to the ON/RUN
position.
The Remote Start Comfort System can be activated and
deactivated through the Uconnect® system. For more
information on Remote Start Comfort System operation
refer to “Uconnect® Settings — Customer Programmable
Features” in “Understanding Your Instrument Panel”.
DOOR LOCKS
Manual Door Locks
To lock each door, push the door lock knob on each door
trim panel downward. To unlock the front doors, pull the
inside door handle to the first detent. To unlock the rear
doors, pull the door lock knob on the door trim panel
upward.
28 THINGS TO KNOW BEFORE STARTING YOUR VEHICLE
Page 36 of 648
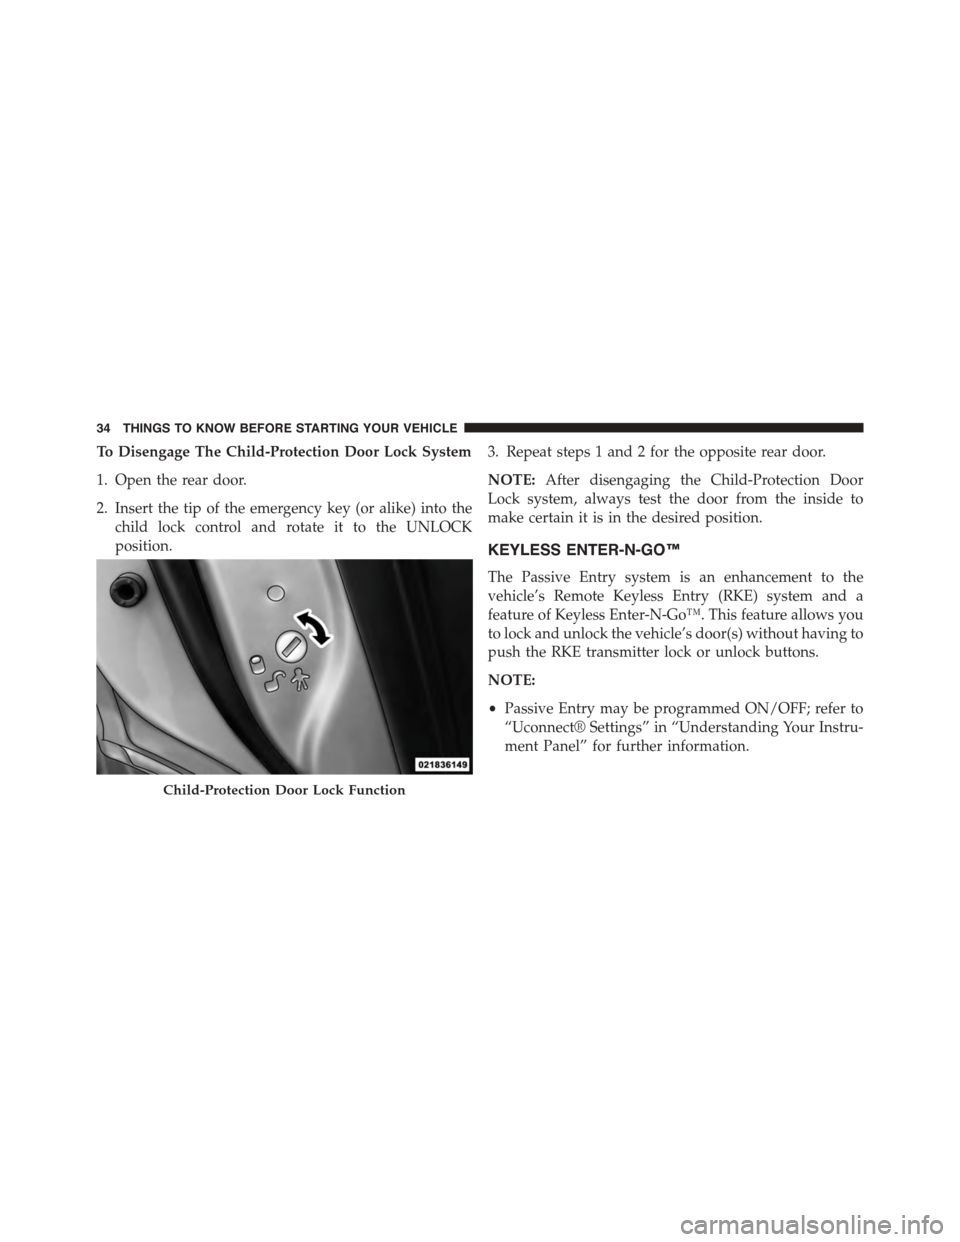
To Disengage The Child-Protection Door Lock System
1. Open the rear door.
2. Insert the tip of the emergency key (or alike) into the
child lock control and rotate it to the UNLOCK
position.
3. Repeat steps 1 and 2 for the opposite rear door.
NOTE:After disengaging the Child-Protection Door
Lock system, always test the door from the inside to
make certain it is in the desired position.
KEYLESS ENTER-N-GO™
The Passive Entry system is an enhancement to the
vehicle’s Remote Keyless Entry (RKE) system and a
feature of Keyless Enter-N-Go™. This feature allows you
to lock and unlock the vehicle’s door(s) without having to
push the RKE transmitter lock or unlock buttons.
NOTE:
•Passive Entry may be programmed ON/OFF; refer to
“Uconnect® Settings” in “Understanding Your Instru-
ment Panel” for further information.
Child-Protection Door Lock Function
34 THINGS TO KNOW BEFORE STARTING YOUR VEHICLE
Page 44 of 648
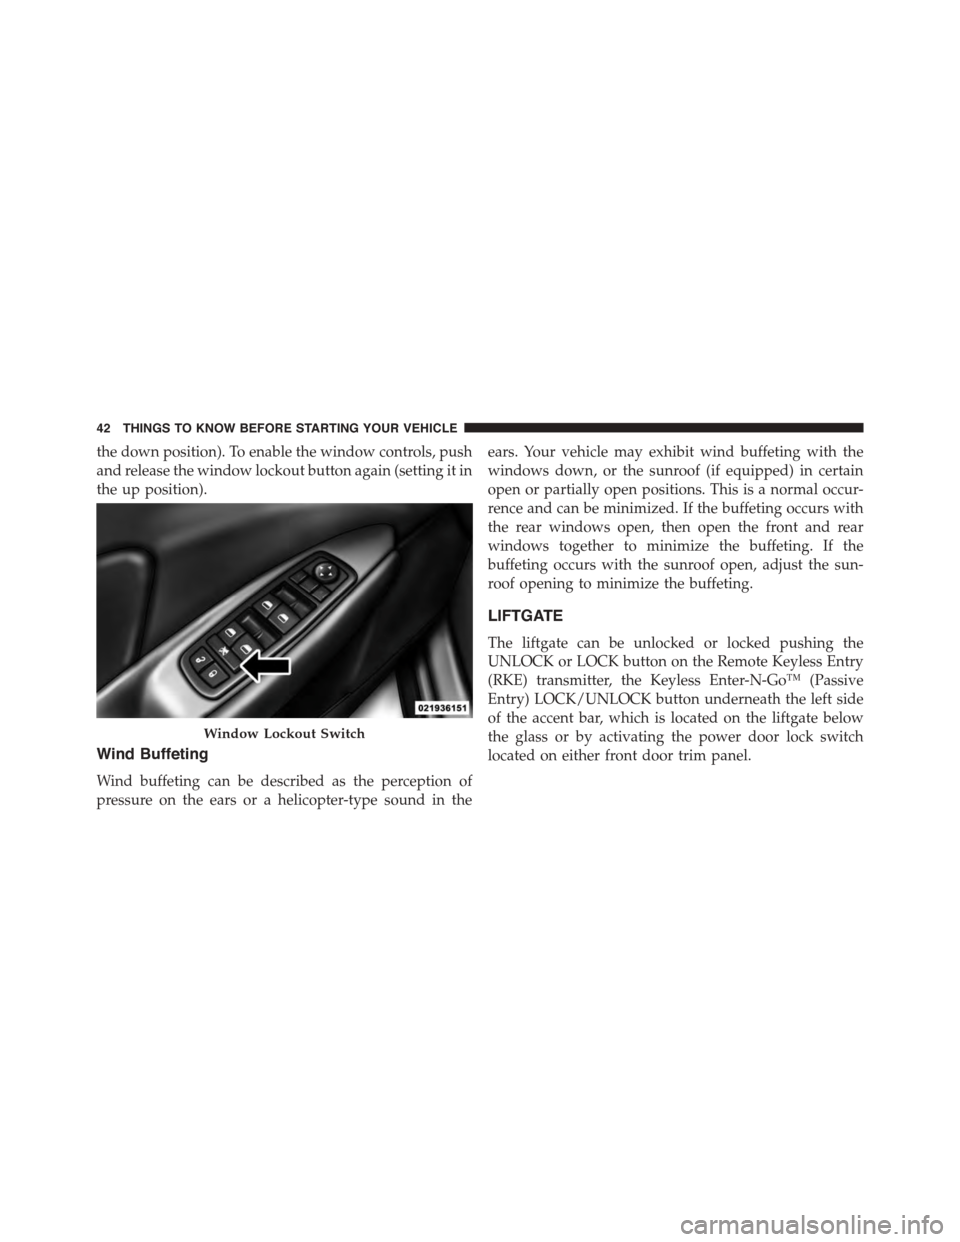
the down position). To enable the window controls, push
and release the window lockout button again (setting it in
the up position).
Wind Buffeting
Wind buffeting can be described as the perception of
pressure on the ears or a helicopter-type sound in the
ears. Your vehicle may exhibit wind buffeting with the
windows down, or the sunroof (if equipped) in certain
open or partially open positions. This is a normal occur-
rence and can be minimized. If the buffeting occurs with
the rear windows open, then open the front and rear
windows together to minimize the buffeting. If the
buffeting occurs with the sunroof open, adjust the sun-
roof opening to minimize the buffeting.
LIFTGATE
The liftgate can be unlocked or locked pushing the
UNLOCK or LOCK button on the Remote Keyless Entry
(RKE) transmitter, the Keyless Enter-N-Go™ (Passive
Entry) LOCK/UNLOCK button underneath the left side
of the accent bar, which is located on the liftgate below
the glass or by activating the power door lock switch
located on either front door trim panel.
Window Lockout Switch
42 THINGS TO KNOW BEFORE STARTING YOUR VEHICLE
Page 203 of 648
Front Heated Seats — If Equipped
The front heated seats control buttons are located within
the Uconnect® system. You can gain access to the control
buttons through the climate screen or the controls screen.
•Press the heated seat buttononce to turn the High
setting ON.
•Press the heated seat buttona second time to turn
the Low setting ON.
•Press the heated seat buttona third time to turn
the heating elements OFF.
When the HI-level setting is selected, the heater will
provide a boosted heat level during the first four minutes
of operation. Then, the heat output will drop to the
normal HI-level. If the HI-level setting is selected, the
system will automatically switch to LO-level after ap-
proximately 60 minutes of continuous operation. At that
time, the display will change from HI to LO, indicating
the change. The LO-level setting will turn OFF automati-
cally after approximately 45 minutes.
NOTE:The engine must be running for the heated seats
to operate.
Vehicles Equipped With Remote Start
On models that are equipped with remote start, the
heated seats can be programed to come on during a
remote start.
This feature can be programmed through the Uconnect®
system. Refer to “Uconnect® Settings” in “Understand-
ing Your Instrument Panel” for further information.
3
UNDERSTANDING THE FEATURES OF YOUR VEHICLE 201
Page 237 of 648
HEATED STEERING WHEEL — IF EQUIPPED
The steering wheel contains a heating element that helps
warm your hands in cold weather. The heated steering
wheel has only one temperature setting. Once the heated
steering wheel has been turned on it will operate for up
to 80 minutes before automatically shutting off. The
heated steering wheel can shut off early or may not turn
on when the steering wheel is already warm.
The heated steering wheel control button is located
within the Uconnect® system. You can gain access to the
control button through the climate screen or the controls
screen.
•Press the heated steering wheel buttononce to
turn the heating element ON.
•Press the heated steering wheel buttona second
time to turn the heating element OFF.
NOTE:The engine must be running for the heated
steering wheel to operate.
Vehicles Equipped With Remote Start
On models that are equipped with remote start, the
heated steering wheel can be programmed to come on
during a remote start through the Uconnect® system.
Refer to “Uconnect® Settings” in “Understanding Your
Instrument Panel” for further information.
3
UNDERSTANDING THE FEATURES OF YOUR VEHICLE 235
Page 296 of 648
▫Buttons On The Touchscreen..............320
▫Customer Programmable Features —
Uconnect® 4.3 Settings..................321
▫Customer Programmable Features —
Uconnect® System 8.4 Settings............333
!Uconnect® MULTIMEDIA — VIDEO
ENTERTAINMENT SYSTEM (VES™) — IF
EQUIPPED...........................347
▫Getting Started.......................348
▫Single Video Screen....................348
▫Play Video Games.....................349
▫Listen To An Audio Source On Channel 2 While A
Video Is Playing On Channel 1............350
▫Important Notes For Single Video Screen
System.............................351
▫Play A DVD Using The Touchscreen Radio . . .352
▫VES™ Remote Control — If Equipped.......353
▫Remote Control Storage.................356
▫Locking The Remote Control.............357
▫Replacing The Remote Control Batteries......357
▫Headphones Operation.................357
▫Replacing The Headphone Batteries.........358
▫Controls............................358
▫Unwired® Stereo Headphone Lifetime Limited
Warranty...........................359
▫System Information....................361
294 UNDERSTANDING YOUR INSTRUMENT PANEL
Page 312 of 648
•Unstored Messages Until RUN
These messages deal primarily with the Remote Start
feature. This message type is displayed until the ignition
is in the RUN state. Examples of this message type are
#Remote Start Aborted - Door Ajar#and#Push Brake
Pedal and Push Button to Start#.
•Five Second Unstored Messages
When the appropriate conditions occur, this type of mes-
sage takes control of the main display area for five seconds
and then returns to the previous screen. Examples of this
message type are#Memory System Unavailable - Not in
Park#and#Automatic High Beams On#.
The Reconfigurable Telltales section is divided into the
white telltales area on the right, amber telltales in the
middle, and red telltales on the left.
When the appropriate conditions exist, the EVIC displays
the following messages:
•Remote start aborted — Door ajar
•Remote start aborted — Hood ajar
•Remote start aborted — L/Gate ajar
•Remote start aborted — Fuel low
•Remote start disabled — Start Vehicle to Reset
•Remote start active — Push Start Button
•Vehicle Not in Park
•Key Left Vehicle
•Key Not Detected
•Push Brake Pedal and Push Button to Start
•Service Keyless System
310 UNDERSTANDING YOUR INSTRUMENT PANEL
Page 327 of 648
Brake Control System” in “Starting And Operating” for
system function and operating information. To make
your selection, press the “Hill Start Assist” button on the
touchscreen and select “ON” or “OFF.” Then press the
back arrow button on the touchscreen.
Lights
•Illuminated Approach
Press the “Illuminated Approach” button on the touch-
screen to change this display. When this feature is se-
lected, the headlights will activate and remain on for 0,
30, 60, or 90 seconds when the doors are unlocked with
the Remote Keyless Entry (RKE) transmitter. To change
the Illuminated Approach status, press the “0,” “30,”
“60” or “90” button on the touchscreen. Then press the
back arrow button on the touchscreen.
•Headlights With Wipers
Press the “Headlights With Wipers” button on the touch-
screen to change this display. When this feature is se-
lected, and the headlight switch is in the AUTO position,
the headlights will turn on approximately 10 seconds
after the wipers are turned on. The headlights will also
turn off when the wipers are turned off if they were
turned on by this feature. To make your selection, press
the “Headlights With Wipers” button on the touchscreen
and select “ON” or “OFF.” Then press the back arrow
button on the touchscreen.
•Auto High Beams
Press the “Auto High Beams” button on the touchscreen
to change this display. When this feature is selected, the
high beam headlights will deactivate automatically un-
der certain conditions. To make your selection, press the
“Auto High Beams” button on the touchscreen and select
“ON” or “OFF.” Then press the back arrow button on the
4
UNDERSTANDING YOUR INSTRUMENT PANEL 325
Page 329 of 648
Doors & Locks
•Auto Unlock On Exit
Press the “Auto Unlock On Exit” button on the touch-
screen to change this display. When this feature is se-
lected, all doors will unlock when the vehicle is stopped
and the transmission is in the PARK or NEUTRAL
position and the driver’s door is opened. To make your
selection, press the “Auto Unlock On Exit” button on the
touchscreen and select “ON” or “OFF.” Then press the
back arrow button on the touchscreen.
•Auto Lock
When this feature is selected, all doors will lock auto-
matically when the vehicle reaches a speed of 15 mph
(24 km/h). To make your selection, press the “Auto
Lock” button on the touchscreen, until a check-mark
appears next to setting, indicating that the setting has
been selected. Press the back arrow button on the touch-
screen to return to the previous menu.
•Flash Lamps With Lock
Press the “Flash Lamps With Lock” button on the touch-
screen to change this display. When this feature is se-
lected, the exterior lamps will flash when the doors are
locked or unlocked with the Remote Keyless Entry (RKE)
transmitter. To make your selection, press the “Flash
Lights With Lock” button on the touchscreen and select
“ON” or “OFF.” Then press the back arrow button on the
touchscreen.
•Sound Horn With Remote Start
Press the “Sound Horn With Remote Start” button on the
touchscreen to change this display. When this feature is
selected, the horn will sound when the remote start is
activated. To make your selection, press the “Sound Horn
With Remote Start” button on the touchscreen and select
“ON” or “OFF.” Then press the back arrow button on the
touchscreen.
4
UNDERSTANDING YOUR INSTRUMENT PANEL 327