tire pressure DODGE JOURNEY 2020 Owners Manual
[x] Cancel search | Manufacturer: DODGE, Model Year: 2020, Model line: JOURNEY, Model: DODGE JOURNEY 2020Pages: 396, PDF Size: 25.53 MB
Page 5 of 396
3
CLIMATE CONTROLS ...........................................47
Manual Climate Control Overview .. ............ 47
Automatic Climate Controls Overview . . ...... 58
Climate Control Functions . . ......................... 70
Automatic Temperature Control (ATC) — If
Equipped . ..................................................... 70
O
perating Tips . . ........................................... 71
WINDOWS . . ..........................................................72
Power Windows .. ......................................... 72
Wind Buffeting . . .......................................... 74
POWER SUNROOF — IF EQUIPPED. . ...................74
Opening Sunroof .. ........................................ 75
Closing Sunroof . . .......................................... 75
Wind Buffeting . . ........................................... 75
Sunshade Operation. . .................................. 75
Anti Pinch Protect Feature . . ........................ 75
Sunroof Maintenance . . ................................ 75
Ignition Off Operation . . ................................ 76
HOOD. .....................................................................76
O pening ........................................................ 76
C losing . ......................................................... 76
L
IFTGATE . ...............................................................77
O pening ........................................................ 77
C argo Area Features . . ................................. 78
GARAGE DOOR OPENER — IF EQUIPPED . . ........80
Before You Begin Programming
HomeLink® . .
................................................ 80
Canadian/Gate Operator Programming . . ... 82Using HomeLink®.
.
...................................... 83
Security. ........................................................ 83
T roubleshooting Tips . . ................................. 83
General Information . . .................................. 84
INTERNAL EQUIPMENT . . ...................................... 84
Storage ......................................................... 84
C upholders . . ................................................ 86
Power Outlets. . ............................................. 87
Power Inverter — If Equipped . . ................... 89
Sunglasses Storage . . .................................. 90
ROOF LUGGAGE RACK — IF EQUIPPED . . .......... 91
GETTING TO KNOW YOUR
INSTRUMENT PANEL
INSTRUMENT CLUSTER ....................................... 93
Instrument Cluster Descriptions .. ............... 94
INSTRUMENT CLUSTER DISPLAY. . ..................... 95
Instrument Cluster Display Location And
Controls . ....................................................... 95
O
il Change Due . . ......................................... 96
Instrument Cluster Display Selectable
Menu Items . .
................................................ 96
Battery Saver On/Battery Saver Mode
Message — Electrical Load Reduction
Actions — If Equipped . .
............................... 99 WARNING LIGHTS AND MESSAGES .
.
............. 100
Red Warning Lights .. ................................. 100
Yellow Warning Lights . . ............................. 103
Green Indicator Lights . . ............................. 106
White Indicator Lights . . ............................. 106
Blue Indicator Lights . . ............................... 106
ONBOARD DIAGNOSTIC SYSTEM — OBD II . . . 107
Onboard Diagnostic System (OBD II)
Cybersecurity . .
........................................... 107
EMISSIONS INSPECTION AND MAINTENANCE
PROGRAMS . .
...................................................... 108
SAFETY
SAFETY FEATURES ............................................ 109
Anti-Lock Brake System (ABS) .. ............... 109
Electronic Brake Control (EBC) System. . .. 110
AUXILIARY DRIVING SYSTEMS . . ...................... 116
Tire Pressure Monitoring System
(TPMS) . ....................................................... 116
O
CCUPANT RESTRAINT SYSTEMS . . ............... 120
Occupant Restraint Systems Features .. .. 120
Important Safety Precautions . . ................. 121
Seat Belt Systems . . .................................. 121
Supplemental Restraint
Systems (SRS) . .
......................................... 130
Child Restraints . . ....................................... 139
Transporting Pets . . ................................... 154
Page 7 of 396
5
JACKING AND TIRE CHANGING........................ 199
Jack Location .. ...........................................199
Spare Tire Location And Removal . . ..........200
Preparations For Jacking. . .........................201
Jacking Instructions . . .................................201
Road Tire Installation . . ..............................205
Spare Tire Stowage. . ..................................206
JUMP STARTING ................................................ 2 0 6
Preparations For Jump Start .. ...................207
Jump Starting Procedure. . .........................208
IF YOUR ENGINE OVERHEATS . . ....................... 209
2.4L Engine — If Equipped .. ...................... 210
GEAR SELECTOR OVERRIDE . . .......................... 210
FREEING A STUCK VEHICLE .. ........................... 211
TOWING A DISABLED VEHICLE .. ...................... 212
Front-Wheel Drive (FWD) Models.. ............213
Tow Eye Usage — If Equipped . . ................213
ENHANCED ACCIDENT RESPONSE
SYSTEM (EARS) . .
............................................... 215
EVENT DATA RECORDER (EDR) .. ..................... 215
SERVICING AND MAINTENANCE
SCHEDULED SERVICING ................................... 216
Maintenance Plan.. ....................................217
ENGINE COMPARTMENT . . ................................ 220
2.4L Engine .. ..............................................220
Checking Oil Level . . ................................... 221
Adding Washer Fluid . . ...............................221
Maintenance-Free Battery . . ...................... 221
Pressure Washing . . ....................................222 DEALER SERVICE .
.
............................................222
Engine Oil .................................................. 223
E ngine Oil Filter . . ........................................ 224
Engine Air Cleaner Filter . . ......................... 224
Air Conditioner Maintenance . . ................. 224
Accessory Drive Belt Inspection . . ............. 225
Body Lubrication . . ...................................... 226
Windshield Wiper Blades . . ........................ 226
Exhaust System . . ...................................... 227
Cooling System . . ....................................... 228
Brake System . . .......................................... 232
Automatic Transmission. . .......................... 233
RAISING THE VEHICLE . . .....................................234
TIRES....................................................................234 T ire Safety Information .. ........................... 234
Tires — General Information . . .................. 242
Tire Types . .................................................. 246
S pare Tires — If Equipped . . ....................... 247
Wheel And Wheel Trim Care . . .................. 249
Tire Chains and Traction Devices . . ........... 250
Tire Rotation Recommendations . . ........... 251
DEPARTMENT OF TRANSPORTATION UNIFORM
TIRE QUALITY GRADES . .
...................................251
Treadwear .................................................. 251
T raction Grades . . ....................................... 251
Temperature Grades . . ............................... 252
BODYWORK . . ...................................................... 252
Protection From Atmospheric Agents..
..... 252
Body And Underbody Maintenance . . ........ 253
Preserving The Bodywork . . ........................ 253INTERIORS .
.
....................................................... 254
Seats And Fabric Parts .. ............................ 254
Plastic And Coated Parts. . ......................... 254
Leather Parts . . ........................................... 255
Glass Surfaces . . ........................................ 255
Cleaning The Cupholders . . ....................... 255
TECHNICAL SPECIFICATIONS
IDENTIFICATION DATA ...................................... 256
Vehicle Identification Number .. ................ 256
BRAKE SYSTEM . . ............................................... 256
WHEEL AND TIRE TORQUE
SPECIFICATIONS ..
.............................................. 257
Torque Specifications.. .............................. 257
FUEL REQUIREMENTS . . .................................... 257
Reformulated Gasoline .. .......................... 258
Materials Added To Fuel . . ......................... 258
Gasoline/Oxygenate Blends . . ................... 258
Do Not Use E-85 In Non-Flex Fuel
Vehicles . ..................................................... 259
C
NG And LP Fuel System Modifications . . 259
MMT In Gasoline. . ...................................... 259
Fuel System Cautions. . .............................. 259
Carbon Monoxide Warnings. . .................... 260
FLUID CAPACITIES . . ........................................... 261
FLUIDS AND LUBRICANTS .. .............................. 262
Engine ....................................................... 262
C hassis . ..................................................... 264
Page 97 of 396
GETTING TO KNOW YOUR INSTRUMENT PANEL 95
INSTRUMENT CLUSTER DISPLAY
Your vehicle may be equipped with an
instrument cluster display, which offers useful
information to the driver. With the ignition in
the OFF mode, opening/closing of a door will
a c
tivate the display for viewing, and display
the total miles, or kilometers, in the odometer.
Y o
ur instrument cluster display is designed to
display important information about your
vehicle’s systems and features. Using a driver
interactive display located on the instrument
panel, your instrument cluster display can show
you how systems are working and give you
warnings when they aren’t. The steering wheel
mounted controls allow you to scroll through
and enter the main menus and submenus.
You can access the specific information you
w a
nt and make selections and adjustments.
INSTRUMENT CLUSTER DISPLAY
L
OCATION AND CONTROLS
The instrument cluster display features a
driver-interactive display that is located in the
instrument cluster.
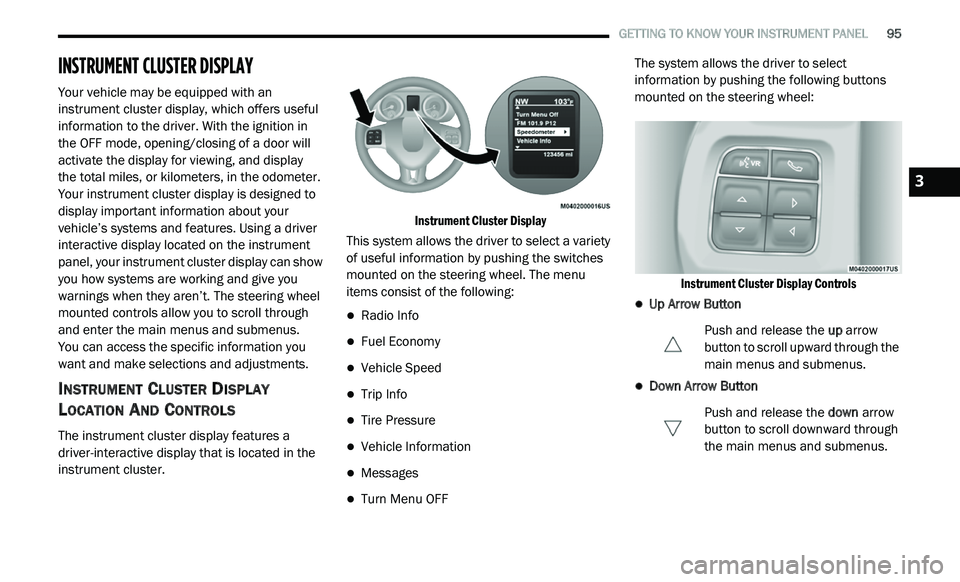
Instrument Cluster Display
This system allows the driver to select a variety
o f
useful information by pushing the switches
mounted on the steering wheel. The menu
items consist of the following:
Radio Info
Fuel Economy
Vehicle Speed
Trip Info
Tire Pressure
Vehicle Information
Messages
Turn Menu OFF The system allows the driver to select
i
n
formation by pushing the following buttons
mounted on the steering wheel:
Instrument Cluster Display Controls
Up Arrow Button Push and release the up
arrow
button to scroll upward through the
m a
in menus and submenus.
Down Arrow Button
Push and release the do
wn arrow
button to scroll downward through
t h
e main menus and submenus.
3
Page 100 of 396
98 GETTING TO KNOW YOUR INSTRUMENT PANEL
The Trip Functions mode displays the following
information:
Trip A
Shows the total distance traveled for Trip A
since the last reset.
Shows the elapsed time traveled for Trip A
since the last reset.
Trip B
Shows the total distance traveled for Trip B
since the last reset.
Shows the elapsed time traveled for Trip B
since the last reset.
Elapsed Time
Shows the total elapsed time of travel since the
l a
st reset. Elapsed time will increment when the
ignition is in the ON/RUN position.
To Reset The Display
Reset will only occur while a resettable function
i s
being displayed. Push and release the right
arrow button once to clear the resettable
function.
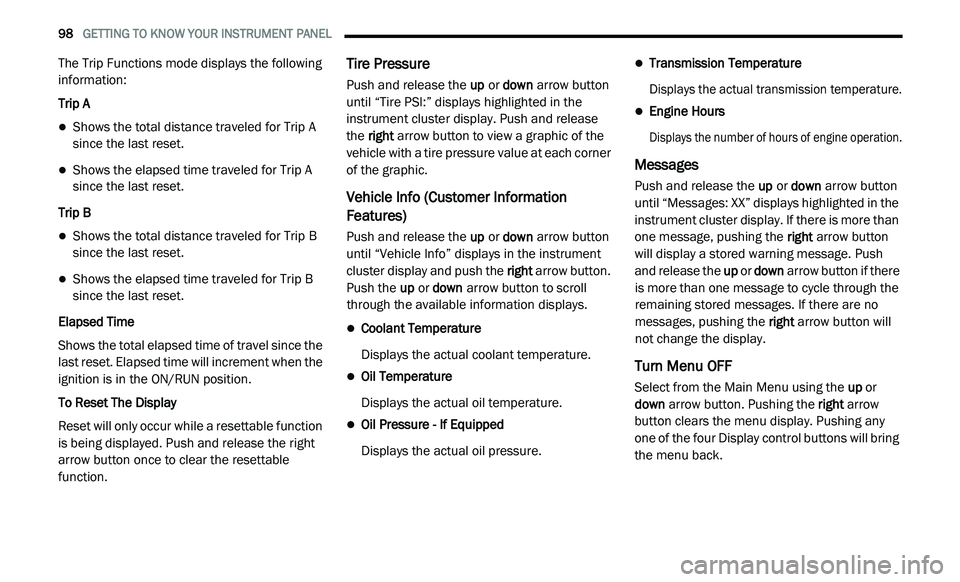
Tire Pressure
Push and release the up or down arrow button
until “Tire PSI:” displays highlighted in the
instrument cluster display. Push and release
the right arrow button to view a graphic of the
vehicle with a tire pressure value at each corner
of the graphic.
Vehicle Info (Customer Information
Features)
Push and release the up or down arrow button
until “Vehicle Info” displays in the instrument
cluster display and push the right arrow button.
Push the up or down arrow button to scroll
through the available information displays.
Coolant Temperature
Displays the actual coolant temperature.
Oil Temperature
Displays the actual oil temperature.
Oil Pressure - If Equipped
Displays the actual oil pressure.
Transmission Temperature
Displays the actual transmission temperature.
Engine Hours
Displays the number of hours of engine operation.
Messages
Push and release the up or down arrow button
until “Messages: XX” displays highlighted in the
instrument cluster display. If there is more than
one message, pushing the right arrow button
will display a stored warning message. Push
and release the up or down arrow button if there
is more than one message to cycle through the
remaining stored messages. If there are no
messages, pushing the right arrow button will
not change the display.
Turn Menu OFF
Select from the Main Menu using the up or
down arrow button. Pushing the right arrow
button clears the menu display. Pushing any
one of the four Display control buttons will bring
the menu back.
Page 106 of 396
104 GETTING TO KNOW YOUR INSTRUMENT PANEL
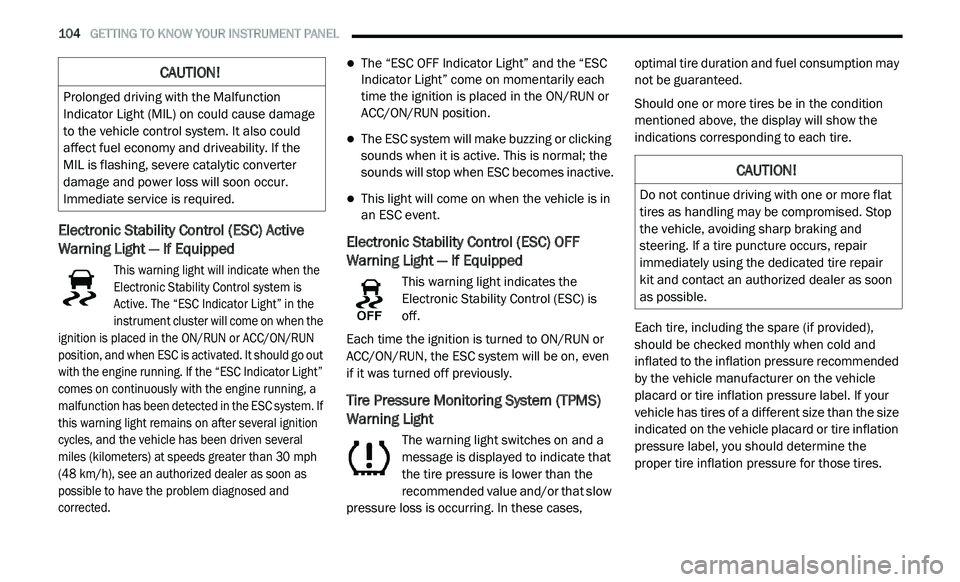
Electronic Stability Control (ESC) Active
Warning Light — If Equipped
This warning light will indicate when the
Electronic Stability Control system is
Ac
tive. The “ESC Indicator Light” in the
instrument cluster will come on when the
ignition is placed in the ON/RUN or ACC/ON/RUN
position, and when ESC is activated. It should go out
with the engine running. If the “ESC Indicator Light”
comes on continuously with the engine running, a
malfunction has been detected in the ESC system. If
this warning light remains on after several ignition
cycles, and the vehicle has been driven several
miles (kilometers) at speeds greater than 30 mph
( 4
8 km/h), see an authorized dealer as soon as
p o
ssible to have the problem diagnosed and
corrected.
The “ESC OFF Indicator Light” and the “ESC
Indicator Light” come on momentarily each
time the ignition is placed in the ON/RUN or
ACC/ON/RUN position.
The ESC system will make buzzing or clicking
sounds when it is active. This is normal; the
sounds will stop when ESC becomes inactive.
This light will come on when the vehicle is in
an ESC event.
Electronic Stability Control (ESC) OFF
Warning Light — If Equipped
This warning light indicates the
Electronic Stability Control (ESC) is
o f
f.
Each time the ignition is turned to ON/RUN or
A C
C/ON/RUN, the ESC system will be on, even
if it was turned off previously.
Tire Pressure Monitoring System (TPMS)
Warning Light
The warning light switches on and a
message is displayed to indicate that
t h
e tire pressure is lower than the
recommended value and/or that slow
pressure loss is occurring. In these cases, optimal tire duration and fuel consumption may
not be guaranteed.
Should one or more tires be in the condition
m
e
ntioned above, the display will show the
indications corresponding to each tire.
Each tire, including the spare (if provided),
sh
ould be checked monthly when cold and
inflated to the inflation pressure recommended
by the vehicle manufacturer on the vehicle
placard or tire inflation pressure label. If your
vehicle has tires of a different size than the size
indicated on the vehicle placard or tire inflation
pressure label, you should determine the
proper tire inflation pressure for those tires.
CAUTION!
Prolonged driving with the Malfunction
Indicator Light (MIL) on could cause damage
to the vehicle control system. It also could
affect fuel economy and driveability. If the
MIL is flashing, severe catalytic converter
damage and power loss will soon occur.
Immediate service is required.
CAUTION!
Do not continue driving with one or more flat
tires as handling may be compromised. Stop
the vehicle, avoiding sharp braking and
steering. If a tire puncture occurs, repair
immediately using the dedicated tire repair
kit and contact an authorized dealer as soon
as possible.
Page 107 of 396
GETTING TO KNOW YOUR INSTRUMENT PANEL 105
As an added safety feature, your vehicle has
been equipped with a Tire Pressure Monitoring
System (TPMS) that illuminates a low tire
pressure telltale when one or more of your tires is
significantly under-inflated. Accordingly, when
the low tire pressure telltale illuminates, you
should stop and check your tires as soon as
possible, and inflate them to the proper pressure.
Driving on a significantly under-inflated tire
causes the tire to overheat and can lead to tire
failure. Under-inflation also reduces fuel
efficiency and tire tread life, and may affect the
vehicle’s handling and stopping ability.
Please note that the TPMS is not a substitute for
pr
oper tire maintenance, and it is the driver’s
responsibility to maintain correct tire pressure,
even if under-inflation has not reached the level
to trigger illumination of the TPMS low tire
pressure telltale.
Your vehicle has also been equipped with a TPMS
m a
lfunction indicator to indicate when the system is
not operating properly. The TPMS malfunction
indicator is combined with the low tire pressure
telltale. When the system detects a malfunction, the
telltale will flash for approximately one minute and
then remain continuously illuminated. This
sequence will continue upon subsequent vehicle start-ups as long as the malfunction exists. When
the malfunction indicator is illuminated, the system
may not be able to detect or signal low tire pressure
as intended. TPMS malfunctions may occur for a
variety of reasons, including the installation of
replacement or alternate tires or wheels on the
vehicle that prevent the TPMS from functioning
properly. Always check the TPMS malfunction
telltale after replacing one or more tires or wheels
on your vehicle to ensure that the replacement or
alternate tires and wheels allow the TPMS to
continue to function properly.
Anti-Lock Brake System (ABS) Warning
Light
This warning light monitors the
Anti-Lock Brake System (ABS).
The light will turn on when the
ignition is placed in the ON/RUN or
A C
C/ON/RUN position and may stay on for as
long as four seconds.
If the ABS light remains on or turns on while
d r
iving, then the Anti-Lock portion of the brake
system is not functioning and service is
required as soon as possible. However, the
conventional brake system will continue to
operate normally, assuming the Brake Warning
Light is not also on.
If the ABS light does not turn on when the
i g
nition is placed in the ON/RUN or ACC/ON/
RUN position, have the brake system inspected
by an authorized dealer.
Low Fuel Warning Light
When the fuel level reaches
approximately 2 gal (7.5 L), this light
w i
ll turn on and a chime will sound. The
light will remain on until fuel is added.
CAUTION!
The TPMS has been optimized for the original
equipment tires and wheels. TPMS pressures and
warning have been established for the tire size
equipped on your vehicle. Undesirable system
operation or sensor damage may result when
using replacement equipment that is not of the
same size, type, and/or style. Aftermarket wheels
can cause sensor damage. Using aftermarket tire
sealants may cause the Tire Pressure Monitoring
System (TPMS) sensor to become inoperable.
After using an aftermarket tire sealant it is
recommended that you take your vehicle to an
authorized dealer to have your sensor function
checked.
3
Page 112 of 396
110 SAFETY
ABS is designed to function with the Original
Equipment Manufacturer (OEM) tires.
Modification may result in degraded ABS
performance.
Anti-Lock Brake Warning Light
The yellow “Anti-Lock Brake Warning Light” will
turn on when the ignition is placed in the ON/RUN
mode and may stay on for as long as four
seconds.
If the “Anti-Lock Brake Warning Light” remains
on
or comes on while driving, it indicates that
the anti-lock portion of the brake system is not
functioning and that service is required.
However, the conventional brake system will
continue to operate normally if the “Anti-Lock
Brake Warning Light” is on.
If the “Anti-Lock Brake Warning Light” is on, the
b r
ake system should be serviced as soon as
possible to restore the benefits of anti-lock
brakes. If the “Anti-Lock Brake Warning Light”
does not come on when the ignition is placed in
the ON/RUN mode, have the light repaired as
soon as possible.
ELECTRONIC BRAKE CONTROL (EBC)
S
YSTEM
Your vehicle is equipped with an advanced
Electronic Brake Control (EBC) system.
This system includes Electronic Brake Force
D i
stribution (EBD), Anti-Lock Brake System
(ABS), Brake Assist System (BAS), Hill Start
Assist (HSA), Traction Control System (TCS),
Electronic Stability Control (ESC), and Electronic
Roll Mitigation (ERM). These systems work
together to enhance both vehicle stability and
control in various driving conditions.
Your vehicle may also be equipped with Trailer
S w
ay Control (TSC).
Brake Assist System (BAS)
The Brake Assist System (BAS) is designed to
optimize the vehicle’s braking capability during
emergency braking maneuvers. The system
detects an emergency braking situation by
sensing the rate and amount of brake application
and then applies optimum pressure to the
brakes. This can help reduce braking distances.
The BAS complements the Anti-Lock Brake
System (ABS). Applying the brakes very quickly
results in the best BAS assistance. To receive the
benefit of the system, you must apply continuous braking pressure during the stopping sequence
(do not “pump” the brakes). Do not reduce brake
pedal pressure unless braking is no longer
desired. Once the brake pedal is released, the
BAS is deactivated.
Brake System Warning Light
The red “Brake System Warning Light” will turn
on when the ignition is placed in the ON/RUN
mode and may stay on for as long as
four seconds.
WARNING!
The Brake Assist System (BAS) cannot prevent
the natural laws of physics from acting on
the vehicle, nor can it increase the traction
a f
forded by prevailing road conditions.
BAS cannot prevent collisions, including those
r e
sulting from excessive speed in turns, driving
on very slippery surfaces, or hydroplaning.
The capabilities of a BAS-equipped vehicle
m u
st never be exploited in a reckless or
dangerous manner, which could jeopardize
the user's safety or the safety of others.
Page 118 of 396
116 SAFETY
AUXILIARY DRIVING SYSTEMS
TIRE PRESSURE MONITORING SYSTEM
(TPMS)
The Tire Pressure Monitoring System (TPMS)
will warn the driver of a low tire pressure based
on the vehicle recommended cold placard
pressure.
The tire pressure will vary with temperature
by about 1 psi (7 kPa) for every 12°F (6.5°C).
Th
is means that when the outside temperature
decreases, the tire pressure will decrease. Tire
pressure should always be set based on cold
inflation tire pressure. This is defined as the tire
pressure after the vehicle has not been driven for
at least three hours, or driven less than 1 mile
( 1
.6 km) after a three hour period. The cold tire
i n
flation pressure must not exceed the maximum
inflation pressure molded into the tire sidewall.
Refer to “Tires” in “Servicing And Maintenance”
for information on how to properly inflate the
vehicle’s tires. The tire pressure will also increase
as the vehicle is driven. This is normal and there
should be no adjustment for this increased
pressure.
The TPMS will warn the driver of a low tire
p r
essure if the tire pressure falls below the low-pressure warning limit for any reason,
including low temperature effects and natural
pressure loss through the tire.
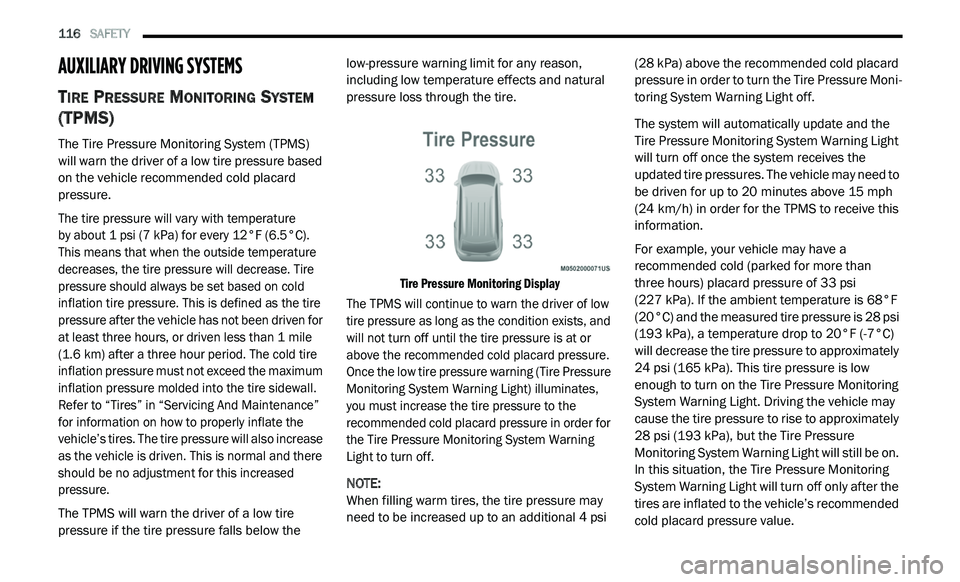
Tire Pressure Monitoring Display
The TPMS will continue to warn the driver of low
t i
re pressure as long as the condition exists, and
will not turn off until the tire pressure is at or
above the recommended cold placard pressure.
Once the low tire pressure warning (Tire Pressure
Monitoring System Warning Light) illuminates,
you must increase the tire pressure to the
recommended cold placard pressure in order for
the Tire Pressure Monitoring System Warning
Light to turn off.
NOTE:
When filling warm tires, the tire pressure may
n e
ed to be increased up to an additional 4 psi (28 kPa) above the recommended cold placard
pressure in order to turn the Tire Pressure Moni
-
toring System Warning Light off.
The system will automatically update and the
T i
re Pressure Monitoring System Warning Light
will turn off once the system receives the
updated tire pressures. The vehicle may need to
be driven for up to 20 minutes above 15 mph
( 2
4 km/h) in order for the TPMS to receive this
i n
formation.
For example, your vehicle may have a
r e
commended cold (parked for more than
three hours) placard pressure of 33 psi
(227 kPa). If the ambient temperature is 68°F
( 2
0°C) and the measured tire pressure is 28 psi
(193 kPa), a temperature drop to 20°F (-7°C)
will decrease the tire pressure to approximately
24 psi (165 kPa). This tire pressure is low
enough to turn on the Tire Pressure Monitoring
System Warning Light. Driving the vehicle may
cause the tire pressure to rise to approximately
28 psi (193 kPa), but the Tire Pressure
Monitoring System Warning Light will still be on.
In this situation, the Tire Pressure Monitoring
System Warning Light will turn off only after the
tires are inflated to the vehicle’s recommended
cold placard pressure value.
Page 119 of 396
SAFETY 117
NOTE:
The TPMS is not intended to replace normal
tire care and maintenance, or to provide
warning of a tire failure or condition.
The TPMS should not be used as a tire pres -
sure gauge while adjusting your tire pressure.
Driving on a significantly under-inflated tire
causes the tire to overheat and can lead to
tire failure. Under-inflation also reduces fuel
efficiency and tire tread life, and may affect
the vehicle’s handling and stopping ability.
The TPMS is not a substitute for proper tire
maintenance, and it is the driver’s responsi -
bility to maintain correct tire pressure using
a n
accurate tire pressure gauge, even if
under-inflation has not reached the level to
trigger illumination of the Tire Pressure Moni -
toring System Warning Light.
Seasonal temperature changes will affect
tire pressure, and the TPMS will monitor the
actual tire pressure in the tire.
Premium System
The Tire Pressure Monitoring System (TPMS)
uses wireless technology with wheel rim
mounted electronic sensors to monitor tire
pressure levels. Sensors, mounted to each
wheel as part of the valve stem, transmit tire
pressure readings to the receiver module.
NOTE:
It is particularly important for you to check the
t i
re pressure in all of the tires on your vehicle
monthly and to maintain the proper pressure.
The TPMS consists of the following
c o
mponents:
Receiver module
Four Tire Pressure Monitoring sensors
Various Tire Pressure Monitoring System
messages, which display in the instrument
cluster
Tire Pressure Monitoring System Warning
Light
CAUTION!
The TPMS has been optimized for the orig -
inal equipment tires and wheels. TPMS
p r
essures and warnings have been estab -
lished for the tire size equipped on your
v e
hicle. Undesirable system operation or
sensor damage may result when using
replacement equipment that is not of the
same size, type, and/or style. The TPM
sensor is not designed for use on after -
market wheels and may contribute to a
p o
or overall system performance or sensor
damage. Customers are encouraged to use
OEM wheels to assure proper TPM feature
operation.
Using aftermarket tire sealants may cause
the Tire Pressure Monitoring System
(TPMS) sensor to become inoperable.
After using an aftermarket tire sealant it is
r e
commended that you take your vehicle to
an authorized dealership to have your
sensor function checked.
After inspecting or adjusting the tire pres -
sure, always reinstall the valve stem cap.
T h
is will prevent moisture and dirt from
entering the valve stem, which could
damage the TPM sensor.
4
Page 120 of 396
118 SAFETY
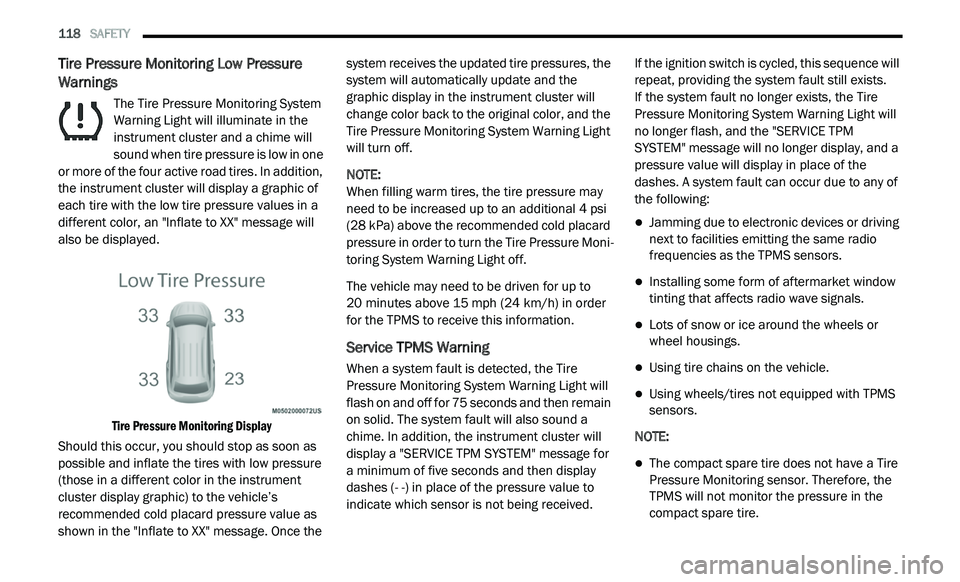
Tire Pressure Monitoring Low Pressure
Warnings
The Tire Pressure Monitoring System
Warning Light will illuminate in the
in
strument cluster and a chime will
sound when tire pressure is low in one
or more of the four active road tires. In addition,
the instrument cluster will display a graphic of
each tire with the low tire pressure values in a
different color, an "Inflate to XX" message will
also be displayed.
Tire Pressure Monitoring Display
Should this occur, you should stop as soon as
p o
ssible and inflate the tires with low pressure
(those in a different color in the instrument
cluster display graphic) to the vehicle’s
recommended cold placard pressure value as
shown in the "Inflate to XX" message. Once the system receives the updated tire pressures, the
system will automatically update and the
graphic display in the instrument cluster will
change color back to the original color, and the
Tire Pressure Monitoring System Warning Light
will turn off.
NOTE:
When filling warm tires, the tire pressure may
n e
ed to be increased up to an additional 4 psi
(28 kPa) above the recommended cold placard
pressure in order to turn the Tire Pressure Moni -
toring System Warning Light off.
The vehicle may need to be driven for up to
2 0
minutes above 15 mph (24 km/h) in order
f o
r the TPMS to receive this information.
Service TPMS Warning
When a system fault is detected, the Tire
Pressure Monitoring System Warning Light will
flash on and off for 75 seconds and then remain
on solid. The system fault will also sound a
chime. In addition, the instrument cluster will
display a "SERVICE TPM SYSTEM" message for
a minimum of five seconds and then display
dashes (- -) in place of the pressure value to
indicate which sensor is not being received. If the ignition switch is cycled, this sequence will
r
e
peat, providing the system fault still exists.
If the system fault no longer exists, the Tire
P r
essure Monitoring System Warning Light will
no longer flash, and the "SERVICE TPM
SYSTEM" message will no longer display, and a
pressure value will display in place of the
dashes. A system fault can occur due to any of
the following:
Jamming due to electronic devices or driving
next to facilities emitting the same radio
frequencies as the TPMS sensors.
Installing some form of aftermarket window
tinting that affects radio wave signals.
Lots of snow or ice around the wheels or
wheel housings.
Using tire chains on the vehicle.
Using wheels/tires not equipped with TPMS
sensors.
NOTE:
The compact spare tire does not have a Tire
Pressure Monitoring sensor. Therefore, the
TPMS will not monitor the pressure in the
compact spare tire.