set clock DODGE JOURNEY 2020 Owners Manual
[x] Cancel search | Manufacturer: DODGE, Model Year: 2020, Model line: JOURNEY, Model: DODGE JOURNEY 2020Pages: 396, PDF Size: 25.53 MB
Page 38 of 396
36 GETTING TO KNOW YOUR VEHICLE
The heated steering wheel control button is
located within the Uconnect system. You can
gain access to the control button through the
climate screen or the controls screen.
Press the heated steering wheel button
once to turn the heating element on.
Press the heated steering wheel button a
second time to turn the heating element off.
NOTE:
The engine must be running for the heated
s t
eering wheel to operate.
Vehicles Equipped With Remote Start
On models that are equipped with remote start,
t h
e heated steering wheel can be programmed
to come on during a remote start through the
Uconnect system. Refer to “Uconnect Settings”
in “Multimedia” for further information.
MIRRORS
INSIDE DAY/NIGHT MIRROR — IF
E
QUIPPED
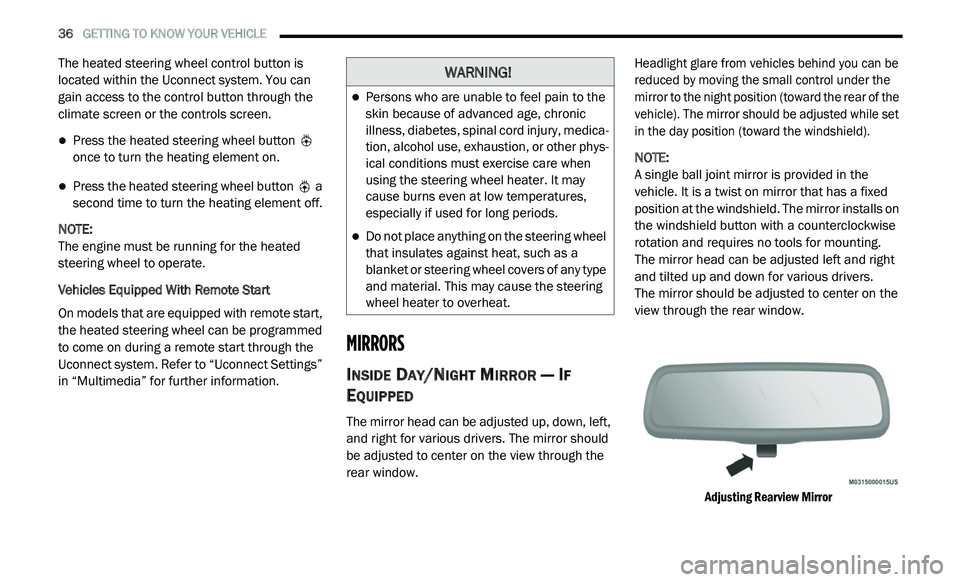
The mirror head can be adjusted up, down, left,
and right for various drivers. The mirror should
be adjusted to center on the view through the
rear window.
Headlight glare from vehicles behind you can be
r
e
duced by moving the small control under the
mirror to the night position (toward the rear of the
vehicle). The mirror should be adjusted while set
in the day position (toward the windshield).
NOTE:
A single ball joint mirror is provided in the
v e
hicle. It is a twist on mirror that has a fixed
position at the windshield. The mirror installs on
the windshield button with a counterclockwise
rotation and requires no tools for mounting.
The mirror head can be adjusted left and right
a n
d tilted up and down for various drivers.
The mirror should be adjusted to center on the
v i
ew through the rear window.
Adjusting Rearview Mirror
WARNING!
Persons who are unable to feel pain to the
skin because of advanced age, chronic
illness, diabetes, spinal cord injury, medica -
tion, alcohol use, exhaustion, or other phys -
ical conditions must exercise care when
u s
ing the steering wheel heater. It may
cause burns even at low temperatures,
especially if used for long periods.
Do not place anything on the steering wheel
that insulates against heat, such as a
blanket or steering wheel covers of any type
and material. This may cause the steering
wheel heater to overheat.
Page 39 of 396
GETTING TO KNOW YOUR VEHICLE 37
AUTOMATIC DIMMING MIRROR — IF
E
QUIPPED
A single ball joint mirror is provided in the
vehicle. It is a twist on mirror that has a fixed
position at the windshield. The mirror installs on
the windshield button with a counterclockwise
rotation and requires no tools for mounting.
The mirror head can be adjusted up, down, left,
a n
d right for various drivers. The mirror should
be adjusted to center on the view through the
rear window.
This mirror automatically adjusts for headlight
g l
are from vehicles behind you.
NOTE:
The Automatic Dimming Mirror feature is
disabled when the vehicle is in REVERSE to
improve rear view viewing.
The Automatic Dimming Mirror feature can
be turned on or off using the Uconnect
system. Refer to “Uconnect Settings” in
“Multimedia” for further information.
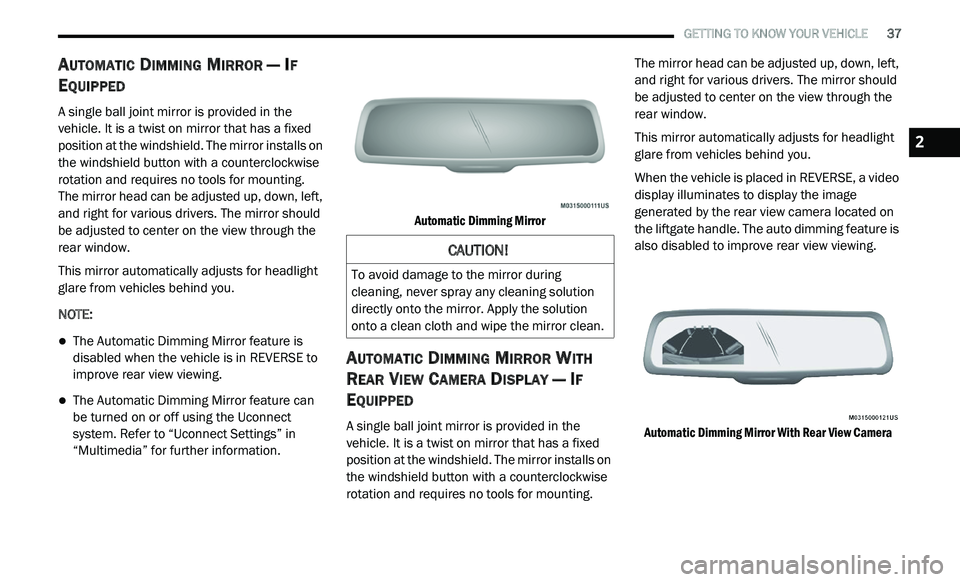
Automatic Dimming Mirror
AUTOMATIC DIMMING MIRROR WITH
R
EAR VIEW CAMERA DISPLAY — IF
E
QUIPPED
A single ball joint mirror is provided in the
vehicle. It is a twist on mirror that has a fixed
position at the windshield. The mirror installs on
the windshield button with a counterclockwise
rotation and requires no tools for mounting. The mirror head can be adjusted up, down, left,
a
n
d right for various drivers. The mirror should
be adjusted to center on the view through the
rear window.
This mirror automatically adjusts for headlight
g l
are from vehicles behind you.
When the vehicle is placed in REVERSE, a video
d i
splay illuminates to display the image
generated by the rear view camera located on
the liftgate handle. The auto dimming feature is
also disabled to improve rear view viewing.
Automatic Dimming Mirror With Rear View Camera
CAUTION!
To avoid damage to the mirror during
cleaning, never spray any cleaning solution
directly onto the mirror. Apply the solution
onto a clean cloth and wipe the mirror clean.
2
Page 43 of 396
GETTING TO KNOW YOUR VEHICLE 41
DAYTIME RUNNING LIGHTS (DRLS)
The Daytime Running Lights will turn on the first
time the vehicle is shifted out of PARK, and
remain on unless the parking brake is applied.
Upon returning to the PARK position, the DRLs
will turn off. DRLs will turn off when the ignition
is placed in the OFF position.
NOTE:
The DRLs can be turned on and off using the
Uconnect system, refer to “Uconnect Settings”
in “Multimedia” for further information.
On some vehicles, the Daytime Running
Lights may deactivate or reduce intensity on
one side of the vehicle (when a turn signal is
activated on that side), or on both sides of
the vehicle (when the hazard warning lights
are activated).
HIGH/LOW BEAM SWITCH
Push the multifunction lever away from you to
switch the headlights to high beam. Pull the
multifunction lever toward you to switch the
headlights back to low beam.
FLASH-TO-PASS
You can signal another vehicle with your
headlights by lightly pulling the multifunction
lever toward you. This will cause the high beam
headlights to turn on, and remain on, until the
lever is released.
AUTOMATIC HEADLIGHTS
This system automatically turns the headlights
on or off according to ambient light levels. To turn
the system on, rotate the headlight switch
counterclockwise to the AUTO position. When the
system is on, the headlight time delay feature is
also on. This means the headlights will stay on for
up to 90 seconds after you place the ignition in
the OFF position. The headlight time delay can be
programmed 0/30/60/90 seconds.
Refer to “Uconnect Settings” in “Multimedia”
fo
r further information.
To turn the automatic system off, move the
h e
adlight switch out of the AUTO position.
NOTE:
The engine must be running before the head -
lights will come on in the automatic mode.
HEADLIGHTS ON WITH WIPERS
(A
VAILABLE WITH AUTOMATIC
H
EADLIGHTS ONLY)
When this feature is active, the headlights will
turn on after the wipers are turned on if the
headlight switch is placed in the AUTO position
and programmable feature is set to on. In
addition, the headlights will turn off when the
wipers are turned off if they were turned on by
this feature.
NOTE:
The Headlights On with Wipers feature can be
t u
rned on or off using the Uconnect System.
Refer to “Uconnect Settings” in “Multimedia”
for further information.
HEADLIGHT TIME DELAY
This feature provides the safety of headlight
illumination for up to 90 seconds when leaving
your vehicle in an unlit area.
To activate the delay feature, place the ignition in
t h
e OFF position while the headlights are still on.
Then, turn off the headlights within 45 seconds.
The delay interval begins when the headlight
switch is turned off.
2
Page 51 of 396
GETTING TO KNOW YOUR VEHICLE 49
Manual Climate Control Descriptions
Icon Description
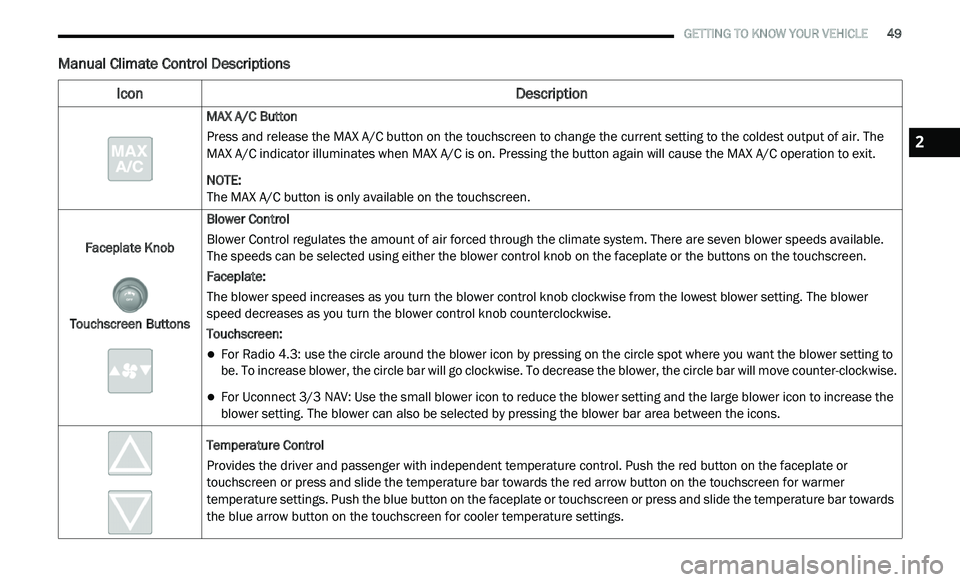
MAX A/C Button
Press and release the MAX A/C button on the touchscreen to change the current setting to the coldest output of air. The
MA
X A/C indicator illuminates when MAX A/C is on. Pressing the button again will cause the MAX A/C operation to exit.
NOTE:
The MAX A/C button is only available on the touchscreen.
Faceplate Knob
Touchscreen Buttons Blower Control
Blower Control regulates the amount of air forced through the climate system. There are seven blower speeds available.
T
h
e speeds can be selected using either the blower control knob on the faceplate or the buttons on the touchscreen.
Faceplate:
The blower speed increases as you turn the blower control knob clockwise from the lowest blower setting. The blower
s p
eed decreases as you turn the blower control knob counterclockwise.
Touchscreen:
For Radio 4.3: use the circle around the blower icon by pressing on the circle spot where you want the blower setting to
be. To increase blower, the circle bar will go clockwise. To decrease the blower, the circle bar will move counter-clockwise.
For Uconnect 3/3 NAV: Use the small blower icon to reduce the blower setting and the large blower icon to increase the
blo
wer setting. The blower can also be selected by pressing the blower bar area between the icons.
Temperature Control
Provides the driver and passenger with independent temperature control. Push the red button on the faceplate or
t o
uchscreen or press and slide the temperature bar towards the red arrow button on the touchscreen for warmer
temperature settings. Push the blue button on the faceplate or touchscreen or press and slide the temperature bar towards
the blue arrow button on the touchscreen for cooler temperature settings.
2
Page 59 of 396
GETTING TO KNOW YOUR VEHICLE 57
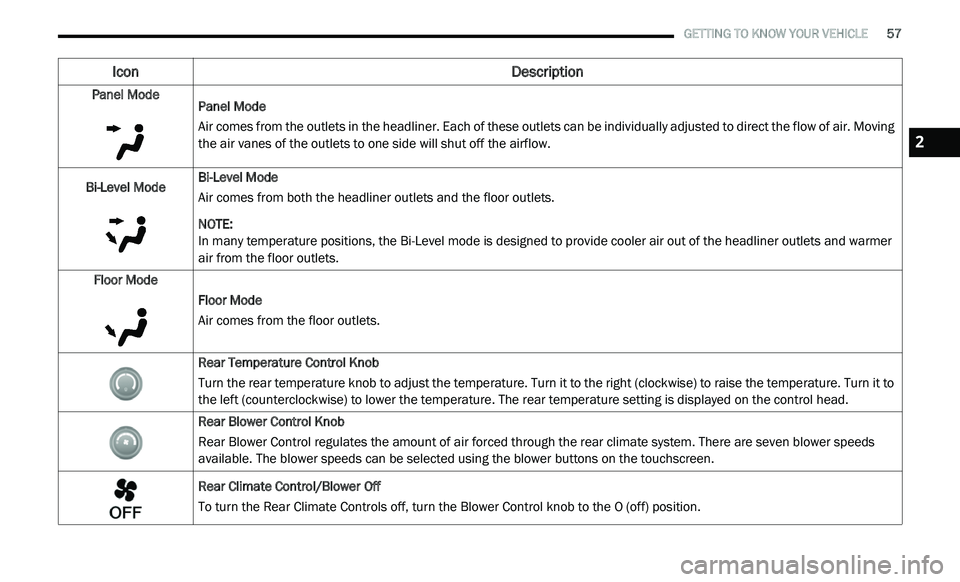
Panel Mode
Panel Mode
Air comes from the outlets in the headliner. Each of these outlets can be individually adjusted to direct the flow of air. Moving
th
e air vanes of the outlets to one side will shut off the airflow.
Bi-Level Mode Bi-Level Mode
Air comes from both the headliner outlets and the floor outlets.
NOTE:
In many temperature positions, the Bi-Level mode is designed to provide cooler air out of the headliner outlets and warmer
a i
r from the floor outlets.
Floor Mode Floor Mode
Air comes from the floor outlets.
Rear Temperature Control Knob
Turn the rear temperature knob to adjust the temperature. Turn it to the right (clockwise) to raise the temperature. Turn it to
th
e left (counterclockwise) to lower the temperature. The rear temperature setting is displayed on the control head.
Rear Blower Control Knob
Rear Blower Control regulates the amount of air forced through the rear climate system. There are seven blower speeds
a v
ailable. The blower speeds can be selected using the blower buttons on the touchscreen.
Rear Climate Control/Blower Off
To turn the Rear Climate Controls off, turn the Blower Control knob to the O (off) position.
Icon Description
2
Page 64 of 396
62 GETTING TO KNOW YOUR VEHICLE
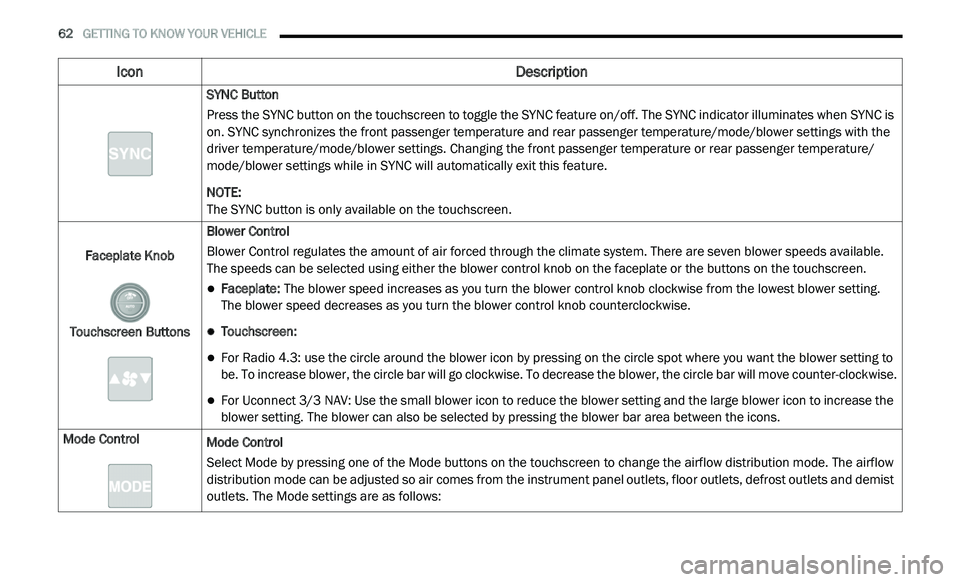
SYNC Button
Press the SYNC button on the touchscreen to toggle the SYNC feature on/off. The SYNC indicator illuminates when SYNC is
on
. SYNC synchronizes the front passenger temperature and rear passenger temperature/mode/blower settings with the
driver temperature/mode/blower settings. Changing the front passenger temperature or rear passenger temperature/
mode/blower settings while in SYNC will automatically exit this feature.
NOTE:
The SYNC button is only available on the touchscreen.
Faceplate Knob
Touchscreen Buttons Blower Control
Blower Control regulates the amount of air forced through the climate system. There are seven blower speeds available.
T
h
e speeds can be selected using either the blower control knob on the faceplate or the buttons on the touchscreen.
Faceplate: The blower speed increases as you turn the blower control knob clockwise from the lowest blower setting.
The blower speed decreases as you turn the blower control knob counterclockwise.
Touchscreen:
For Radio 4.3: use the circle around the blower icon by pressing on the circle spot where you want the blower setting to
be. To increase blower, the circle bar will go clockwise. To decrease the blower, the circle bar will move counter-clockwise.
For Uconnect 3/3 NAV: Use the small blower icon to reduce the blower setting and the large blower icon to increase the
blo
wer setting. The blower can also be selected by pressing the blower bar area between the icons.
Mode Control Mode Control
Select Mode by pressing one of the Mode buttons on the touchscreen to change the airflow distribution mode. The airflow
di
stribution mode can be adjusted so air comes from the instrument panel outlets, floor outlets, defrost outlets and demist
outlets. The Mode settings are as follows:
Icon Description
Page 71 of 396
GETTING TO KNOW YOUR VEHICLE 69
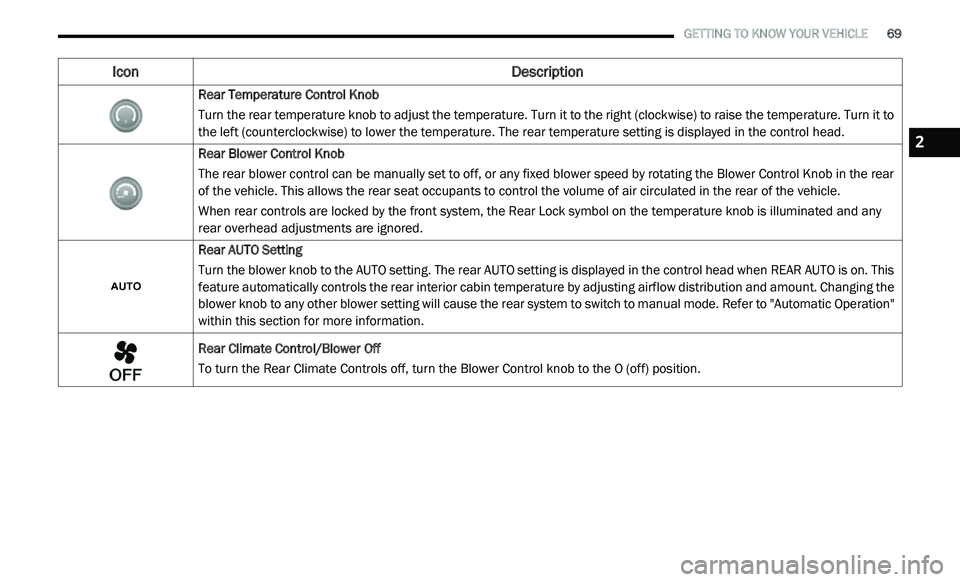
Rear Temperature Control Knob
Turn the rear temperature knob to adjust the temperature. Turn it to the right (clockwise) to raise the temperature. Turn it to
th
e left (counterclockwise) to lower the temperature. The rear temperature setting is displayed in the control head.
Rear Blower Control Knob
The rear blower control can be manually set to off, or any fixed blower speed by rotating the Blower Control Knob in the rear
o f
the vehicle. This allows the rear seat occupants to control the volume of air circulated in the rear of the vehicle.
When rear controls are locked by the front system, the Rear Lock symbol on the temperature knob is illuminated and any
r e
ar overhead adjustments are ignored.
Rear AUTO Setting
Turn the blower knob to the AUTO setting. The rear AUTO setting is displayed in the control head when REAR AUTO is on. This
f e
ature automatically controls the rear interior cabin temperature by adjusting airflow distribution and amount. Changing the
blower knob to any other blower setting will cause the rear system to switch to manual mode. Refer to "Automatic Operation"
within this section for more information.
Rear Climate Control/Blower Off
To turn the Rear Climate Controls off, turn the Blower Control knob to the O (off) position.
Icon Description
2
Page 208 of 396
206 IN CASE OF EMERGENCY
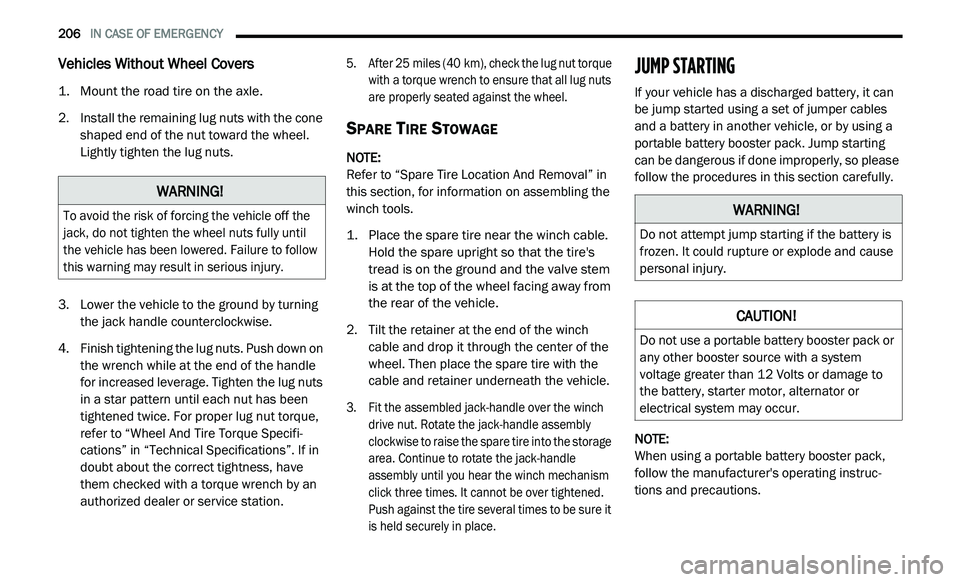
Vehicles Without Wheel Covers
1. Mount the road tire on the axle.
2. I nstall the remaining lug nuts with the cone
s
haped end of the nut toward the wheel.
Lightly tighten the lug nuts.
3. Lo wer the vehicle to the ground by turning
t
he jack handle counterclockwise.
4. F inish tightening the lug nuts. Push down on
t
he wrench while at the end of the handle
for increased leverage. Tighten the lug nuts
in a star pattern until each nut has been
tightened twice. For proper lug nut torque,
refer to “Wheel And Tire Torque Specifi -
cations” in “Technical Specifications”. If in
d o
ubt about the correct tightness, have
them checked with a torque wrench by an
authorized dealer or service station.
5. A
fter 25
miles (40 km), check the lug nut torque
wi
th a torque wrench to ensure that all lug nuts
are properly seated against the wheel.
SPARE TIRE STOWAGE
NOTE:
Refer to “Spare Tire Location And Removal” in
t h
is section, for information on assembling the
winch tools.
1. P lace the spare tire near the winch cable.
H
old the spare upright so that the tire's
tread is on the ground and the valve stem
is at the top of the wheel facing away from
the rear of the vehicle.
2. T ilt the retainer at the end of the winch
c
able and drop it through the center of the
wheel. Then place the spare tire with the
cable and retainer underneath the vehicle.
3. Fit the assembled jack-handle over the winch d
rive nut. Rotate the jack-handle assembly
clockwise to raise the spare tire into the storage
area. Continue to rotate the jack-handle
assembly until you hear the winch mechanism
click three times. It cannot be over tightened.
Push against the tire several times to be sure it
is held securely in place.
JUMP STARTING
If your vehicle has a discharged battery, it can
be jump started using a set of jumper cables
and a battery in another vehicle, or by using a
portable battery booster pack. Jump starting
can be dangerous if done improperly, so please
follow the procedures in this section carefully.
NOTE:
When using a portable battery booster pack,
f o
llow the manufacturer's operating instruc -
tions and precautions.
WARNING!
To avoid the risk of forcing the vehicle off the
jack, do not tighten the wheel nuts fully until
the vehicle has been lowered. Failure to follow
this warning may result in serious injury.
WARNING!
Do not attempt jump starting if the battery is
frozen. It could rupture or explode and cause
personal injury.
CAUTION!
Do not use a portable battery booster pack or
any other booster source with a system
voltage greater than 12 Volts or damage to
the battery, starter motor, alternator or
electrical system may occur.
Page 268 of 396
266 MULTIMEDIA
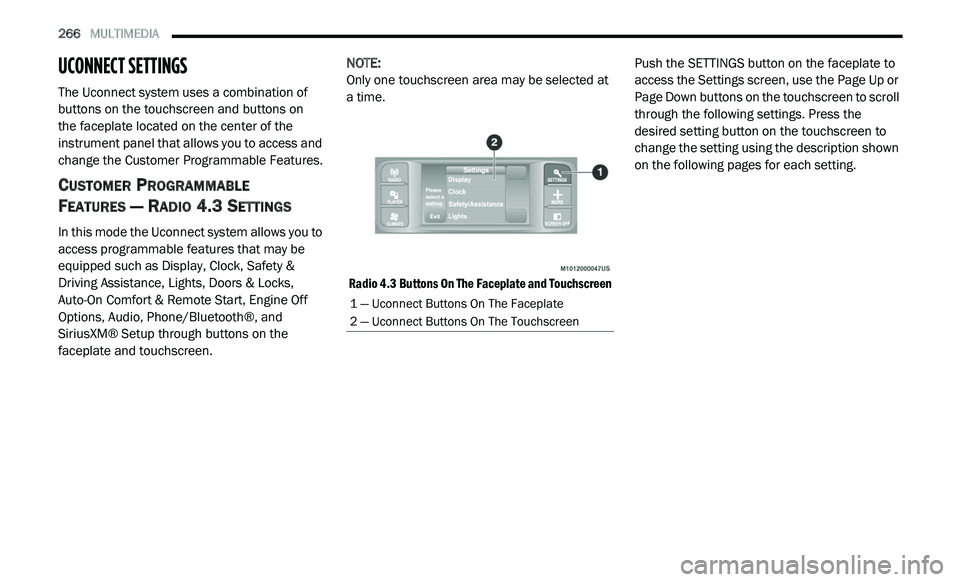
UCONNECT SETTINGS
The Uconnect system uses a combination of
buttons on the touchscreen and buttons on
the faceplate located on the center of the
i n
strument panel that allows you to access and
change the Customer Programmable Features.
CUSTOMER PROGRAMMABLE
F
EATURES — RADIO 4.3 SETTINGS
In this mode the Uconnect system allows you to
access programmable features that may be
equipped such as Display, Clock, Safety &
Driving Assistance, Lights, Doors & Locks,
Auto-On Comfort & Remote Start, Engine Off
Options, Audio, Phone/Bluetooth®, and
SiriusXM® Setup through buttons on the
faceplate and touchscreen. NOTE:
Only one touchscreen area may be selected at
a
time.
Radio 4.3 Buttons On The Faceplate and Touchscreen
Push the SETTINGS button on the faceplate to
a
c
cess the Settings screen, use the Page Up or
Page Down buttons on the touchscreen to scroll
through the following settings. Press the
desired setting button on the touchscreen to
change the setting using the description shown
on the following pages for each setting.
1 — Uconnect Buttons On The Faceplate
2 — Uconnect Buttons On The Touchscreen
Page 269 of 396
MULTIMEDIA 267
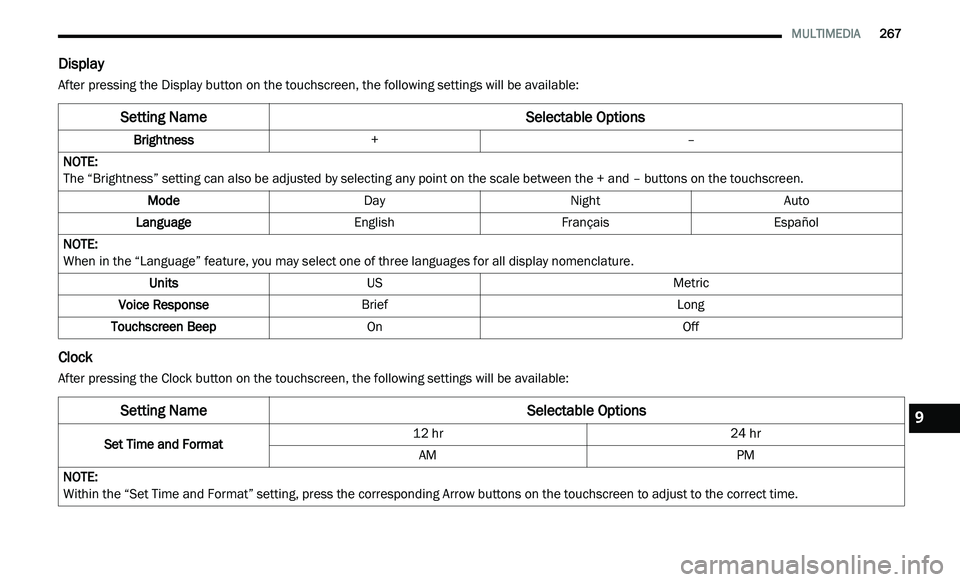
Display
After pressing the Display button on the touchscreen, the following settings will be available:
Clock
After pressing the Clock button on the touchscreen, the following settings will be available:
Setting Name Selectable Options
Brightness+ –
NOTE:
The “Brightness” setting can also be adjusted by selecting any point on the scale between the + and – buttons on the touchscreen.
Mode DayNight Auto
Language EnglishFrançais Español
NOTE:
When in the “Language” feature, you may select one of three languages for all display nomenclature.
Units US Metric
Voice Response Brief Long
Touchscreen Beep On Off
Setting NameSelectable Options
Set Time and Format12 hr
24 hr
AM PM
NOTE:
Within the “Set Time and Format” setting, press the corresponding Arrow buttons on the touchscreen to adjust to the correct time.
9