check engine light DODGE MAGNUM SRT 2007 1.G Owners Manual
[x] Cancel search | Manufacturer: DODGE, Model Year: 2007, Model line: MAGNUM SRT, Model: DODGE MAGNUM SRT 2007 1.GPages: 380, PDF Size: 6.63 MB
Page 14 of 380
NOTE:A key, which has not been programmed, is also
considered an invalid key even if it is cut to fit the
ignition lock cylinder for that vehicle.
During normal operation, after turning on the ignition
switch, the Vehicle Security Alarm Indicator Light will
turn on for three (3) seconds for a bulb check. If the light
remains on after the bulb check, it indicates that there is
a problem with the electronics. In addition, if the light
begins to flash after the bulb check, it indicates that
someone used an invalid key to start the engine. Either of
these conditions will result in the engine being shut off
after two (2) seconds.
If the Vehicle Security Alarm Indicator Light turns on
during normal vehicle operation (vehicle running for
longer than 10 seconds), it indicates that there is a fault in
the electronics. Should this occur, have the vehicle ser-
viced as soon as possible.
NOTE:
²
The Sentry Key Immobilizer System is not compatible
with remote starting systems. Use of these systems
may result in vehicle starting problems and loss of
security protection.
²Exxon/Mobil Speed Pass,Ÿ additional Sentry Keys, or
any other transponder-equipped components on the
same key chain willnot
cause a key-related (tran-
sponder) fault unless the additional part isphysi-
cally held against the ignition keybeing used
when starting the vehicle. Cell phones, pagers, or
other RF electronics will not cause interference with
this system.
All of the keys provided with your new vehicle have
been programmed to the vehicle electronics.
Replacement Keys
NOTE:
Only keys that are programmed to the vehicle
electronics can be used to start and operate the vehicle.
Once a Sentry Key is programmed to a vehicle, it cannot
be programmed to any other vehicle.
At the time of purchase, the original owner is provided
with a four-digit PIN number. This number is required
for dealer replacement of keys. Duplication of keys may
be performed at an authorized dealer or by using the
Customer Key Programming procedure. This procedure
THINGS TO KNOW BEFORE STARTING YOUR VEHICLE 13
2
Page 60 of 380
Front seat belt assemblies must be replaced after a
collision. Rear seat belt assemblies must be replaced after
a collision if they have been damaged (bent retractor, torn
webbing, etc. If there is any question regarding belt or
retractor condition, replace the belt.
Airbag Warning Light
The light should come on and remain on for 6 to 8
seconds as a bulb check when the ignition switch is first
turned ON. If the light is not lit during starting, see you
authorized dealer. If the light stays on, flickers, or comes
on while driving, have the system checked by an autho-
rized dealer.
Defroster
Check operation by selecting the defrost mode and place
the blower control on high speed. You should be able to
feel the air directed against the windshield.
Periodic Safety Checks You Should Make Outside
The Vehicle
Tires
Examine tires for excessive tread wear and uneven wear
patterns. Check for stones, nails, glass, or other objects
lodged in the tread. Inspect tread and sidewall for cuts
and cracks. Check the wheel nuts for tightness. Check the
tires (including spare) for proper pressure.
Lights
Have someone observe the operation of exterior lights
while you work the controls. Check turn signal and high
beam indicator lights on the instrument panel.
Door Latches
Check for positive closing, latching, and locking.
Fluid Leaks
Check area under vehicle after overnight parking for fuel,
engine coolant, oil, or other fluid leaks. Also, if gasoline
fumes are detected or if fuel, power steering fluid, or
brake fluid leaks are suspected, the cause should be
located and corrected immediately.
THINGS TO KNOW BEFORE STARTING YOUR VEHICLE 59
2
Page 101 of 380
If you activate the washer while the windshield wiper
control is in the delay range, the wipers will operate for
two wipe cycles after releasing the lever and then resume
the intermittent interval previously selected.
If you activate the washer while the windshield wiper is
turned OFF, the wipers will operate for two wipe cycles
and then turn OFF.
Headlights On with Wipers (Available with Auto
Headlights Only)
When this feature is active, the headlights will turn on
approximately 10 seconds after the wipers are turned on
if the headlight switch is placed in the AUTO position. In
addition, the headlights will turn off when the wipers are
turned off if they were turned on by this feature.
The Headlights On With Wipers feature can be enabled
or disabled. For details, refer to ºHeadlights On with
Wipers,º under ªPersonal Settings (Customer Program-
mable Features),º under ªElectronic Vehicle Information
Centerº in Section 4 of this manual.
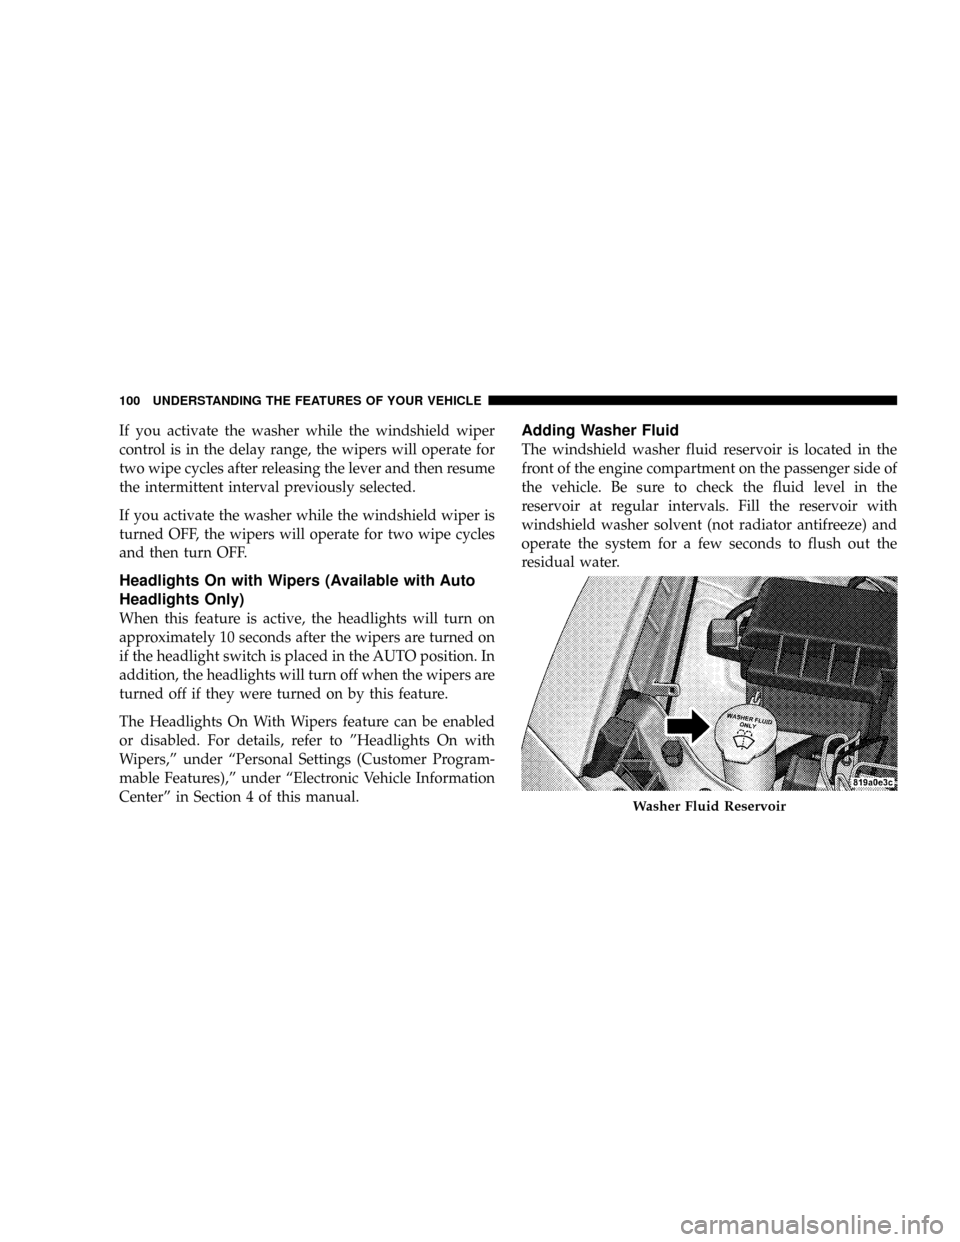
Adding Washer Fluid
The windshield washer fluid reservoir is located in the
front of the engine compartment on the passenger side of
the vehicle. Be sure to check the fluid level in the
reservoir at regular intervals. Fill the reservoir with
windshield washer solvent (not radiator antifreeze) and
operate the system for a few seconds to flush out the
residual water.
Washer Fluid Reservoir
100 UNDERSTANDING THE FEATURES OF YOUR VEHICLE
Page 136 of 380
INSTRUMENT CLUSTER DESCRIPTIONS
1. Fuel Gauge
The pointer shows the level of fuel in the fuel tank when
the ignition switch is in the ON position.
2. Trip Odometer Button
Press this button to change the display from odometer to
either of two trip odometer settings. The letter ªAº or ªBº
will appear when in the trip odometer mode. Push in and
hold the button for two seconds to reset the trip odometer
to 0 miles (kilometers). The odometer must be in trip
mode to reset it.
3. Speedometer
Indicates vehicle speed.
4. Electronic Speed Control Indicator Light
This light will turn on when the electronic
speed control is ON. (See page 103 for more
information.)5. Tachometer
The red segments indicate the maximum permissible
engine revolutions-per-minute (r.p.m. x 1000) for each
gear range. Ease up on the accelerator before reaching the
red area.
6. Voltage Light
This light monitors the electrical system volt-
age. The light should turn on momentarily as
the engine is started. If the light stays on or turns on
while driving, it indicates a problem with the charging
system. Immediate service should be obtained.
7. Electronic Throttle Control (ETC) Light
This light will turn on briefly as a bulb check
when the ignition switch is turned ON. This
light will also turn on while the engine is
running if there is a problem with the Elec-
tronic Throttle Control system.
If the light comes on while the engine is running, safely
bring the vehicle to a complete stop as soon as possible,
place the gear selector in park, and cycle the ignition key.
The light should turn off. If the light remains lit with the
UNDERSTANDING YOUR INSTRUMENT PANEL 135
4
Page 137 of 380
engine running, your vehicle will usually be drivable.
However, see your dealer for service as soon as possible.
If the light is flashing when the engine is running,
immediate service is required. In this case, you may
experience reduced performance, an elevated/rough idle
or engine stall, and your vehicle may require towing.
Also, have the system checked by an authorized dealer if
the light does not come on during starting.
8. Temperature Gauge
The temperature gauge shows engine coolant tempera-
ture. Any reading within the normal range indicates that
the engine cooling system is operating satisfactorily.
The gauge pointer will likely indicate a higher tempera-
ture when driving in hot weather, up mountain grades,
or when towing a trailer. It should not be allowed to
exceed the upper limits of the normal operating range.
CAUTION!
Driving with a hot cooling system could damage
your vehicle. If temperature gauge reads 240ÉF
(116ÉC) or greater, pull over and stop the vehicle. Idle
the vehicle with the air conditioner turned off until
the pointer drops back into the normal range 200±
230ÉF (93±110ÉC). If the pointer remains at 240ÉF
(116ÉC) or greater and you hear a chime, turn the
engine off immediately, and call for service.
WARNING!
A hot engine cooling system is dangerous. You or
others could be badly burned by steam or boiling
coolant. You may want to call a service center if your
vehicle overheats. If you decide to look under the
hood yourself, see Section 7 of this manual. Follow
the warnings under the Cooling System Pressure
Cap paragraph.
136 UNDERSTANDING YOUR INSTRUMENT PANEL
Page 138 of 380
9. Turn Signal Indicators
The arrow will flash with the exterior turn signal
when the turn signal lever is operated.
NOTE:
A continuous chime will sound if the vehicle is
driven more than 1 mile (1.6 km) with either turn signal
on.
NOTE:Check for a defective outside light bulb if either
indicator flashes at a rapid rate. (See page 96 for more
information.)
10. Airbag Warning Light
This light will turn on for 6 to 8 seconds as a
bulb check when the ignition switch is first
turned ON. If the light is either not on
during starting, or stays on, or turns on
while driving, then have the system inspected at your
authorized dealer as soon as possible. (See page 47 for
more information.)11. Engine Temperature Warning Light
This light will turn on and a single chime will
sound to warn of an overheated engine condi-
tion. When this light turns on, the engine tem-
perature is critically hot. The vehicle should be turned
off immediately and serviced as soon as possible. (See
page 276 for more information.)
12. Electronic Stability Program (ESP)/Traction
Control System (TCS) Indicator Light
If this indicator light flashes during accelera-
tion, ease up on the accelerator and apply as
little throttle as possible. Adapt your speed
and driving to the prevailing road condi-
tions, and do not switch off the ESP. (See page 222 for
more information.)
13. Electronic Stability Program (ESP) / Brake
Assist System (BAS) Malfunction Indicator Light
The yellow ESP/BAS malfunction indicator
light will turn on when the key in the
ignition switch is turned to the ªONº posi-
tion. The light should go out with the engine
running. If the light remains on after several ignition
UNDERSTANDING YOUR INSTRUMENT PANEL 137
4
Page 139 of 380
cycles, and the vehicle has been driven several miles at
speeds greater than 30 mph (48 km/h), see your
authorized dealer as soon as possible to have the
problem diagnosed and corrected. (See page 222 for
more information.)
14. Oil Pressure Warning Light
This light shows low engine oil pressure. The
light should turn on momentarily when the
engine is started. If the light turns on while driving,
stop the vehicle, and shut off the engine as soon as
possible. A single chime will sound when this light
turns on.
Do not operate the vehicle until the cause is corrected.
This light does not show how much oil is in the engine.
The engine oil level must be checked using the procedure
shown in section 7. (See page 295 for more information.)
15. High Beam Light
This light will turn on when the high beam
headlights are ON. Push the Multi-Function
lever away from the steering wheel to switch the
headlights to high beam. (See page 96 for more
information.)16. Seat Belt Reminder Light
This light will turn on for 5 to 8 seconds as a
bulb check when the ignition switch is first
turned ON. A chime will sound if the driver's
seat belt is unbuckled during the bulb check. The Seat
Belt Warning Light will flash or remain on continu-
ously if the driver's seat belt remains unbuckled after
the bulb check or when driving. (See page 36 for more
information.)
17. Transmission Range Indicator
This display indicator shows the automatic transmission
gear selection.
18. Front Fog Light Indicator Ð If Equipped
This light will turn on when the front fog lights
are ON. (See page 95 for more information.)
19. Electronic Vehicle Information Center Display
This display shows the Electronic Vehicle Information
Center (EVIC) messages when the appropriate conditions
exist. (See page 143 for more information.)
138 UNDERSTANDING YOUR INSTRUMENT PANEL
Page 143 of 380
23. Anti-Lock Brake Light
This light monitors the Anti-Lock Brake System.
The light will turn on when the ignition switch
is turned to the ON position and may stay on for as
long as four seconds.
If the ABS light remains on or turns on while driving,
then the Anti-Lock portion of the brake system is not
functioning and service is required. However, the con-
ventional brake system will continue to operate normally
if the BRAKE warning light is not on.
If the ABS light is on, the brake system should be serviced
as soon as possible to restore the benefits of Anti-Lock
brakes. If the ABS light does not turn on when the
Ignition switch is turned to the ON position, have the
light inspected by an authorized dealer. (See page 219 for
more information.)
24. Low Fuel Indicator Light
This light will turn on and a single chime will
sound when the fuel level drops to 1/8 tank. (See
page 257 for more information.)25. Malfunction Indicator Light
This light is part of an onboard diagnostic
system called OBD. The OBD system monitors
engine and automatic transmission control sys-
tems. The light will turn on when the key is in the ON
position before engine start. If the light does not come
on when turning the key from OFF to ON, have the
condition checked promptly.
Certain conditions such as a loose or missing gas cap,
poor fuel quality, etc. may illuminate the light after
engine start. The vehicle should be serviced if the light
stays on through several of your typical driving cycles. In
most situations, the vehicle will drive normally and will
not require towing.
The Malfunction Indicator Light flashes to alert you to
serious conditions that could lead to immediate loss of
power or severe catalytic converter damage. The vehicle
should be serviced as soon as possible if this occurs. (See
page 292 for more information.)
142 UNDERSTANDING YOUR INSTRUMENT PANEL
Page 215 of 380
Delayed Shifts in Cold Temperatures
During cold temperature operation, you may notice
delayed upshifts depending on engine and transmission
temperature as well as vehicle speed. This feature im-
proves warm up time of the engine and transmission to
achieve maximum efficiency.
Temporary Transmission Limp Home Mode
The transmission is monitored for abnormal conditions.
If a condition is detected that could result in transmission
damage, the transmission will engage Limp Home Mode.
If vehicle acceleration worsens, or the transmission no
longer shifts, the transmission is most likely operating in
the Limp Home Mode. In this mode, the transmission
will remain in the current gear until the vehicle is
brought to a stop. After the vehicle has stopped, P (Park),
R (Reverse), and N (Neutral) will continue to operate.
Second gear will operate in the D (Drive) shifter position.
The Malfunction Indicator Light may be illuminated.
A reset feature is available to allow the vehicle to be
driven to a dealer for service. To reset the transmission,
use the following procedure:
1. Stop the vehicle.2. Move the selector lever to the P (Park) position.
3. Turn off the engine.
4. Wait approximately 10 seconds.
5. Restart the engine.
6. Move the selector lever to the desired range. If the
problem is no longer detected, the transmission will
return to normal operation.
NOTE:Even if the transmission can be reset, we
recommend that you visit a dealer at your earliest
possible convenience. Your dealer has diagnostic equip-
ment to determine if the problem could recur.
Have the transmission checked at your authorized dealer
as soon as possible.
If the problem has been momentary, the transmission can
be reset to regain all forward gears.
Permanent Transmission Limp Home Mode
Permanent Limp Home Mode will be activated if the
transmission enters temporary Limp Home Mode three
214 STARTING AND OPERATING
Page 220 of 380
BRAKE SYSTEM
Your vehicle is equipped with dual hydraulic
brake systems. If either of the two hydraulic
systems loses normal capability, the remaining
system will still function. There will be some
loss of overall braking effectiveness. This may be evident
by increased pedal travel during application, greater
pedal force required to slow or stop, and potential
activation of the Brake Warning Light.
In the event power assist is lost for any reason (for
example, repeated brake applications with the engine off)
the brakes will still function. The effort required to brake
the vehicle will be much greater than that required with
the power system operating.
Anti-Lock Brake System
The Anti-Lock Brake System provides increased vehicle
stability and brake performance under most braking
conditions. The system automatically ªpumpsº the
brakes during severe braking conditions to prevent
wheel lock-up.The electronic brake force distribution (EBD) prevents the
rear wheels from over-braking and provides greater
control of available braking forces applied to the rear
axle.
When the vehicle is driven over 7 mph (11 km/h), you
may also hear a slight clicking sound as well as some
related motor noises. These noises are the system per-
forming its self check cycle to ensure that the ABS system
is working properly. This self check occurs each time the
vehicle is started and accelerated past 7 mph (11 km/h).
ABS is activated during braking under certain road or
stopping conditions. ABS-inducing conditions can in-
clude ice, snow, gravel, bumps, railroad tracks, loose
debris, or panic stops.
STARTING AND OPERATING 219
5