fuel DODGE MAGNUM SRT 2007 1.G User Guide
[x] Cancel search | Manufacturer: DODGE, Model Year: 2007, Model line: MAGNUM SRT, Model: DODGE MAGNUM SRT 2007 1.GPages: 380, PDF Size: 6.63 MB
Page 206 of 380
Automatic Transmission
The gear selector must be in the NEUTRAL or PARK
position before you can start the engine. Apply the brakes
before shifting into any driving gear.
Normal Starting
Normal Starting of either a cold or a warm engine is
obtained without pumping or depressing the accelerator
pedal. Turn the key to the ªSTARTº position and release
when the engine starts. If the engine has not started
within 3 seconds, slightly depress the accelerator pedal
while continuing to crank. If the engine fails to start
within 15 seconds, turn the key to the ªLOCKº position,
wait 10 to 15 seconds, then repeat the normal starting
procedure.
Extremely Cold Weather (below220ÉF or229ÉC)
To insure reliable starting at these temperatures, use of an
externally powered electric engine block heater (available
from your dealer) is recommended.
If Engine Fails To Start
If the engine fails to start after you have followed the
ªNORMAL STARTINGº procedure, it may be flooded.
Push the accelerator pedal all the way to the floor and
hold it there while cranking the engine. This should clear
any excess fuel in case the engine is flooded.
CAUTION!
To prevent damage to the starter, do not crank the
engine for more than 15 seconds at a time. Wait 10 to
15 seconds before trying again.
STARTING AND OPERATING 205
5
Page 207 of 380
WARNING!
²Never pour fuel or other flammable liquid into
the throttle body air inlet opening in an attempt to
start the vehicle. This could result in flash fire
causing serious personal injury.
²Do not attempt to push or tow your vehicle to get
it started. Vehicles equipped with an automatic
transmission cannot be started this way. Un-
burned fuel could enter the catalytic converter and
once the engine has started, ignite and damage the
converter and vehicle. If the vehicle has a dis-
charged battery, booster cables may be used to
obtain a start from a booster battery or the battery
in another vehicle. This type of start can be
dangerous if done improperly. See section 6 of
this manual for the proper jump-starting proce-
dures and follow them carefully.
If the engine is flooded, it may start to run, but not have
enough power to continue running when the key is
released. If this occurs, continue cranking up to 15
seconds with the accelerator pedal pushed all the way to
the floor. Release the accelerator pedal and the key once
the engine is running smoothly. Do not overspeed the
engine.
If the engine shows no sign of starting after two 15-
second periods of cranking with the accelerator pedal
held to the floor, the ªNORMAL STARTINGº procedure
should be repeated.
After Starting
The idle speed is controlled automatically and it will
decrease as the engine warms up.
206 STARTING AND OPERATING
Page 214 of 380
D (Drive)
This range should be used for most city and highway
driving. It provides the smoothest upshifts and down-
shifts and best fuel economy.
The transmission automatically upshifts through fifth
gear. The D (Drive) position provides optimum driving
characteristics under all normal operating conditions.
When frequent transmission shifting occurs when using
the Overdrive range, such as when operating the vehicle
under heavy loading conditions (in hilly terrain, travel-
ing into strong head winds, or while towing heavy
trailers, use the AutoSticktmode and select the ª3º
range.
AutoSticktGear selection
The AutoSticktfeature can be selected by pressing the
selector lever to the right or the left with the lever in the
D (Drive) position. The gear currently selected is indi-
cated in the instrument cluster display. Briefly, press the
selector lever in the ªD -º direction and the transmission
will shift from the current gear to the next lower gear.Press and hold the selector lever in the ªD-º direction and
the transmission will shift from the current gear directly
to the next lowest gear for best acceleration.
NOTE:To avoid overrevving the engine when the
selector lever is moved in ªD -º direction, the transmis-
sion will not shift to a lower gear if the engine's revolu-
tions per minute (RPM) limit would be exceeded.
Briefly, press the selector lever in the ªD +º direction and
the transmission will shift from the current gear to the
next higher gear.
Press and hold the selector lever in the ªD +º direction
and the transmission will shift from the current gear
directly to gear ªD.º
WARNING!
On slippery road surfaces, never downshift in order
to obtain braking action. This could result in drive
wheel slip and reduced vehicle control. Your vehi-
cle's ABS will not prevent this type of loss of control.
You could lose control of your vehicle and have an
accident.
STARTING AND OPERATING 213
5
Page 239 of 380
2. EconomyÐ
Improper inflation pressures can cause uneven wear
patterns to develop across the tire tread. These abnormal
wear patterns will reduce tread life resulting in a need for
earlier tire replacement. Under inflation, also increases
tire rolling resistance and results in higher fuel consump-
tion.
3. Ride Comfort and Vehicle StabilityÐ
Proper tire inflation contributes to a comfortable ride.
Over inflation produces a jarring and uncomfortable ride.
Tire Inflation Pressures
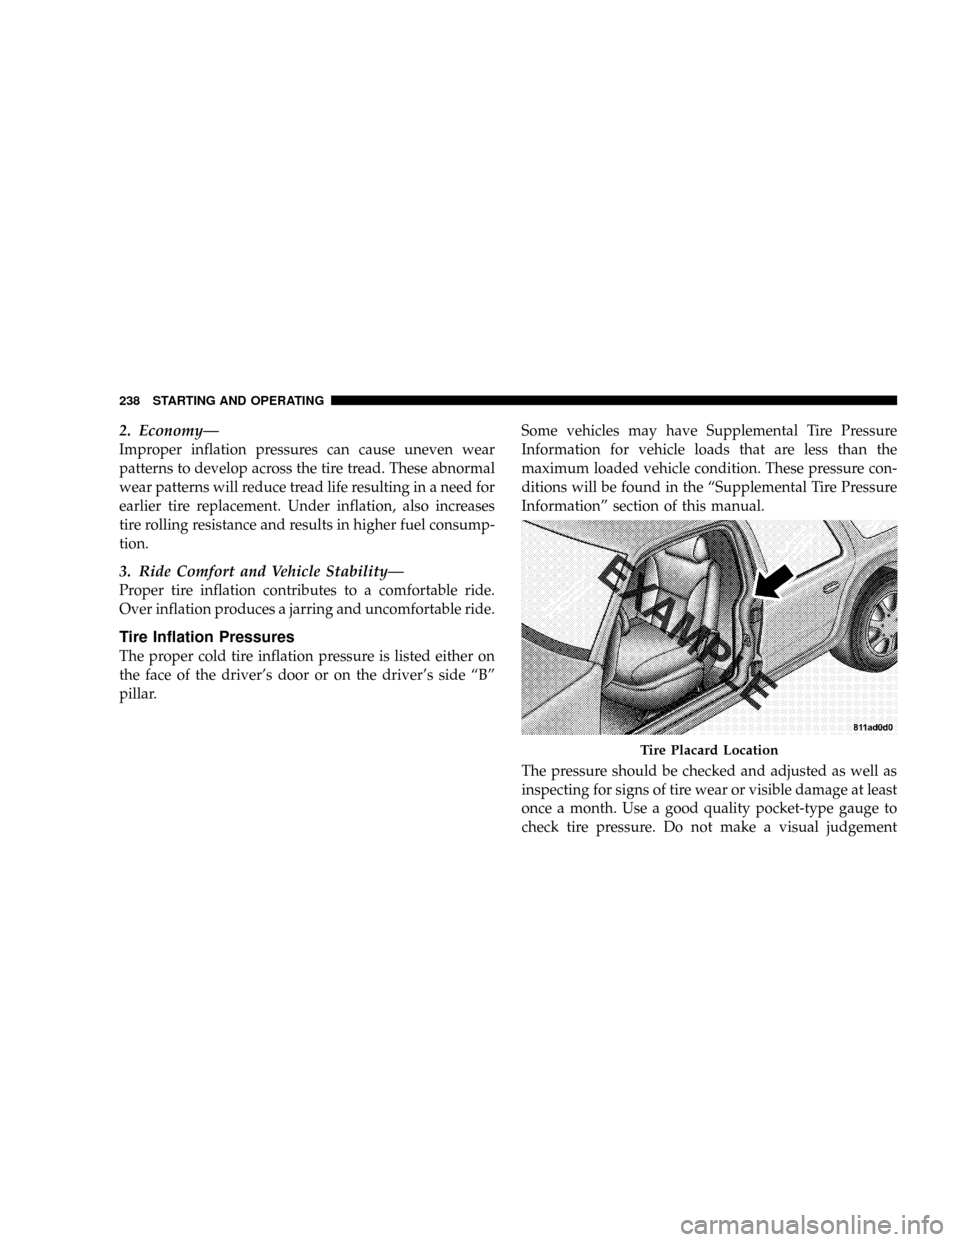
The proper cold tire inflation pressure is listed either on
the face of the driver's door or on the driver's side ªBº
pillar.Some vehicles may have Supplemental Tire Pressure
Information for vehicle loads that are less than the
maximum loaded vehicle condition. These pressure con-
ditions will be found in the ªSupplemental Tire Pressure
Informationº section of this manual.
The pressure should be checked and adjusted as well as
inspecting for signs of tire wear or visible damage at least
once a month. Use a good quality pocket-type gauge to
check tire pressure. Do not make a visual judgement
Tire Placard Location
238 STARTING AND OPERATING
Page 249 of 380
CAUTION!
²The TPMS has been optimized for the original
equipment tires and wheels. TPMS pressures and
warning have been established for the tire size
equipped on your vehicle. Undesirable system
operation or sensor damage may result when
using replacement equipment that is not of the
same size, type, and/or style. After-market wheels
can cause sensor damage. Do not use tire sealant
from a can, or balance beads if your vehicle is
equipped with a TPMS, as damage to the sensors
may result.
²After inspecting or adjusting the tire pressure,
always reinstall the valve stem cap. This will
prevent moisture and dirt from entering the valve
stem, which could damage the Tire Pressure
Monitoring Sensor.
NOTE:
²
The TPMS is not intended to replace normal tire care
and maintenance, or to provide warning of a tire
failure or condition.
²The TPMS should not be used as a tire pressure gauge
while adjusting your tire pressure.
²Driving on a significantly under-inflated tire causes
the tire to overheat and can lead to tire failure.
Under-inflation also reduces fuel efficiency and tire
tread life, and may affect the vehicle's handling and
stopping ability.
²The TPMS is not a substitute for proper tire mainte-
nance, and it is the driver 's responsibility to maintain
correct tire pressure, even if under-inflation has not
reached the level to trigger illumination of the Tire
Pressure Monitoring Telltale light.
248 STARTING AND OPERATING
Page 254 of 380
NOTE:You can change the pressure units to display in
PSI, kPA, or BAR. Refer to ªLanguage,º under ªPersonal
Settings (Customer Programmable Features),º under
ªElectronic Vehicle Information Center (EVIC)º in Sec-
tion 4 of this manual for details.
If the ignition key is cycled, this sequence will repeat,
providing the system fault still exists. If the system fault
no longer exists, the Tire Pressure Monitoring Telltale
Light will no longer flash, and the9CHECK TPM SYS-
TEM9message will no longer display, and a pressure
value will display in place of the dashes.
General Information
This device complies with part 15 of the FCC rules and
RSS 210 of Industry Canada. Operation is subject to the
following conditions:
²This device may not cause harmful interference.
²This device must accept any interference received,
including interference that may cause undesired op-
eration.The tire pressure sensors are covered under one of the
following licenses:
United States.....................KR5S120123
Canada........................2671-S120123
FUEL REQUIREMENTS
6.1L Engine
The 6.1L engine is designed to meet all
emissions regulations and provide excel-
lent fuel economy and performance when
using high-quality premium unleaded
gasoline with an octane rating of 91 or
higher.
Light spark knock at low engine speeds is not harmful to
your engine. However, continued heavy spark knock at
high speeds can cause damage and immediate service is
required.
Poor quality gasoline can cause problems such as hard
starting, stalling, and hesitations. If you experience these
symptoms, try another brand of ªpremiumº gasoline
before considering service for the vehicle.
STARTING AND OPERATING 253
5
Page 255 of 380
Over 40 automobile manufacturers around the world
have issued and endorsed consistent gasoline specifica-
tions (the World Wide Fuel Charter, WWFC) which
define fuel properties necessary to deliver enhanced
emissions, engine performance, and durability for your
vehicle. The manufacturer recommends the use of gaso-
lines that meet the WWFC specifications if they are
available.
Reformulated Gasoline
Many areas of the country require the use of cleaner
burning gasoline referred to as ªReformulated Gasolineº.
Reformulated gasolines contain oxygenates, and are spe-
cifically blended to reduce vehicle emissions and im-
prove air quality.
The manufacturer supports the use of reformulated gaso-
lines. Properly blended reformulated gasolines will pro-
vide excellent performance and durability of engine and
fuel system components.
Gasoline/Oxygenate Blends
Some fuel suppliers blend unleaded gasoline with oxy-
genates such as 10% ethanol, MTBE, and ETBE. Oxygen-
ates are required in some areas of the country during the
winter months to reduce carbon monoxide emissions.
Fuels blended with these oxygenates may be used in
your vehicle.
CAUTION!
DO NOT use gasolines containing Methanol or E85
Ethanol. Use of these blends may result in starting
and driveability problems and may damage critical
fuel system components.
Problems that result from using methanol/gasoline or
E85 Ethanol blends are not the responsibility of the
manufacturer. While MTBE is an oxygenate made from
Methanol, it does not have the negative effects of Metha-
nol.
254 STARTING AND OPERATING
Page 256 of 380
MMT In Gasoline
MMT is a manganese containing metallic additive that is
blended into some gasoline to increase the octane num-
ber. Gasolines blended with MMT offer no performance
advantage beyond gasolines of the same octane number
without MMT. Gasolines blended with MMT have shown
to reduce spark plug life and reduce emission system
performance in some vehicles. The manufacturer recom-
mends using gasolines without MMT. Since the MMT
content of gasoline may not be indicated on the pump,
you should ask your gasoline retailer if his/her gasoline
contains MMT.
It is even more important to look for gasolines without
MMT in Canada, because MMT can be used at levels
higher than allowed in the United States. MMT is pro-
hibited in Federal and California reformulated gasolines.
Materials Added to Fuel
All gasoline sold in the United States is required to
contain effective detergent additives. Use of additional
detergents or other additives are not needed undernormal conditions and they would result in additional
cost. Therefore, you should not have to add anything to
the fuel.
Fuel System Cautions
CAUTION!
Follow these guidelines to maintain your vehicle's
performance:
²The use of leaded gas is prohibited by Federal law.
Using leaded gasoline can impair engine performance,
or damage the emission control system.
²An out-of-tune engine, or certain fuel or ignition
malfunctions, can cause the catalytic converter to
overheat. If you notice a pungent burning odor or
some light smoke, your engine may be out-of-tune or
malfunctioning and may require immediate service.
Contact your dealer for service assistance.
STARTING AND OPERATING 255
5
Page 257 of 380
²The use of fuel additives, which are now being sold as
octane enhancers, are not recommended. Most of these
products contain high concentrations of methanol.
Fuel system damage or vehicle performance problems
resulting from the use of such fuels or additives are not
the responsibility of the manufacturer.
NOTE:Intentional tampering with emissions control
systems can result in civil penalties being assessed
against you.
Carbon Monoxide Warnings
WARNING!
Carbon monoxide (CO) in exhaust gases is deadly.
Follow the precautions below to prevent carbon
monoxide poisoning:
²Do not inhale exhaust gases. They contain carbon
monoxide, a colorless and odorless gas, which can kill.
Never run the engine in a closed area, such as a
garage, and never sit in a parked vehicle with the
engine running for an extended period. If the vehicle is
stopped in an open area with the engine running for
more than a short period, adjust the ventilation system
to force fresh, outside air into the vehicle.
²Guard against carbon monoxide with proper mainte-
nance. Have the exhaust system inspected every time
the vehicle is raised. Have any abnormal conditions
repaired promptly. Until repaired, drive with all side
windows fully open.
²Keep the trunk closed when driving your vehicle to
prevent carbon monoxide and other poisonous ex-
haust gases from entering the vehicle.
256 STARTING AND OPERATING
Page 258 of 380
ADDING FUEL
Fuel Filler Cap (Gas Cap)
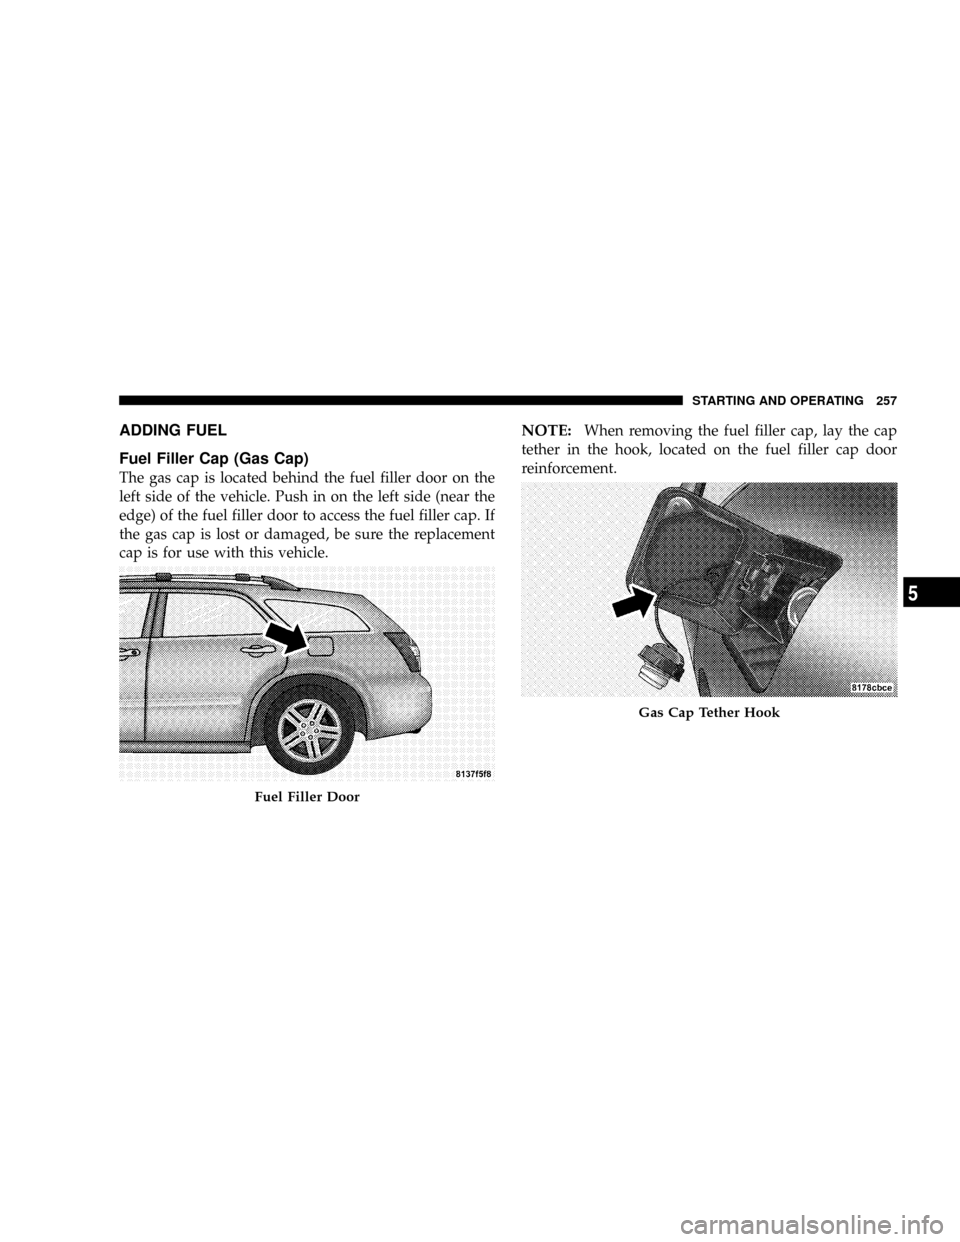
The gas cap is located behind the fuel filler door on the
left side of the vehicle. Push in on the left side (near the
edge) of the fuel filler door to access the fuel filler cap. If
the gas cap is lost or damaged, be sure the replacement
cap is for use with this vehicle.
NOTE:When removing the fuel filler cap, lay the cap
tether in the hook, located on the fuel filler cap door
reinforcement.
Fuel Filler Door
Gas Cap Tether Hook
STARTING AND OPERATING 257
5