interior lights DODGE MAGNUM SRT 2007 1.G Owners Manual
[x] Cancel search | Manufacturer: DODGE, Model Year: 2007, Model line: MAGNUM SRT, Model: DODGE MAGNUM SRT 2007 1.GPages: 380, PDF Size: 6.63 MB
Page 17 of 380
To Disarm the System:
Either press the UNLOCK button on the remote keyless
entry transmitter or insert a valid sentry key into the
ignition lock cylinder and turn the key to the ON/START
position.
If you open the liftgate after disarming the system, you
must use one of the previously described arming se-
quences if you wish to rearm the system after closing the
liftgate.
NOTE:
²
The driver's door key cylinder cannot arm or disarm
the system.
²Once the alarm is set, you have a 30-second one-time
access into the liftgate area. If the liftgate is not opened
within 30 seconds, the liftgate will automatically re-
lock within 10 seconds.
²The system remains armed during liftgate entry. If
someone enters the vehicle through the liftgate, and
opens any door, the alarm will sound.
²When the system is armed, the interior power door
lock switches will not unlock the doors.The Vehicle Security Alarm system is designed to protect
your vehicle; however, you can create conditions where
the system will give you a false alarm. If one of the
previously described arming sequences has occurred, the
system will arm regardless of whether you are in the
vehicle or not. If you remain in the vehicle and open a
door, the alarm will sound. If this occurs, disarm the
system.
The alarm system will be activated when the battery is
connected if the system was previously armed. The
exterior lights will flash, the horn will sound, and the
ignition will not start the vehicle. If this occurs, disarm
the system.
Tamper Alert
If something has triggered the system in your absence,
the horn will sound three times when you disarm the
system. Check the vehicle for tampering.
16 THINGS TO KNOW BEFORE STARTING YOUR VEHICLE
Page 20 of 380
Sound Horn with Remote Key Lock
This feature will cause the horn to chirp when the doors
are locked with the transmitter. This feature can be
enabled or disabled. For details on how to change the
current setting, refer to ªSound Horn with Remote Key
Lock,º under ªPersonal Settings (Customer Program-
mable Features),º under ªElectronic Vehicle Information
Center (EVIC)º in Section 4 of this manual.
Using The Panic Alarm:
To turn the panic alarm feature ON or OFF, press and
hold the PANIC button on the transmitter for at least one
second and release. When the panic alarm is on, the
headlights and park lights will flash, the horn will pulse
on and off, and the interior lights will turn on.
The panic alarm will stay on for 3 minutes unless you
turn it off by either pressing the PANIC button a second
time or drive the vehicle at a speed of 15 mph (24 km/h)
or greater.
NOTE:
²
The interior lights will turn off if you turn the ignitionswitch to the ACC or ON position while the panic
alarm is activated. However, the exterior lights and
horn will remain on.
²You may need to be less than 23 feet (7 meters) from
the vehicle when using the transmitter to turn off the
panic alarm due to the radio frequency noises emitted
by the system.
Programming Additional Transmitters
Refer to SENTRY KEY ªCustomer Key Programming.º
(See page 14 for more information.)
If you do not have a programmed transmitter, contact
your dealer for details.
Battery Replacement
The recommended replacement battery is CR2032.
NOTE:Do not touch the battery terminals that are on
the back housing or the printed circuit board.
1. With the transmitter buttons facing downward, re-
move the small screw (if equipped).
THINGS TO KNOW BEFORE STARTING YOUR VEHICLE 19
2
Page 41 of 380
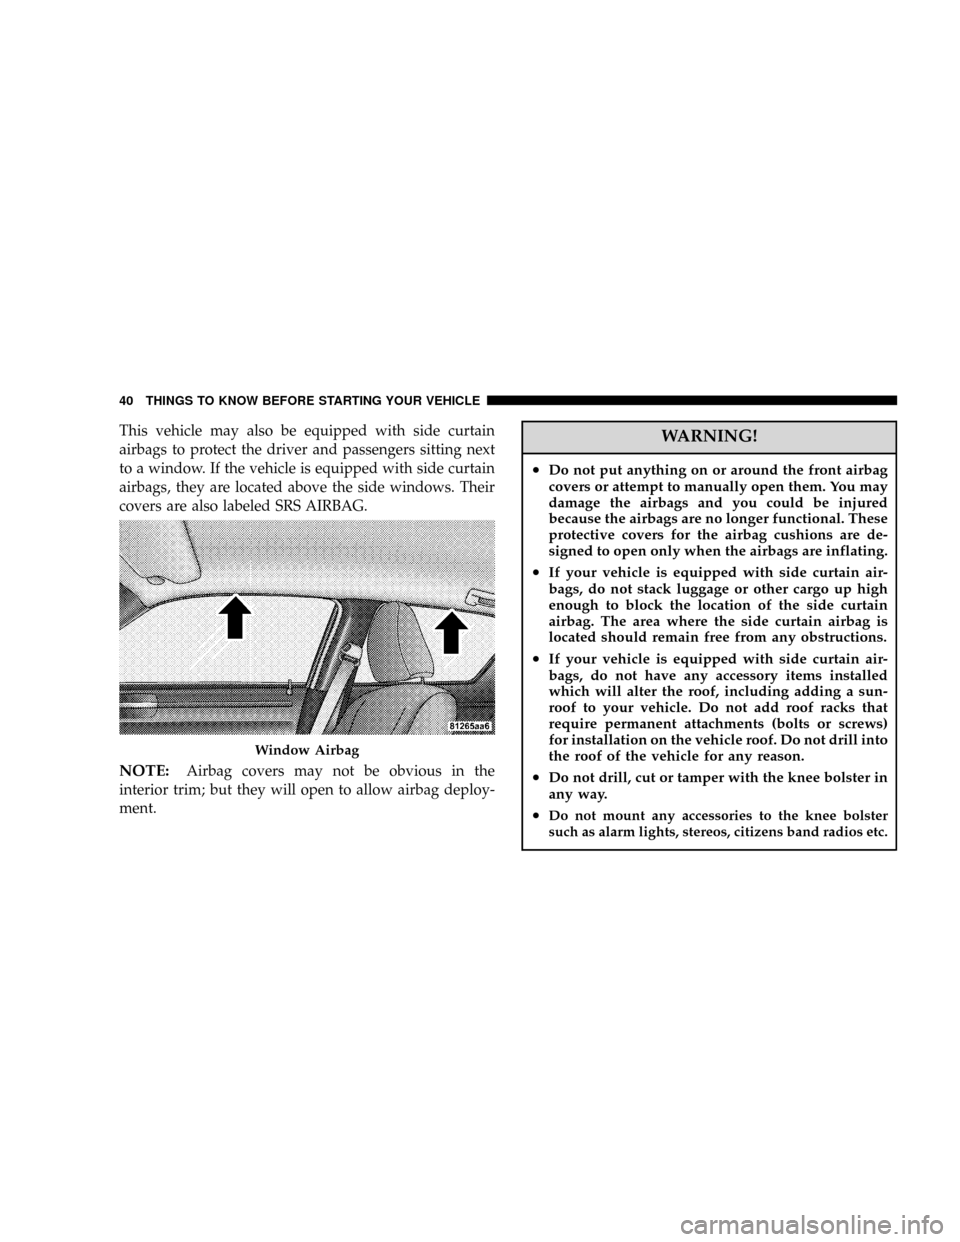
This vehicle may also be equipped with side curtain
airbags to protect the driver and passengers sitting next
to a window. If the vehicle is equipped with side curtain
airbags, they are located above the side windows. Their
covers are also labeled SRS AIRBAG.
NOTE:Airbag covers may not be obvious in the
interior trim; but they will open to allow airbag deploy-
ment.
WARNING!
²Do not put anything on or around the front airbag
covers or attempt to manually open them. You may
damage the airbags and you could be injured
because the airbags are no longer functional. These
protective covers for the airbag cushions are de-
signed to open only when the airbags are inflating.
²If your vehicle is equipped with side curtain air-
bags, do not stack luggage or other cargo up high
enough to block the location of the side curtain
airbag. The area where the side curtain airbag is
located should remain free from any obstructions.
²If your vehicle is equipped with side curtain air-
bags, do not have any accessory items installed
which will alter the roof, including adding a sun-
roof to your vehicle. Do not add roof racks that
require permanent attachments (bolts or screws)
for installation on the vehicle roof. Do not drill into
the roof of the vehicle for any reason.
²Do not drill, cut or tamper with the knee bolster in
any way.
²Do not mount any accessories to the knee bolster
such as alarm lights, stereos, citizens band radios etc.
Window Airbag
40 THINGS TO KNOW BEFORE STARTING YOUR VEHICLE
Page 47 of 380
WARNING!
Deployed airbags can't protect you in another colli-
sion. Have the airbags replaced by an authorized
dealer as soon as possible.
Enhanced Accident Response Feature
If the airbags deploy after an impact and the electrical
system remains functional, vehicles equipped with
power door locks will unlock automatically. In addition,
approximately 5 seconds after the vehicle has stopped
moving, the interior lights will illuminate to aid visibility.
NOTE:The interior lights can only be deactivated if the
key is removed from the ignition switch or the vehicle is
driven.
Maintaining Your Airbag System
WARNING!
²Modifications to any part of the airbag system
could cause it to fail when you need it. You could
be injured because the airbags are not there to
protect you. Do not modify the components or
wiring, including adding any kind of badges or
stickers to the steering wheel hub trim cover or
the upper passenger side of the instrument panel.
Do not modify the front bumper, vehicle body
structure, or frame.
²You need proper knee impact protection in a
collision. Do not mount or locate any aftermarket
equipment on or behind the knee impact bolster.
²It is dangerous to try to repair any part of the
airbag system yourself. Be sure to tell anyone who
works on your vehicle that it has airbags.
46 THINGS TO KNOW BEFORE STARTING YOUR VEHICLE
Page 63 of 380
NHeated Seats.........................89
NFolding Rear Seat......................91
mTo Open And Close The Hood.............92
mLights...............................93
NHeadlight Switch......................93
NAutomatic Headlights Ð If Equipped........94
NHeadlights On With Wipers (Available With
Auto Headlights Only)..................94
NHeadlight Time Delay...................94
NDaytime Running Lights (Canada Only)......95
NLights-On Reminder....................95
NFog Lights...........................95
NMulti-Function Lever....................96
NOverhead Console Map/Reading Lights......97
NInterior Lights........................97
mWindshield Wipers And Washers...........98NIntermittent Wiper System................99
NMist Feature..........................99
NWindshield Washers....................99
NHeadlights On With Wipers (Available With
Auto Headlights Only).................100
NAdding Washer Fluid..................100
mTilt/Telescoping Steering Column..........101
mAdjustable Pedals Ð If Equipped..........102
mElectronic Speed Control.................103
NElectronic Speed Control Operation........103
NTo Activate..........................104
NTo Set At A Desired Speed...............104
NTo Deactivate........................104
NTo Resume Speed.....................104
NTo Vary The Speed Setting...............105
NTo Accelerate For Passing...............105
62 UNDERSTANDING THE FEATURES OF YOUR VEHICLE
Page 98 of 380
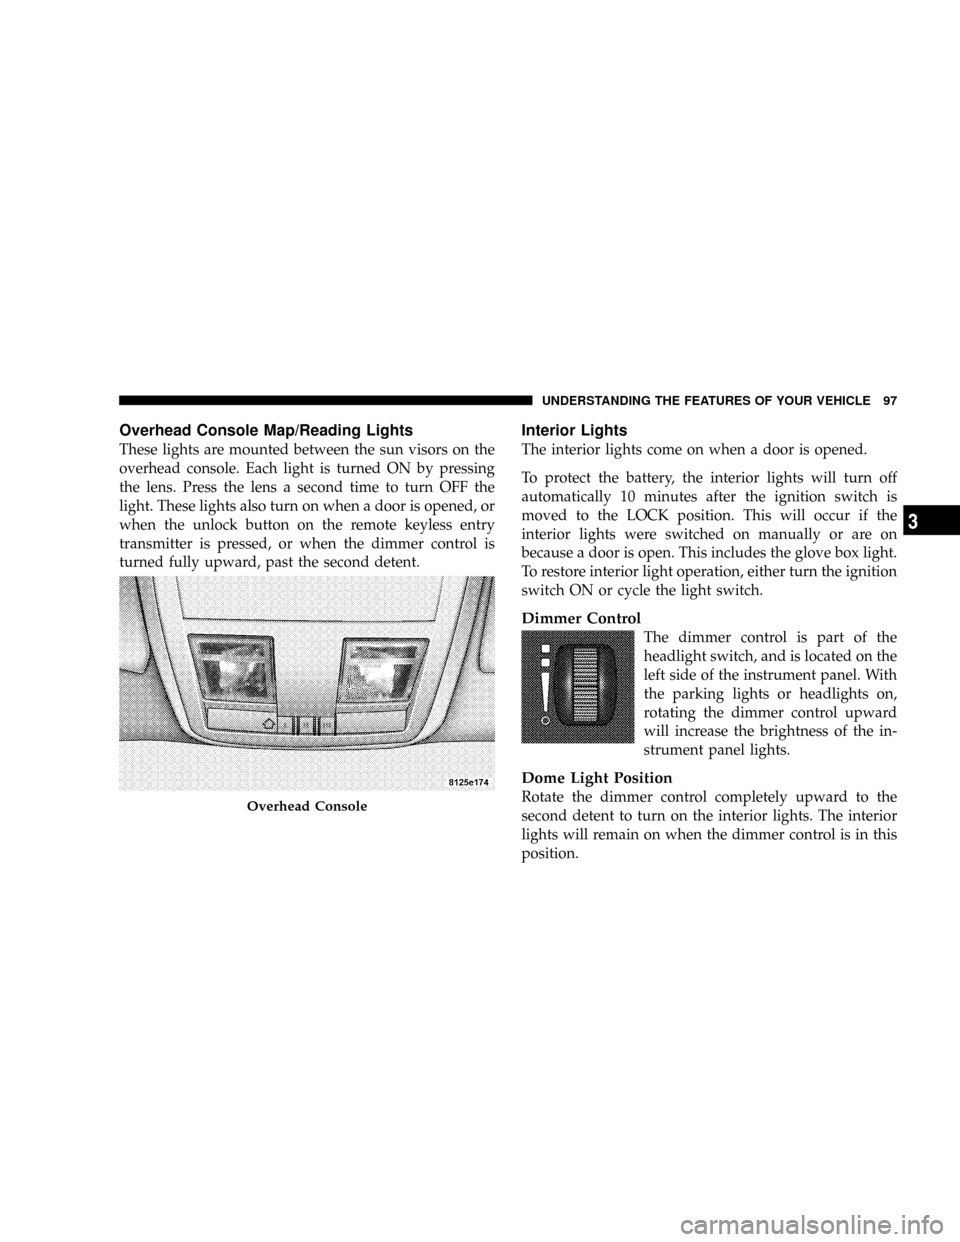
Overhead Console Map/Reading Lights
These lights are mounted between the sun visors on the
overhead console. Each light is turned ON by pressing
the lens. Press the lens a second time to turn OFF the
light. These lights also turn on when a door is opened, or
when the unlock button on the remote keyless entry
transmitter is pressed, or when the dimmer control is
turned fully upward, past the second detent.
Interior Lights
The interior lights come on when a door is opened.
To protect the battery, the interior lights will turn off
automatically 10 minutes after the ignition switch is
moved to the LOCK position. This will occur if the
interior lights were switched on manually or are on
because a door is open. This includes the glove box light.
To restore interior light operation, either turn the ignition
switch ON or cycle the light switch.
Dimmer Control
The dimmer control is part of the
headlight switch, and is located on the
left side of the instrument panel. With
the parking lights or headlights on,
rotating the dimmer control upward
will increase the brightness of the in-
strument panel lights.
Dome Light Position
Rotate the dimmer control completely upward to the
second detent to turn on the interior lights. The interior
lights will remain on when the dimmer control is in this
position.Overhead Console
UNDERSTANDING THE FEATURES OF YOUR VEHICLE 97
3
Page 99 of 380
Interior light Defeat (OFF)
Rotate the dimmer control to the extreme bottom ªOFFº
position. The interior lights will remain off when the
doors are open.
Parade Mode (Daytime Brightness Feature)
Rotate the dimmer control upward to the first detent.
This feature brightens all text displays such as the
odometer, Electronic Vehicle Information Center (EVIC),
and radio when the parking lights or headlights are on.
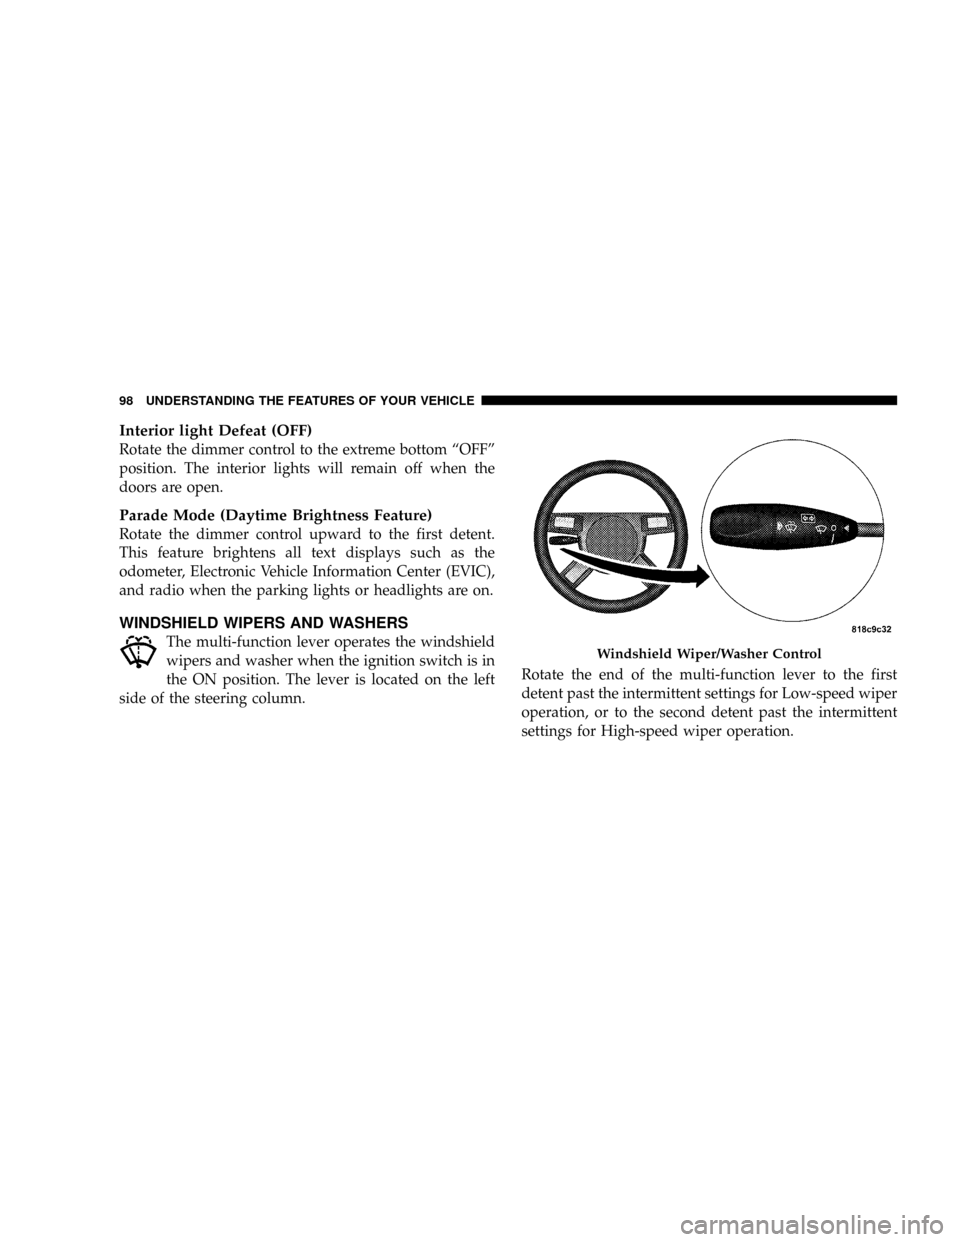
WINDSHIELD WIPERS AND WASHERS
The multi-function lever operates the windshield
wipers and washer when the ignition switch is in
the ON position. The lever is located on the left
side of the steering column.Rotate the end of the multi-function lever to the first
detent past the intermittent settings for Low-speed wiper
operation, or to the second detent past the intermittent
settings for High-speed wiper operation.Windshield Wiper/Washer Control
98 UNDERSTANDING THE FEATURES OF YOUR VEHICLE
Page 319 of 380
Interior Care
Use MopartFabric Cleaner or equivalent to clean fabric
upholstery and MopartCarpet Cleaner for carpeting.
Interior Trim should be cleaned starting with a damp
cloth, or MopartSatin Select. Do not use harsh cleaners
or Armorall. Use MopartTotal Clean to clean vinyl
upholstery.
MopartTotal Clean is specifically recommended for
leather upholstery.
Your leather upholstery can be best preserved by regular
cleaning with a damp soft cloth. Small particles of dirt
can act as an abrasive and damage the leather upholstery
and should be removed promptly with a damp cloth.
Stubborn soils can be removed easily with a soft cloth
and MopartTotal Clean or equivalent. Care should be
taken to avoid soaking your leather upholstery with any
liquid. Please do not use polishes, oils, cleaning fluids,
solvents, detergents, or ammonia-based cleaners to clean
your leather upholstery. Application of a leather condi-
tioner is not required to maintain the original condition.WARNING!
Do not use volatile solvents for cleaning purposes.
Many are potentially flammable, and if used in
closed areas they may cause respiratory harm.
Cleaning Headlights
Your vehicle has plastic headlights that are lighter and
less susceptible to stone breakage than glass headlights.
Plastic is not as scratch resistant as glass and therefore
different lens cleaning procedures must be followed.
To minimize the possibility of scratching the lenses and
reducing light output, avoid wiping with a dry cloth. To
remove road dirt, wash with a mild soap solution fol-
lowed by rinsing.
Do not use abrasive cleaning components, solvents, steel
wool or other aggressive material to clean the lenses.
Glass Surfaces
All glass surfaces should be cleaned on a regular basis
with MopartGlass Cleaner or any commercial
household-type glass cleaner. Never use an abrasive type
318 MAINTAINING YOUR VEHICLE
Page 327 of 380
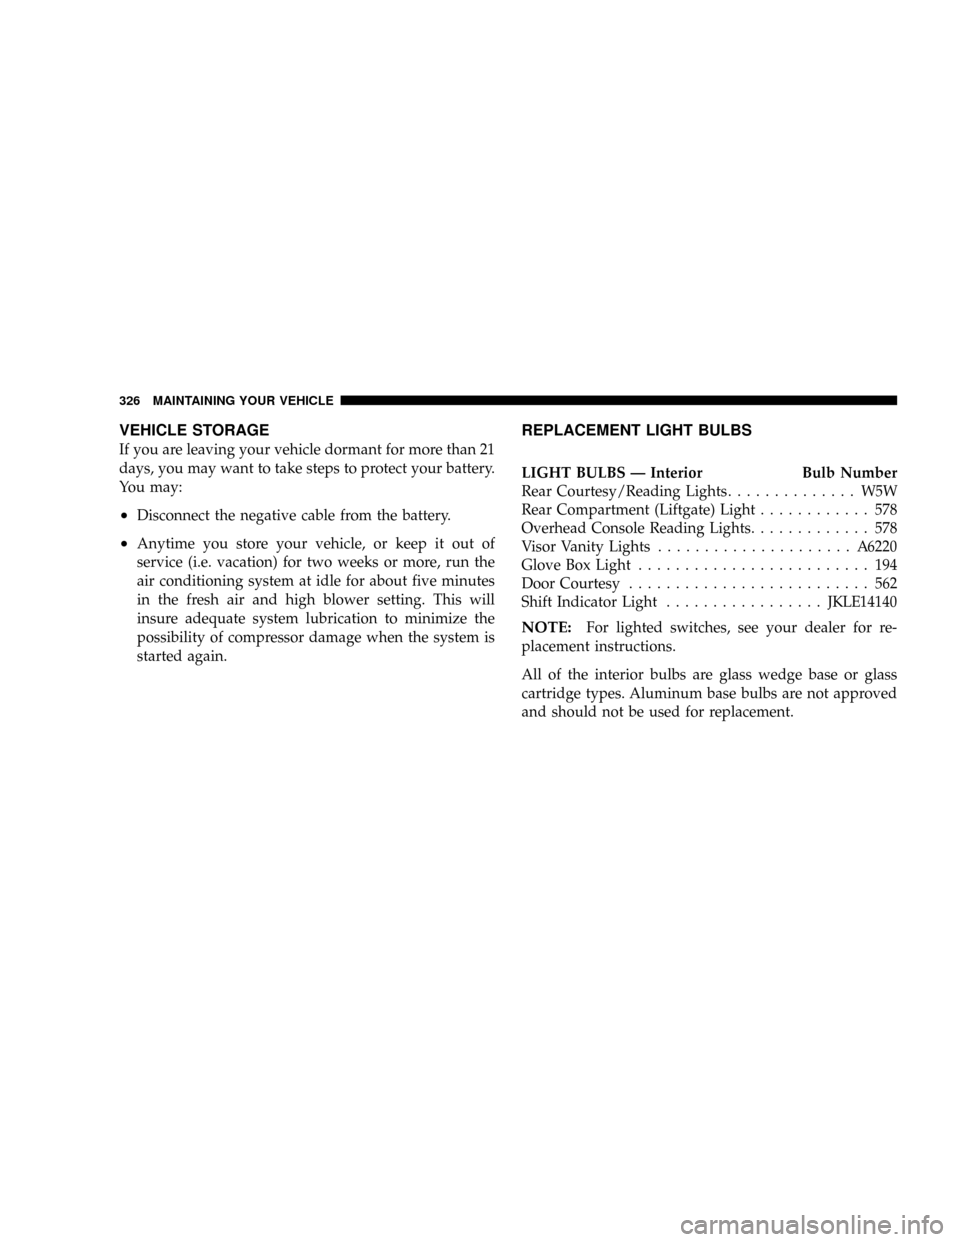
VEHICLE STORAGE
If you are leaving your vehicle dormant for more than 21
days, you may want to take steps to protect your battery.
You may:
²Disconnect the negative cable from the battery.
²Anytime you store your vehicle, or keep it out of
service (i.e. vacation) for two weeks or more, run the
air conditioning system at idle for about five minutes
in the fresh air and high blower setting. This will
insure adequate system lubrication to minimize the
possibility of compressor damage when the system is
started again.
REPLACEMENT LIGHT BULBS
LIGHT BULBS Ð Interior Bulb Number
Rear Courtesy/Reading Lights.............. W5W
Rear Compartment (Liftgate) Light............ 578
Overhead Console Reading Lights............. 578
Visor Vanity Lights.....................A6220
Glove Box Light......................... 194
Door Courtesy.......................... 562
Shift Indicator Light.................JKLE14140
NOTE:For lighted switches, see your dealer for re-
placement instructions.
All of the interior bulbs are glass wedge base or glass
cartridge types. Aluminum base bulbs are not approved
and should not be used for replacement.
326 MAINTAINING YOUR VEHICLE
Page 371 of 380
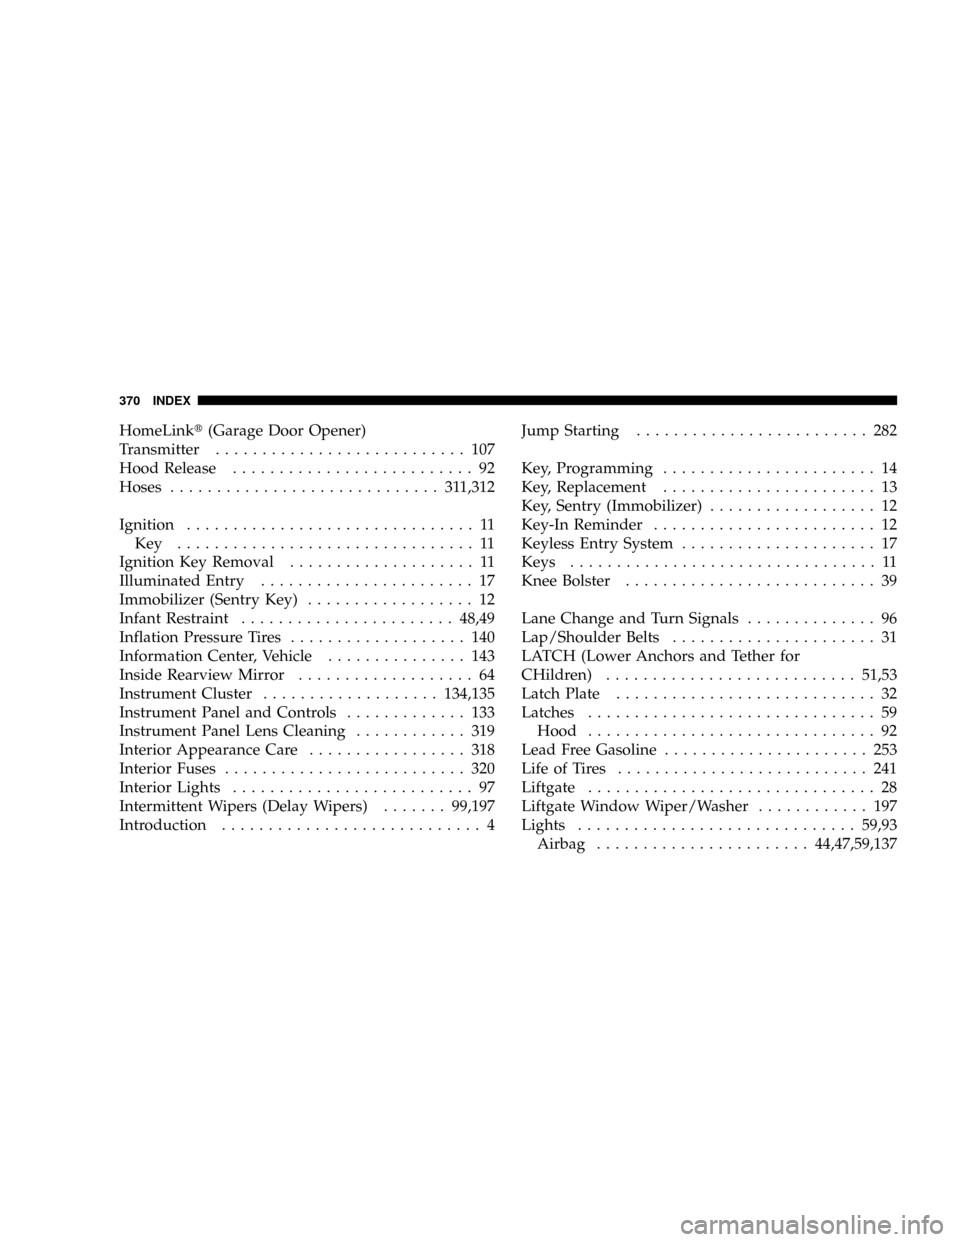
HomeLinkt(Garage Door Opener)
Transmitter........................... 107
Hood Release.......................... 92
Hoses............................. 311,312
Ignition............................... 11
Key ................................ 11
Ignition Key Removal.................... 11
Illuminated Entry....................... 17
Immobilizer (Sentry Key).................. 12
Infant Restraint.......................48,49
Inflation Pressure Tires................... 140
Information Center, Vehicle............... 143
Inside Rearview Mirror................... 64
Instrument Cluster...................134,135
Instrument Panel and Controls............. 133
Instrument Panel Lens Cleaning............ 319
Interior Appearance Care................. 318
Interior Fuses.......................... 320
Interior Lights.......................... 97
Intermittent Wipers (Delay Wipers).......99,197
Introduction............................ 4Jump Starting......................... 282
Key, Programming....................... 14
Key, Replacement....................... 13
Key, Sentry (Immobilizer).................. 12
Key-In Reminder........................ 12
Keyless Entry System..................... 17
Keys................................. 11
Knee Bolster........................... 39
Lane Change and Turn Signals.............. 96
Lap/Shoulder Belts...................... 31
LATCH (Lower Anchors and Tether for
CHildren)...........................51,53
Latch Plate............................ 32
Latches............................... 59
Hood............................... 92
Lead Free Gasoline...................... 253
Life of Tires........................... 241
Liftgate............................... 28
Liftgate Window Wiper/Washer............ 197
Lights..............................59,93
Airbag.......................44,47,59,137
370 INDEX