key battery DODGE MAGNUM SRT 2007 1.G Owners Manual
[x] Cancel search | Manufacturer: DODGE, Model Year: 2007, Model line: MAGNUM SRT, Model: DODGE MAGNUM SRT 2007 1.GPages: 380, PDF Size: 6.63 MB
Page 10 of 380
THINGS TO KNOW BEFORE STARTING YOUR VEHICLE
CONTENTS
mA Word About Your Keys.................11
NIgnition Key Removal...................11
NKey-In-Ignition Reminder................12
mSentry Key............................12
NReplacement Keys......................13
NCustomer Key Programming..............14
NGeneral Information....................15
mSecurity Alarm System Ð If Equipped.......15
NRearming Of The System.................15
NTo Arm The System.....................15
NTo Disarm The System...................16
mIlluminated Entry System.................17
mRemote Keyless Entry....................17
NTo Unlock The Doors...................18
NTo Lock The Doors.....................18
NUsing The Panic Alarm..................19
NProgramming Additional Transmitters........19
NBattery Replacement....................19
NGeneral Information....................20
mDoor Locks...........................21
NManual Door Locks.....................21
NPower Door Locks.....................22
2
Page 17 of 380
To Disarm the System:
Either press the UNLOCK button on the remote keyless
entry transmitter or insert a valid sentry key into the
ignition lock cylinder and turn the key to the ON/START
position.
If you open the liftgate after disarming the system, you
must use one of the previously described arming se-
quences if you wish to rearm the system after closing the
liftgate.
NOTE:
²
The driver's door key cylinder cannot arm or disarm
the system.
²Once the alarm is set, you have a 30-second one-time
access into the liftgate area. If the liftgate is not opened
within 30 seconds, the liftgate will automatically re-
lock within 10 seconds.
²The system remains armed during liftgate entry. If
someone enters the vehicle through the liftgate, and
opens any door, the alarm will sound.
²When the system is armed, the interior power door
lock switches will not unlock the doors.The Vehicle Security Alarm system is designed to protect
your vehicle; however, you can create conditions where
the system will give you a false alarm. If one of the
previously described arming sequences has occurred, the
system will arm regardless of whether you are in the
vehicle or not. If you remain in the vehicle and open a
door, the alarm will sound. If this occurs, disarm the
system.
The alarm system will be activated when the battery is
connected if the system was previously armed. The
exterior lights will flash, the horn will sound, and the
ignition will not start the vehicle. If this occurs, disarm
the system.
Tamper Alert
If something has triggered the system in your absence,
the horn will sound three times when you disarm the
system. Check the vehicle for tampering.
16 THINGS TO KNOW BEFORE STARTING YOUR VEHICLE
Page 20 of 380
Sound Horn with Remote Key Lock
This feature will cause the horn to chirp when the doors
are locked with the transmitter. This feature can be
enabled or disabled. For details on how to change the
current setting, refer to ªSound Horn with Remote Key
Lock,º under ªPersonal Settings (Customer Program-
mable Features),º under ªElectronic Vehicle Information
Center (EVIC)º in Section 4 of this manual.
Using The Panic Alarm:
To turn the panic alarm feature ON or OFF, press and
hold the PANIC button on the transmitter for at least one
second and release. When the panic alarm is on, the
headlights and park lights will flash, the horn will pulse
on and off, and the interior lights will turn on.
The panic alarm will stay on for 3 minutes unless you
turn it off by either pressing the PANIC button a second
time or drive the vehicle at a speed of 15 mph (24 km/h)
or greater.
NOTE:
²
The interior lights will turn off if you turn the ignitionswitch to the ACC or ON position while the panic
alarm is activated. However, the exterior lights and
horn will remain on.
²You may need to be less than 23 feet (7 meters) from
the vehicle when using the transmitter to turn off the
panic alarm due to the radio frequency noises emitted
by the system.
Programming Additional Transmitters
Refer to SENTRY KEY ªCustomer Key Programming.º
(See page 14 for more information.)
If you do not have a programmed transmitter, contact
your dealer for details.
Battery Replacement
The recommended replacement battery is CR2032.
NOTE:Do not touch the battery terminals that are on
the back housing or the printed circuit board.
1. With the transmitter buttons facing downward, re-
move the small screw (if equipped).
THINGS TO KNOW BEFORE STARTING YOUR VEHICLE 19
2
Page 21 of 380
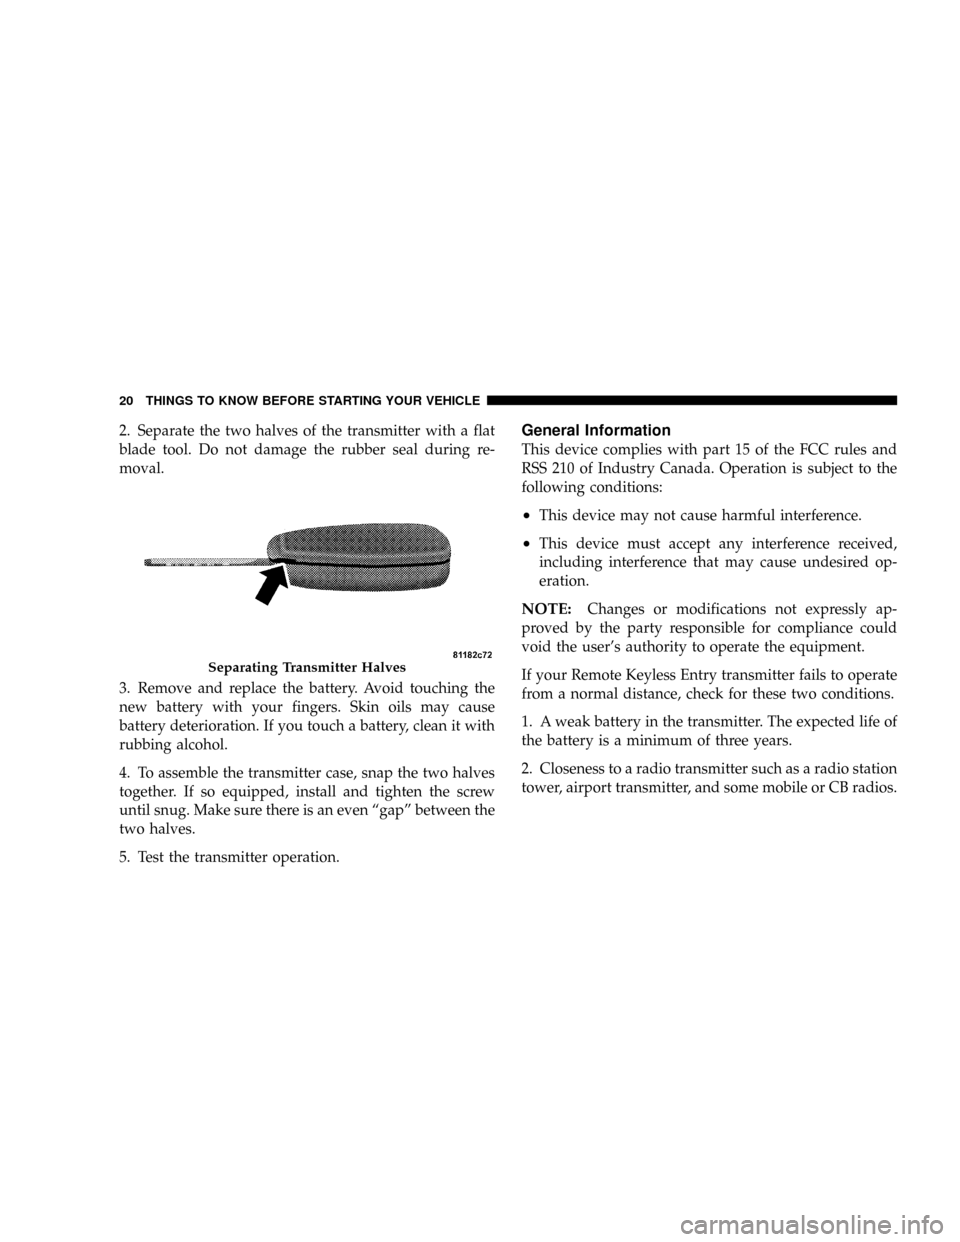
2. Separate the two halves of the transmitter with a flat
blade tool. Do not damage the rubber seal during re-
moval.
3. Remove and replace the battery. Avoid touching the
new battery with your fingers. Skin oils may cause
battery deterioration. If you touch a battery, clean it with
rubbing alcohol.
4. To assemble the transmitter case, snap the two halves
together. If so equipped, install and tighten the screw
until snug. Make sure there is an even ªgapº between the
two halves.
5. Test the transmitter operation.General Information
This device complies with part 15 of the FCC rules and
RSS 210 of Industry Canada. Operation is subject to the
following conditions:
²This device may not cause harmful interference.
²This device must accept any interference received,
including interference that may cause undesired op-
eration.
NOTE:Changes or modifications not expressly ap-
proved by the party responsible for compliance could
void the user's authority to operate the equipment.
If your Remote Keyless Entry transmitter fails to operate
from a normal distance, check for these two conditions.
1. A weak battery in the transmitter. The expected life of
the battery is a minimum of three years.
2. Closeness to a radio transmitter such as a radio station
tower, airport transmitter, and some mobile or CB radios.
Separating Transmitter Halves
20 THINGS TO KNOW BEFORE STARTING YOUR VEHICLE
Page 29 of 380
Reset
Any time the vehicle battery is disconnected, or goes
dead, the auto-up function will be disabled. To reactivate
the auto-up feature, perform the following steps after
vehicle power is restored:
1. Pull the window switch up to close window com-
pletely and continue to hold the switch up for an
additional two seconds after the window is closed.
2. Push the window switch down firmly to the second
detent to open the window completely and continue to
hold the switch down for an additional two seconds after
the window is fully open.
Wind Buffeting
Wind buffeting can be described as the perception of
pressure on the ears or a helicopter type sound in the
ears. Your vehicle may exhibit wind buffeting with the
windows down, or the sunroof (if equipped) in certain
open or partially open positions. This is a normal occur-
rence and can be minimized. If the buffeting occurs with
the rear windows open, then open the front and rear
windows together to minimize the buffeting. If the
buffeting occurs with the sunroof open, then adjust the
sunroof opening to minimize the buffeting.
LIFTGATE
The liftgate can be unlocked or locked by the remote
keyless entry transmitter or by activating the power door
lock switches located on the front doors.
28 THINGS TO KNOW BEFORE STARTING YOUR VEHICLE
Page 77 of 380
²After ignition key is switched off, a call can continue
on the UConnectŸ system either until the call ends or
until the vehicle battery condition dictates cessation of
the call on the UConnectŸ system and transfer of the
call to the mobile phone.
²After ignition key is switched to off, a call can continue
on the UConnectŸ system for certain duration, after
which the call is automatically transferred from the
UConnectŸ system to the mobile phone.
²An active call is automatically transferred to the
mobile phone after ignition key is switched to off.
UConnectŸ System Features
Language Selection
To change the language that the UConnectŸ system is
using,
²Press the 'Phone' button to begin.
²After the9Ready9prompt and the following beep, say
the name of the language you wish to switch to
(English, Espanol, or Francais, if so equipped).
²Continue to follow the system prompts to complete
language selection.
After selecting one of the languages, all prompts and
voice commands will be in that language.
NOTE:After every UConnectŸ language change op-
eration, only the language specific 32-name phonebook is
usable. The paired phone name is not language specific
and usable across all languages.
Emergency Assistance
If you are in an emergency and the mobile phone is
reachable:
²Pick up the phone and manually dial the emergency
number for your area.
If the phone is not reachable and the UConnectŸ system
is operational, you may reach the emergency number as
follows:
²Press the 'Phone' button to begin.
²After the9Ready9prompt and the following beep, say
9Emergency9and the UConnectŸ system will instruct
the paired cellular phone to call the emergency num-
ber. This feature is only supported in the USA.
76 UNDERSTANDING THE FEATURES OF YOUR VEHICLE
Page 80 of 380
your cell phone, the UConnectŸ system will provide
notification to inform you of your phone and network
status when you are attempting to make a phone call
using UConnectŸ. The status is given for roaming net-
work signal strength, phone battery strength, etc.
Dialing Using the Cellular Phone Keypad
You can dial a phone number with your cellular phone
keypad and still use the UConnectŸ system (while
dialing via the cell phone keypad, the user must exercise
caution and take precautionary safety measures). By
dialing a number with your paired BluetoothŸ cellular
phone, the audio will be played through your vehicle's
audio system. The UConnectŸ system will work the
same as if you dial the number using voice recognition.
NOTE:Certain brands of mobile phones do not send
the dial ring to the UConnectŸ system to play it on the
vehicle audio system, so you will not hear it. Under this
situation, after successfully dialing a number, the user
may feel that the call did not go through even though the
call is in progress. Once your call is answered, you will
hear the audio.
Mute/Un-mute (Mute off)
When you mute the UConnectŸ system, you will still be
able to hear the conversation coming from the other
party, but the other party will not be able to hear you. In
order to mute the UConnectŸ system:
²Press the 'Voice Recognition' button.
²After the9Ready9prompt and the following beep, say
9Mute.9
In order to un-mute the UConnectŸ system:
²Press the 'Voice Recognition' button.
²After the9Ready9prompt and the following beep, say
9Mute-off.9
Information Service
When using AT&T Wireless Service, dialing to phone
number9#121,9you can access voice activated automated
system to receive news, weather, stocks, traffic, etc.
related information.
UNDERSTANDING THE FEATURES OF YOUR VEHICLE 79
3
Page 98 of 380
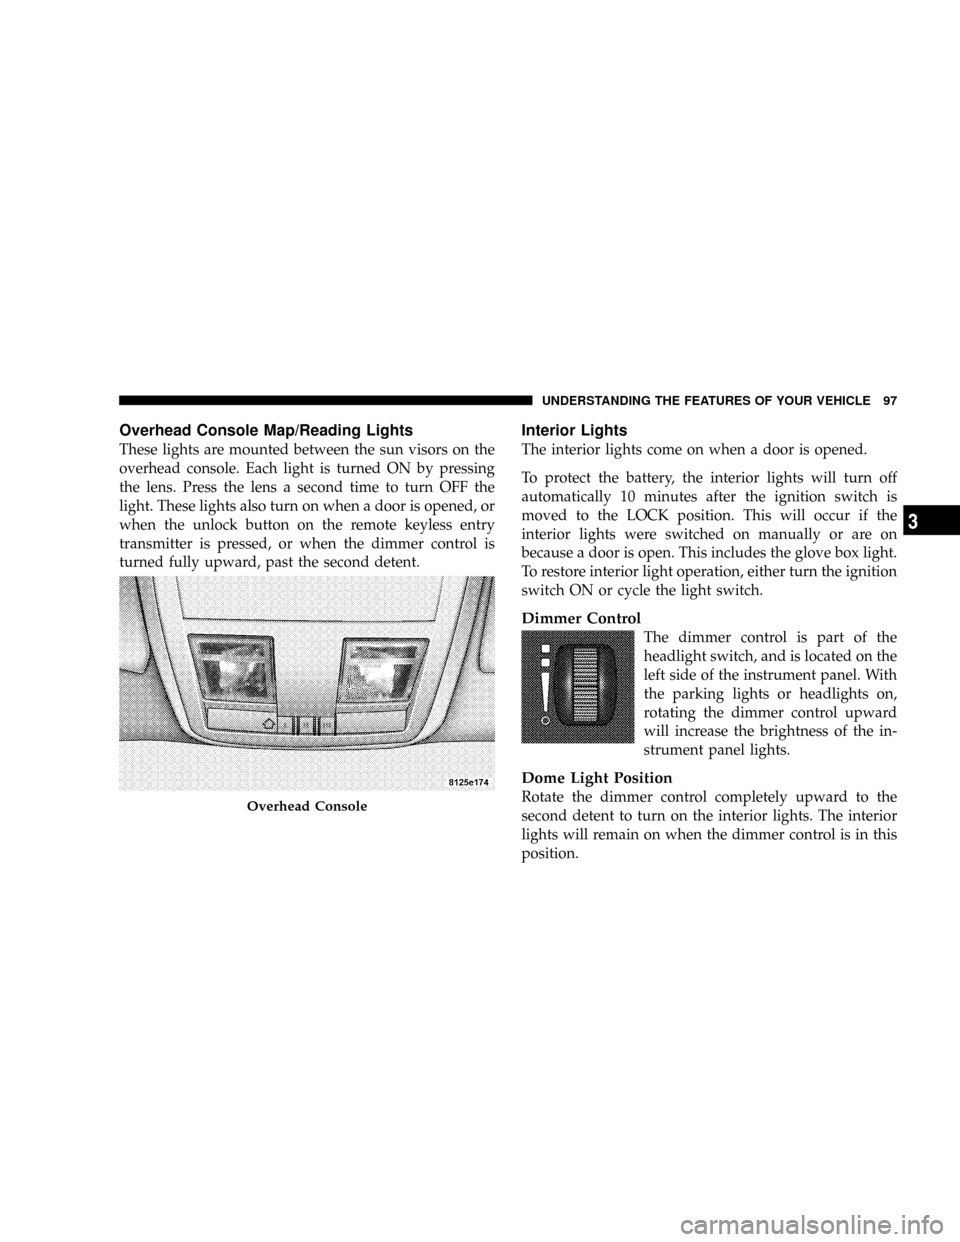
Overhead Console Map/Reading Lights
These lights are mounted between the sun visors on the
overhead console. Each light is turned ON by pressing
the lens. Press the lens a second time to turn OFF the
light. These lights also turn on when a door is opened, or
when the unlock button on the remote keyless entry
transmitter is pressed, or when the dimmer control is
turned fully upward, past the second detent.
Interior Lights
The interior lights come on when a door is opened.
To protect the battery, the interior lights will turn off
automatically 10 minutes after the ignition switch is
moved to the LOCK position. This will occur if the
interior lights were switched on manually or are on
because a door is open. This includes the glove box light.
To restore interior light operation, either turn the ignition
switch ON or cycle the light switch.
Dimmer Control
The dimmer control is part of the
headlight switch, and is located on the
left side of the instrument panel. With
the parking lights or headlights on,
rotating the dimmer control upward
will increase the brightness of the in-
strument panel lights.
Dome Light Position
Rotate the dimmer control completely upward to the
second detent to turn on the interior lights. The interior
lights will remain on when the dimmer control is in this
position.Overhead Console
UNDERSTANDING THE FEATURES OF YOUR VEHICLE 97
3
Page 207 of 380
WARNING!
²Never pour fuel or other flammable liquid into
the throttle body air inlet opening in an attempt to
start the vehicle. This could result in flash fire
causing serious personal injury.
²Do not attempt to push or tow your vehicle to get
it started. Vehicles equipped with an automatic
transmission cannot be started this way. Un-
burned fuel could enter the catalytic converter and
once the engine has started, ignite and damage the
converter and vehicle. If the vehicle has a dis-
charged battery, booster cables may be used to
obtain a start from a booster battery or the battery
in another vehicle. This type of start can be
dangerous if done improperly. See section 6 of
this manual for the proper jump-starting proce-
dures and follow them carefully.
If the engine is flooded, it may start to run, but not have
enough power to continue running when the key is
released. If this occurs, continue cranking up to 15
seconds with the accelerator pedal pushed all the way to
the floor. Release the accelerator pedal and the key once
the engine is running smoothly. Do not overspeed the
engine.
If the engine shows no sign of starting after two 15-
second periods of cranking with the accelerator pedal
held to the floor, the ªNORMAL STARTINGº procedure
should be repeated.
After Starting
The idle speed is controlled automatically and it will
decrease as the engine warms up.
206 STARTING AND OPERATING
Page 294 of 380
A loose, improperly installed, or damaged fuel filler cap
may also turn on the Malfunction Indicator Light (MIL).
EMISSIONS INSPECTION AND MAINTENANCE
PROGRAMS
In some localities, it may be a legal requirement to pass
an inspection of your vehicle's emissions control system.
Failure to pass could prevent vehicle registration.
For states, which have an I/M (Inspection and
Maintenance) requirement, this check verifies the
following: the MIL (Malfunction Indicator Lamp)
is functioning and is not on when the engine is running,
and that the OBD (On Board Diagnostic) system is ready
for testing.
Normally, the OBD system will be ready. The OBD
system maynotbe ready if your vehicle was recently
serviced, if you recently had a dead battery, or a battery
replacement. If the OBD system should be determined
not ready for the I/M test, your vehicle may fail the test.Your vehicle has a simple ignition key actuated test,
which you can use prior to going to the test station. To
check if your vehicle's OBD system is ready, you must do
the following:
1. Insert your ignition key into the ignition switch.
2. Turn the ignition to the ON position, but do not crank
or start the engine.
3. If you crank or start the engine, you will have to start
this test over.
4. As soon as you turn your key to the ON position, you
will see your MIL symbol come on as part of a normal
bulb check.
5. Approximately 15 seconds later, one of two things will
happen:
a. The MIL will flash for about 10 seconds and then
return to being fully illuminated until you turn off
the ignition key or start the engine. This means that
your vehicle's OBD system isnot readyand you
shouldnotproceed to the I/M station.
MAINTAINING YOUR VEHICLE 293
7