air conditioning DODGE NITRO 2010 1.G User Guide
[x] Cancel search | Manufacturer: DODGE, Model Year: 2010, Model line: NITRO, Model: DODGE NITRO 2010 1.GPages: 72, PDF Size: 11.5 MB
Page 16 of 72

WARNING!
Be certain that the seatback is securely locked into position. If the seatback is not
securely locked into position, the seat willnot provide the proper stability for child
seats and/or passengers. An improperly latched seat could cause serious injury.
Recliner Adjustment
• Pull the release strap while sitting in the rear seat to recline the seatback.
HEATED SEATS
Front Heated Seats
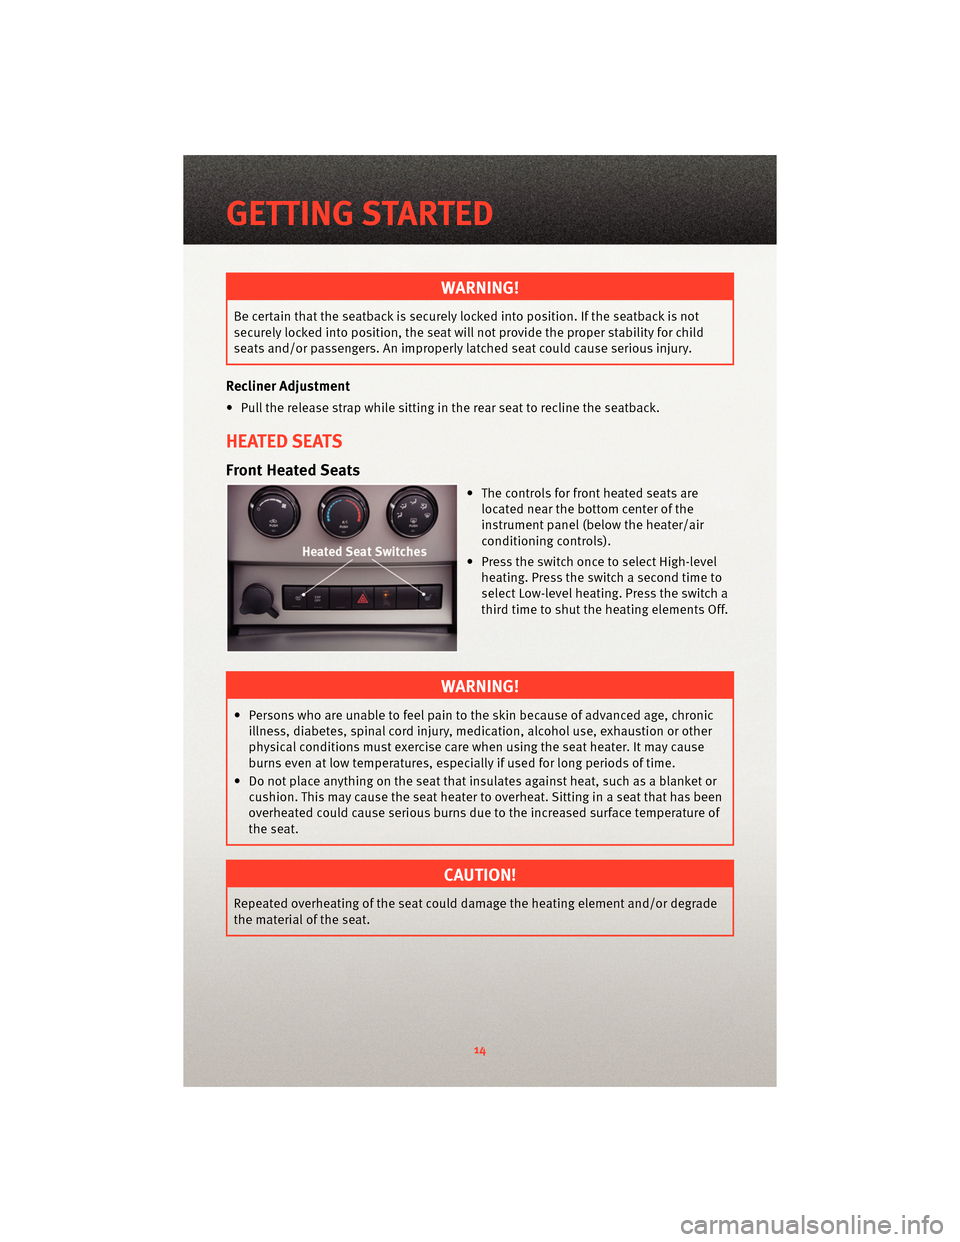
• The controls for fr ont heatedseats are
located near the bottom center of the
instrument panel (below the heater/air
conditioning controls).
• Press the switch once to select High-level heating. Press the switch a second time to
select Low-level heating. Press the switch a
third time to shut the heating elements Off.
WARNING!
• Persons who are unable to feel pain to the skin because of advanced age, chronicillness, diabetes, spinal cord injury, medication, alcohol use, exhaustion or other
physical conditions must exercise care when using the seat heater. It may cause
burns even at low temperatures, especially if used for long periods of time.
• Do not place anything on the seat that insulates against heat, such as a blanket or cushion. This may cause the seat heater to overheat. Sitting in a seat that has been
overheated could cause serious burns due to the increased surface temperature of
the seat.
CAUTION!
Repeated overheating of the seat could damage the heating element and/or degrade
the material of the seat.
GETTING STARTED
14
Page 23 of 72

Air Conditioning (A/C)
• If the air conditioning button is pressed while in the AUTO mode, the indicator lightmay flash three times to indicate the cabin air is being controlled automatically.
Air Recirculation
• Use recirculation for maximum A/C operation.
• For window defogging, turn the air recirculation button off.
• If the recirculation button is pressed while in the AUTO mode, the indicator light may flash three times to indicate the cabin air is being controlled automatically.
PARKSENSE®REAR PARK ASSIST
• If an object is detected behind the rear bumper while the vehicle is in REVERSE, awarning will display in the instrument cluster and a chime will sound. The chime rate
will change depending on the distance of the object, getting faster as the object gets
closer to the bumper.
POWER SUNROOF
• The power sunroof switch is located on the overhead console.
WARNING!
• Never leave children in a vehicle with the key in the ignition switch. Occupants,particularly unattended children, can become entrapped by the power sunroof
while operating the power sunroof switch. Such entrapment may result in serious
injury or death.
• In an accident, there is a greater risk of being thrown from a vehicle with an open sunroof. You could also be seriously injured or killed. Always fasten your seat belt
properly and make sure all passengers are properly secured too.
• Do not allow small children to operate the sunroof. Never allow your fingers, other
body parts, or any object to project through the sunroof opening. Injury may result.
Opening Sunroof
Express
• Press the switch rearward and release. The sunroof will fully open and stop
automatically.
Closing Sunroof
Express
• Press the switch forward and release. The sunroof will close automatically from anyposition.
21
OPERATING YOUR VEHICLE
Page 62 of 72

Cavity Cartridge Fuse Mini-FuseDescription
M10 20 Amp Yellow Ignition Off Draw — Vehicle Entertainment
System (IOD-VES), Satellite Digital Audio
Receiver (SDARS), DVD, Hands-Free Module
(HFM), RADIO, Antenna (ANT), Universal
Garage Door Opener (UGDO), Vanity Lamp
(VANITY LP)
M11 10 Amp Red (Ignition Off Draw) IOD-HVAC/ATC, MW
SENSR, Underhood Lamp (UH LMP)
M12 30 Amp Green Amplifier (AMP)
M13 20 Amp Yellow Ignition Off Draw— Cabin Compartment
Node (IOD-CCN), Wireless Control Module
(WCM), SIREN, Clock Module (CLK MOD),
Multifunction Control Switch (MULTIFCTN
SW)
M14 20 Amp Yellow Trailer Tow (Export Only)
M15 20 Amp Yellow COL MOD, IR SNS, Heater Ventilation, Air
Conditioning/Automatic Temperature
Control (HVAC/ATC), Rearview Mirror (RR VW
MIR), Cabin Compartment Node (CCN),
Transfer Case Switch (T-CASE SW), RUN/ST,
Multifunction Control Switch (MULTIFTCN
SW), Tire Pressure Monitor (TPM), Glow Plug
Module (GLW PLG MOD) — Export Diesel
Only
M16 10 Amp Red Occupant Restraint Controller/Occupant
Classification Module (ORC/OCM)
M17 15 Amp Blue Left Tail/License/Park Lamp (LT-TAIL/LIC/
PRK LMP)
M18 15 Amp Blue Right Tail/Park/Run Lamp (RT-TAIL/PRK/RUN
LMP)
M19 25 Amp
NaturalAuto Shut Down (ASD #1 and #2)
M20 15 Amp Blue Cabin Compartment Node Interior Light
(CCN INT LIGHT), Switch Bank (SW BANK),
Steering Control Module (SCM)
M21 20 Amp Yellow Auto Shut Down (ASD #3)
M22 10 Amp Red Right Horn (RT HORN (HI/LOW)
M23 10 Amp Red Left Horn (LT HORN (HI/LOW)
M24 25 Amp
Natural Rear Wiper (REAR WIPER)
M25 20 Amp Yellow Fuel Pump (FUEL PUMP), Diesel Lift Pump
(DSL LIFT PUMP) — Export Only
M26 10 Amp Red Power Mirror Switch (PWR MIRR SW), Driver
Window Switch (DRVR WIND SW)
M27 10 Amp Red Ignition Switch (IGN SW), Window Module
(WIN MOD)
MAINTAINING YOUR VEHICLE
60
Page 63 of 72

Cavity Cartridge Fuse Mini-FuseDescription
M28 10 Amp Red Next Generation Controller (NGC),
Transmission Feed (TRANS FEED), J1962
M29 10 Amp Red Occupant Classification Module (OCM)
M30 15 Amp Blue Rear Wiper Module (RR WIPER MOD), Power
Folding Mirror (PWR FOLD MIR)
M31 20 Amp Yellow Back-Up Lamps (B/U LAMPS)
M32 10 Amp Red Occupant Restraint Controller (ORC), TT
EUROPE
M33 10 Amp Red Next Generation Controller (NGC), Global
Powertrain Engine Controller (GPEC)
M34 10 Amp Red Park Assist(PRK ASST), Heat er Ventilation,
Air Conditioning Module (HVAC MOD),
Headlamp Wash (HDLP WASH), Compass
(COMPAS)
M35 10 Amp Red Heated Mirrors
M36 20 Amp Yellow Power Outlet #3 (BATT)
M37 10 Amp Red Anti-Lock Brake System (ABS), Electronic
Stability Program (ESP), Stop Lamp Switch
(STP LP SW), Fuel Pump Rly Hi Control
M38 25 Amp
NaturalLock/Unlock Motors (LOCK/UNLOCK MTRS)
TIRE PRESSURES
• Check the inflation pressure of each tire, including the spare tire, at least monthly and
inflate to the recommended pressure for your vehicle.
• The tire pressures recommended for your vehicle are found on the “Tire and Loading Information” label located on the driver’s side door opening.
NOTE: Refer to the Owner's Manual on the DVD for more information on the life of tires.
WARNING!
Overloading of your tires is dangerous. Ov erloading can causetire failure, affect
vehicle handling, and increase your stopping distance. Use tires of the recommended
load capacity for your vehicle. Never overload them.
61
MAINTAINING YOUR VEHICLE