engine DODGE POWER WAGON 2007 2.G User Guide
[x] Cancel search | Manufacturer: DODGE, Model Year: 2007, Model line: POWER WAGON, Model: DODGE POWER WAGON 2007 2.GPages: 492, PDF Size: 8.25 MB
Page 27 of 492
either of these conditions, or if the Vehicle Theft Alarm is
alarming, or if the PANIC button was pressed, the vehicle
must be reset by inserting a valid key into the ignition
and moving it to the RUN position, then back to LOCK.
The parking lamps will remain illuminated to indicate
that the vehicle has remote started and the engine is
running. The lamps will turn off when the ignition is
turned to RUN or the remote start is cancelled.
DOOR LOCKS
Manual Door Locks
Front and Rear doors may be locked, by moving the lock
plunger up or down.
All doors may be opened with the inside door handle
without lifting the lock plunger. Doors locked before
closing will remain locked when closed.
The ignition key will unlock all the locks on your vehicle.
WARNING!
²For personal security and safety in the event of an
accident, lock the vehicle doors when you drive as
well as when you park and leave the vehicle.
²Never leave children alone in a vehicle. Leaving
children in a vehicle unattended is dangerous for
a number of reasons. A child or others could be
seriously or fatally injured. Don't leave the keys
in the ignition. A child could operate power
windows, other controls, or move the vehicle.
Power Door Locks Ð If Equipped
A power door lock switch is on each front door trim
panel. Use this switch to lock or unlock the doors.
26 THINGS TO KNOW BEFORE STARTING YOUR VEHICLE
Page 29 of 492
4. Within 15 seconds cycle the key from the LOCK
position to the ON/RUN position a minimum of four
times; ending in the LOCK position(do not start the
engine).
5. Within 30 seconds, press the driver's door lock switch
in the LOCK direction.
6. A single chime will be heard to indicate the feature has
been disabled.
7. To reactivate this feature, repeat the above steps.
8. If a chime is not heard, program mode was canceled
before the feature could be disabled. If necessary, repeat
the above procedure.
Auto Unlock On Exit Ð If Equipped
This feature unlocks all of the doors of the vehicle when
any door is opened. This will occur only after the vehicle
has been shifted into the Park position after the vehicle
has been driven (shifted out of Park and all doors closed).This feature will not operate if there is any manual
operation of the power door locks (Lock or Unlock).
Auto Unlock On Exit Programming Ð If Equipped
Customer Programming sequence to enable or disable
the Auto Unlock Feature:
1. Enter your vehicle and close all doors.
2. Fasten your seat belt (fastening the seat belt will cancel
any chimes that may be confusing during this program-
ming procedure).
3. Insert the key into the ignition.
4. Within 15 seconds, cycle the key from the LOCK
position to the ON/RUN position a minimum of four
times ending in the LOCK position(do not start the
engine).
5. Within 30 seconds, press the driver's door lock switch
in the UNLOCK direction.
28 THINGS TO KNOW BEFORE STARTING YOUR VEHICLE
Page 45 of 492
Enhanced Warning System (BeltAlert) will be reactivated
if the driver's seat belt is unbuckled for more than 10
seconds and the vehicle speed is greater than 5 mph (8
km/h).
The Enhanced Warning System (BeltAlert) can be en-
abled or disabled by your authorized dealer or by
following these steps:
NOTE:The following steps must occur within the first
60 seconds of the ignition switch being turned to the ON
or START position. DaimlerChrysler does not recom-
mend deactivating the Enhanced Warning System
(BeltAlert).
1. With all doors closed and the ignition switch in any
position except On or Start, buckle the driver's seat belt.
2. Turn the ignition switch to the ON position and wait
for the Seat Belt Warning Light to turn off.3. Within 60 seconds of starting the vehicle, unbuckle
and then re-buckle the driver's seat belt at least three
times within 10 seconds, ending with the seat belt
buckled.
4. Turn off the engine. A single chime will sound to
signify that you have successfully completed the pro-
gramming.
The Enhanced Warning System (BeltAlert) can be reacti-
vated by repeating this procedure.
NOTE:Although the Enhanced Warning System
(BeltAlert) has been deactivated, the Seat Belt Warning
Light will continue to illuminate while the driver's seat
belt remains unbuckled.
44 THINGS TO KNOW BEFORE STARTING YOUR VEHICLE
Page 57 of 492
Airbag Light
You will want to have the airbags ready to
inflate for your protection in an impact. While
the airbag system is designed to be mainte-
nance free, if any of the following occurs, have
an authorized dealer service the system promptly:
²The airbag light does not come on or flickers during
the 6 to 8 seconds when the ignition switch is first
turned on.
²The light remains on or flickers after the 6 to 8 second
interval.
²The light flickers or comes on and remains on while
driving.
NOTE:If the speedometer, tachometer or any engine
related gauges are not working, the airbag control mod-
ule may also be disabled. The airbags may not be readyto inflate for your protection. Promptly check fuse num-
bers 52 and 53 in the fuse and relay center. See your
dealer if the fuse is good.
Event Data Recorder (EDR)
In the event of an airbag deployment, your vehicle is
designed to record up to 2-seconds of specific vehicle
data parameters (see list below) in an event data recorder
prior to the moment of airbag deployment. Please note
that such data are ONLY recorded if an airbag deploys,
and are otherwise unavailable. In conjunction with other
data gathered during a complete accident investigation,
the electronic data may be used by DaimlerChrysler
Corporation and others to learn more about the possible
causes of crashes and associated injuries in order to
assess and improve vehicle performance. In addition to
56 THINGS TO KNOW BEFORE STARTING YOUR VEHICLE
Page 59 of 492
²Airbag disable lamp status (if equipped)
²9Time9of airbag deployment (in terms of ignition
cycles and vehicle mileage)
²Airbag deployment level (if applicable)
²Seatbelt status
²Brake status (service and parking brakes)
²Accelerator status (including vehicle speed)
²Engine control status (including engine speed)
²Cruise control status
Child Restraint
Everyone in your vehicle needs to be buckled up all the
time Ð babies and children, too. Every state in the United
States and all Canadian provinces require that small
children ride in proper restraint systems. This is the law,
and you can be prosecuted for ignoring it.Children 12 years and under should ride properly buck-
led up in a rear seat, if available. According to crash
statistics, children are safer when properly restrained in
the rear seats rather than in the front.
WARNING!
In a collision, an unrestrained child, even a tiny
baby, can become a missile inside the vehicle. The
force required to hold even an infant on your lap can
become so great that you could not hold the child, no
matter how strong you are. The child and others
could be badly injured. Any child riding in your
vehicle should be in a proper restraint for the child's
size.
58 THINGS TO KNOW BEFORE STARTING YOUR VEHICLE
Page 71 of 492
Children Too Large for Booster Seats
Children who are large enough to wear the shoulder belt
comfortably, and whose legs are long enough to bend
over the front of the seat when their back is against the
seat back should use the lap/shoulder belt in a rear seat.
²Make sure that the child is upright in the seat.
²The lap portion should be low on the hips and as snug
as possible.
²Check belt fit periodically. A child's squirming or
slouching can move the belt out of position.
If the shoulder belt contacts the face or neck, move the
child closer to the center of the vehicle. Never allow a
child to put the shoulder belt under an arm or behind
their back.
ENGINE BREAK-IN RECOMMENDATIONS
A long break-in period is not required for the engine in
your new vehicle. Drive moderately during the first 300
miles (500 km). After the initial 60 miles (100 km), speeds
up to 50 or 55 mph (80 or 90 km/h) are desirable. While
cruising, brief full-throttle acceleration, within the limits
of local traffic laws, contributes to a good break-in.
Avoid wide open throttle acceleration in low gear.
The engine oil installed in the engine at the factory is a
high quality, energy conserving type lubricant. Oil
changes should be consistent with the anticipated cli-
matic conditions under which vehicle operation will
occur. The recommended viscosity and quality grades are
discussed in Section 7 under Maintenance Procedures,
Engine Oil.
NON-DETERGENT OR STRAIGHT MINERAL OILS
MUST NEVER BE USED.
70 THINGS TO KNOW BEFORE STARTING YOUR VEHICLE
Page 72 of 492
A new engine may consume some oil during its first few
thousand miles of operation. This is a normal part of the
break-in and is not an indication of difficulty.
CAUTION!
²During the first 500 miles (805 km) your new
vehicle is driven, do not tow a trailer. Doing so
may damage your axles, driveline and vehicle.
²Limit your speed to 50 mph (80 km/h) during the
first 500 miles (805 km) of towing.
THINGS TO KNOW BEFORE STARTING YOUR VEHICLE 71
2
Page 79 of 492
POWER WAGON FEATURES
Locking Front and Rear Differentials
Most 4WD trucks are equipped with open differentials
front and rear. This design is used because it allows each
wheel to turn independently helping to eliminate bind-
ing when cornering. A disadvantage of using an open
differential is when one or more wheels lose traction; all
of the power is directed to those wheels resulting in a loss
of momentum. The Power Wagon is equipped with
electronically locking front and rear differentials. These
differentials, when engaged, mechanically lock together
the axle shafts forcing the wheels to spin at an equal rate.
This allows the vehicle to maintain its momentum and
thus prevents it from becoming stuck. The locking front
and rear differentials should only be engaged during
low-speed, extreme off-road situations where one wheel
is likely to not be in contact with the ground. It is notrecommended to drive the vehicle with the differentials
locked on pavement due to the reduced ability to turn
and speed limitations.
4.56:1 Gears
This is the highest axle ratio available in a full-size
pickup. The high gearing helps to compensate for the
increased rolling mass and increase diameter of the
off-road tires. As well, there are many advantages to a
higher axle ratio in off-road applications. When driving
downhill the high gearing enables the driver to use the
engine to slow the vehicle down in a more controlled
manner. When driving up a steep grade, the ratio helps
by keeping the truck in its power band helping to
maintain upward momentum.
78 UNDERSTANDING THE FEATURES OF YOUR VEHICLE
Page 82 of 492
Wheels
Stylish forged aluminum 179wheels give the Power
Wagon a powerful stance. Forging a wheel from alumi-
num produces a stronger, lighter weight wheel than
machining or casting the wheel out of the same material.
Standard package features:
²
Fuel Tank Skid Plate - protects the fuel tank from
impingement damage.
²Transfer Case Skid Plate and Tubing - protects the
transfer case and exhaust catalyst from impingement
damage.
²Heavy Duty Cross Members - protects the under
carriage and supports the under body protection skid
plates.
²Fore/Aft rails - which connect the cross member for
additional support and prevent the truck from getting
hung up on large rocks between the cross members.
²Steering Dampener Skid Plate - protects the steering
dampener from impingement damage.
²Electronically Locking Front And Rear Axle Differen-
tials With 4:56 Gears - improves mobility and articu-
lation by locking the differentials.
²Electronically Disconnecting Stabilizer Bar - improves
mobility and articulation by disconnecting the Stabi-
lizer Bar.
²160 Amp Alternator - supplies increased electrical
power for the winch and other off-road accessories.
²Heavy Duty Battery - supplies increased electrical
power for the winch and other off-road accessories.
²Heavy Duty Cooling Fan - provides enhanced engine
and transmission cooling under vigorous off-road
conditions.
UNDERSTANDING THE FEATURES OF YOUR VEHICLE 81
3
Page 122 of 492
Your vehicle is equipped with plastic headlight lenses
that are lighter and less susceptible to stone breakage
than glass headlights.
Plastic is not as scratch resistant as glass and therefore
different lens cleaning procedures must be followed.To minimize the possibility of scratching the lenses and
reducing light output, avoid wiping with a dry cloth. To
remove road dirt, wash with a mild soap solution fol-
lowed by rinsing.
Do not use abrasive cleaning components, solvents, steel
wool or other abrasive materials to clean the lenses.
Daytime Running Lights (Canada Only and Fleet
Vehicles)
The headlights on your vehicle will illuminate when the
engine is started and the transmission is in any gear
except park. This provides a constant9Lights ON9con-
dition until the ignition is turned OFF. The lights illumi-
nate at less than 50% of normal intensity. If the parking
brake is applied the Daytime Running Lights will turn
off.
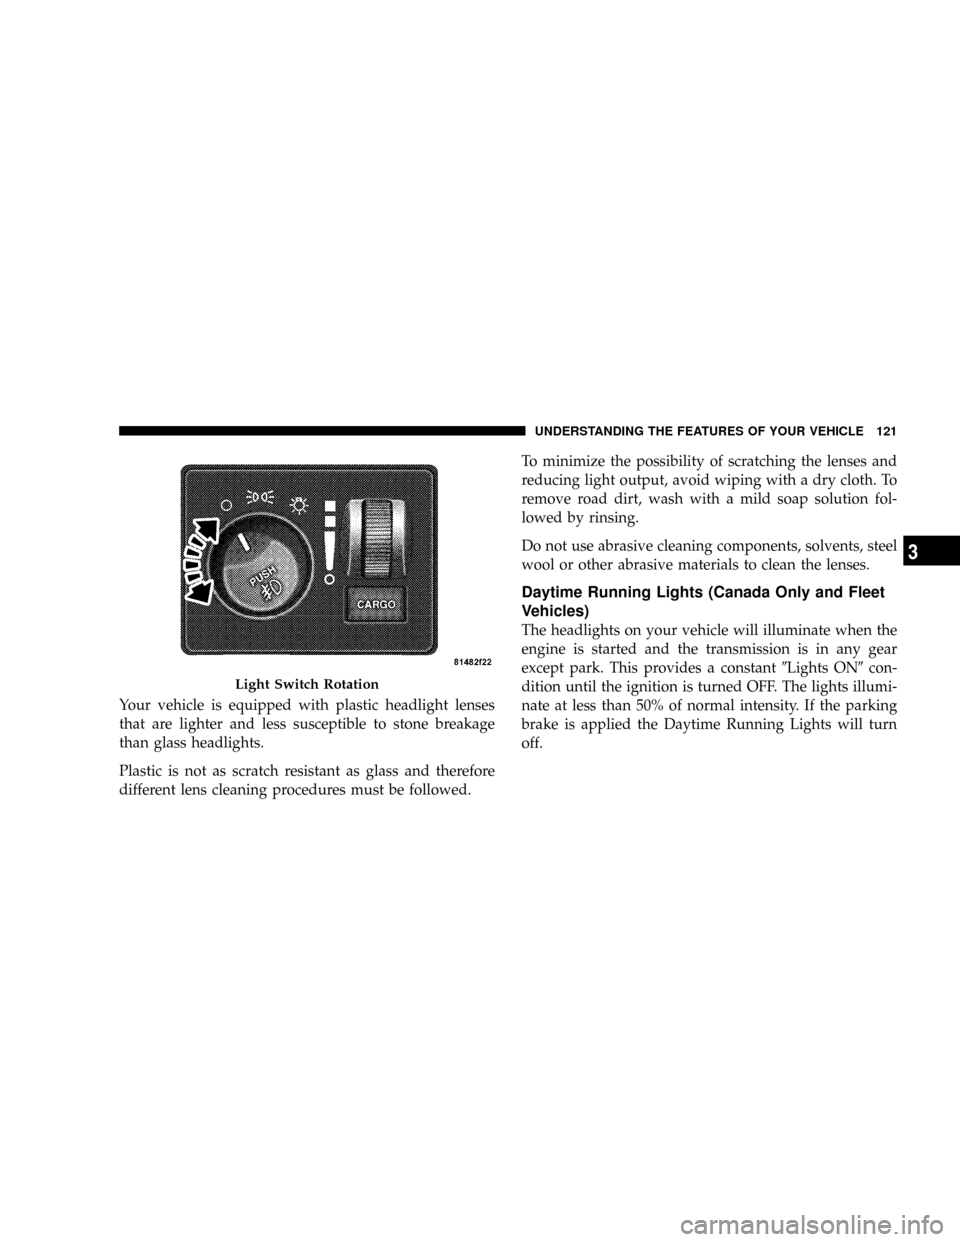
Light Switch Rotation
UNDERSTANDING THE FEATURES OF YOUR VEHICLE 121
3