change time DODGE POWER WAGON 2007 2.G Owners Manual
[x] Cancel search | Manufacturer: DODGE, Model Year: 2007, Model line: POWER WAGON, Model: DODGE POWER WAGON 2007 2.GPages: 492, PDF Size: 8.25 MB
Page 117 of 492
the switch a third time will turn the heated seats OFF. If
you do not purposefully turn the switch OFF, the seat
heating level will automatically change to the next lower
level, or OFF. The High heat level operates for 30 minutes
(approximate), the Low heat level operates for 30 min-
utes (approximate). The seat heat will also turn OFF
when the ignition is turned OFF. Both of the indicators
ON identifies High heat level. The lower indicator On
only, identifies Low heat level. Flashing indicator lights
on the switch indicate that the Heated Seat System needs
servicing.WARNING!
Persons who are unable to feel pain to the skin
because of advanced age, chronic illness, diabetes,
spinal cord injury, medication, alcohol use, exhaus-
tion or other physical condition must exercise care
when using the seat heater. It may cause burns even
at low temperatures, especially if used for long
periods of time.
Do not place anything on the seat that insulates
against heat, such as a blanket or cushion. This may
cause the seat heater to overheat.
116 UNDERSTANDING THE FEATURES OF YOUR VEHICLE
Page 124 of 492

Multifunction Control Lever
The multifunction control lever is located on the left side
of the steering column.
Turn Signals
Move the lever up or down to signal a right-hand or
left-hand turn.
The arrow on either side of the instrument cluster flashes
to indicate the direction of the turn, and proper operation
of the front and rear turn signal lights. If a defective bulb
or wiring circuit is detected for the turn signal system, the
arrow indicators will flash at a faster rate. If an indicator
fails to light when the lever is moved, it would suggest
that the switch or indicator lamp is defective.
You can signal a lane change by moving the lever
partially up or down.
Turn Signal Auto-Mode
Tap the multi-function control lever once and the turn
signal (left or right) will flash 3 times, and automatically
turn off.
Turn Signal Lever
UNDERSTANDING THE FEATURES OF YOUR VEHICLE 123
3
Page 134 of 492
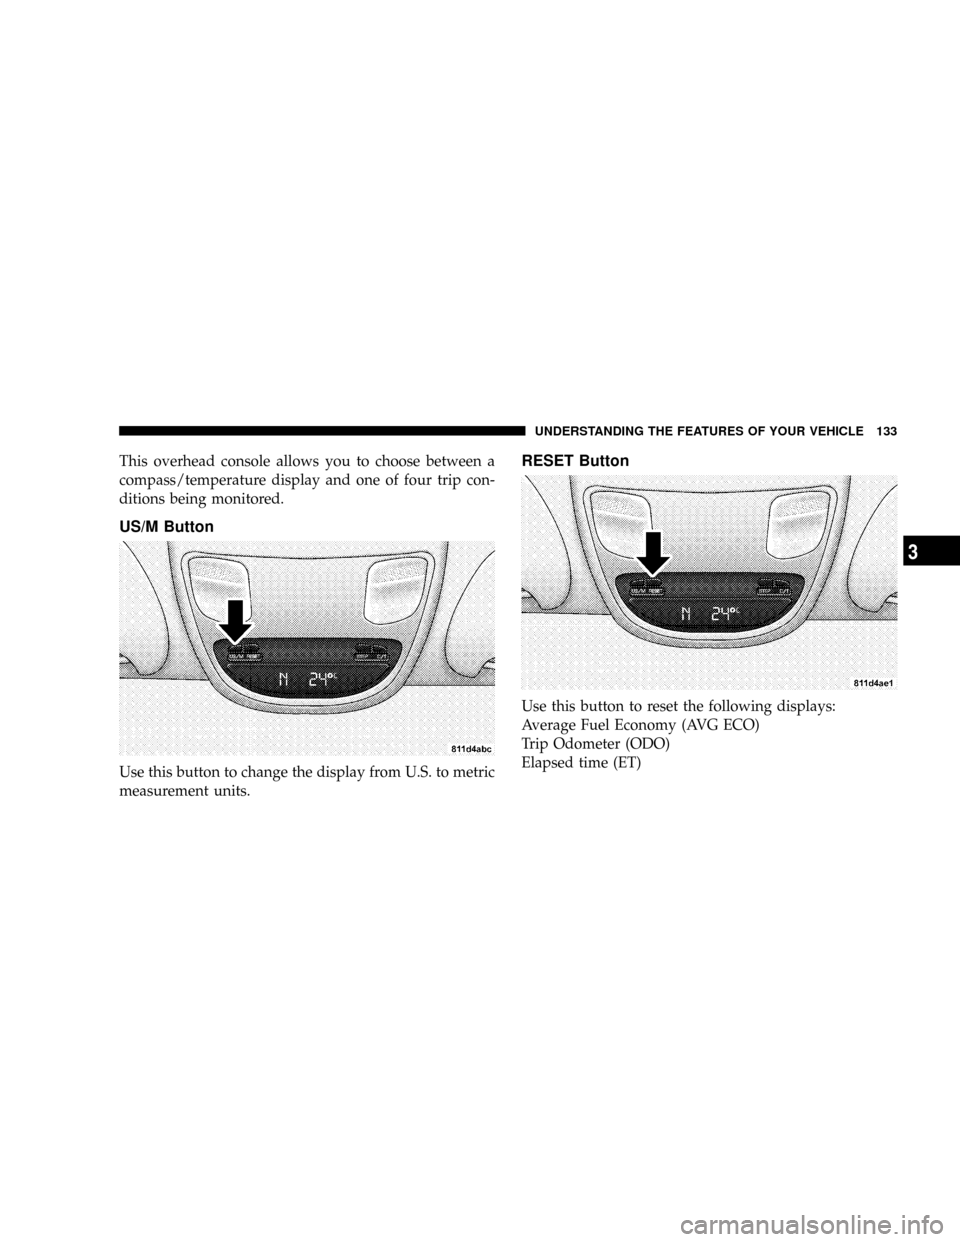
This overhead console allows you to choose between a
compass/temperature display and one of four trip con-
ditions being monitored.
US/M Button
Use this button to change the display from U.S. to metric
measurement units.
RESET Button
Use this button to reset the following displays:
Average Fuel Economy (AVG ECO)
Trip Odometer (ODO)
Elapsed time (ET)
UNDERSTANDING THE FEATURES OF YOUR VEHICLE 133
3
Page 136 of 492
When the DTE value is less than 30 miles estimated
driving distance, the DTE display will change to an
alternating test display of ªLOº and ªFUELº. This dis-
play will continue until the vehicle runs out of fuel.
Adding a significant amount of fuel to the vehicle will
turn off the ªLO FUELº text and a new DTE value will be
displayed, based on the current values in the DTE
calculation and the current fuel tank level.
NOTE:It is possible for DTE to display ªLO FUELº
before the low fuel warning light turns on in the instru-
ment cluster. This could occur because low fuel warning
is set to a specified fuel tank volume and DTE is an
estimated distance calculation based on fuel economy
and remaining fuel tank volume.
Ram fuel tank volumes are as follows:
²34 gallons - short box models
²35 gallons - long box models
Trip Odometer (ODO)
This display shows the distance traveled since the last
reset. Resetting of this screen will cause the trip odometer
to change to Zero.
Elapsed Time (ET)
This display shows the accumulated ignition ON time
since the last reset. Resetting the Elapsed Time will cause
the display to change to Zero.
UNDERSTANDING THE FEATURES OF YOUR VEHICLE 135
3
Page 164 of 492
Exhaust Gas
WARNING!
Exhaust gases contain carbon monoxide, a poten-
tially toxic gas that by itself is colorless and odorless.
To avoid inhaling these gases, the following precau-
tions should be observed:
²Do not run the engine in a closed garage or in confined
areas any longer than needed to move your vehicle in
or out of the area.
²If it is necessary to sit in a parked vehicle with the
engine running for more than a short period, adjust
your climate control system to force outside air into
the vehicle. Set the blower at high speed and the
controls in any position except OFF or MAX A/C.
²The best protection against carbon monoxide entry
into the vehicle body is a properly maintained engine
exhaust system.
Be aware of changes in the sound of the exhaust system;
exhaust fumes detected inside the vehicle; or damage to
the underside or rear of the vehicle. Have a competent
mechanic inspect the complete exhaust system and adja-
cent body areas for broken, damaged, deteriorated or
mispositioned parts. Open seams or loose connections
could permit exhaust fumes to seep into the passenger
compartment. In addition, inspect the exhaust system
each time the vehicle is raised for lubrication or oil
change. Replace or adjust as required.
Safety Checks You Should Make Inside The
Vehicle
Heater Defroster Ducts
Inspect the heater defroster ducts for proper operation.
Check for proper air flow through all defroster ducts. If
UNDERSTANDING THE FEATURES OF YOUR VEHICLE 163
3
Page 189 of 492
²If you insert a disc with the ignition ON and the radio
OFF, the CD will automatically be pulled into the CD
Player.
²This radio does not play discs with MP3 tracks.
SEEK Button (CD Mode)
Press the right side of the SEEK button for the next track
on the CD. Press the left side of the button to return to the
beginning of the current track, or return to the beginning
of the previous track if the CD is within the first 10
seconds of the current selection.
MUTE Button (CD Mode)
Press the MUTE button to cancel the sound from the
speakers.9MUTE9will display. Press the MUTE button a
second time and the sound from the speakers will return.
Rotating the volume control or turning OFF the ignition
will also return the sound from the speakers.
SCAN Button (CD Mode)
Press this button to play the first 10 seconds of each track.
To stop the scan function, press the button a second time.
EJECT Button (CD Mode)
Press this button and the disc will unload and
move to the entrance for easy removal. The
unit will switch to the last selected mode.
If you do not remove the disc within 15 seconds, it will be
reloaded. The radio mode will continue to appear.
TIME Button (CD Mode)
Press this button to change the display from elapsed CD
playing time to time of day. The time of day will display
for 5 seconds.
RW/FF (CD Mode)
Press and hold the FF (Fast Forward) and the CD player
will begin to fast forward until FF is released. The RW
(Reverse) button works in a similar manner.
188 UNDERSTANDING YOUR INSTRUMENT PANEL
Page 190 of 492
RND/SET Button (Random Play Button) (CD
Mode)
Press this button while the CD is playing to activate
Random Play. This feature plays the selections on the
compact disc in random order to provide an interesting
change of pace.
Press the SEEK button to move to the next randomly
selected track.
Press and hold the FF button to fast forward through the
tracks. Release the FF button to stop the fast forward
feature. If the RW button is pressed, the current track will
reverse to the beginning of the track and begin playing.
Press the RND button a second time to stop Random
Play.
Operation Instructions - Auxiliary Mode
The auxiliary (AUX) jack is an audio input jack, which
allows the user to plug in a portable device such as an
MP3 player, cassette player, or microphone and utilize
the vehicle's audio system to amplify the source and play
through the vehicle speakers.
The auxiliary mode becomes active when an electrical
device is plugged into the AUX jack using a standard 3.5
mm stereo audio cable and the user presses and releases
the MODE button until AUX appears on the display.
NOTE:The radio will return to the last stored mode if
the ignition switch is turned from the OFF/LOCK posi-
tion to the ACC position, the radio is turned on, and the
radio was previously in the AUX mode.
SEEK Button (Auxiliary Mode)
No function.
UNDERSTANDING YOUR INSTRUMENT PANEL 189
4
Page 191 of 492
MUTE Button (Auxiliary Mode)
Press the MUTE button to cancel the sound from the
speakers.9MUTE9will display. Press the MUTE button a
second time and the sound from the speakers will return.
Rotating the volume control or turning OFF the ignition
will also return the sound from the speakers.
SCAN Button (Auxiliary Mode)
No function.
EJECT Button (Auxiliary Mode)
No function.
PSCAN Button (Auxiliary Mode)
No function.
TIME Button (Auxiliary Mode)
Press this button to change the display from elapsed
playing time to time of day. The time of day will display
for 5 seconds.
RW/FF (Auxiliary Mode)
No function.
RND/SET Button (Auxiliary Mode)
No function.
Mode Button (Auxiliary Mode)
Press the mode button repeatedly to select between the
CD player and Satellite Radio (if equipped).
Operating Instructions - Hands Free Phone Ð If
Equipped
Refer to the ªHANDS FREE PHONE (UConnectŸ)º
section of the Owner's Manual.
190 UNDERSTANDING YOUR INSTRUMENT PANEL
Page 200 of 492
radio, the radio will remain in CD mode and display
9INSERT DISCº for 10 seconds. If no discs are inserted
within 10 seconds ªNO DISCS LOADEDº will be dis-
played.
On some vehicles a disc can be ejected with the radio and
ignition OFF.
TIME Button (CD MODE for CD Audio Play)
Press this button to change the display from a large CD
playing time display to a small CD playing time display.
RW/FF (CD MODE for CD Audio Play)
Press and hold FF (Fast Forward) and the CD player will
begin to fast forward until FF is released or RW or
another CD button is pressed. The RW (Reverse) button
works in a similar manner.
TUNE Control (CD MODE for CD Audio Play)
Pressing the TUNE control allows the setting of the Tone,
Fade, and Balance. See Radio Mode.
AM/FM Button (CD MODE for CD Audio Play)
Switches the Radio to the Radio mode.
RND/PTY Button (Random Play Button) (CD
MODE for CD Audio Play)
Press this button while the CD is playing to activate
Random Play. This feature plays the selections on the
compact disc in random order to provide an interesting
change of pace.
Press the SEEK button to move to the next randomly
selected track.
Press and hold the FF button to fast forward through the
tracks. Release the FF button to stop the fast forward
feature.
Press the RND button a second time to stop Random
Play.
Buttons1-6(CDMODE for CD Audio Play)
Selects disc positions1-6forPlay/Load/Eject.
UNDERSTANDING YOUR INSTRUMENT PANEL 199
4
Page 211 of 492
Fast Forward (FF)
Press the FF button up momentarily to advance the tape
in the direction that it is playing. The tape will advance
until the button is pressed again or the end of the tape is
reached. At the end of the tape, the tape will play in the
opposite direction.
Rewind (RW)
Press the RW button momentarily to reverse the tape
direction. The tape will reverse until the button is pressed
again or until the end of the tape is reached. At the end of
the tape, the tape will play in the opposite direction.
Tape Eject
Press this button and the cassette will disen-
gage and eject from the radio.
Scan Button
Press this button to play 10 seconds of each selection.
Press the scan button a second time to cancel the feature.
Changing Tape Direction
If you wish to change the direction of tape travel (side
being played), press Preset 6. The lighted arrow in the
display window will show the new direction.
Metal Tape Selection
If a standard metal tape is inserted into the player, the
player will automatically select the correct equalization.
Pinch Roller Release
If ignition power or the radio ON/OFF switch is turned
off, the pinch roller will automatically retract to protect
the tape from any damage. When power is restored to the
tape player, the pinch roller will automatically reengage
and the tape will resume play.
210 UNDERSTANDING YOUR INSTRUMENT PANEL