battery DODGE RAM SRT-10 2006 Service User Guide
[x] Cancel search | Manufacturer: DODGE, Model Year: 2006, Model line: RAM SRT-10, Model: DODGE RAM SRT-10 2006Pages: 5267, PDF Size: 68.7 MB
Page 46 of 5267
When Monitored:
With the ignition on. Battery voltage greater than 10 volts.
Set Condition:
An open condition is detected in the ASD control circuit. One Trip Fault. Three good trips to turn off the MIL.
Possible Causes
(K342) ASD CONTROL OUTPUT CIRCUIT OPEN
FUEL INJECTOR
IGNITION COIL
PCM
TIPM
Always perform the Pre-Diagnostic Troubleshooting procedure before proceeding. (Refer to 9 - ENGINE -
DIAGNOSIS AND TESTING).
Diagnostic Test
1.ACTIVE DTC
Ignition on, engine not running.
With a scan tool, read DTCs.
Is the DTC active at this time?
Ye s>>
Go To 2
No>>
Refer to the INTERMITTENT CONDITION Diagnostic Procedure.
Perform the POWERTRAIN VERIFICATION TEST. (Refer to 9 - ENGINE - STANDARD PROCEDURE)
2.ASD OPERATION FROM THE PCM
Turn the ignition off.
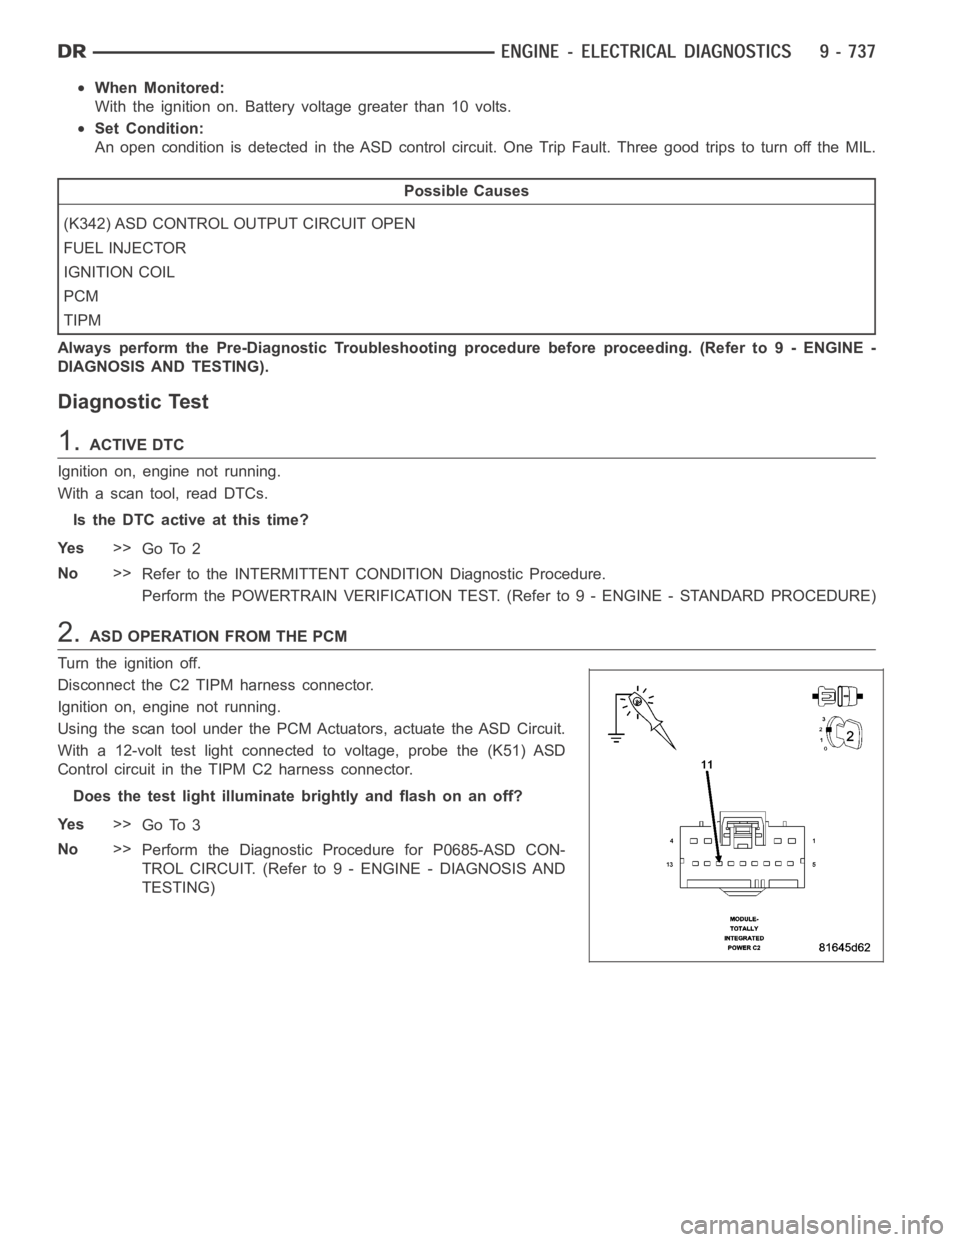
Disconnect the C2 TIPM harness connector.
Ignition on, engine not running.
Using the scan tool under the PCM Actuators, actuate the ASD Circuit.
With a 12-volt test light connected to voltage, probe the (K51) ASD
Control circuit in the TIPM C2 harness connector.
Does the test light illuminate brightly and flash on an off?
Ye s>>
Go To 3
No>>
Perform the Diagnostic Procedure for P0685-ASD CON-
TROL CIRCUIT. (Refer to 9 - ENGINE - DIAGNOSIS AND
TESTING)
Page 50 of 5267
When Monitored:
With the ignition on. Battery voltage greater than 10 volts.
Set Condition:
An overcurrent condition is detected in the ASD control circuit. One Trip Fault. Three good trips to turn off the
MIL.
Possible Causes
(K342) ASD CONTROL OUTPUT CIRCUIT EXCESSIVE RESISTANCE
FUEL INJECTOR
IGNITION COIL
PCM
TIPM
Always perform the Pre-Diagnostic Troubleshooting procedure before proceeding. (Refer to 9 - ENGINE -
DIAGNOSIS AND TESTING).
Diagnostic Test
1.ACTIVE DTC
Ignition on, engine not running.
With a scan tool, read DTCs.
Is the DTC active at this time?
Ye s>>
Go To 2
No>>
Refer to the INTERMITTENT CONDITION Diagnostic Procedure.
Perform the POWERTRAIN VERIFICATION TEST. (Refer to 9 - ENGINE - STANDARD PROCEDURE)
2.ASD OPERATION FROM THE PCM
Turn the ignition off.
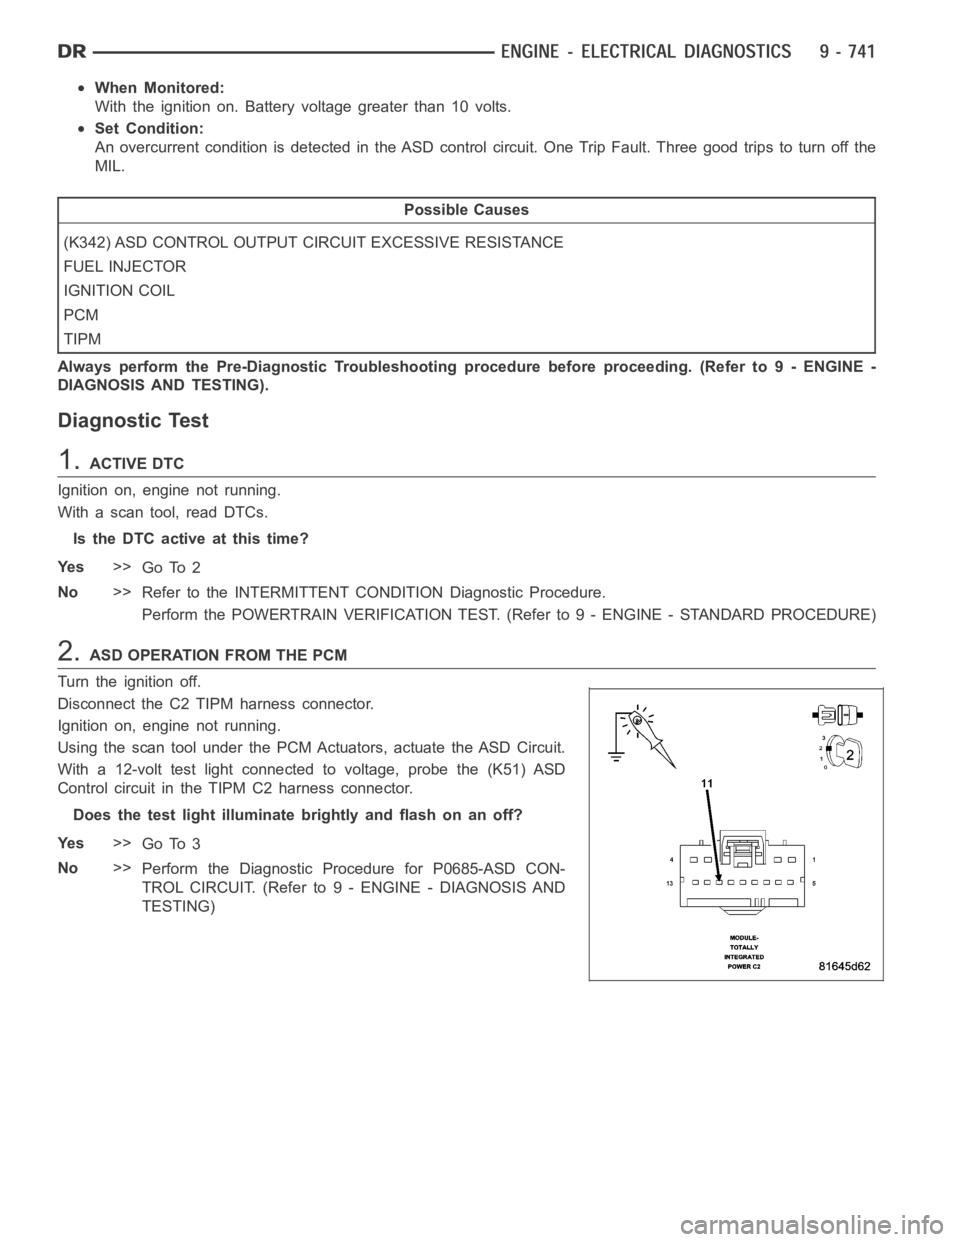
Disconnect the C2 TIPM harness connector.
Ignition on, engine not running.
Using the scan tool under the PCM Actuators, actuate the ASD Circuit.
With a 12-volt test light connected to voltage, probe the (K51) ASD
Control circuit in the TIPM C2 harness connector.
Does the test light illuminate brightly and flash on an off?
Ye s>>
Go To 3
No>>
Perform the Diagnostic Procedure for P0685-ASD CON-
TROL CIRCUIT. (Refer to 9 - ENGINE - DIAGNOSIS AND
TESTING)
Page 54 of 5267
When Monitored:
With the ignition on. Battery voltage greater than 10 volts. A/C Switch on.
Set Condition:
A shorted condition is detected in the A/C clutch relay control circuit. One Trip Fault. Three good trips to turn
off the MIL.
Possible Causes
(C3) A/C COMPRESSOR CLUTCH CONTROL CIRCUIT SHORTED TO GROUND
A/C COMPRESSOR CLUTCH
TIPM
Always perform the Pre-Diagnostic Troubleshooting procedure before proceeding. (Refer to 9 - ENGINE -
DIAGNOSIS AND TESTING).
Diagnostic Test
1.A/C COMPRESSOR CLUTCH OPERATION
Ignition on, engine not running.
With a scan tool under the PCM Actuators, actuate the A/C Clutch.
Is the A/C Clutch actuating?
Ye s>>
Refer to the INTERMITTENT CONDITION Diagnostic Procedure.
Perform the POWERTRAIN VERIFICATION TEST. (Refer to 9 - ENGINE - STANDARD PROCEDURE)
No>>
Go To 2
2.A/C CLUTCH CONTROL OPERATION FROM THE PCM
Turn the ignition off.
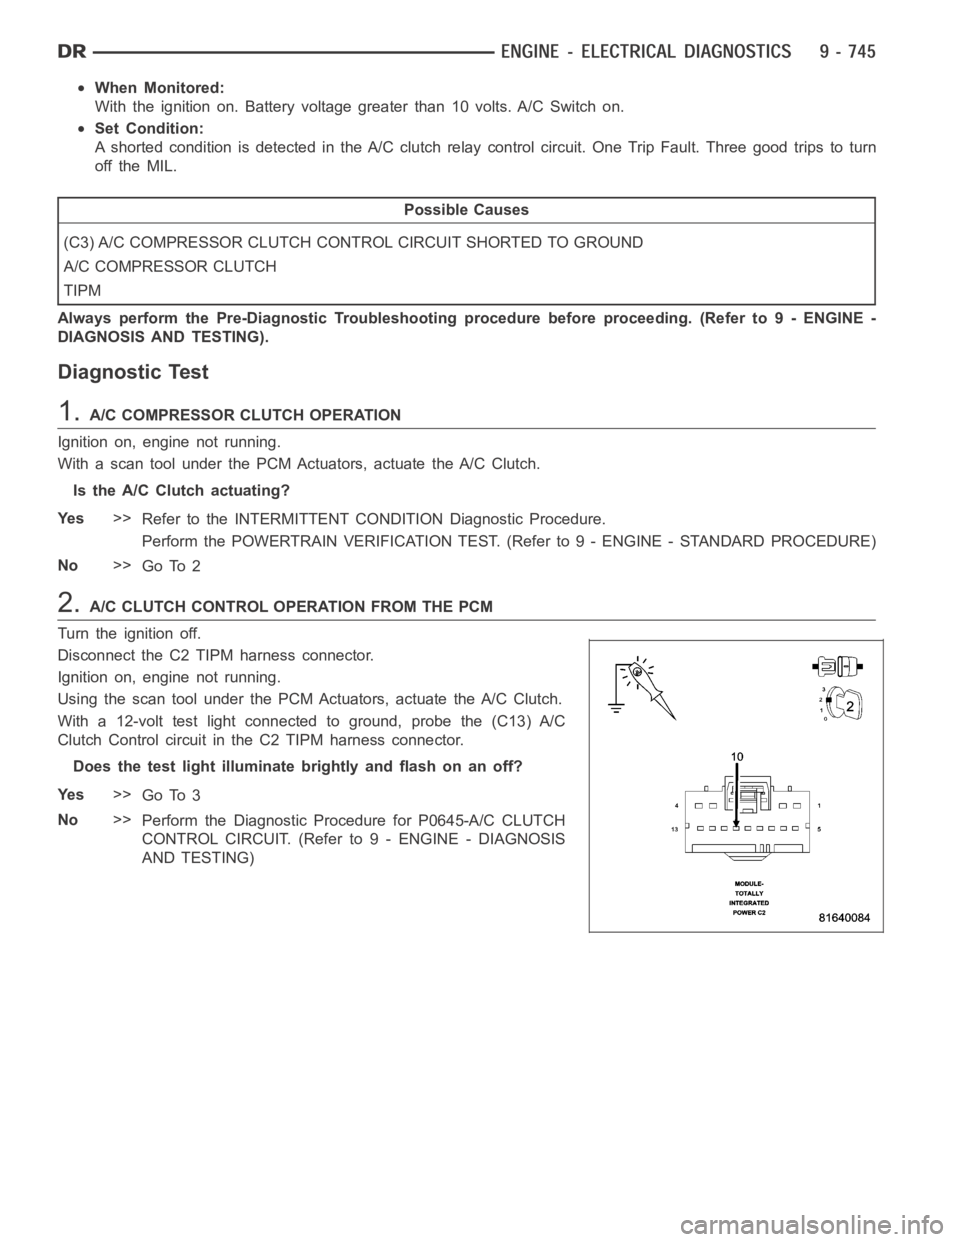
Disconnect the C2 TIPM harness connector.
Ignition on, engine not running.
Using the scan tool under the PCM Actuators, actuate the A/C Clutch.
With a 12-volt test light connected to ground, probe the (C13) A/C
Clutch Control circuit in the C2 TIPM harness connector.
Does the test light illuminate brightly and flash on an off?
Ye s>>
Go To 3
No>>
Perform the Diagnostic Procedure for P0645-A/C CLUTCH
CONTROL CIRCUIT. (Refer to 9 - ENGINE - DIAGNOSIS
AND TESTING)
Page 57 of 5267
When Monitored:
With the ignition on. Battery voltage greater than 10 volts. A/C Switch on.
Set Condition:
A shorted high condition has been detected in the A/C Clutch Control outputcircuit by the TIPM. One Trip
Fault. Three good trips to turn off the MIL.
Possible Causes
(C3) A/C CLUTCH CONTROL OUTPUT CIRCUIT SHORTED TO BATTERY VOLTAGE
EXCESSIVE RESISTANCE IN THE (Z153) A/C CLUTCH GROUND CIRCUIT
A/C COMPRESSOR CLUTCH
TIPM
Always perform the Pre-Diagnostic Troubleshooting procedure before proceeding. (Refer to 9 - ENGINE -
DIAGNOSIS AND TESTING).
Diagnostic Test
1.A/C CLUTCH OPERATION
Ignition on, engine not running.
With a scan tool under the PCM Actuators, actuate the A/C Clutch.
Is the A/C Clutch actuating?
Ye s>>
Refer to the INTERMITTENT CONDITION Diagnostic Procedure.
Perform the POWERTRAIN VERIFICATION TEST. (Refer to 9 - ENGINE - STANDARD PROCEDURE)
No>>
Go To 2
2.A/C CLUTCH CONTROL OPERATION FROM THE PCM
Turn the ignition off.
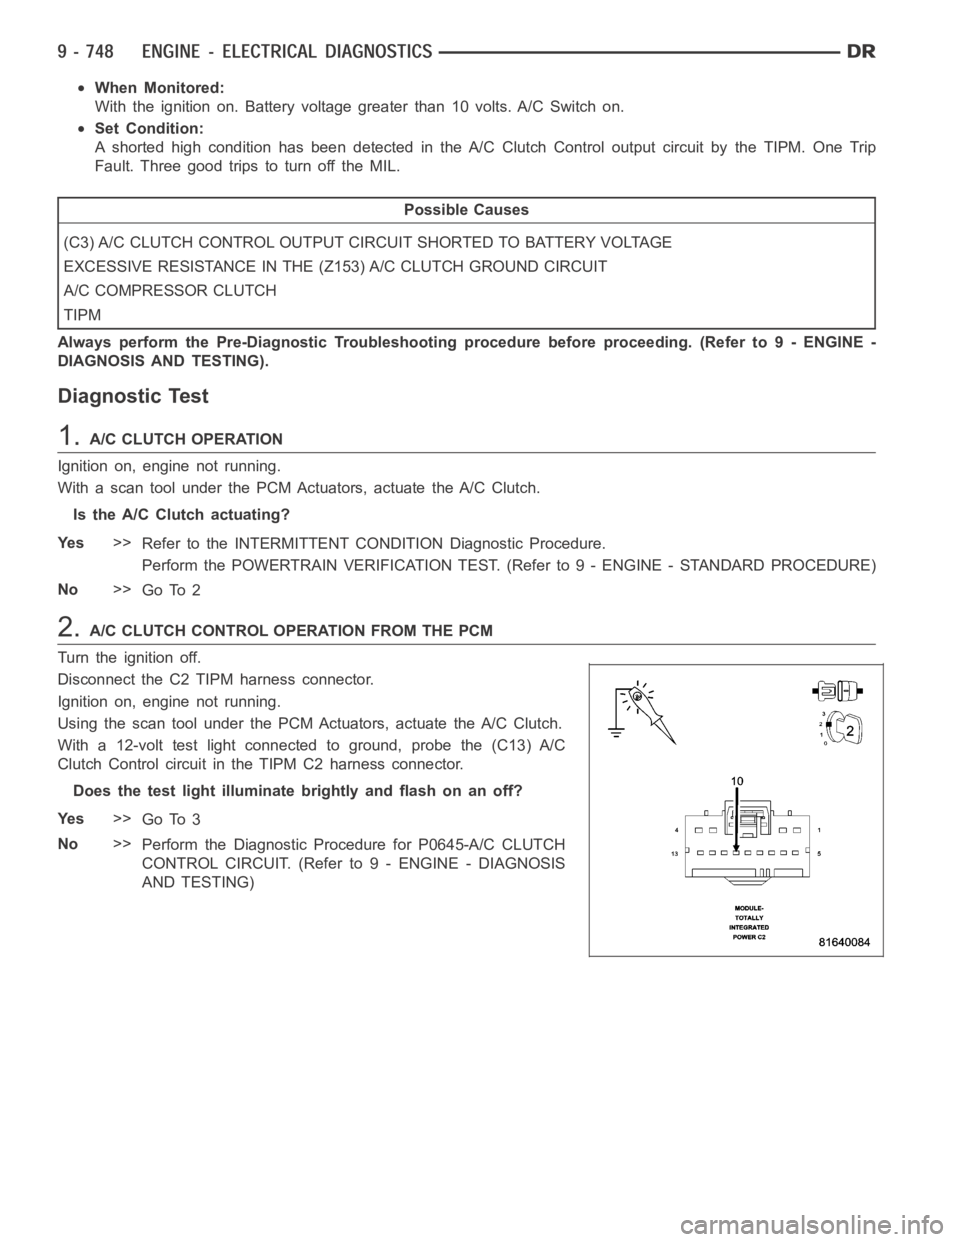
Disconnect the C2 TIPM harness connector.
Ignition on, engine not running.
Using the scan tool under the PCM Actuators, actuate the A/C Clutch.
With a 12-volt test light connected to ground, probe the (C13) A/C
Clutch Control circuit in the TIPM C2 harness connector.
Does the test light illuminate brightly and flash on an off?
Ye s>>
Go To 3
No>>
Perform the Diagnostic Procedure for P0645-A/C CLUTCH
CONTROL CIRCUIT. (Refer to 9 - ENGINE - DIAGNOSIS
AND TESTING)
Page 58 of 5267
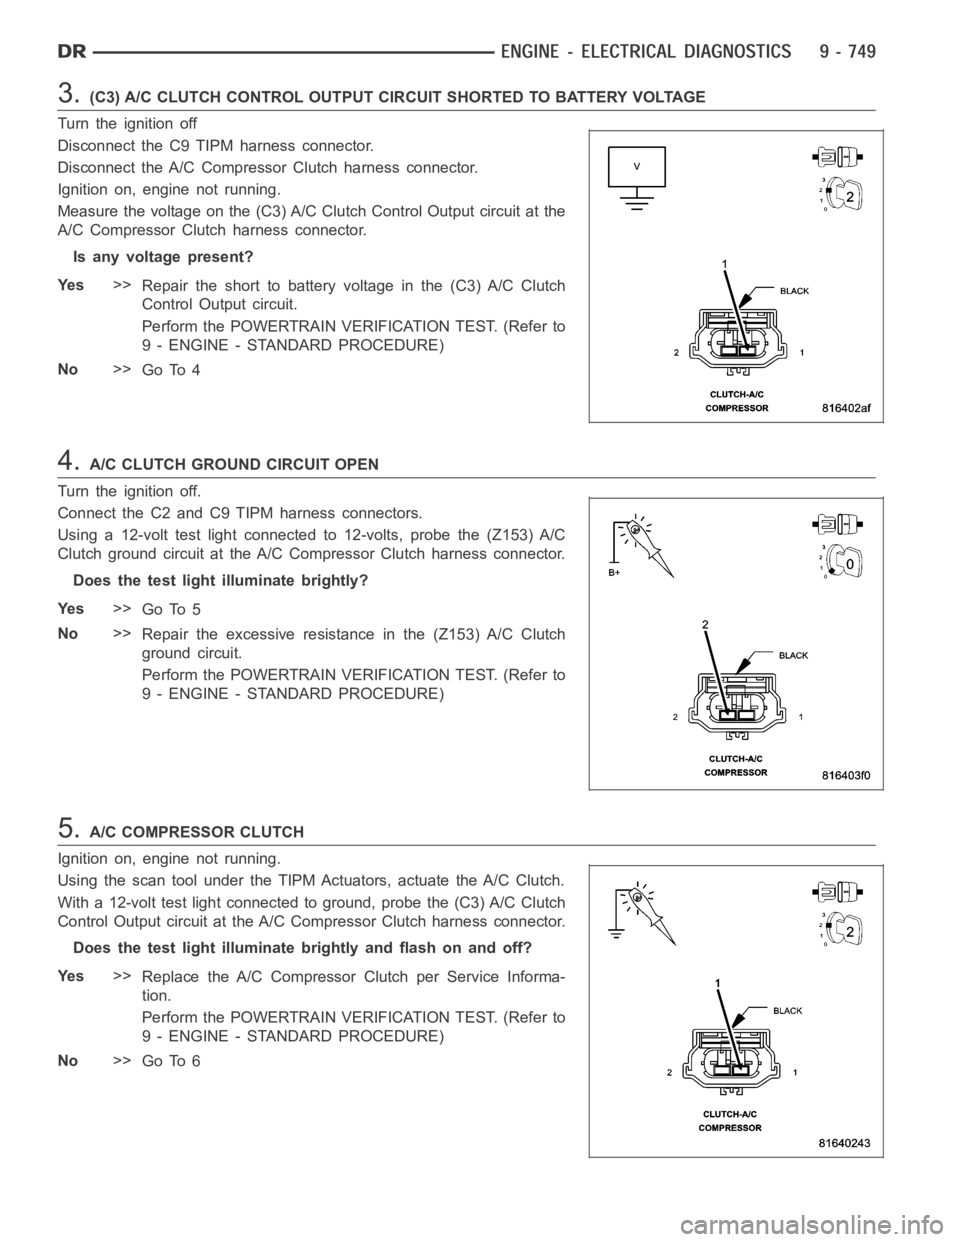
3.(C3) A/C CLUTCH CONTROL OUTPUT CIRCUIT SHORTED TO BATTERY VOLTAGE
Turn the ignition off
Disconnect the C9 TIPM harness connector.
Disconnect the A/C Compressor Clutch harness connector.
Ignition on, engine not running.
Measure the voltage on the (C3) A/C Clutch Control Output circuit at the
A/C Compressor Clutch harness connector.
Is any voltage present?
Ye s>>
Repair the short to battery voltage in the (C3) A/C Clutch
Control Output circuit.
Perform the POWERTRAIN VERIFICATION TEST. (Refer to
9 - ENGINE - STANDARD PROCEDURE)
No>>
Go To 4
4.A/C CLUTCH GROUND CIRCUIT OPEN
Turn the ignition off.
Connect the C2 and C9 TIPM harness connectors.
Using a 12-volt test light connected to 12-volts, probe the (Z153) A/C
Clutch ground circuit at the A/C Compressor Clutch harness connector.
Does the test light illuminate brightly?
Ye s>>
Go To 5
No>>
Repair the excessive resistance in the (Z153) A/C Clutch
ground circuit.
Perform the POWERTRAIN VERIFICATION TEST. (Refer to
9 - ENGINE - STANDARD PROCEDURE)
5.A/C COMPRESSOR CLUTCH
Ignition on, engine not running.
Using the scan tool under the TIPM Actuators, actuate the A/C Clutch.
With a 12-volt test light connected to ground, probe the (C3) A/C Clutch
Control Output circuit at the A/C Compressor Clutch harness connector.
Does the test light illuminate brightly and flash on and off?
Ye s>>
Replace the A/C Compressor Clutch per Service Informa-
tion.
Perform the POWERTRAIN VERIFICATION TEST. (Refer to
9 - ENGINE - STANDARD PROCEDURE)
No>>
Go To 6
Page 61 of 5267
When Monitored:
With the ignition on. Battery voltage greater than 10.4 volts. TIPM requesting A/C Clutch operation.
Set Condition:
An open condition has been detected in the A/C Clutch Control Output circuit by the TIPM. One Trip Fault.
Three good trips to turn off the MIL.
Possible Causes
(C3) A/C CLUTCH CONTROL OUTPUT CIRCUIT OPEN
A/C CLUTCH
TIPM
Always perform the Pre-Diagnostic Troubleshooting procedure before proceeding. (Refer to 9 - ENGINE -
DIAGNOSIS AND TESTING).
Diagnostic Test
1.A/C CLUTCH OPERATION
Ignition on, engine not running.
With a scan tool under the PCM Actuators, actuate the A/C Clutch.
Is the A/C Clutch actuating?
Ye s>>
Refer to the INTERMITTENT CONDITION Diagnostic Procedure.
Perform the POWERTRAIN VERIFICATION TEST. (Refer to 9 - ENGINE - STANDARD PROCEDURE)
No>>
Go To 2
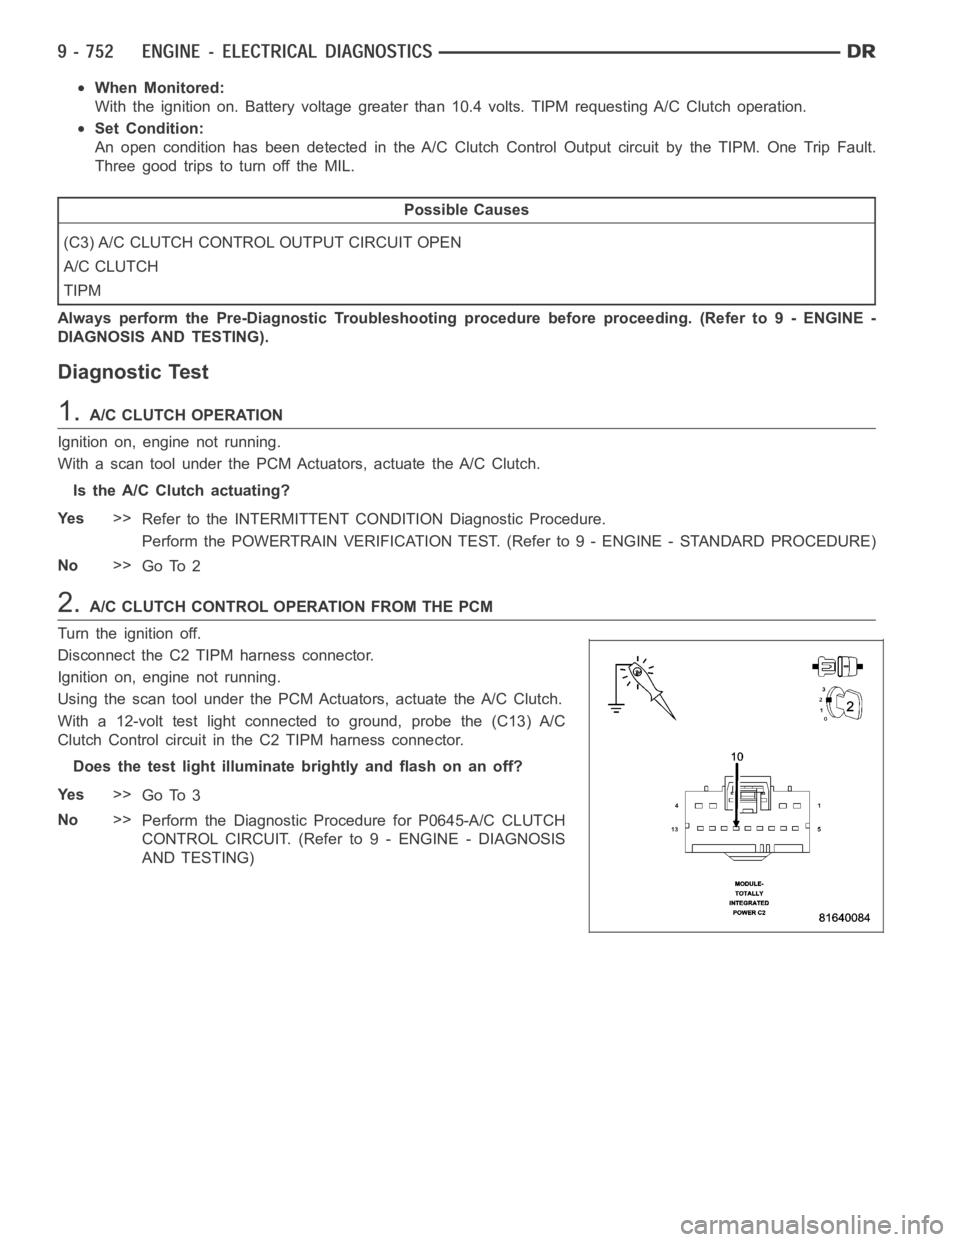
2.A/C CLUTCH CONTROL OPERATION FROM THE PCM
Turn the ignition off.
Disconnect the C2 TIPM harness connector.
Ignition on, engine not running.
Using the scan tool under the PCM Actuators, actuate the A/C Clutch.
With a 12-volt test light connected to ground, probe the (C13) A/C
Clutch Control circuit in the C2 TIPM harness connector.
Does the test light illuminate brightly and flash on an off?
Ye s>>
Go To 3
No>>
Perform the Diagnostic Procedure for P0645-A/C CLUTCH
CONTROL CIRCUIT. (Refer to 9 - ENGINE - DIAGNOSIS
AND TESTING)
Page 65 of 5267
When Monitored:
With the ignition on. Battery voltage greater than 10.4 volts. TIPM requesting A/C Clutch operation.
Set Condition:
An overcurrent condition is detected in the A/C Clutch control output circuit. One Trip Fault. Three good trips
to turn off the MIL.
Possible Causes
TERMINAL DAMAGE OR CORROSION
A/C CLUTCH GROUND HIGH RESISTANCE
(C3) A/C CLUTCH CONTROL OUTPUT CIRCUIT HIGH RESISTANCE
A/C COMPRESSOR CLUTCH
TIPM
Always perform the Pre-Diagnostic Troubleshooting procedure before proceeding. (Refer to 9 - ENGINE -
DIAGNOSIS AND TESTING).
Diagnostic Test
1.A/C CLUTCH OPERATION
Ignition on, engine not running.
With a scan tool in the TIPM Actuators, actuate the A/C Clutch.
Is the A/C Clutch actuating?
Ye s>>
Refer to the INTERMITTENT CONDITION Diagnostic Procedure.
Perform the POWERTRAIN VERIFICATION TEST. (Refer to 9 - ENGINE - STANDARD PROCEDURE)
No>>
Go To 2
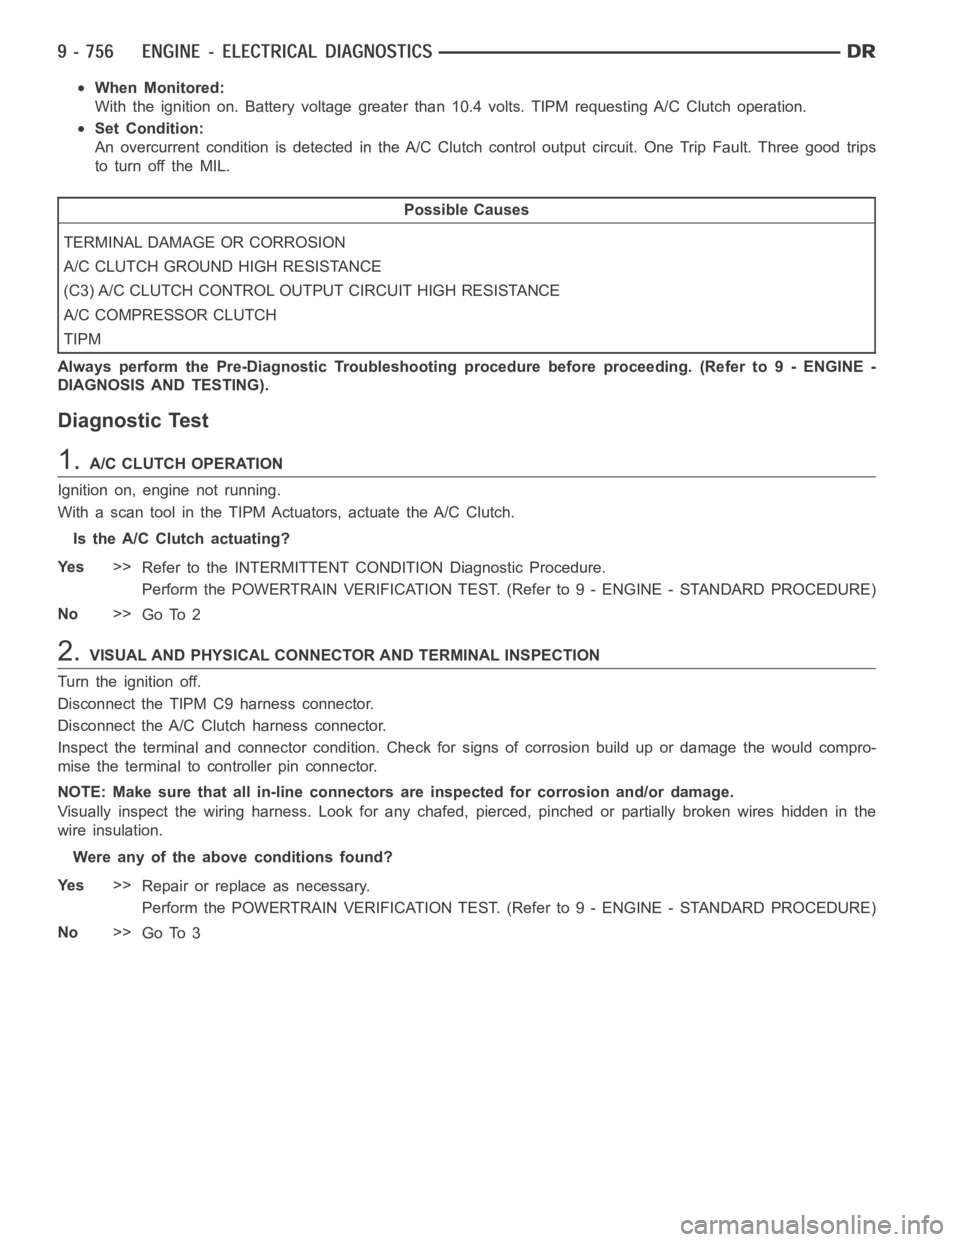
2.VISUAL AND PHYSICAL CONNECTOR AND TERMINAL INSPECTION
Turn the ignition off.
Disconnect the TIPM C9 harness connector.
Disconnect the A/C Clutch harness connector.
Inspect the terminal and connector condition. Check for signs of corrosion build up or damage the would compro-
mise the terminal to controller pin connector.
NOTE: Make sure that all in-line connectors are inspected for corrosion and/or damage.
Visually inspect the wiring harness. Look for any chafed, pierced, pinched or partially broken wires hidden in the
wire insulation.
Were any of the above conditions found?
Ye s>>
Repair or replace as necessary.
Perform the POWERTRAIN VERIFICATION TEST. (Refer to 9 - ENGINE - STANDARD PROCEDURE)
No>>
Go To 3
Page 66 of 5267
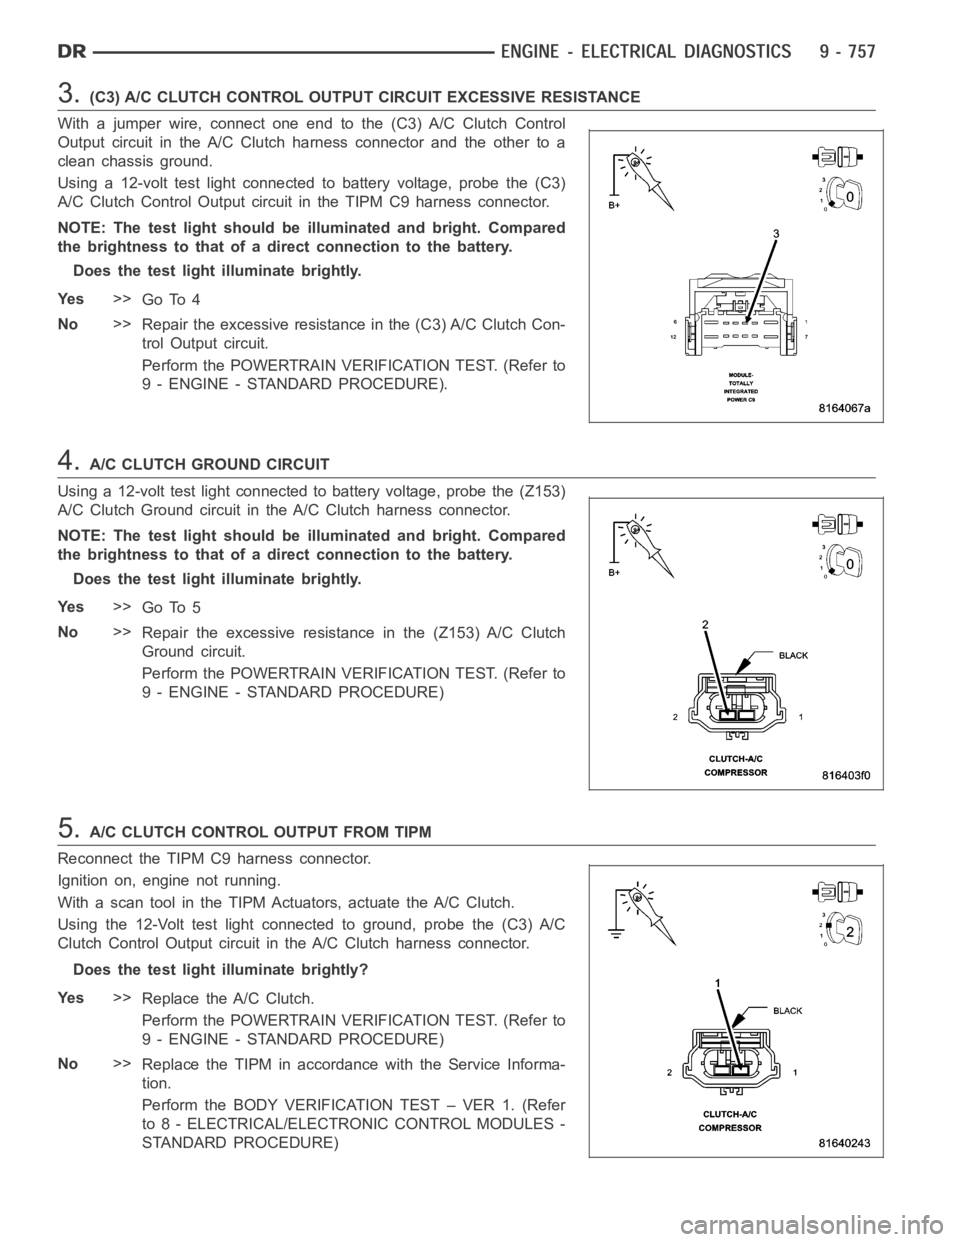
3.(C3) A/C CLUTCH CONTROL OUTPUT CIRCUIT EXCESSIVE RESISTANCE
With a jumper wire, connect one end to the (C3) A/C Clutch Control
Output circuit in the A/C Clutch harness connector and the other to a
clean chassis ground.
Using a 12-volt test light connected to battery voltage, probe the (C3)
A/C Clutch Control Output circuit in the TIPM C9 harness connector.
NOTE: The test light should be illuminated and bright. Compared
the brightness to that of a direct connection to the battery.
Does the test light illuminate brightly.
Ye s>>
Go To 4
No>>
Repair the excessive resistance in the (C3) A/C Clutch Con-
trol Output circuit.
Perform the POWERTRAIN VERIFICATION TEST. (Refer to
9 - ENGINE - STANDARD PROCEDURE).
4.A/C CLUTCH GROUND CIRCUIT
Using a 12-volt test light connected to battery voltage, probe the (Z153)
A/C Clutch Ground circuit in the A/C Clutch harness connector.
NOTE: The test light should be illuminated and bright. Compared
the brightness to that of a direct connection to the battery.
Does the test light illuminate brightly.
Ye s>>
Go To 5
No>>
Repair the excessive resistance in the (Z153) A/C Clutch
Ground circuit.
Perform the POWERTRAIN VERIFICATION TEST. (Refer to
9 - ENGINE - STANDARD PROCEDURE)
5.A/C CLUTCH CONTROL OUTPUT FROM TIPM
Reconnect the TIPM C9 harness connector.
Ignition on, engine not running.
With a scan tool in the TIPM Actuators, actuate the A/C Clutch.
Using the 12-Volt test light connected to ground, probe the (C3) A/C
Clutch Control Output circuit in the A/C Clutch harness connector.
Does the test light illuminate brightly?
Ye s>>
Replace the A/C Clutch.
Perform the POWERTRAIN VERIFICATION TEST. (Refer to
9 - ENGINE - STANDARD PROCEDURE)
No>>
Replace the TIPM in accordance with the Service Informa-
tion.
Perform the BODY VERIFICATION TEST – VER 1. (Refer
to 8 - ELECTRICAL/ELECTRONIC CONTROL MODULES -
STANDARD PROCEDURE)
Page 68 of 5267
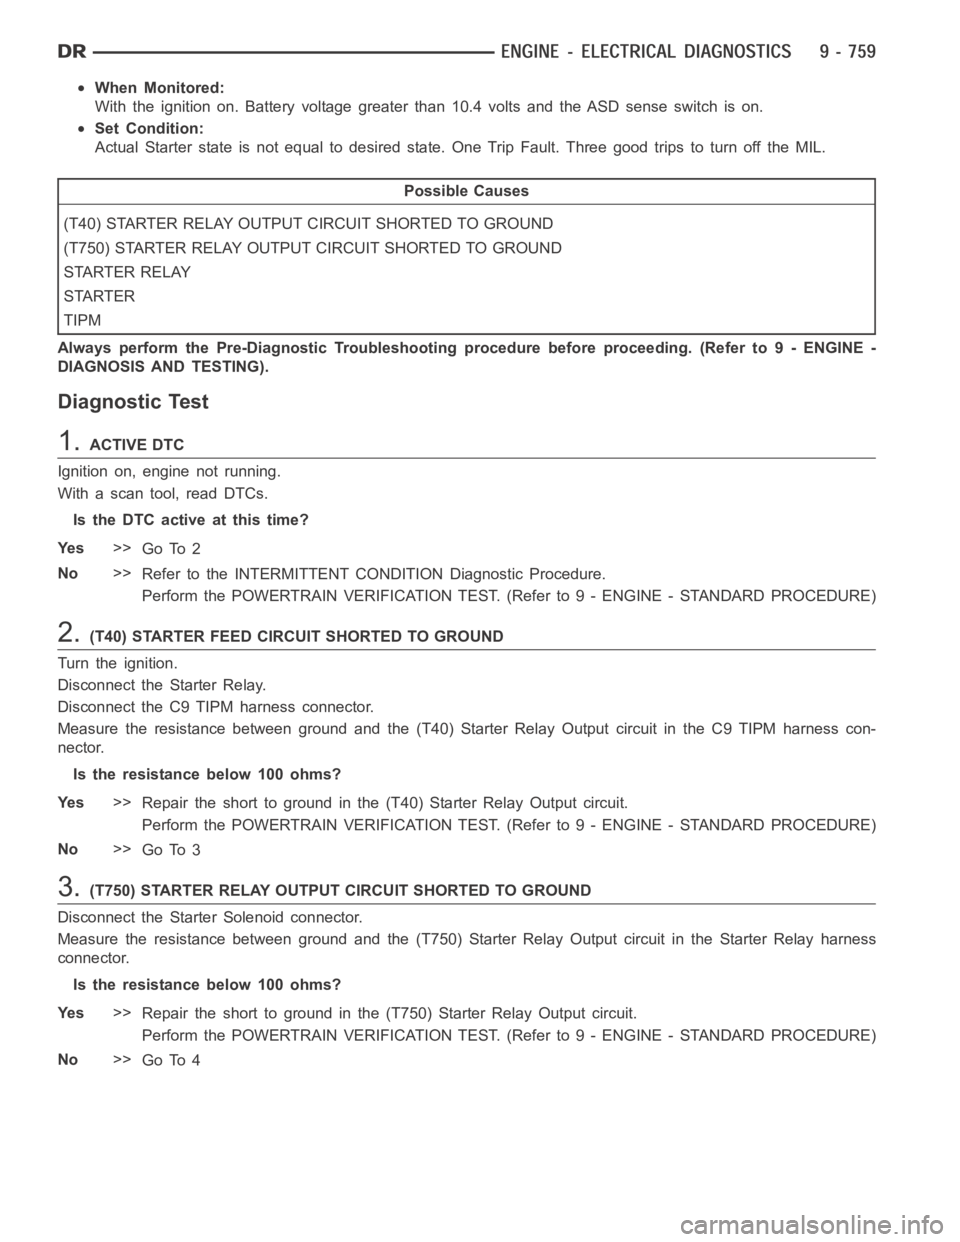
When Monitored:
With the ignition on. Battery voltage greater than 10.4 volts and the ASD sense switch is on.
Set Condition:
Actual Starter state is not equal to desired state. One Trip Fault. Three goodtripstoturnofftheMIL.
Possible Causes
(T40) STARTER RELAY OUTPUT CIRCUIT SHORTED TO GROUND
(T750) STARTER RELAY OUTPUT CIRCUIT SHORTED TO GROUND
STARTER RELAY
STARTER
TIPM
Always perform the Pre-Diagnostic Troubleshooting procedure before proceeding. (Refer to 9 - ENGINE -
DIAGNOSIS AND TESTING).
Diagnostic Test
1.ACTIVE DTC
Ignition on, engine not running.
With a scan tool, read DTCs.
Is the DTC active at this time?
Ye s>>
Go To 2
No>>
Refer to the INTERMITTENT CONDITION Diagnostic Procedure.
Perform the POWERTRAIN VERIFICATION TEST. (Refer to 9 - ENGINE - STANDARD PROCEDURE)
2.(T40) STARTER FEED CIRCUIT SHORTED TO GROUND
Turn the ignition.
Disconnect the Starter Relay.
Disconnect the C9 TIPM harness connector.
Measure the resistance between ground and the (T40) Starter Relay Output circuit in the C9 TIPM harness con-
nector.
Istheresistancebelow100ohms?
Ye s>>
Repair the short to ground in the (T40) Starter Relay Output circuit.
Perform the POWERTRAIN VERIFICATION TEST. (Refer to 9 - ENGINE - STANDARD PROCEDURE)
No>>
Go To 3
3.(T750) STARTER RELAY OUTPUT CIRCUIT SHORTED TO GROUND
Disconnect the Starter Solenoid connector.
Measure the resistance between ground and the (T750) Starter Relay Outputcircuit in the Starter Relay harness
connector.
Istheresistancebelow100ohms?
Ye s>>
Repair the short to ground in the (T750) Starter Relay Output circuit.
Perform the POWERTRAIN VERIFICATION TEST. (Refer to 9 - ENGINE - STANDARD PROCEDURE)
No>>
Go To 4
Page 71 of 5267
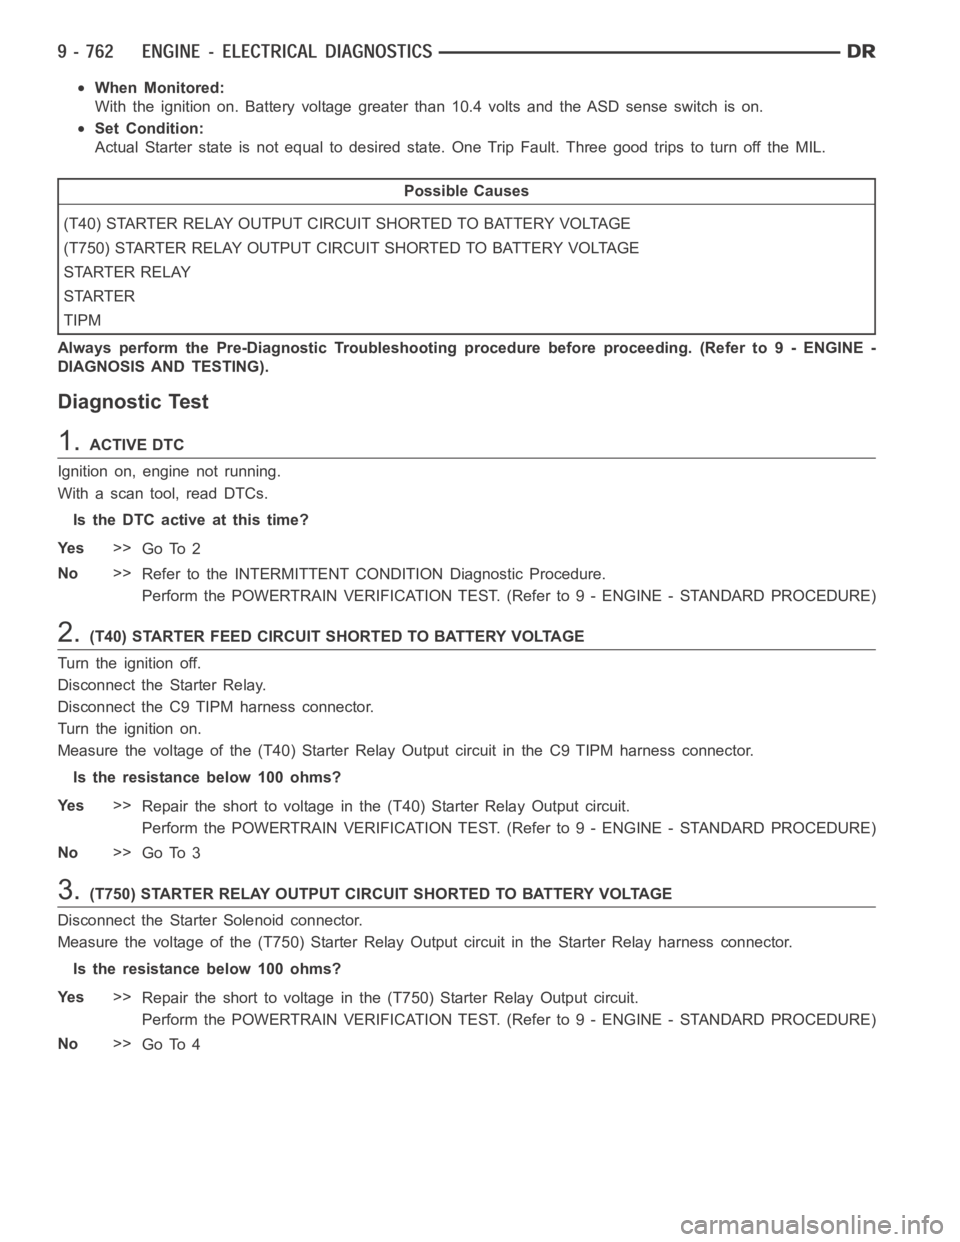
When Monitored:
With the ignition on. Battery voltage greater than 10.4 volts and the ASD sense switch is on.
Set Condition:
Actual Starter state is not equal to desired state. One Trip Fault. Three goodtripstoturnofftheMIL.
Possible Causes
(T40) STARTER RELAY OUTPUT CIRCUIT SHORTED TO BATTERY VOLTAGE
(T750) STARTER RELAY OUTPUT CIRCUIT SHORTED TO BATTERY VOLTAGE
STARTER RELAY
STARTER
TIPM
Always perform the Pre-Diagnostic Troubleshooting procedure before proceeding. (Refer to 9 - ENGINE -
DIAGNOSIS AND TESTING).
Diagnostic Test
1.ACTIVE DTC
Ignition on, engine not running.
With a scan tool, read DTCs.
Is the DTC active at this time?
Ye s>>
Go To 2
No>>
Refer to the INTERMITTENT CONDITION Diagnostic Procedure.
Perform the POWERTRAIN VERIFICATION TEST. (Refer to 9 - ENGINE - STANDARD PROCEDURE)
2.(T40) STARTER FEED CIRCUIT SHORTED TO BATTERY VOLTAGE
Turn the ignition off.
Disconnect the Starter Relay.
Disconnect the C9 TIPM harness connector.
Turn the ignition on.
Measure the voltage of the (T40) Starter Relay Output circuit in the C9 TIPMharness connector.
Istheresistancebelow100ohms?
Ye s>>
Repair the short to voltage in the (T40) Starter Relay Output circuit.
Perform the POWERTRAIN VERIFICATION TEST. (Refer to 9 - ENGINE - STANDARD PROCEDURE)
No>>
Go To 3
3.(T750) STARTER RELAY OUTPUT CIRCUIT SHORTED TO BATTERY VOLTAGE
Disconnect the Starter Solenoid connector.
Measure the voltage of the (T750) Starter Relay Output circuit in the Starter Relay harness connector.
Istheresistancebelow100ohms?
Ye s>>
Repair the short to voltage in the (T750) Starter Relay Output circuit.
Perform the POWERTRAIN VERIFICATION TEST. (Refer to 9 - ENGINE - STANDARD PROCEDURE)
No>>
Go To 4