DODGE SPRINTER 2005 1.G Repair Manual
SPRINTER 2005 1.G
DODGE
DODGE
https://www.carmanualsonline.info/img/12/5674/w960_5674-0.png
DODGE SPRINTER 2005 1.G Repair Manual
Trending: change wheel, wiper blades, parking brake, spare tire location, child seat, check engine light, tailgate
Page 61 of 288
UNDERSTANDING THE FEATURES OF YOUR VEHICLE 61
3
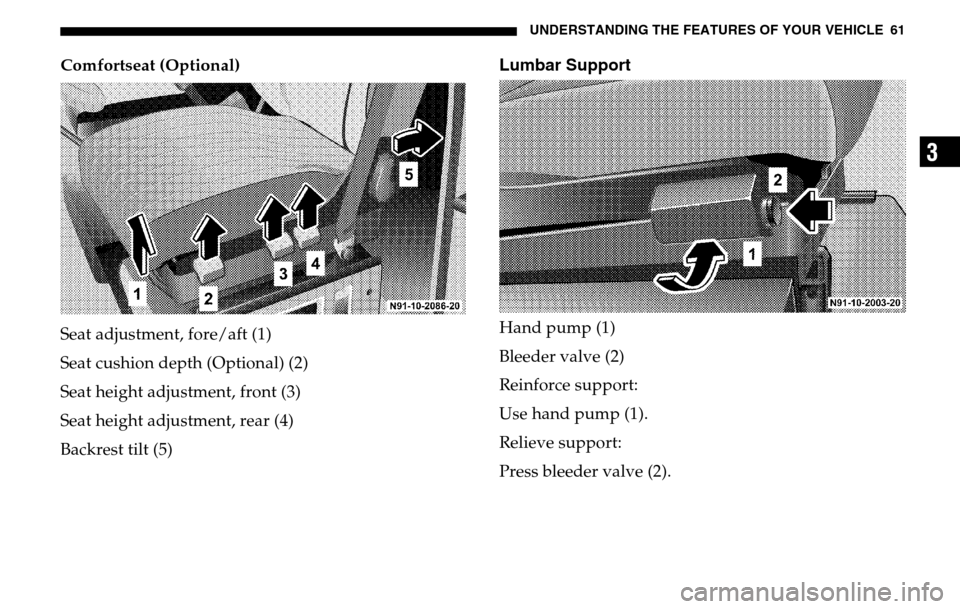
Comfortseat (Optional)
Seat adjustment, fore/aft (1)
Seat cushion depth (Optional) (2)
Seat height adjustment, front (3)
Seat height adjustment, rear (4)
Backrest tilt (5)
Lumbar SupportHand pump (1)
Bleeder valve (2)
Reinforce support:
Use hand pump (1).
Relieve support:
Press bleeder valve (2).
Page 62 of 288
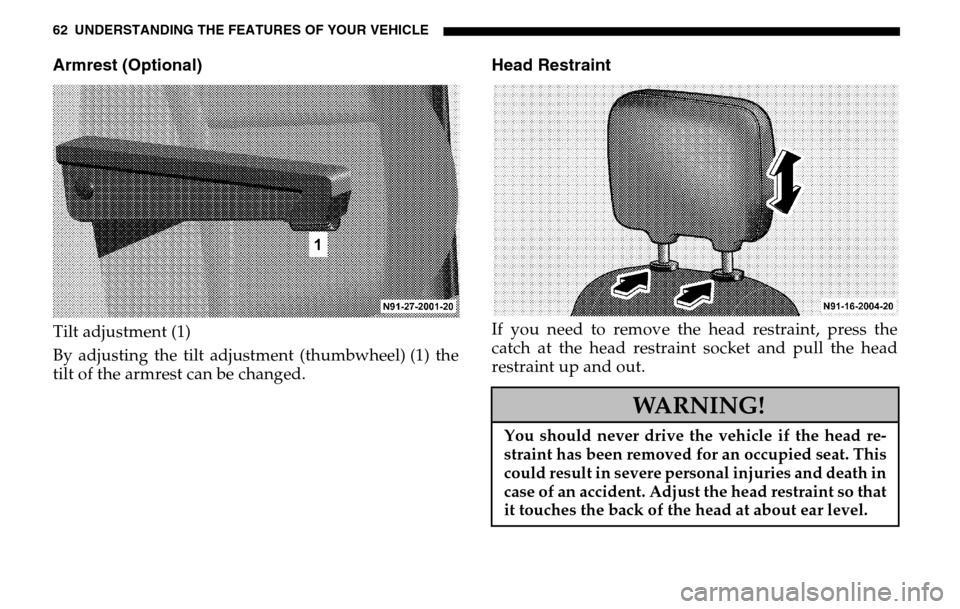
62 UNDERSTANDING THE FEATURES OF YOUR VEHICLEArmrest (Optional)Tilt adjustment (1)
By adjusting the tilt adjustment (thumbwheel) (1) the
tilt of the armrest can be changed.
Head RestraintIf you need to remove the head restraint, press the
catch at the head restraint socket and pull the head
restraint up and out.
WARNING!
You should never drive the vehicle if the head re-
straint has been removed for an occupied seat. This
could result in severe personal injuries and death in
case of an accident. Adjust the head restraint so that
it touches the back of the head at about ear level.
Page 63 of 288
UNDERSTANDING THE FEATURES OF YOUR VEHICLE 63
3
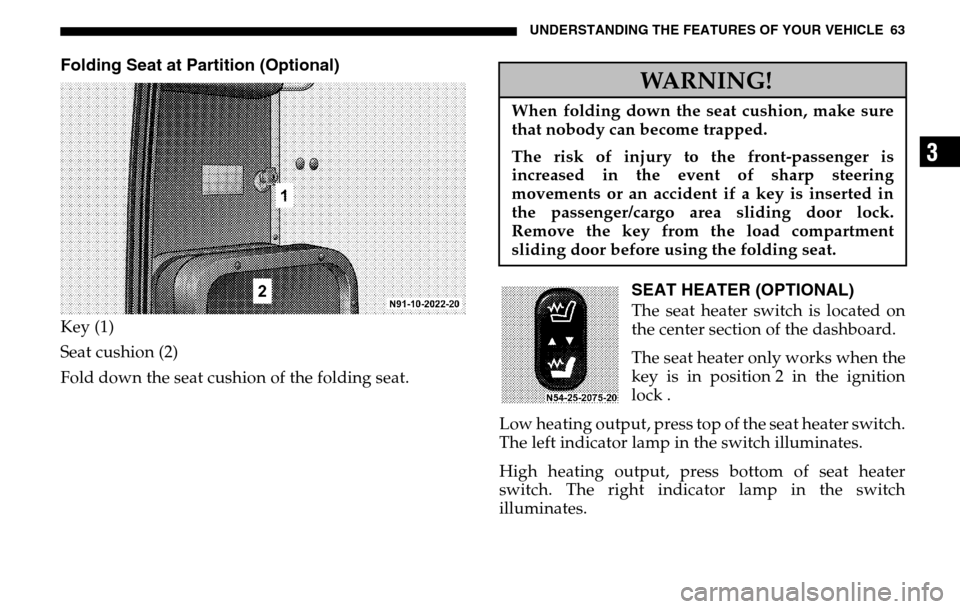
Folding Seat at Partition (Optional)Key (1)
Seat cushion (2)
Fold down the seat cushion of the folding seat.
SEAT HEATER (OPTIONAL)The seat heater switch is located on
the center section of the dashboard.
The seat heater only works when the
key is in position 2 in the ignition
lock .
Low heating output, press top of the seat heater switch.
The left indicator lamp in the switch illuminates.
High heating output, press bottom of seat heater
switch. The right indicator lamp in the switch
illuminates.WARNING!
When folding down the seat cushion, make sure
that nobody can become trapped.
The risk of injury to the front-passenger is
increased in the event of sharp steering
movements or an accident if a key is inserted in
the passenger/cargo area sliding door lock.
Remove the key from the load compartment
sliding door before using the folding seat.
Page 64 of 288
64 UNDERSTANDING THE FEATURES OF YOUR VEHICLEREAR SEAT BENCH REMOVAL AND
INSTALLATION
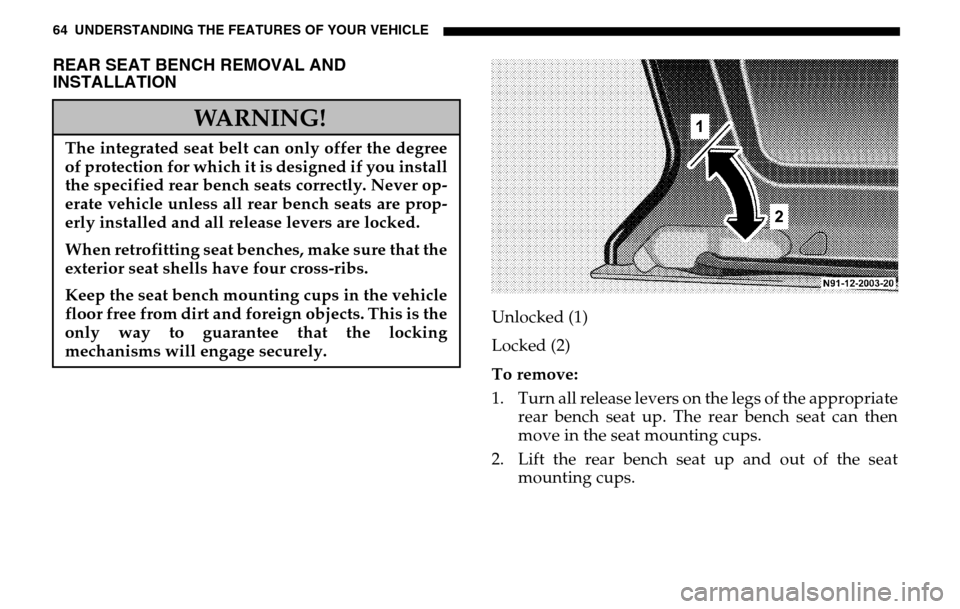
Unlocked (1)
Locked (2)
To remove:
1. Turn all release levers on the legs of the appropriate rear bench seat up. The rear bench seat can then
move in the seat mounting cups.
2. Lift the rear bench seat up and out of the seat mounting cups.
WARNING!
The integrated seat belt can only offer the degree
of protection for which it is designed if you install
the specified rear bench seats correctly. Never op-
erate vehicle unless all rear bench seats are prop-
erly installed and all release levers are locked.
When retrofitting seat benches, make sure that the
exterior seat shells have four cross-ribs.
Keep the seat bench mounting cups in the vehicle
floor free from dirt and foreign objects. This is the
only way to guarantee that the locking
mechanisms will engage securely.
Page 65 of 288
UNDERSTANDING THE FEATURES OF YOUR VEHICLE 65
3
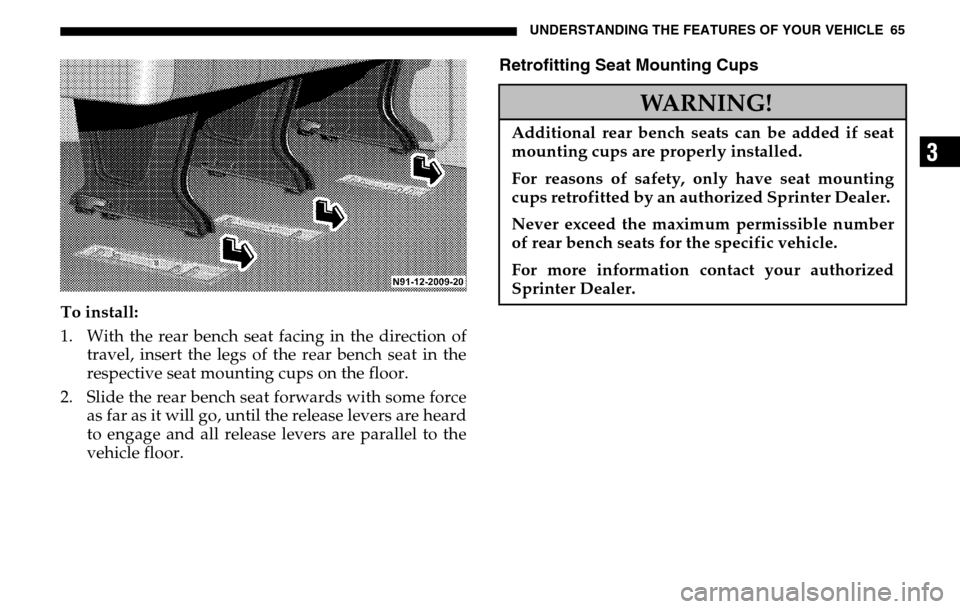
To install:
1. With the rear bench seat facing in the direction of travel, insert the legs of the rear bench seat in the
respective seat mounting cups on the floor.
2. Slide the rear bench seat forwards with some force as far as it will go, until the release levers are heard
to engage and all release levers are parallel to the
vehicle floor.
Retrofitting Seat Mounting Cups
WARNING!
Additional rear bench seats can be added if seat
mounting cups are properly installed.
For reasons of safety, only have seat mounting
cups retrofitted by an authorized Sprinter Dealer.
Never exceed the maximum permissible number
of rear bench seats for the specific vehicle.
For more information contact your authorized
Sprinter Dealer.
Page 66 of 288
66 UNDERSTANDING THE FEATURES OF YOUR VEHICLEHOOD
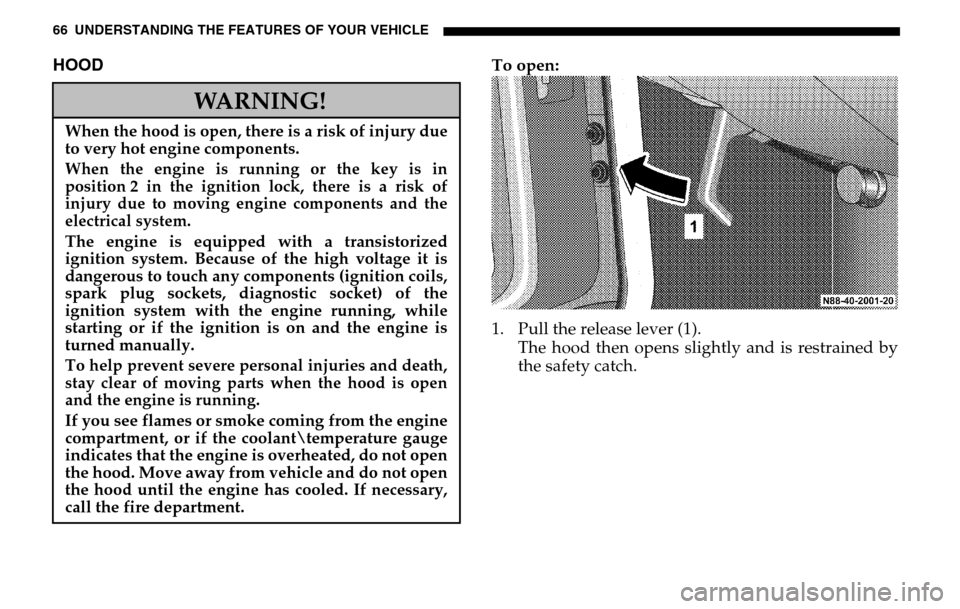
To open:
1. Pull the release lever (1). The hood then opens slightly and is restrained by
the safety catch.
WARNING!
When the hood is open, there is a risk of injury due
to very hot engine components.When the engine is running or the key is in
position 2 in the ignition lock, there is a risk of
injury due to moving engine components and the
electrical system.The engine is equipped with a transistorized
ignition system. Because of the high voltage it is
dangerous to touch any components (ignition coils,
spark plug sockets, diagnostic socket) of the
ignition system with the engine running, while
starting or if the ignition is on and the engine is
turned manually.To help prevent severe personal injuries and death,
stay clear of moving parts when the hood is open
and the engine is running. If you see flames or smoke coming from the engine
compartment, or if the coolant emperature gauge
indicates that the engine is overheated, do not open
the hood. Move away from vehicle and do not open
the hood until the engine has cooled. If necessary,
call the fire department.
Page 67 of 288
UNDERSTANDING THE FEATURES OF YOUR VEHICLE 67
3
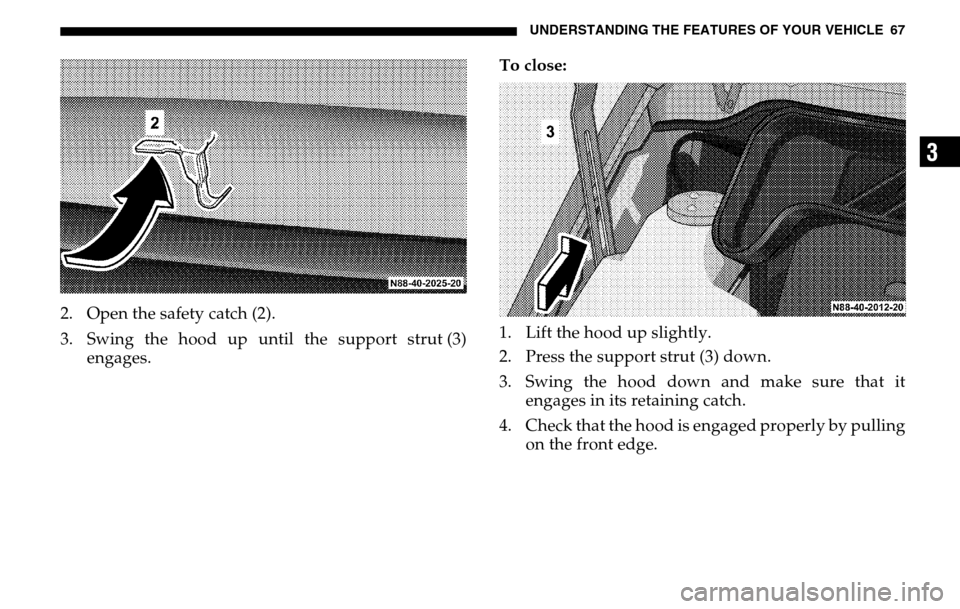
2. Open the safety catch (2).
3. Swing the hood up until the support strut (3) engages. To close:
1. Lift the hood up slightly.
2. Press the support strut (3) down.
3. Swing the hood down and make sure that it
engages in its retaining catch.
4. Check that the hood is engaged properly by pulling on the front edge.
Page 68 of 288
68 UNDERSTANDING THE FEATURES OF YOUR VEHICLEHEADLAMP RANGE CONTROLSee Section 4, Understanding Your Instrument Panel,
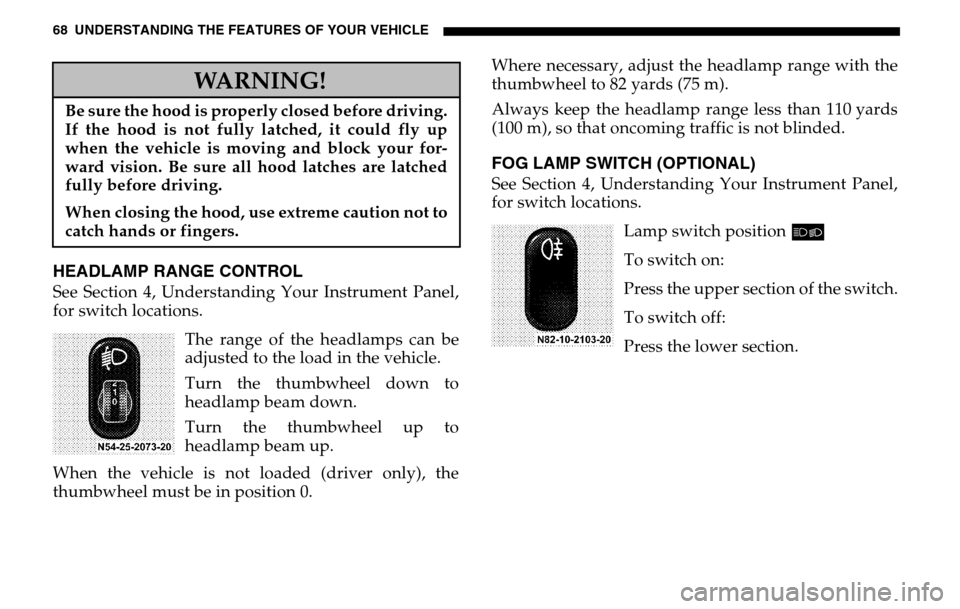
for switch locations. The range of the headlamps can be
adjusted to the load in the vehicle.
Turn the thumbwheel down to
headlamp beam down.
Turn the thumbwheel up to
headlamp beam up.
When the vehicle is not loaded (driver only), the
thumbwheel must be in position 0. Where necessary, adjust the headlamp range with the
thumbwheel to 82 yards (75 m).
Always keep the headlamp range less than 110 yards
(100 m), so that oncoming traffic is not blinded.
FOG LAMP SWITCH (OPTIONAL)See Section 4, Understanding Your Instrument Panel,
for switch locations.
Lamp switch position õ
To switch on:
Press the upper section of the switch.
To switch off:
Press the lower section.
WARNING!
Be sure the hood is properly closed before driving.
If the hood is not fully latched, it could fly up
when the vehicle is moving and block your for-
ward vision. Be sure all hood latches are latched
fully before driving.
When closing the hood, use extreme caution not to
catch hands or fingers.
Page 69 of 288
UNDERSTANDING THE FEATURES OF YOUR VEHICLE 69
3
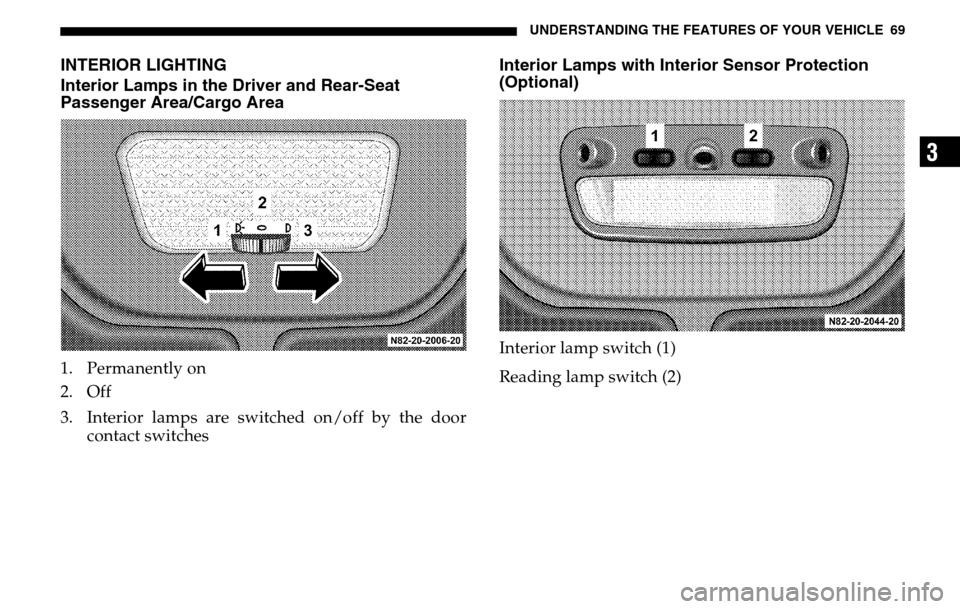
INTERIOR LIGHTING
Interior Lamps in the Driver and Rear-Seat
Passenger Area/Cargo Area1. Permanently on
2. Off
3. Interior lamps are switched on/off by the door contact switches
Interior Lamps with Interior Sensor Protection
(Optional)Interior lamp switch (1)
Reading lamp switch (2)
Page 70 of 288
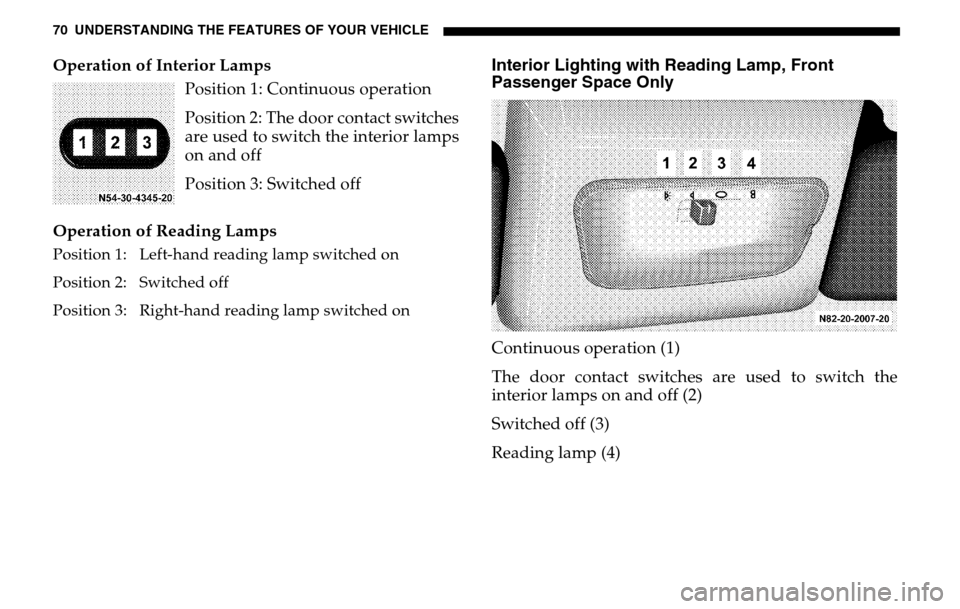
70 UNDERSTANDING THE FEATURES OF YOUR VEHICLEOperation of Interior Lamps Position 1: Continuous operation
Position 2: The door contact switches
are used to switch the interior lamps
on and off
Position 3: Switched off
Operation of Reading LampsPosition 1: Left-hand reading lamp switched on
Position 2: Switched off
Position 3: Right-hand reading lamp switched on
Interior Lighting with Reading Lamp, Front
Passenger Space OnlyContinuous operation (1)
The door contact switches are used to switch the
interior lamps on and off (2)
Switched off (3)
Reading lamp (4)
Trending: lumbar support, instrument cluster, power steering, stop start, brake, fuse box, auxiliary battery
