DODGE SPRINTER 2005 1.G Manual PDF
Manufacturer: DODGE, Model Year: 2005, Model line: SPRINTER, Model: DODGE SPRINTER 2005 1.GPages: 288, PDF Size: 27.89 MB
Page 71 of 288
UNDERSTANDING THE FEATURES OF YOUR VEHICLE 71
3
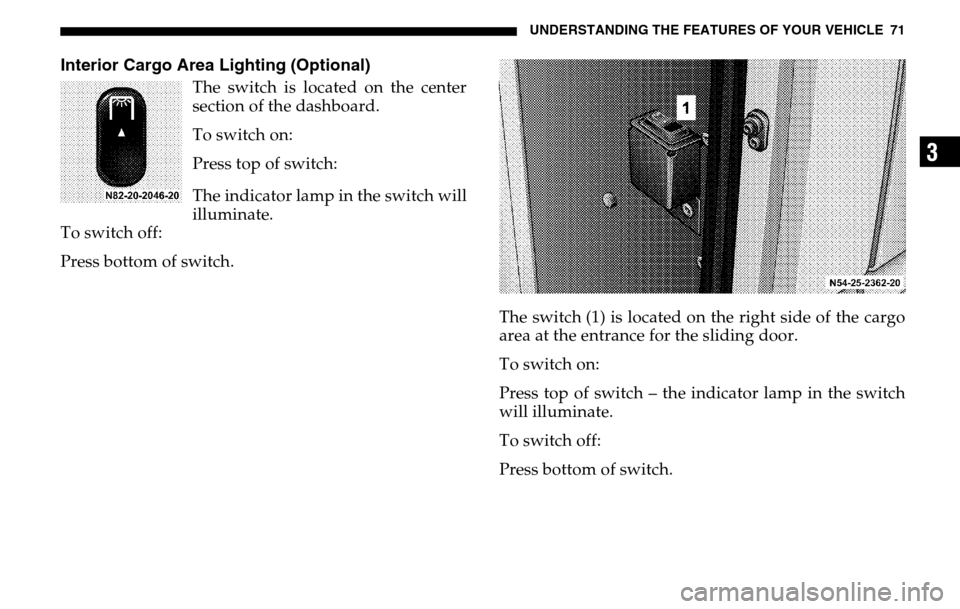
Interior Cargo Area Lighting (Optional)
The switch is located on the center
section of the dashboard.
To switch on:
Press top of switch:
The indicator lamp in the switch will
illuminate.
To switch off:
Press bottom of switch.
The switch (1) is located on the right side of the cargo
area at the entrance for the sliding door.
To switch on:
Press top of switch – the indicator lamp in the switch
will illuminate.
To switch off:
Press bottom of switch.
Page 72 of 288
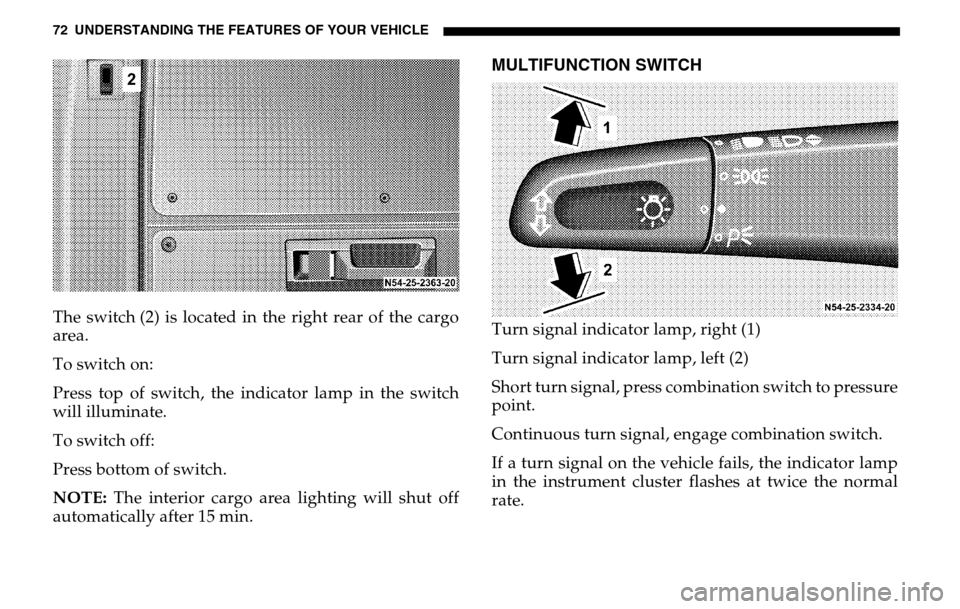
72 UNDERSTANDING THE FEATURES OF YOUR VEHICLEThe switch (2) is located in the right rear of the cargo
area.
To switch on:
Press top of switch, the indicator lamp in the switch
will illuminate.
To switch off:
Press bottom of switch.
NOTE: The interior cargo area lighting will shut off
automatically after 15 min.
MULTIFUNCTION SWITCHTurn signal indicator lamp, right (1)
Turn signal indicator lamp, left (2)
Short turn signal, press combination switch to pressure
point.
Continuous turn signal, engage combination switch.
If a turn signal on the vehicle fails, the indicator lamp
in the instrument cluster flashes at twice the normal
rate.
Page 73 of 288
UNDERSTANDING THE FEATURES OF YOUR VEHICLE 73
3
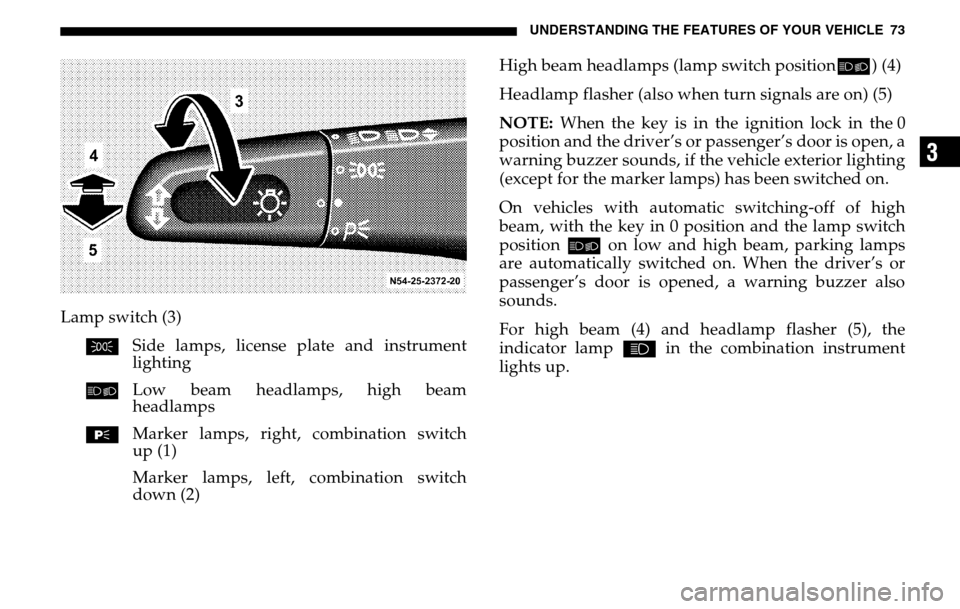
Lamp switch (3) C Side lamps, license plate and instrument
lighting
õ Low beam headlamps, high beam
headlamps
ƒ Marker lamps, right, combination switch
up (1)
Marker lamps, left, combination switch
down (2) High beam headlamps (lamp switch position
õ) (4)
Headlamp flasher (also when turn signals are on) (5)
NOTE: When the key is in the ignition lock in the 0
position and the driver’s or passenger’s door is open, a
warning buzzer sounds, if the vehicle exterior lighting
(except for the marker lamps) has been switched on.
On vehicles with automatic switching-off of high
beam, with the key in 0 position and the lamp switch
position õ on low and high beam, parking lamps
are automatically switched on. When the driver’s or
passenger’s door is opened, a warning buzzer also
sounds.
For high beam (4) and headlamp flasher (5), the
indicator lamp A in the combination instrument
lights up.
Page 74 of 288
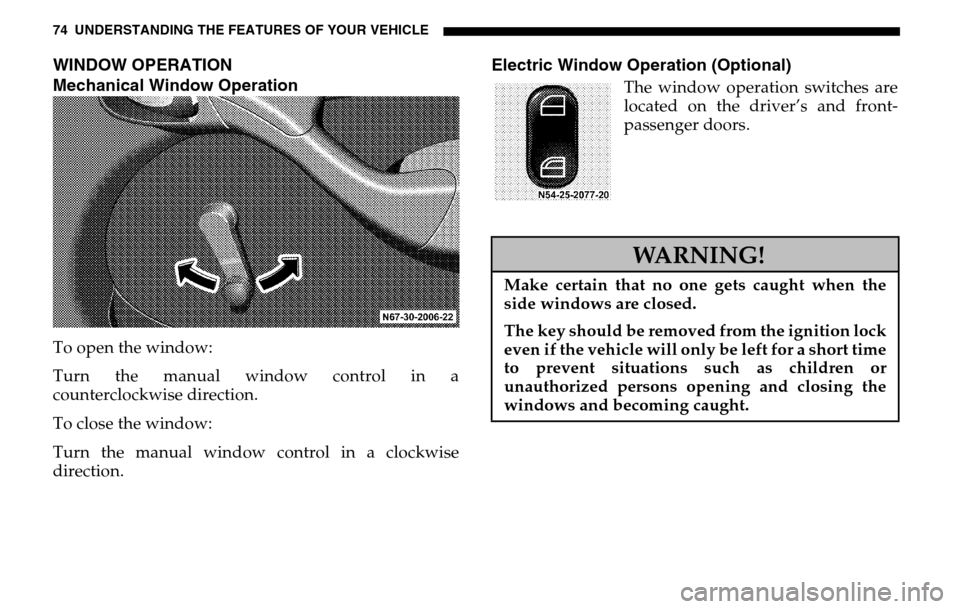
74 UNDERSTANDING THE FEATURES OF YOUR VEHICLEWINDOW OPERATION
Mechanical Window OperationTo open the window:
Turn the manual window control in a
counterclockwise direction.
To close the window:
Turn the manual window control in a clockwise
direction.
Electric Window Operation (Optional)
The window operation switches are
located on the driver’s and front-
passenger doors.WARNING!
Make certain that no one gets caught when the
side windows are closed.
The key should be removed from the ignition lock
even if the vehicle will only be left for a short time
to prevent situations such as children or
unauthorized persons opening and closing the
windows and becoming caught.
Page 75 of 288
UNDERSTANDING THE FEATURES OF YOUR VEHICLE 75
3
Place the key in position 2 in the ignition lock.
To open the window:
Keep switch pressed downward until the window has
reached the desired position.
To close the window:
Keep switch pressed upward until the window has
reached the desired position.
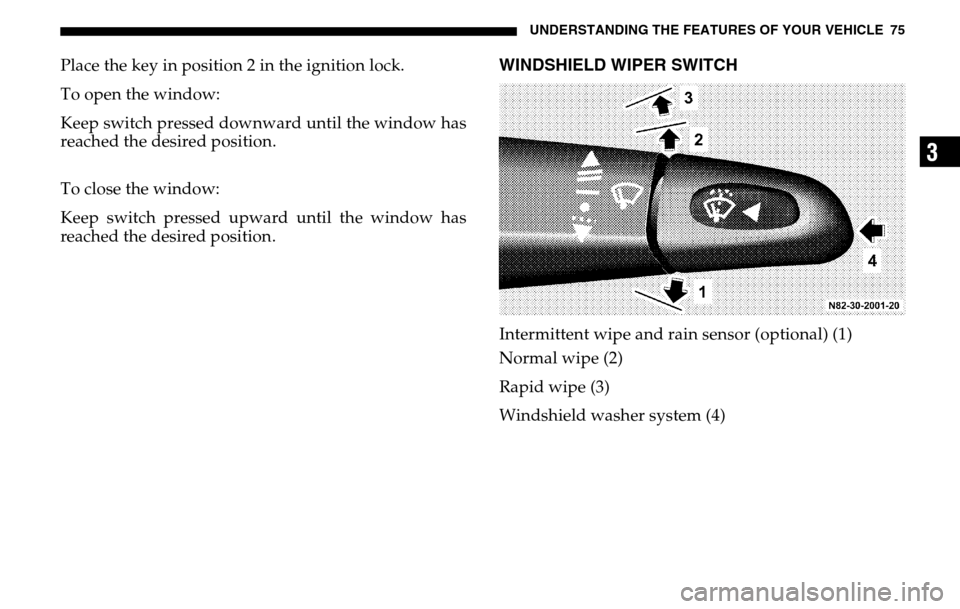
WINDSHIELD WIPER SWITCHIntermittent wipe and rain sensor (optional) (1)
Normal wipe (2)
Rapid wipe (3)
Windshield washer system (4)
Page 76 of 288

76 UNDERSTANDING THE FEATURES OF YOUR VEHICLETouch-wipe:
Press the windshield wiper switch up to the pressure
point.
NOTE: Smears may form on the glass when the
windshield wipers are in use. In this case, operate the
windshield washer, even in rainy weather.
Check wiper blades regularly for damage and
contamination.
Windshield wipers with rain sensor (Optional)To switch on:
Turn the windshield wiper switch to Intermittent
wipe.
When switched on, the windshield wipers wipe one
time. After that the wiping interval and wiping speed
(normal and rapid), depend on wetness of the
windshield and are controlled automatically.
WARNING!
Sudden loss of visibility through the windshield
caused by e. g. ice, steam, fog or water could lead
to an accident. You might not see other vehicles or
other obstacles. To avoid sudden icing of the
windshield during freezing weather, warm the
windshield with the defroster or with the wind-
shield heater (optional) before and during wind-
shield washer use.Follow the recommended settings for de-fogging
and de-icing the front windows given in Section 4.
CAUTION!
Do not leave windshield wipers in intermittent
setting when vehicle is taken to an automatic car
wash or during windshield cleaning and/or de-
icing. Wipers will operate if the windshield gets
wet, and wipers may be damaged as a result.
Page 77 of 288
UNDERSTANDING THE FEATURES OF YOUR VEHICLE 77
3
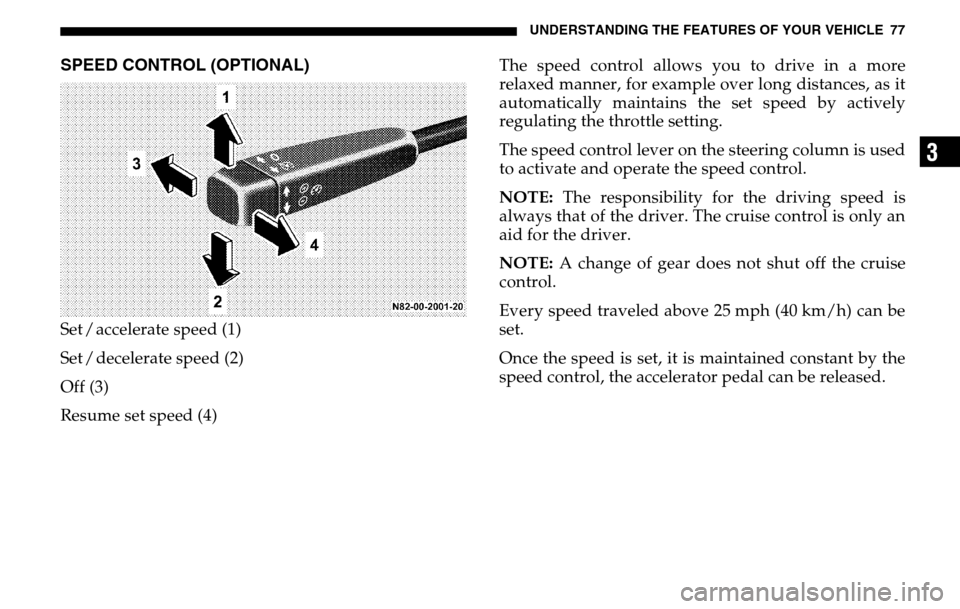
SPEED CONTROL (OPTIONAL)Set / accelerate speed (1)
Set / decelerate speed (2)
Off (3)
Resume set speed (4) The speed control allows you to drive in a more
relaxed manner, for example over long distances, as it
automatically maintains the set speed by actively
regulating the throttle setting.
The speed control lever on th
e steering column is used
to activate and oper ate the speed control.
NOTE: The responsibility for the driving speed is
always that of the driver. The cruise control is only an
aid for the driver.
NOTE: A change of gear does not shut off the cruise
control.
Every speed traveled above 25 mph (40 km/h) can be
set.
Once the speed is set, it is maintained constant by the
speed control, the accelerator pedal can be released.
Page 78 of 288

78 UNDERSTANDING THE FEATURES OF YOUR VEHICLESetting momentary speed
Briefly push speed control lever up (1) or down (2).
Cancel speed control
Push speed control lever forwards (3) or step on the
brake pedal.
Increase set speed
Push up speed control lever (1) briefly – speed increase
of 0.6 mph (1 km/h) each time.
To increase speed steadily = hold the speed control
lever in the push-up position. Decrease set speed
Push down speed control lever (2) briefly – speed
decrease of 0.6 mph (1 km/h) each time.
To decrease speed steadily, hold the speed control
lever in the push-down position.
Resume set speed (after shutting off)
Push speed control lever back (4).
With the accelerator pedal the set speed can be
increased (for passing).
When the accelerator pedal is released again, the set
speed regulates itself again.
With the key in position 0 or 1 in the ignition lock the
set speed is cancelled.
WARNING!
Leaving the Speed Control on when not in use is
dangerous. You could accidently set the system or
cause it to go faster than you want. You could lose
control and have an accident. Always turn the
system off when you are not using it.
Page 79 of 288

UNDERSTANDING THE FEATURES OF YOUR VEHICLE 79
3
NOTE: On uphill and downhill grades it may not be
possible to maintain set speed.
SUNROOF (OPTIONAL)
WARNING!
The speed control does not adapt itself automati-
cally to road conditions; therefore do not use
cruise control on icy roads. There is a risk of skid-
ding and loss of vehicle control. This could cause
an accident resulting in severe personal injuries,
death and property damage.
WARNING!
In an accident, there is a greater risk of being
thrown from a vehicle with an open sun roof. You
could also be seriously injured or killed. Always
fasten your seatbelt properly and make sure all
passengers are properly secured too.
Do not allow small children to operate the electric
sun roof.
Never allow fingers or other body parts, or any
object to project through the sun roof opening.
Injury may result.
Make certain that no one gets caught when the
electric sun roof is closed. The key should be
removed from the ignition lock even if the vehicle
will only be left for a short time to prevent
situations such as children or unauthorized
persons opening and closing the electric sun roof
and becoming caught.
Page 80 of 288
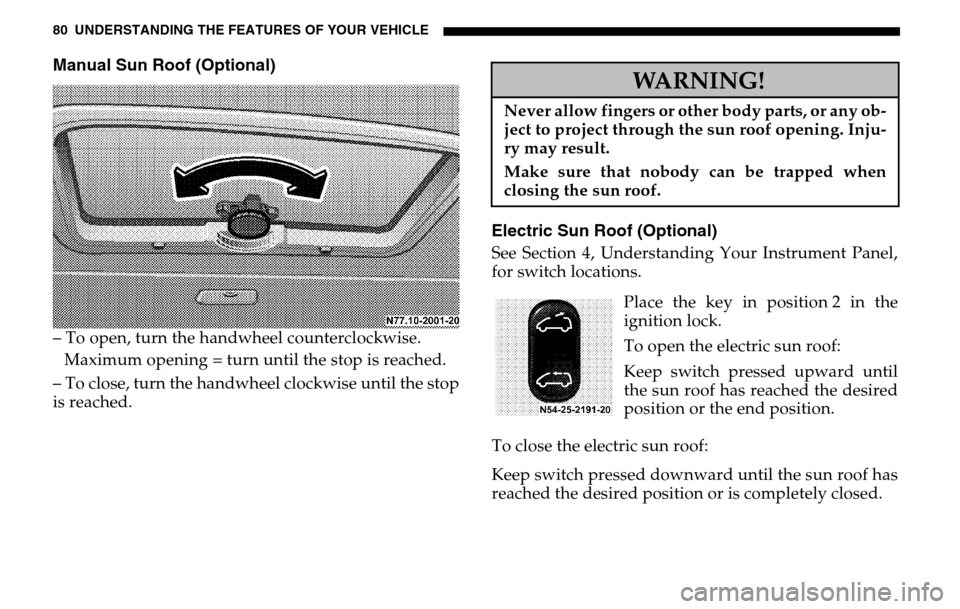
80 UNDERSTANDING THE FEATURES OF YOUR VEHICLEManual Sun Roof (Optional)
– To open, turn the handwheel counterclockwise. Maximum opening = turn until the stop is reached.– To close, turn the handwheel clockwise until the stop
is reached.
Electric Sun Roof (Optional)See Section 4, Understanding Your Instrument Panel,
for switch locations.
Place the key in position 2 in the
ignition lock.
To open the electric sun roof:
Keep switch pressed upward until
the sun roof has reached the desired
position or the end position.
To close the electric sun roof:
Keep switch pressed downward until the sun roof has
reached the desired position or is completely closed.
WARNING!
Never allow fingers or other body parts, or any ob-
ject to project through the sun roof opening. Inju-
ry may result.
Make sure that nobody can be trapped when
closing the sun roof.