stop start DODGE SPRINTER 2006 1.G User Guide
[x] Cancel search | Manufacturer: DODGE, Model Year: 2006, Model line: SPRINTER, Model: DODGE SPRINTER 2006 1.GPages: 330, PDF Size: 10.82 MB
Page 156 of 330

156 STARTING AND OPERATING
For all sensors, the minimum distance between sensor
and obstacle is 12 in (30 cm).
In the event of a malfunction, a continuous warning
signal sounds for approximately three seconds when
the vehicle is reversing
NOTE: Distance display
"in" in USA only
"cm" in Canada onlyLOADING THE VEHICLE
WARNING!
Do not overload the tires by exceeding the specified
vehicle capacity weight (as indicated by the label on
the base of the driver’s seat). Overloading the tires
can overheat them, possibly causing a blowout,
which could cause an accident and personal injury.
In addition, braking and stopping distances can be
significantly longer if the vehicle is overloaded.
WARNING!
Always close the sliding and rear doors when
driving.
Otherwise exhaust fumes could enter the vehicle
interior and poison you.
Page 157 of 330

STARTING AND OPERATING 157
5
The handling characteristics of a vehicle when laden
are dependent on the type of load and the distribution
of the load within the vehicle.
Carrying heavy or bulky loads may alter the vehicle’s
handling characteristic.
Loading Guidelines
Please note and comply with the following information
when loading and transporting goods.
Do not allow the load, including passengers, to
exceed the permitted gross vehicle weight or the
permitted axle loads for the vehicle. Bear in mind
that the unladen weight could be increased by
installing items of optional equipment and
accessories.
Distribute the load uniformly. Excessive loads on
individual points of the load surface could cause
damage to the floor covering.
Transport heavy loads between the axles near the
rear axle as low as possible in the vehicle.
Secure any kind of load with sufficient wear and
tear-resistant load restraints. See tie-down rings.WARNING!
Unsecured or poorly secured loads, and seats that
have been removed, could move around the vehi-
cle interior uncontrollably in the event of sudden
braking, a rapid change in direction or an acci-
dent. This increases the risk of injury to occu-
pants in these situations.
Secure and position a load as described in the
following loading guidelines.
Piling up heavy objects or placing them on upper
shelves or loading them otherwise high up in the
vehicle will significantly raise the center of
gravity of the vehicle. Placing excessive loads on
individual points of the load surface or behind
the rear axle will also adversely affect the
handling characteristics of your vehicle and may
lead to loss of control over the vehicle.
Road safety and tire durability are adversely
affected if the permissible axle loads or gross
vehicle weight are exceeded due to the vehicle’s
load. Braking and stopping distances can be
significantly longer.
Page 158 of 330

158 STARTING AND OPERATING
Protect sharp edges with padding.
Check the tire pressures after loading the vehicle.
For passenger vans:
Do not stack loads higher than the upper edge of the
backrests.
Always place the load against the backrests of the
seat benches.
Whenever possible, transport loads behind seats
that are not occupied.
Distribute the load in such a way that the
permissible axle loads are not exceeded when the
vehicle is equipped with the maximum number of
seats. Loading the luggage compartment up to the
maximum payload would cause the permissible
rear axle load to be exceeded.BRAKES
Service Brake
WARNING!
When the engine is not running, the brake and
steering systems are without power assistance.
Under these circumstances, a much greater effort
is necessary to stop or steer the vehicle.
After driving in heavy rain for some time without
applying the brakes or through water deep
enough to wet brake components, the first
braking action may be somewhat reduced and
increased pedal pressure may be necessary. Be
sure to maintain a safe distance from vehicles in
front.
Resting your foot on the brake pedal will cause
excessive and premature wear of the brake pads.
It can also result in the brakes overheating,
thereby significantly reducing their effectiveness.
It may not be possible to stop the vehicle in
sufficient time to avoid an accident.
Page 162 of 330

162 STARTING AND OPERATING
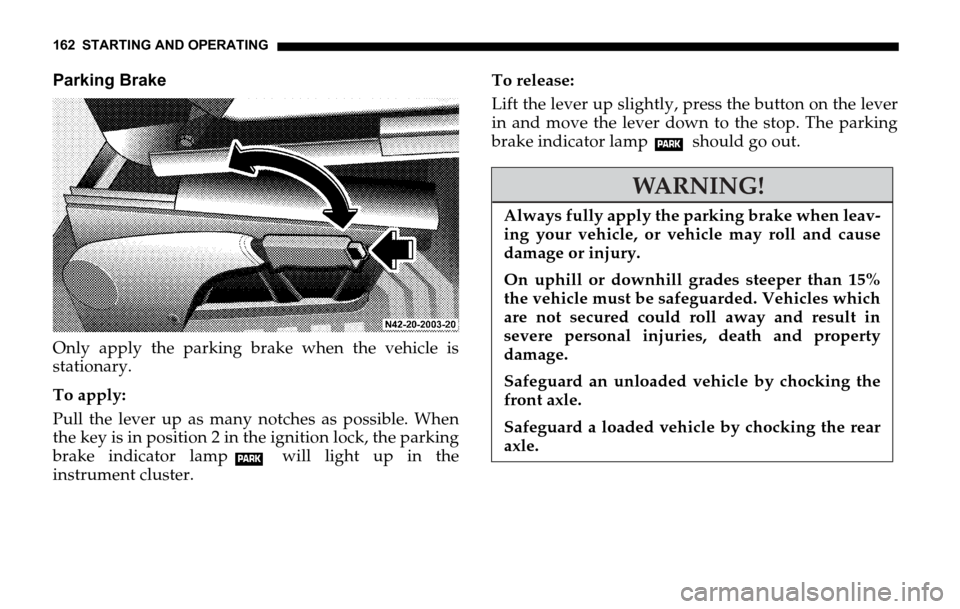
Parking Brake
Only apply the parking brake when the vehicle is
stationary.
To apply:
Pull the lever up as many notches as possible. When
the key is in position 2 in the ignition lock, the parking
brake indicator lamp will light up in the
instrument cluster.To release:
Lift the lever up slightly, press the button on the lever
in and move the lever down to the stop. The parking
brake indicator lamp should go out.
WARNING!
Always fully apply the parking brake when leav-
ing your vehicle, or vehicle may roll and cause
damage or injury.
On uphill or downhill grades steeper than 15%
the vehicle must be safeguarded. Vehicles which
are not secured could roll away and result in
severe personal injuries, death and property
damage.
Safeguard an unloaded vehicle by chocking the
front axle.
Safeguard a loaded vehicle by chocking the rear
axle.
Page 166 of 330

166 STARTING AND OPERATING
WARNING!
Do not reduce the force applied to the brake pedal if
it is necessary to brake the vehicle further. This will
negate the main benefit of ABS – the ability to brake
without affecting the steerability of the vehicle.
In the event of an emergency stop, fully depress
the brake pedal. Do not pump the brake pedal,
rather use firm, steady brake pedal pressure.
Pumping the pedal defeats the purpose of ABS
and significantly reduces braking effectiveness.
WARNING!
Anti-lock brake system (ABS) cannot prevent the
natural laws of physics from acting on the vehicle,
nor can it increase braking or steering efficiency
beyond that afforded by the condition of the vehi-
cle brakes and tires or the traction afforded.
The ABS cannot prevent accidents, including
those resulting from excessive speed in turns,
following another vehicle too closely, or
hydroplaning. Only a safe, attentive, and skillful
driver can prevent accidents.
The capabilities of an ABS equipped vehicle must
never be exploited in a reckless or dangerous
manner which could jeopardize the user’s safety
or the safety of others.
Adapt your speed and driving style to the
prevailing road, traffic and weather conditions.
Driving too fast increases the risk of an accident.
Page 171 of 330

STARTING AND OPERATING 171
5
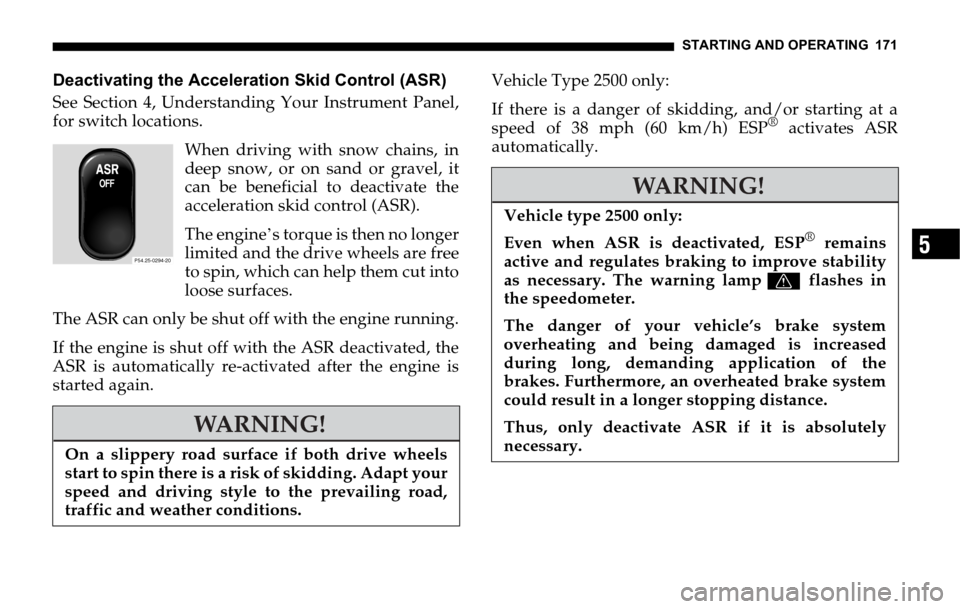
Deactivating the Acceleration Skid Control (ASR)
See Section 4, Understanding Your Instrument Panel,
for switch locations.
When driving with snow chains, in
deep snow, or on sand or gravel, it
can be beneficial to deactivate the
acceleration skid control (ASR).
The engine’s torque is then no longer
limited and the drive wheels are free
to spin, which can help them cut into
loose surfaces.
The ASR can only be shut off with the engine running.
If the engine is shut off with the ASR deactivated, the
ASR is automatically re-activated after the engine is
started again.Vehicle Type 2500 only:
If there is a danger of skidding, and/or starting at a
speed of 38 mph (60 km/h) ESP
® activates ASR
automatically.
WARNING!
On a slippery road surface if both drive wheels
start to spin there is a risk of skidding. Adapt your
speed and driving style to the prevailing road,
traffic and weather conditions.
P54.25-0294-20
WARNING!
Vehicle type 2500 only:
Even when ASR is deactivated, ESP
® remains
active and regulates braking to improve stability
as necessary. The warning lampv flashes in
the speedometer.
The danger of your vehicle’s brake system
overheating and being damaged is increased
during long, demanding application of the
brakes. Furthermore, an overheated brake system
could result in a longer stopping distance.
Thus, only deactivate ASR if it is absolutely
necessary.
Page 185 of 330

STARTING AND OPERATING 185
5
Vehicles type 2500 C/HC/SHC
The vehicles are factory equipped with "L" or "N"-rated
tires, which have a speed rating of 74 mph (120 km/h)
or 87 mph (140 km/h) respectively.
Vehicles type 3500 C/HC/SHC
The vehicles are factory equipped with "L", "N" or "R"-
rated tires, which have a speed rating of 74 mph (120
km/h), 87 mph (140 km/h) or 106 mph (170 km/h)
respectively.
Tire Grip
Tire grip is greatly reduced on a wet, snow covered or
icy road. Speed and driving style must therefore be
adapted to suit road conditions. The safe speed on a
wet, snow covered or icy road is always lower than on
a dry road.
Below a tread depth of 1/8 in (3 mm), tire grip begins
to decrease rapidly on wet roads.
Pay particular attention to the condition of the road
whenever the outside temperatures are close to the
freezing point.Hydroplaning
Depending on the depth of the water layer on the road,
hydroplaning may occur, even at low speeds and with
new tires. Reduce vehicle speed, avoid track grooves in
the road, and apply brakes cautiously in the rain.
In winter, install M+S radial tires with a minimum
tread depth of approximately 1/6 in (4 mm) on all
wheels to ensure normal balanced handling
characteristics. On packed snow, they can reduce your
stopping distance compared to summer tires.
Stopping distance, however, is still considerably
greater than when the road is not covered with snow or
ice. Exercise appropriate caution.
For information on winter tires, refer to "Winter
Operation".
WARNING!
If ice has formed on the road, tire traction will be
substantially reduced. Under such weather condi-
tions, drive, steer and brake with extreme caution.
Page 186 of 330

186 STARTING AND OPERATING
Recommended Tire Inflation Pressure
The tire inflation pressure (including the spare wheel)
should be checked regularly and adjusted as well asinspecting for signs of tire wear or visible damage. Use
a good quality pocket-type gauge to check tire inflation
pressure.
Do not make a visual judgement when determining
proper inflation. Radial tires may look properly
inflated even when they are underinflated.
The tire inflation pressure should be checked
regularly, i.e. at least each time you refuel the vehicle,
and should only be adjusted on cold tires. The
preferred interval for checking the tire inflation
pressure, however, is before each trip.
The tires can be considered cold if the vehicle has been
parked for at least 3 hours or driven less than 1 mile
(1.6 km) at an ambient temperature of approximately
68 °F (20 °C).
Follow recommended cold tire inflation pressures
listed on Tire and Loading Information placard on the
driver’s door B-pillar.
Keeping the tires properly inflated provides the best
handling, tread life and riding comfort.
The pressure difference between the tires on a single
axle should not exceed 1.5 psi (10 kPa).
WARNING!
Avoid spinning of one drive wheel. This may
cause serious damage to the drivetrain which is
not covered by the Warranty.
WARNING!
Follow recommended tire inflation pressures.
Do not underinflate tires. Underinflated tires
wear excessively and/or unevenly, adversely
affect handling and fuel economy, and are more
likely to fail from being overheated.
Do not overinflate tires. Overinflated tires can
adversely affect handling and ride comfort, wear
unevenly, increase stopping distance, and result
in sudden deflation (blowout) because they are
more likely to become punctured or damaged by
road debris, potholes etc.
Page 189 of 330

STARTING AND OPERATING 189
5
Follow the steps below to achieve correct tire inflation
pressure:
Remove the cap from the valve on one tire. Firmly press a tire gauge onto the valve.
Read tire inflation pressure on tire gauge and check
against the recommended tire inflation pressure on
the Tire and Loading Information placard on the
driver’s door B-pillar. If necessary, add air to
achieve the recommended tire inflation pressure.
NOTE: If you have overfilled the tire, release tire
inflation pressure by pushing the metal stem of the
valve with e.g. a tip of a pen. Then recheck the tire
inflation pressure with the tire gauge.
Install the valve cap.
Repeat this procedure for each tire.
WARNING!
Follow recommended tire inflation pressures.
Do not underinflate tires. Underinflated tires
wear excessively and/or unevenly, adversely
affect handling and fuel economy, and are more
likely to fail from being overheated.
Do not overinflate tires. Overinflated tires can
adversely affect handling and ride comfort, wear
unevenly, increase stopping distance, and result
in sudden deflation (blowout) because they are
more likely to become punctured or damaged by
road debris, potholes etc.
Do not overload the tires by exceeding the
specified load limit as indicated on the Tire and
Loading Information placard on the driver’s door
B-pillar. Overloading the tires can overheat them,
possibly causing a blowout.
WARNING!
After inspecting or adjusting the tire inflation
pressure always reinstall the valve cap if
equipped.
This will prevent moisture and dirt from entering
the valve stem, which could damage the valve
stem.
Page 199 of 330

STARTING AND OPERATING 199
5
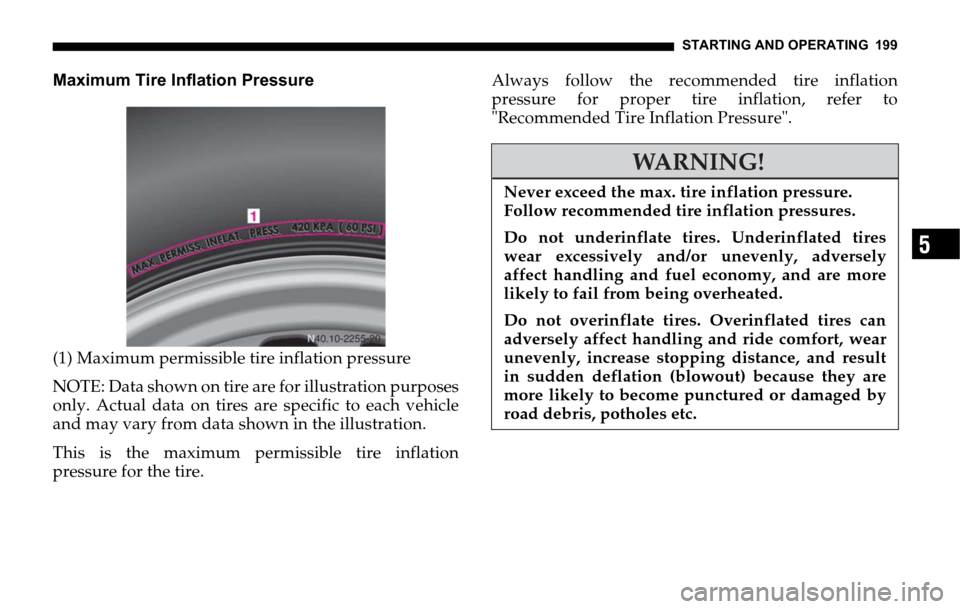
Maximum Tire Inflation Pressure
(1) Maximum permissible tire inflation pressure
NOTE: Data shown on tire are for illustration purposes
only. Actual data on tires are specific to each vehicle
and may vary from data shown in the illustration.
This is the maximum permissible tire inflation
pressure for the tire.Always follow the recommended tire inflation
pressure for proper tire inflation, refer to
"Recommended Tire Inflation Pressure".
WARNING!
Never exceed the max. tire inflation pressure.
Follow recommended tire inflation pressures.
Do not underinflate tires. Underinflated tires
wear excessively and/or unevenly, adversely
affect handling and fuel economy, and are more
likely to fail from being overheated.
Do not overinflate tires. Overinflated tires can
adversely affect handling and ride comfort, wear
unevenly, increase stopping distance, and result
in sudden deflation (blowout) because they are
more likely to become punctured or damaged by
road debris, potholes etc.