radio DODGE VIPER 2008 ZB II / 2.G Owners Manual
[x] Cancel search | Manufacturer: DODGE, Model Year: 2008, Model line: VIPER, Model: DODGE VIPER 2008 ZB II / 2.GPages: 303, PDF Size: 2.65 MB
Page 14 of 303
NOTE:The Power Accessory Delay feature allows you
to operate the radio and the power windows for 2
minutes after turning off the ignition switch. Removing
the key from the ignition switch and opening the driver's
door will cancel this feature. Your dealership can enable
or disable the Power Accessory Delay feature as desired.
Key-In-Ignition Reminder
If you open the driver's door when the key is in the
ignition, a chime will sound to remind you to remove the
key.
NOTE:The Key-In-Ignition reminder only sounds
when the ignition switch is placed in the OFF/LOCK or
ACC positions.
SECURITY ALARM SYSTEM
This system monitors the doors, trunk/liftgate, and hood
for unauthorized entry and the ignition switch for unau-
thorized operation. If something triggers the alarm, the
system will prevent the vehicle from starting. It will also
sound the horn and flash the park lights, the taillights,
and the fog lights.
Rearming of the System:
If something triggers the alarm, and no action is taken to
disarm it, the system will turn off the horn after 3
minutes, turn off all of the visual signals (flashing lights)
after 15 minutes, and then rearm itself.
To Arm the System:
Remove the key from the ignition switch and either press
a power door lock switch while the driver or passenger
door is open or press the LOCK button on the Remote
THINGS TO KNOW BEFORE STARTING YOUR VEHICLE 13
2
Page 18 of 303
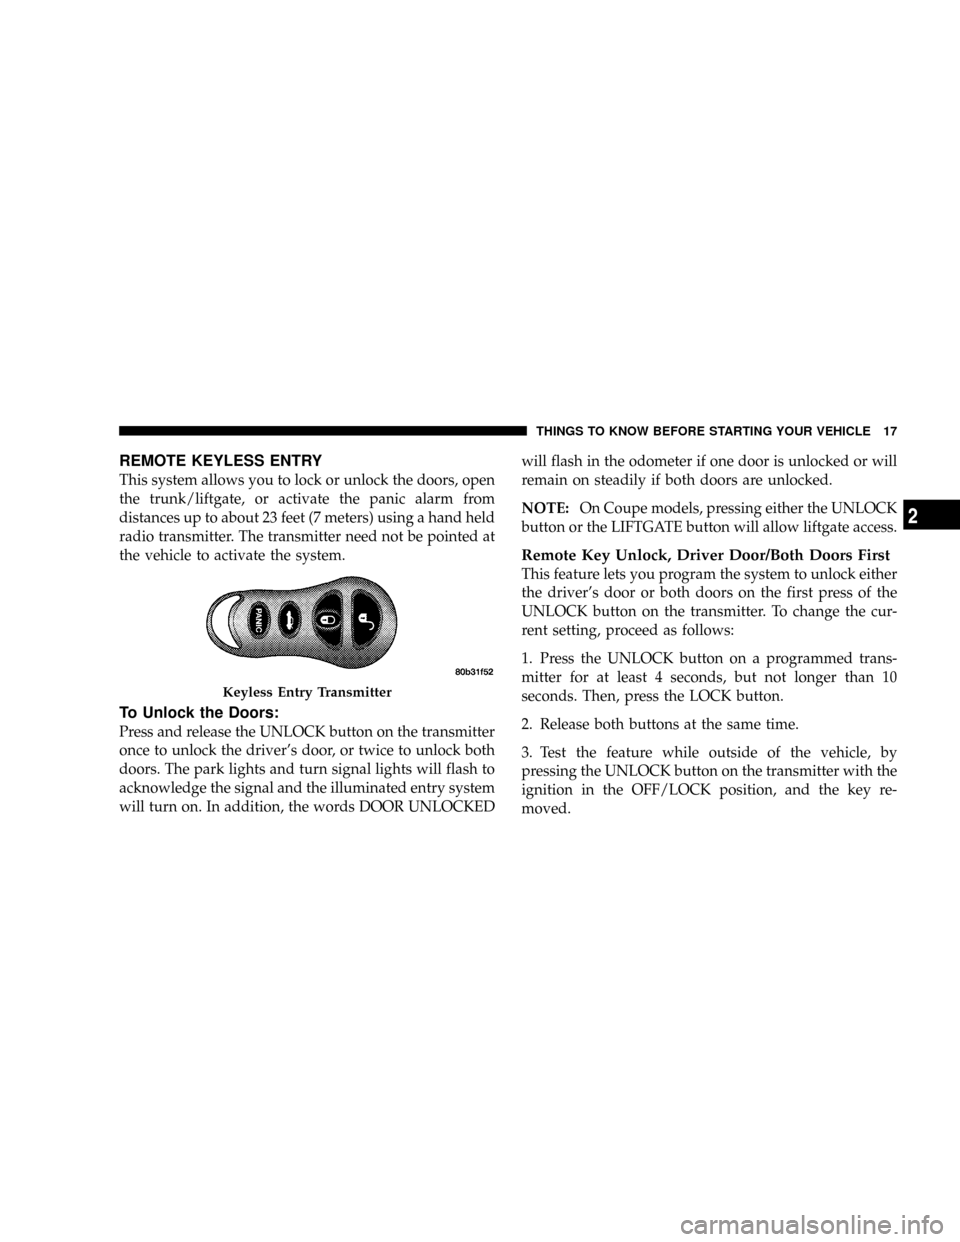
REMOTE KEYLESS ENTRY
This system allows you to lock or unlock the doors, open
the trunk/liftgate, or activate the panic alarm from
distances up to about 23 feet (7 meters) using a hand held
radio transmitter. The transmitter need not be pointed at
the vehicle to activate the system.
To Unlock the Doors:
Press and release the UNLOCK button on the transmitter
once to unlock the driver's door, or twice to unlock both
doors. The park lights and turn signal lights will flash to
acknowledge the signal and the illuminated entry system
will turn on. In addition, the words DOOR UNLOCKEDwill flash in the odometer if one door is unlocked or will
remain on steadily if both doors are unlocked.
NOTE:On Coupe models, pressing either the UNLOCK
button or the LIFTGATE button will allow liftgate access.
Remote Key Unlock, Driver Door/Both Doors First
This feature lets you program the system to unlock either
the driver's door or both doors on the first press of the
UNLOCK button on the transmitter. To change the cur-
rent setting, proceed as follows:
1. Press the UNLOCK button on a programmed trans-
mitter for at least 4 seconds, but not longer than 10
seconds. Then, press the LOCK button.
2. Release both buttons at the same time.
3. Test the feature while outside of the vehicle, by
pressing the UNLOCK button on the transmitter with the
ignition in the OFF/LOCK position, and the key re-
moved.
Keyless Entry Transmitter
THINGS TO KNOW BEFORE STARTING YOUR VEHICLE 17
2
Page 23 of 303
2. Remove and replace the battery. Avoid touching the
new battery with your fingers. Skin oils may cause
battery deterioration. If you touch a battery, clean it with
rubbing alcohol.
3. To assemble the transmitter case, snap the two halves
together.
4. Test the transmitter operation.
General Information
This transmitter complies with FCC rules part 15. Opera-
tion is subject to the following conditions:
1. This device may not cause harmful interference.
2. This device must accept any interference that may be
received, including interference that may cause undes-
ired operation.
If your Remote Keyless Entry transmitter ever fails to
operate from a normal distance, check the following:1. Closeness to a radio transmitter, such as a radio station
tower, airport transmitter, and some mobile or CB radios
can affect transmitter operation. To verify if this is the
cause, move the vehicle to another area and test trans-
mitter operation.
2. The transmitter may become ªout of syncº and will no
longer function if operated more than 255 times while out
of range of the vehicle (23 feet or 7 meters) or if operated
while the vehicle battery is dead or disconnected. To
ªsynchronizeº the transmitter, remove the key from the
ignition. Close the hood and all doors. Press both buttons
on the transmitter for about 10 seconds. The horn will
chirp once to acknowledge the signal. Normal transmit-
ter operation should resume.
3. The transmitter battery may be weak or dead. The
expected life of the battery is a minimum of three years.
22 THINGS TO KNOW BEFORE STARTING YOUR VEHICLE
Page 41 of 303
Driver and Passenger Supplemental Restraint
System (SRS) - Airbag
This vehicle is equipped with airbags for the driver and
passenger as a supplement to the seat belt restraint
systems. The driver airbag is mounted in the steering
wheel. The passenger airbag is mounted underneath a
cover in the passenger's side of the instrument panel. The
words SRS/AIRBAG is embossed on the airbag covers.
NOTE:The airbags are certified to the Federal regula-
tions that allow less forceful deployment. The passenger
airbag is certified to the Federal regulations that define
Occupant Classification (Refer to ªHow The Airbag Sys-
tem Worksº in this section).
The airbags have a multi stage inflator design. This may
allow the airbag to have different rates of inflation that
are based on collision severity and occupant size.
WARNING!
²Do not put anything on or around the airbag covers or
attempt to open them manually. You may damage the
airbags and you could be injured because the airbags are
no longer functional. These protective covers for the
airbag cushions are designed to open only when the
airbags are inflating.
²Do not drill, cut, or tamper with the knee bolster in any
way.
²Do not mount any accessories to the knee bolster such as
alarm lights, stereos, citizens band radios, etc.
²Relying on the airbags alone could lead to more severe
injuries in a collision. The airbags work with your seat
belt to restrain you properly. In some collisions, the
airbags won't deploy at all. Always wear your seat belts
even though you have airbags.
²Being too close to the steering wheel or instrument panel
during airbag deployment could cause serious injury.
Airbags need room to inflate. Sit back, extending your
arms comfortably to reach the steering wheel or instru-
ment panel.
40 THINGS TO KNOW BEFORE STARTING YOUR VEHICLE
Page 87 of 303
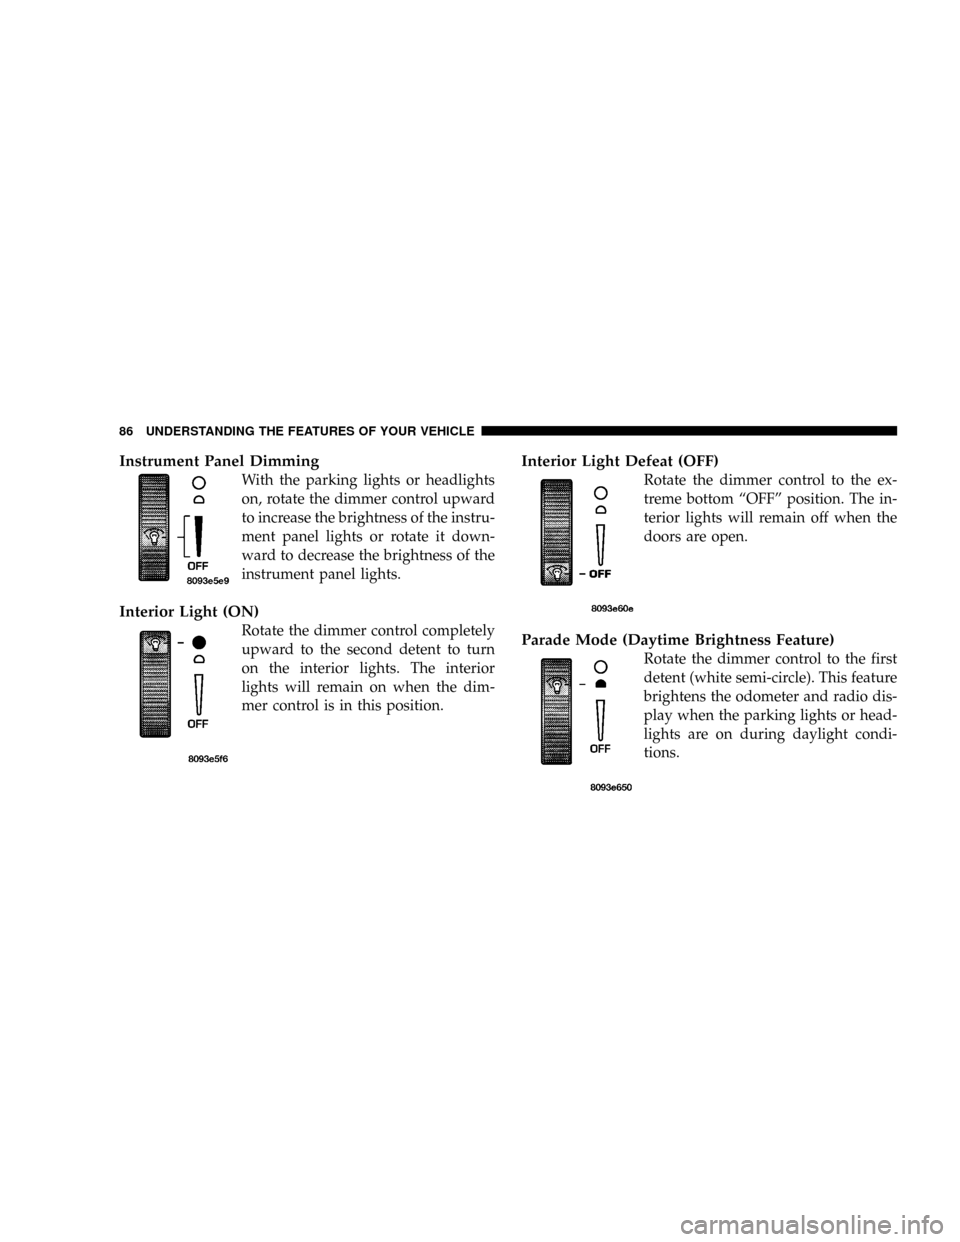
Instrument Panel Dimming
With the parking lights or headlights
on, rotate the dimmer control upward
to increase the brightness of the instru-
ment panel lights or rotate it down-
ward to decrease the brightness of the
instrument panel lights.
Interior Light (ON)
Rotate the dimmer control completely
upward to the second detent to turn
on the interior lights. The interior
lights will remain on when the dim-
mer control is in this position.
Interior Light Defeat (OFF)
Rotate the dimmer control to the ex-
treme bottom ªOFFº position. The in-
terior lights will remain off when the
doors are open.
Parade Mode (Daytime Brightness Feature)
Rotate the dimmer control to the first
detent (white semi-circle). This feature
brightens the odometer and radio dis-
play when the parking lights or head-
lights are on during daylight condi-
tions.
86 UNDERSTANDING THE FEATURES OF YOUR VEHICLE
Page 94 of 303
UNDERSTANDING YOUR INSTRUMENT PANEL
CONTENTS
mInstrument Panel Features..................95
mInstrument Cluster Description..............96
NSpeedometer..........................96
NMessage Center.......................97
NGauges & Indicator Lights...............103
mSetting The Digital Clock.................106
NClock Setting Procedure.................106
mRadio General Information................106
NRadio Broadcast Signals.................106NTwo Types Of Signals..................107
NElectrical Disturbances..................107
NAM Reception.......................107
NFM Reception........................107
mSales Code RAH Ð AM & FM Stereo Radio
With CD Player And CD/DVD Changer
Controls.............................108
NRadio Operation......................108
NCD Player Operation...................112
NCD/DVD Changer Operation.............1144
Page 95 of 303
NNotes On Playing MP3 Files.............114
NOperation Instructions - (CD Mode For
MP3 Audio Play).....................116
mSatellite Radio Ð If Equipped..............117
NSystem Activation.....................118
NElectronic Serial Number/Sirius Identification
Number (ENS/SID)....................118
NSelecting Satellite Mode In RBB, RAH, REV
And RBK Radios......................119
NSelecting Satellite Mode In RBP, RBU, RAZ,
RB1 And RBQ Radios..................119
NSelecting a Channel....................120
NStoring And Selecting Pre-Set Channels......120
NUsing The PTY (Program Type) Button
(If Equipped)........................120NPTY Button9Scan9.....................120
NPTY Button9Seek9.....................121
NSatellite Antenna......................121
NReception Quality.....................121
mRadio Antenna........................122
mCD/DVD Disc Maintenance...............122
mRadio Operation And Cellular Phones........122
mClimate Controls.......................122
NAir Conditioning And Heating System......123
NOperating Tips.......................126
mRear Window Features...................128
NElectric Rear Window Defroster...........128
94 UNDERSTANDING YOUR INSTRUMENT PANEL
Page 107 of 303
Charge System Light
The red Charge System Light is located in the
Voltage Gauge. It will turn on when there is a
charging system malfunction or a possible accessory
drive belt failure.
CAUTION!
The accessory belt also drives the water pump. Op-
erating the vehicle with a failed belt can cause engine
overheating and possible severe engine damage.
SETTING THE DIGITAL CLOCK
The digital display panel on the radio displays the time in
hours and minutes. The display panel is operative when
the ignition switch is in the ON/RUN or ACC position.
Press and release the Time button on the radio to display
the time. Press and release the button a second time to
turn off the time display.
Clock Setting Procedure
1. Turn the ignition switch to the ªON/RUNº or ªACCº
position.
2. Using the point of a ballpoint pen or similar object,
press either the ªHº (Hour) or ªMº (Minute) button on
the radio. The display will show the time.
3. Press the ªHº button to set hours or the ªMº button to
set minutes. The time setting will increase each time you
press a button.
RADIO GENERAL INFORMATION
Radio Broadcast Signals
The radio will provide excellent reception under most
operating conditions. Like any system, however, car
radios have performance limitations, due to mobile op-
eration and natural phenomena, which might lead you to
believe your sound system is malfunctioning. To help
106 UNDERSTANDING YOUR INSTRUMENT PANEL
Page 108 of 303
you understand and save you concern about these ªap-
parentº malfunctions, you must understand a point or
two about the transmission and reception of radio sig-
nals.
Two Types of Signals
There are two basic types of radio signals: AM or
Amplitude Modulation, in which the transmitted sound
causes the amplitude, or height, of the radio waves to
vary; and FM or Frequency Modulation, in which the
frequency of the wave is varied to carry the sound.
Electrical Disturbances
Radio waves may pick up electrical disturbances during
transmission. They mainly affect the wave amplitude,
and thus remain a part of the AM reception. They
interfere very little with the frequency variations that
carry the FM signal.
AM Reception
AM sound is based on wave amplitude, so AM reception
can be disrupted by such things as lightning, power lines
and neon signs.
FM Reception
Because FM transmission is based on frequency varia-
tions, interference that consists of amplitude variations
can be filtered out, leaving the reception relatively clear,
which is the major feature of FM radio.
NOTE:The radio, steering wheel radio controls (if
equipped), and 6±Disc CD/DVD changer (if equipped)
will remain active for up to 10 minutes after the ignition
switch has been turned OFF. Opening a vehicle front
door will cancel this feature.
UNDERSTANDING YOUR INSTRUMENT PANEL 107
4
Page 109 of 303
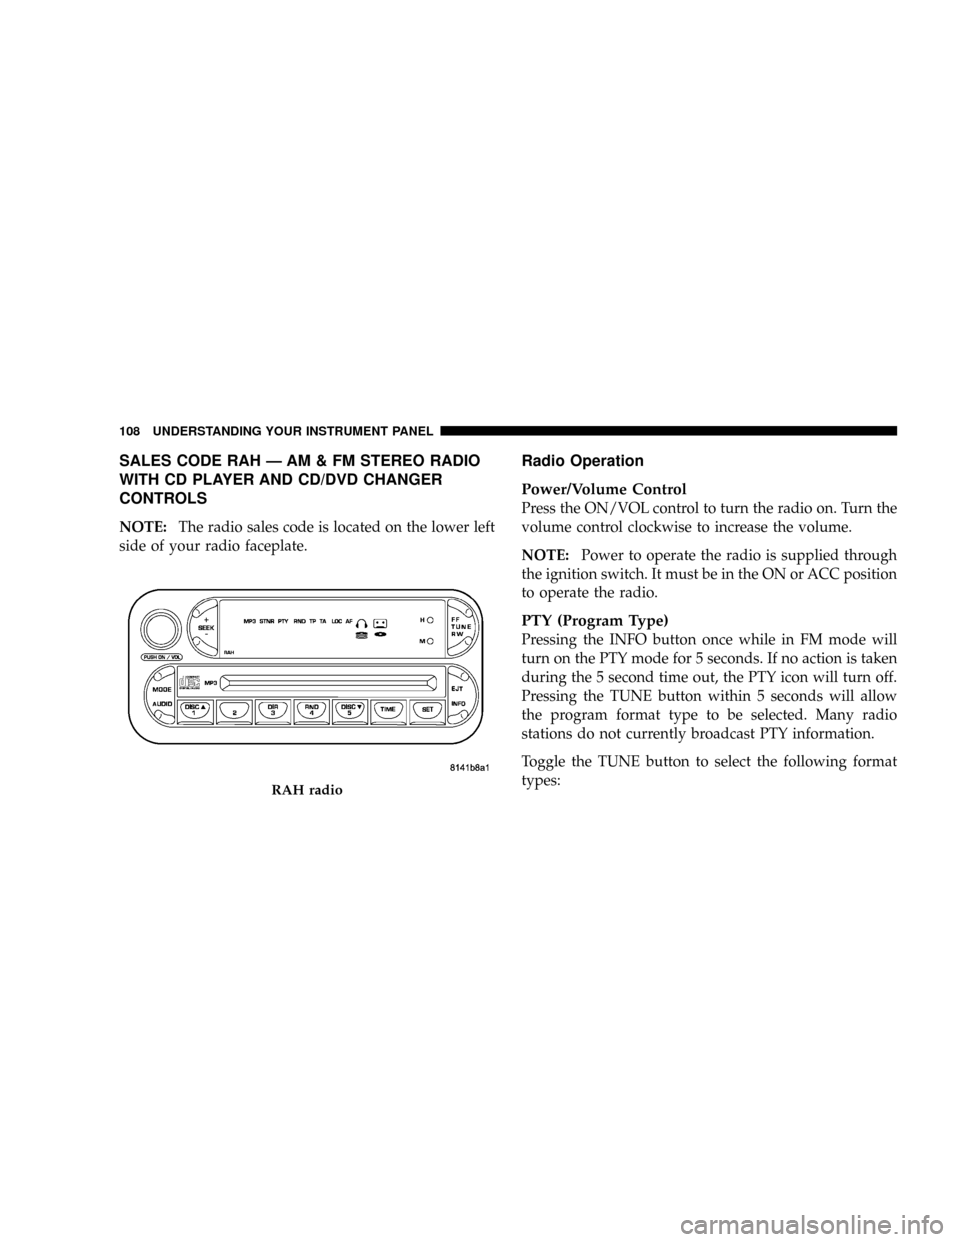
SALES CODE RAH Ð AM & FM STEREO RADIO
WITH CD PLAYER AND CD/DVD CHANGER
CONTROLS
NOTE:The radio sales code is located on the lower left
side of your radio faceplate.
Radio Operation
Power/Volume Control
Press the ON/VOL control to turn the radio on. Turn the
volume control clockwise to increase the volume.
NOTE:Power to operate the radio is supplied through
the ignition switch. It must be in the ON or ACC position
to operate the radio.
PTY (Program Type)
Pressing the INFO button once while in FM mode will
turn on the PTY mode for 5 seconds. If no action is taken
during the 5 second time out, the PTY icon will turn off.
Pressing the TUNE button within 5 seconds will allow
the program format type to be selected. Many radio
stations do not currently broadcast PTY information.
Toggle the TUNE button to select the following format
types:
RAH radio
108 UNDERSTANDING YOUR INSTRUMENT PANEL