DODGE VIPER 2010 ZB II / 2.G Owners Manual
Manufacturer: DODGE, Model Year: 2010, Model line: VIPER, Model: DODGE VIPER 2010 ZB II / 2.GPages: 315, PDF Size: 4.43 MB
Page 91 of 315
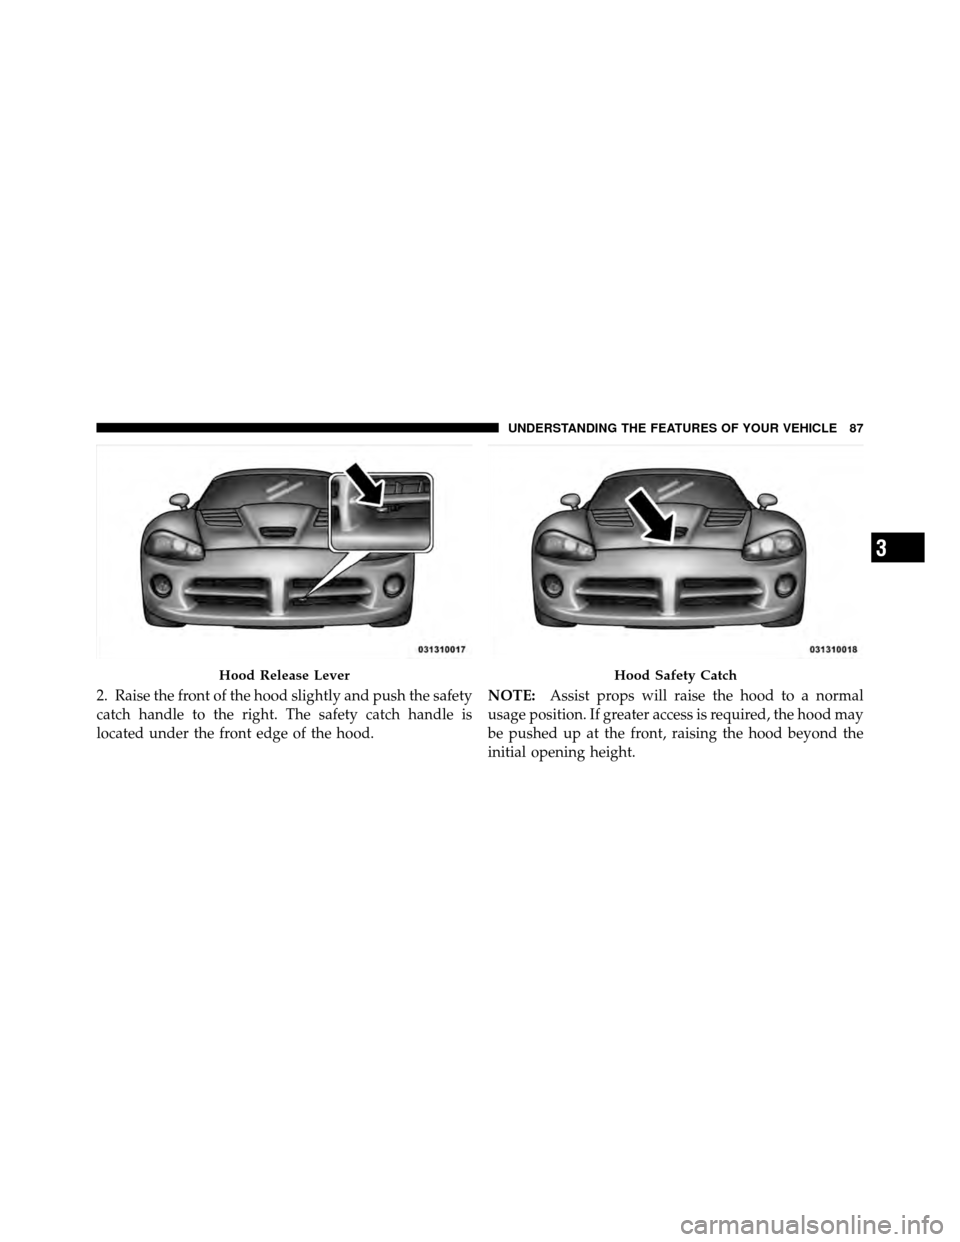
2. Raise the front of the hood slightly and push the safety
catch handle to the right. The safety catch handle is
located under the front edge of the hood.NOTE:
Assist props will raise the hood to a normal
usage position. If greater access is required, the hood may
be pushed up at the front, raising the hood beyond the
initial opening height.
Hood Release LeverHood Safety Catch
3
UNDERSTANDING THE FEATURES OF YOUR VEHICLE 87
Page 92 of 315
CAUTION!
•Do not leave the hood open in areas where strong
gusts of wind are likely. Such a place might be by
the side of the road where large trucks pass by.
Strong gusts of wind may damage your hood.
Always close the hood in such situations.
•To prevent possible damage, do not slam the hood
to close it. Simply lower the hood until it is open
approximately 6 in (15 cm) and then drop it. This
should secure both latches. Never drive your ve-
hicle unless the hood is fully closed with both
latches engaged.
WARNING!
Be sure the hood is fully latched before driving your
vehicle. If the hood is not fully latched, it could open
when the vehicle is in motion and block your vision.
Failure to follow this warning could result in serious
injury or death.
LIGHTS
Exterior and Interior Lighting Control
The multifunction lever on the left side of the
steering column controls the operation of the
headlights, parking lights, turn signal lights, front
fog lights, instrument panel lights and interior lights.
Headlights and Parking Lights
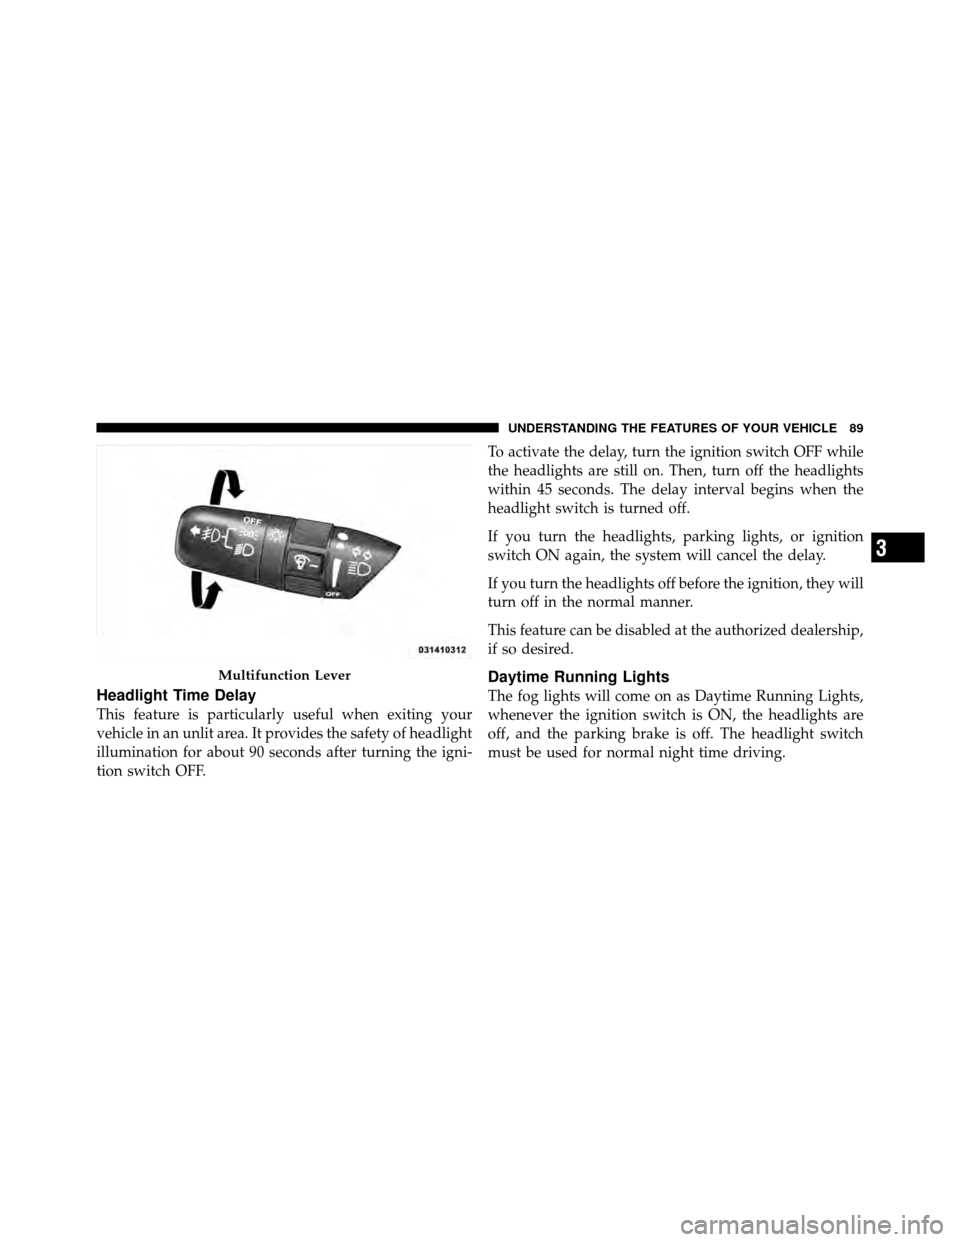
Turn the end of the multifunction lever to the first detent
for parking light operation. Turn the end of the lever to
the second detent for headlight operation.
88 UNDERSTANDING THE FEATURES OF YOUR VEHICLE
Page 93 of 315
Headlight Time Delay
This feature is particularly useful when exiting your
vehicle in an unlit area. It provides the safety of headlight
illumination for about 90 seconds after turning the igni-
tion switch OFF.To activate the delay, turn the ignition switch OFF while
the headlights are still on. Then, turn off the headlights
within 45 seconds. The delay interval begins when the
headlight switch is turned off.
If you turn the headlights, parking lights, or ignition
switch ON again, the system will cancel the delay.
If you turn the headlights off before the ignition, they will
turn off in the normal manner.
This feature can be disabled at the authorized dealership,
if so desired.
Daytime Running Lights
The fog lights will come on as Daytime Running Lights,
whenever the ignition switch is ON, the headlights are
off, and the parking brake is off. The headlight switch
must be used for normal night time driving.
Multifunction Lever
3
UNDERSTANDING THE FEATURES OF YOUR VEHICLE 89
Page 94 of 315
NOTE:This feature is standard on all Canadian vehicles
and cannot be disabled. For U.S. vehicles, this feature is
shipped disabled and can be enabled or disabled at a
authorized dealership, if so desired.
Lights-On Reminder
If the headlights or parking lights are on and the ignition
switch is turned OFF, a chime will sound when the
driver’s door is opened to alert the driver.
Battery Saver Feature — Exterior Lights
To protect the battery, the exterior lights will turn off
automatically three minutes after the ignition switch is
turned OFF. To restore exterior light operation, either
turn the ignition switch ON or cycle the headlight switch.
Fog Lights
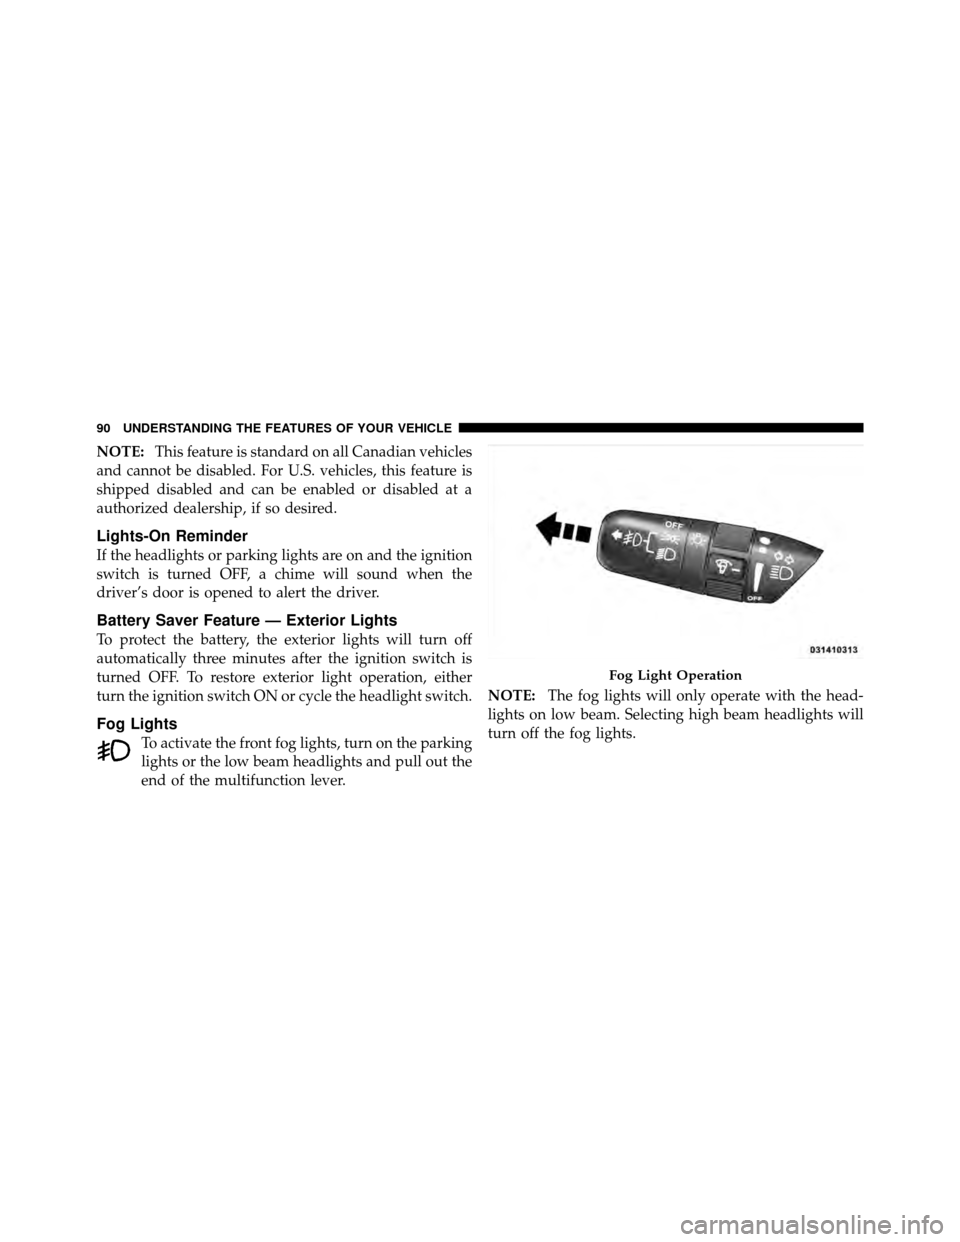
To activate the front fog lights, turn on the parking
lights or the low beam headlights and pull out the
end of the multifunction lever. NOTE:
The fog lights will only operate with the head-
lights on low beam. Selecting high beam headlights will
turn off the fog lights.
Fog Light Operation
90 UNDERSTANDING THE FEATURES OF YOUR VEHICLE
Page 95 of 315
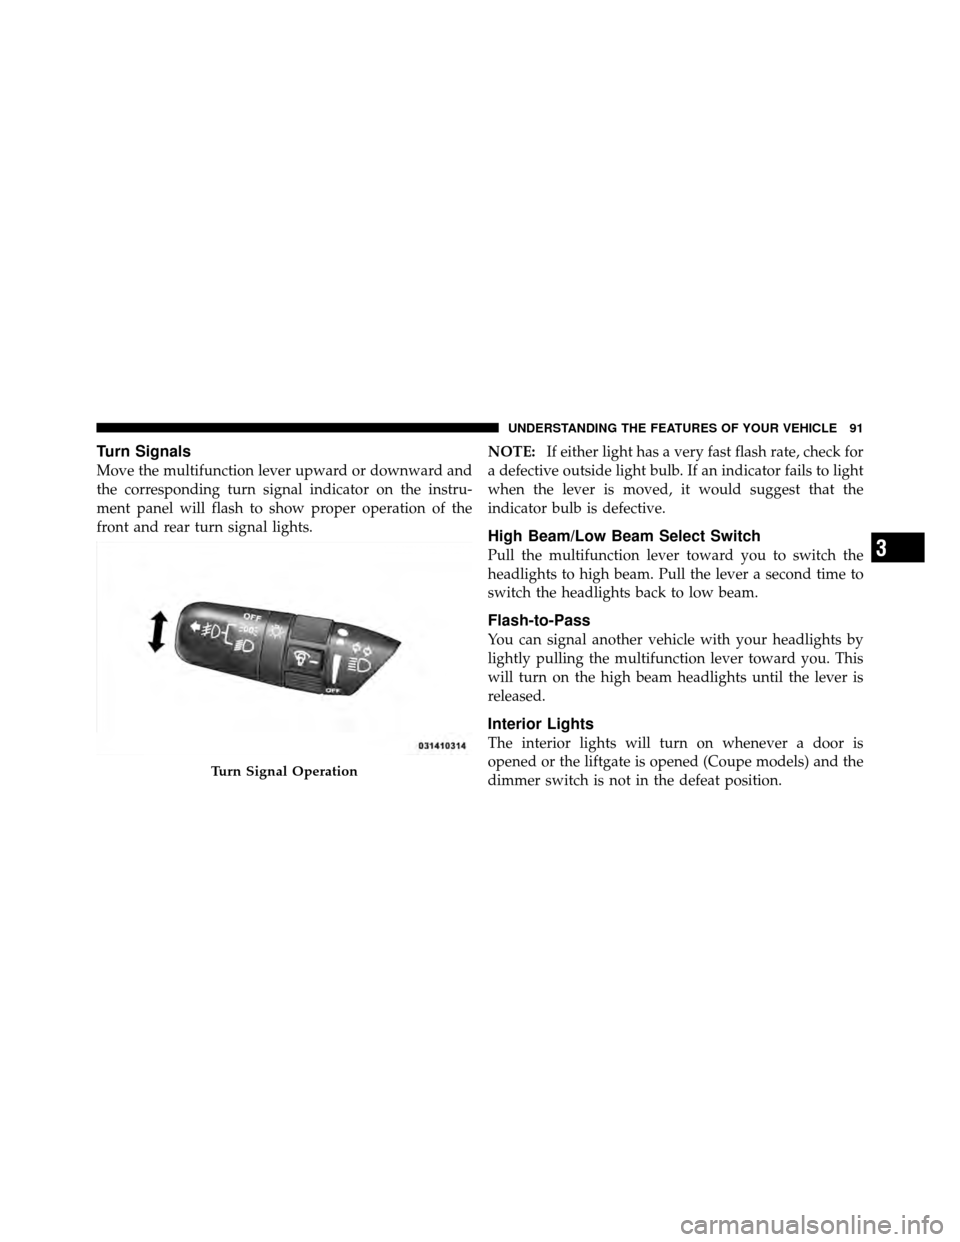
Turn Signals
Move the multifunction lever upward or downward and
the corresponding turn signal indicator on the instru-
ment panel will flash to show proper operation of the
front and rear turn signal lights.NOTE:
If either light has a very fast flash rate, check for
a defective outside light bulb. If an indicator fails to light
when the lever is moved, it would suggest that the
indicator bulb is defective.
High Beam/Low Beam Select Switch
Pull the multifunction lever toward you to switch the
headlights to high beam. Pull the lever a second time to
switch the headlights back to low beam.
Flash-to-Pass
You can signal another vehicle with your headlights by
lightly pulling the multifunction lever toward you. This
will turn on the high beam headlights until the lever is
released.
Interior Lights
The interior lights will turn on whenever a door is
opened or the liftgate is opened (Coupe models) and the
dimmer switch is not in the defeat position.
Turn Signal Operation
3
UNDERSTANDING THE FEATURES OF YOUR VEHICLE 91
Page 96 of 315
The interior lights will turn on, remain on for about
30 seconds, and then fade to off if any of the following
occur:
•A door is opened using the outside door handle and
then closed.
•A door is unlocked using the Remote Keyless Entry
(RKE) transmitter.
•A door is unlocked using the outside driver’s door key
cylinder.
The interior lights will turn on and remain on for about
four seconds and then fade to off if a door is opened
using the inside door handle.
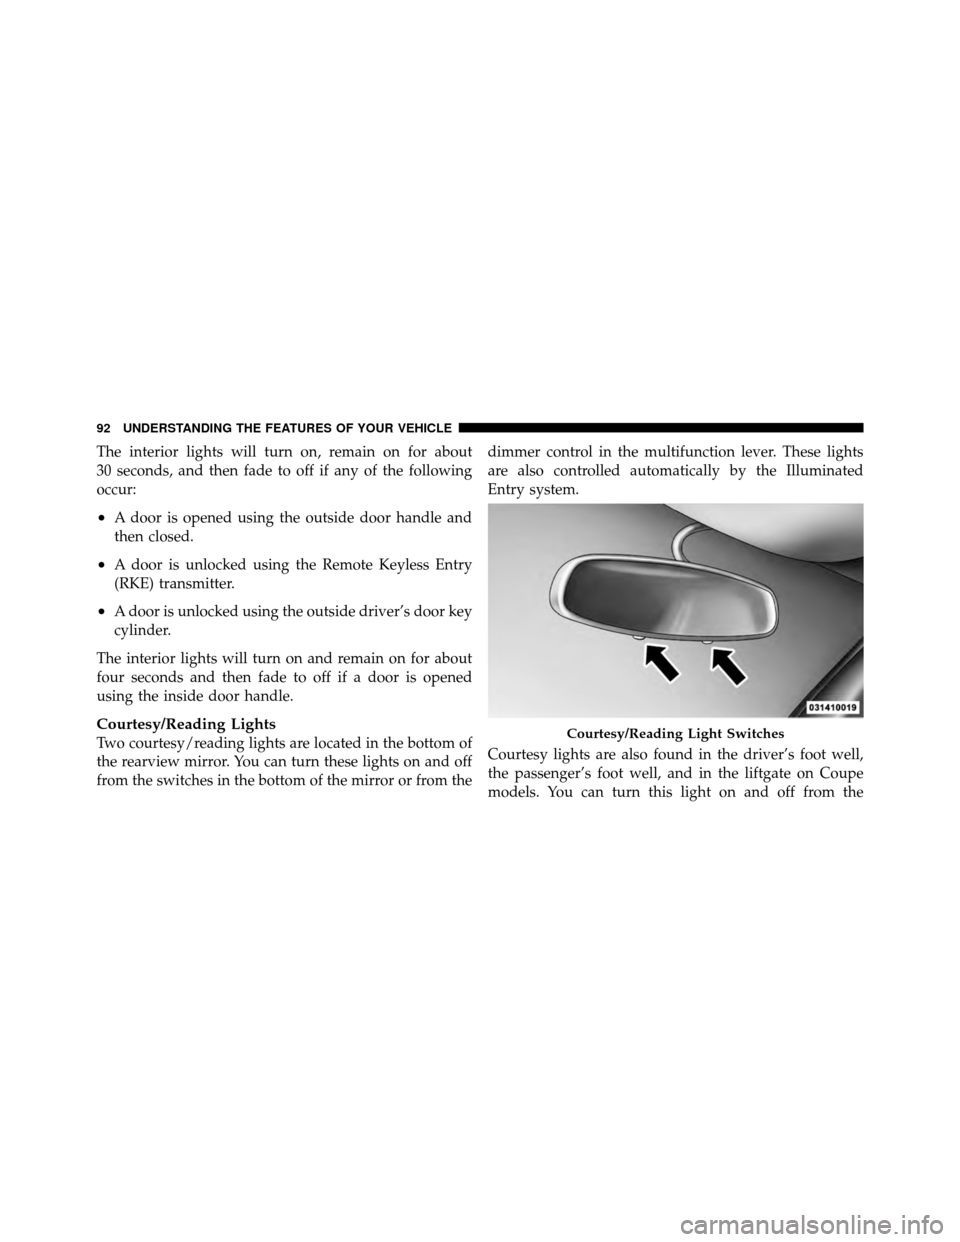
Courtesy/Reading Lights
Two courtesy/reading lights are located in the bottom of
the rearview mirror. You can turn these lights on and off
from the switches in the bottom of the mirror or from the dimmer control in the multifunction lever. These lights
are also controlled automatically by the Illuminated
Entry system.
Courtesy lights are also found in the driver’s foot well,
the passenger’s foot well, and in the liftgate on Coupe
models. You can turn this light on and off from theCourtesy/Reading Light Switches
92 UNDERSTANDING THE FEATURES OF YOUR VEHICLE
Page 97 of 315
dimmer control in the multifunction lever. This light is
also controlled automatically by the Illuminated Entry
system.
Battery Saver Feature — Interior Lights
To protect the battery, the interior lights will turn off
automatically 15 minutes after the ignition switch is
moved to the OFF/LOCK position. This will occur if the
interior lights were switched on manually or are on
because a door is open or the liftgate is open (Coupe
models). To restore interior light operation, turn the
ignition switch to the ON/RUN position or cycle the
light switch.
Dimmer Control
The dimmer control is part of the multifunction lever. It
controls the operation of the interior lights and the
brightness of the instrument panel lights.
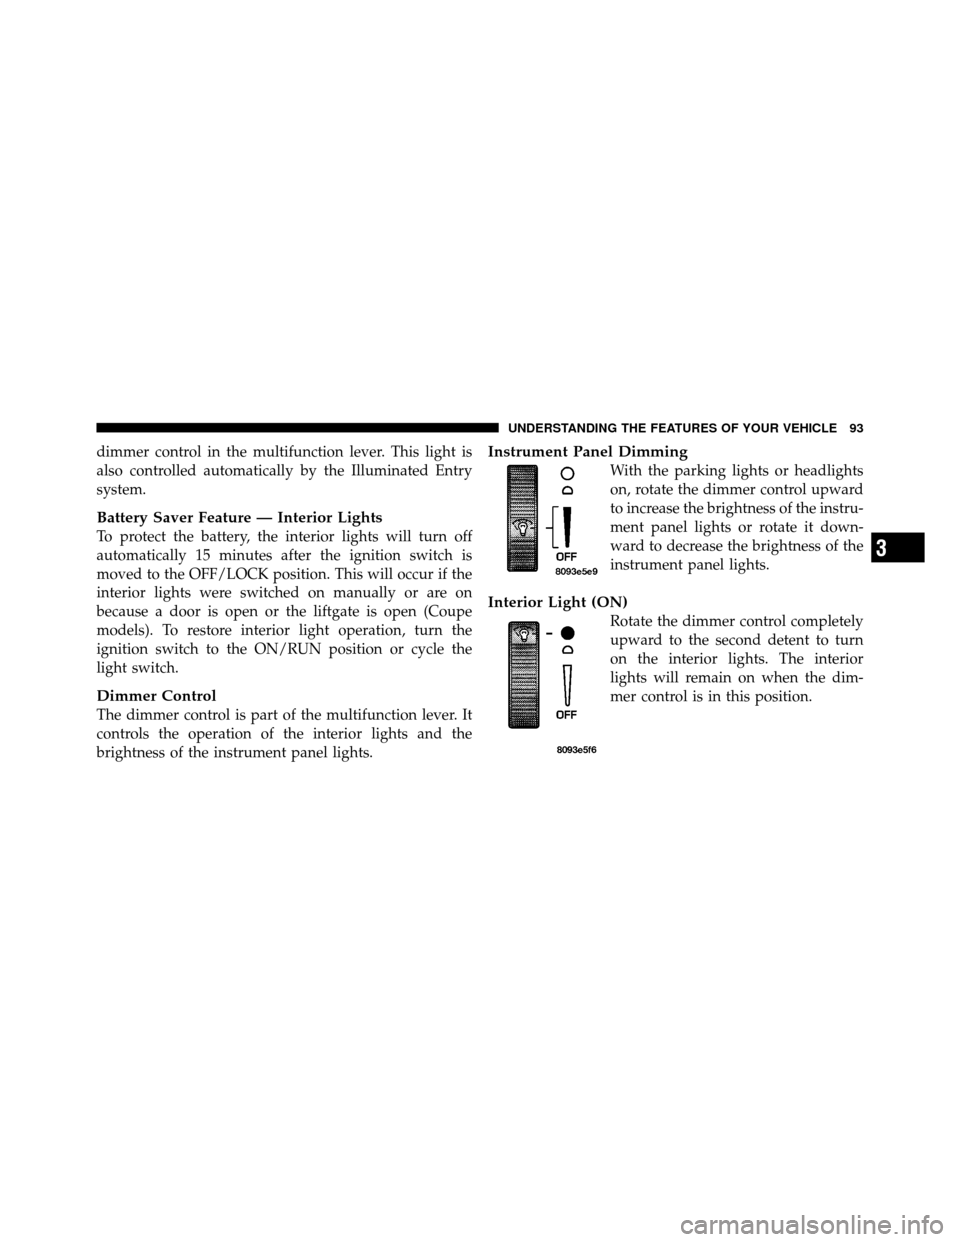
Instrument Panel Dimming
With the parking lights or headlights
on, rotate the dimmer control upward
to increase the brightness of the instru-
ment panel lights or rotate it down-
ward to decrease the brightness of the
instrument panel lights.
Interior Light (ON)
Rotate the dimmer control completely
upward to the second detent to turn
on the interior lights. The interior
lights will remain on when the dim-
mer control is in this position.
3
UNDERSTANDING THE FEATURES OF YOUR VEHICLE 93
Page 98 of 315
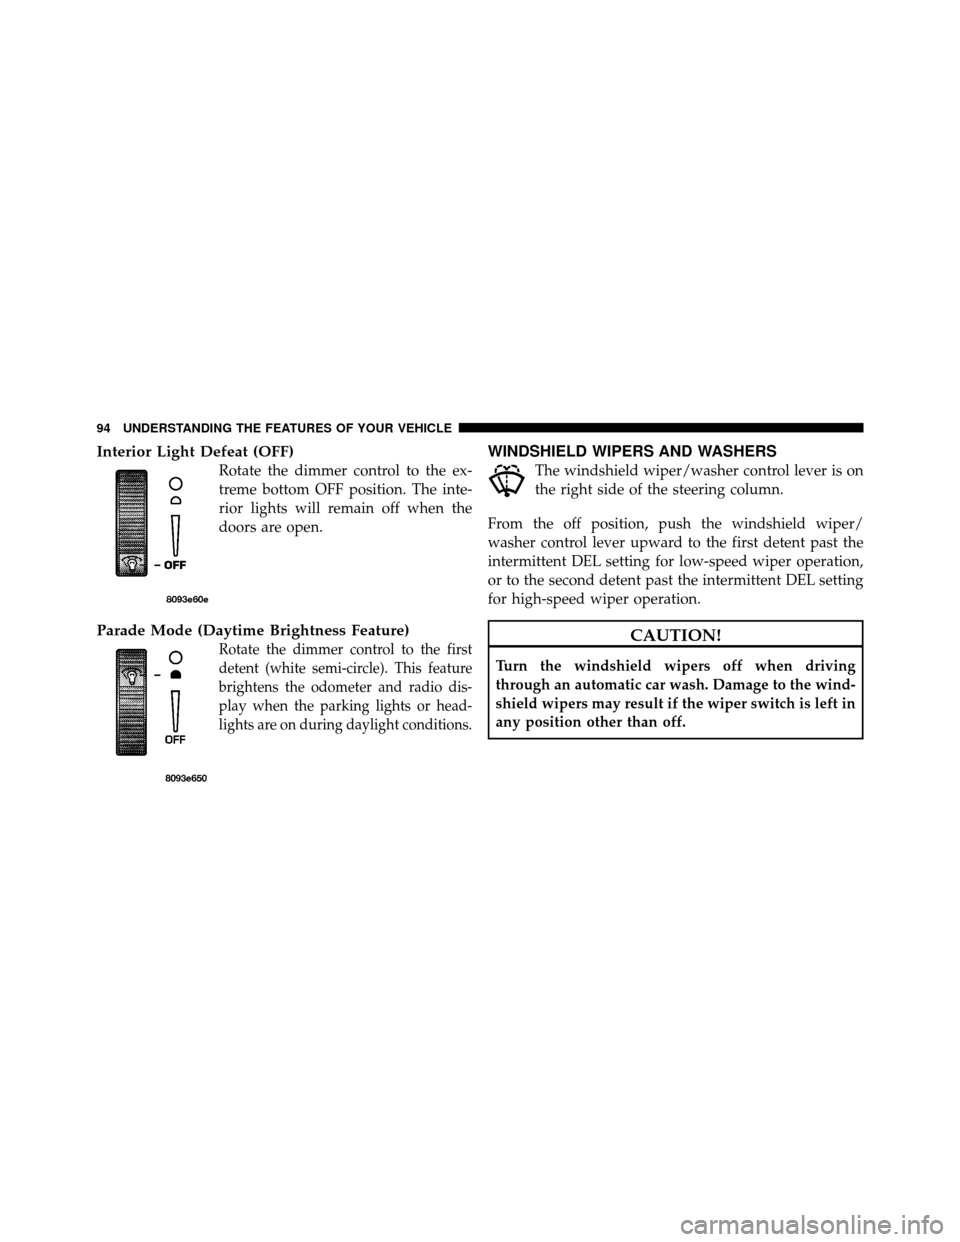
Interior Light Defeat (OFF)
Rotate the dimmer control to the ex-
treme bottom OFF position. The inte-
rior lights will remain off when the
doors are open.
Parade Mode (Daytime Brightness Feature)
Rotate the dimmer control to the first
detent (white semi-circle). This feature
brightens the odometer and radio dis-
play when the parking lights or head-
lights are on during daylight conditions.
WINDSHIELD WIPERS AND WASHERS
The windshield wiper/washer control lever is on
the right side of the steering column.
From the off position, push the windshield wiper/
washer control lever upward to the first detent past the
intermittent DEL setting for low-speed wiper operation,
or to the second detent past the intermittent DEL setting
for high-speed wiper operation.
CAUTION!
Turn the windshield wipers off when driving
through an automatic car wash. Damage to the wind-
shield wipers may result if the wiper switch is left in
any position other than off.
94 UNDERSTANDING THE FEATURES OF YOUR VEHICLE
Page 99 of 315
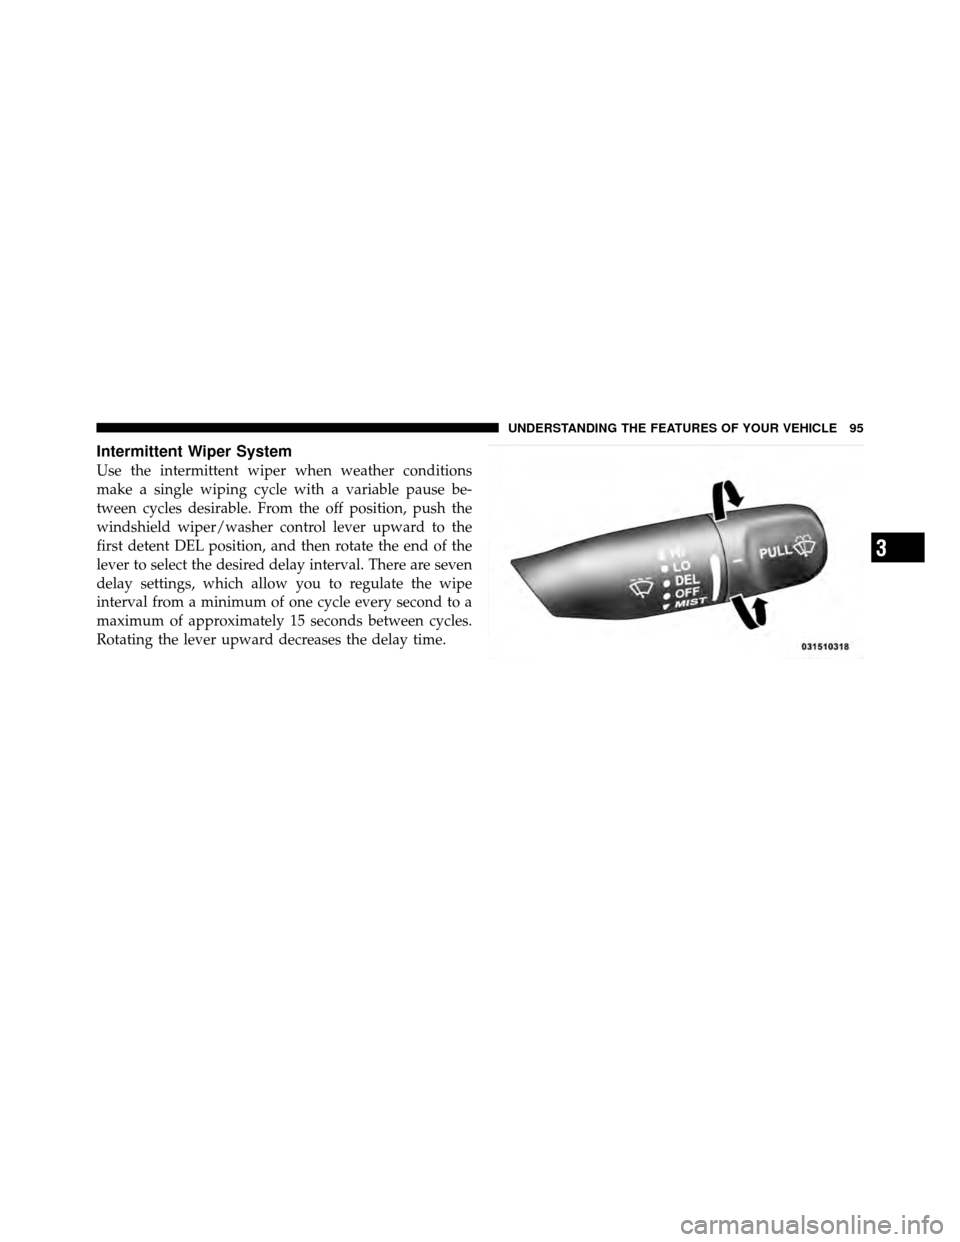
Intermittent Wiper System
Use the intermittent wiper when weather conditions
make a single wiping cycle with a variable pause be-
tween cycles desirable. From the off position, push the
windshield wiper/washer control lever upward to the
first detent DEL position, and then rotate the end of the
lever to select the desired delay interval. There are seven
delay settings, which allow you to regulate the wipe
interval from a minimum of one cycle every second to a
maximum of approximately 15 seconds between cycles.
Rotating the lever upward decreases the delay time.
3
UNDERSTANDING THE FEATURES OF YOUR VEHICLE 95
Page 100 of 315
WARNING!
Sudden loss of visibility through the windshield
could lead to an accident. You might not see other
vehicles or other obstacles. To avoid sudden icing of
the windshield during freezing weather, warm the
windshield with defroster before and during wind-
shield washer use.
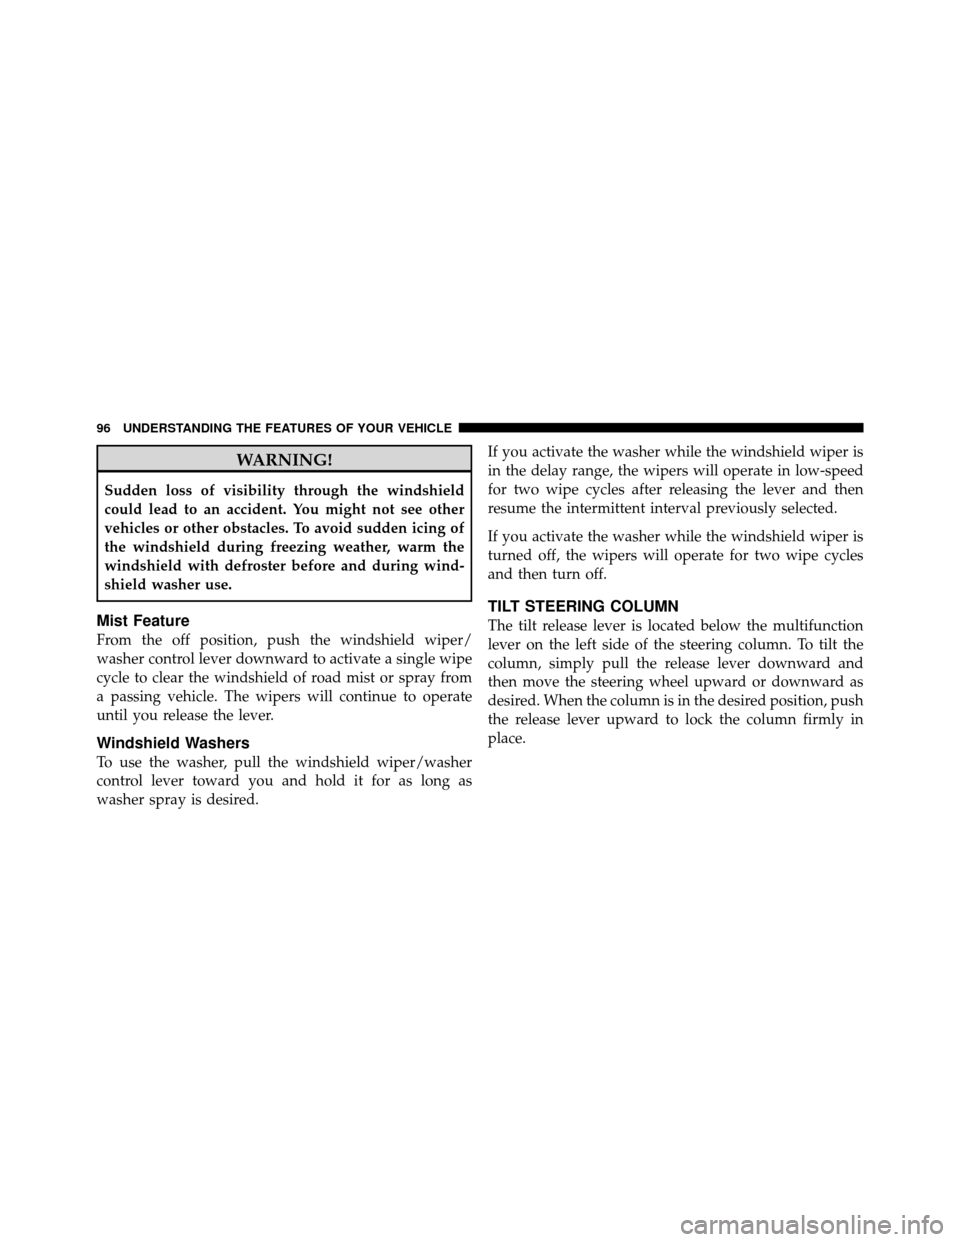
Mist Feature
From the off position, push the windshield wiper/
washer control lever downward to activate a single wipe
cycle to clear the windshield of road mist or spray from
a passing vehicle. The wipers will continue to operate
until you release the lever.
Windshield Washers
To use the washer, pull the windshield wiper/washer
control lever toward you and hold it for as long as
washer spray is desired.If you activate the washer while the windshield wiper is
in the delay range, the wipers will operate in low-speed
for two wipe cycles after releasing the lever and then
resume the intermittent interval previously selected.
If you activate the washer while the windshield wiper is
turned off, the wipers will operate for two wipe cycles
and then turn off.
TILT STEERING COLUMN
The tilt release lever is located below the multifunction
lever on the left side of the steering column. To tilt the
column, simply pull the release lever downward and
then move the steering wheel upward or downward as
desired. When the column is in the desired position, push
the release lever upward to lock the column firmly in
place.
96 UNDERSTANDING THE FEATURES OF YOUR VEHICLE