suspension DODGE VIPER 2013 VX / 3.G User Guide
[x] Cancel search | Manufacturer: DODGE, Model Year: 2013, Model line: VIPER, Model: DODGE VIPER 2013 VX / 3.GPages: 100, PDF Size: 3.1 MB
Page 68 of 100

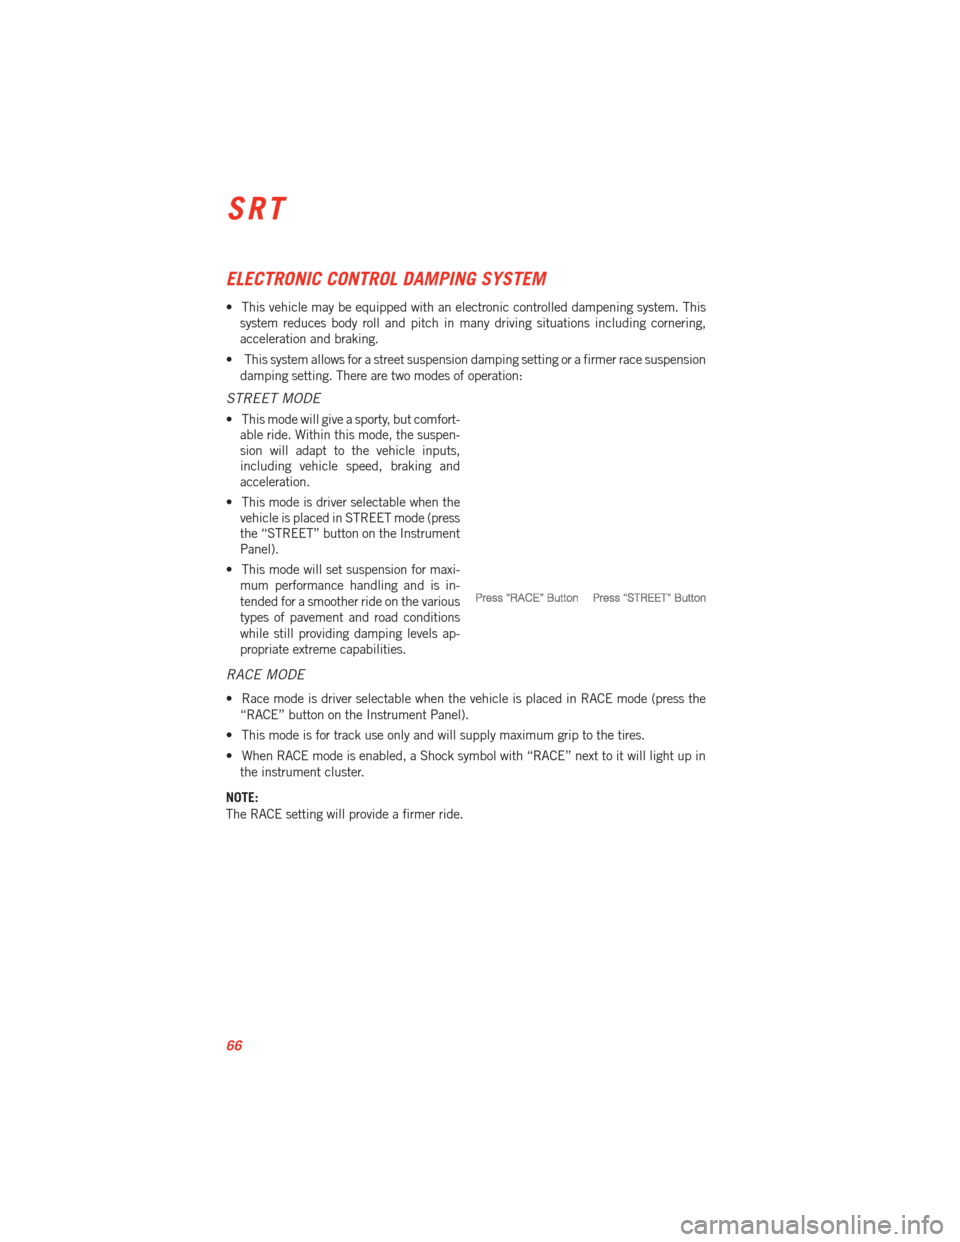
ELECTRONIC CONTROL DAMPING SYSTEM
• This vehicle may be equipped with an electronic controlled dampening system. Thissystem reduces body roll and pitch in many driving situations including cornering,
acceleration and braking.
• This system allows for a street suspension damping setting or a firmer race suspension damping setting. There are two modes of operation:
STREET MODE
• This mode will give a sporty, but comfort-able ride. Within this mode, the suspen-
sion will adapt to the vehicle inputs,
including vehicle speed, braking and
acceleration.
• This mode is driver selectable when the vehicle is placed in STREET mode (press
the “STREET” button on the Instrument
Panel).
• This mode will set suspension for maxi- mum performance handling and is in-
tended for a smoother ride on the various
types of pavement and road conditions
while still providing damping levels ap-
propriate extreme capabilities.
RACE MODE
• Race mode is driver selectable when the vehicle is placed in RACE mode (press the“RACE” button on the Instrument Panel).
• This mode is for track use only and will supply maximum grip to the tires.
• When RACE mode is enabled, a Shock symbol with “RACE” next to it will light up in the instrument cluster.
NOTE:
The RACE setting will provide a firmer ride.
SRT
66
Page 82 of 100

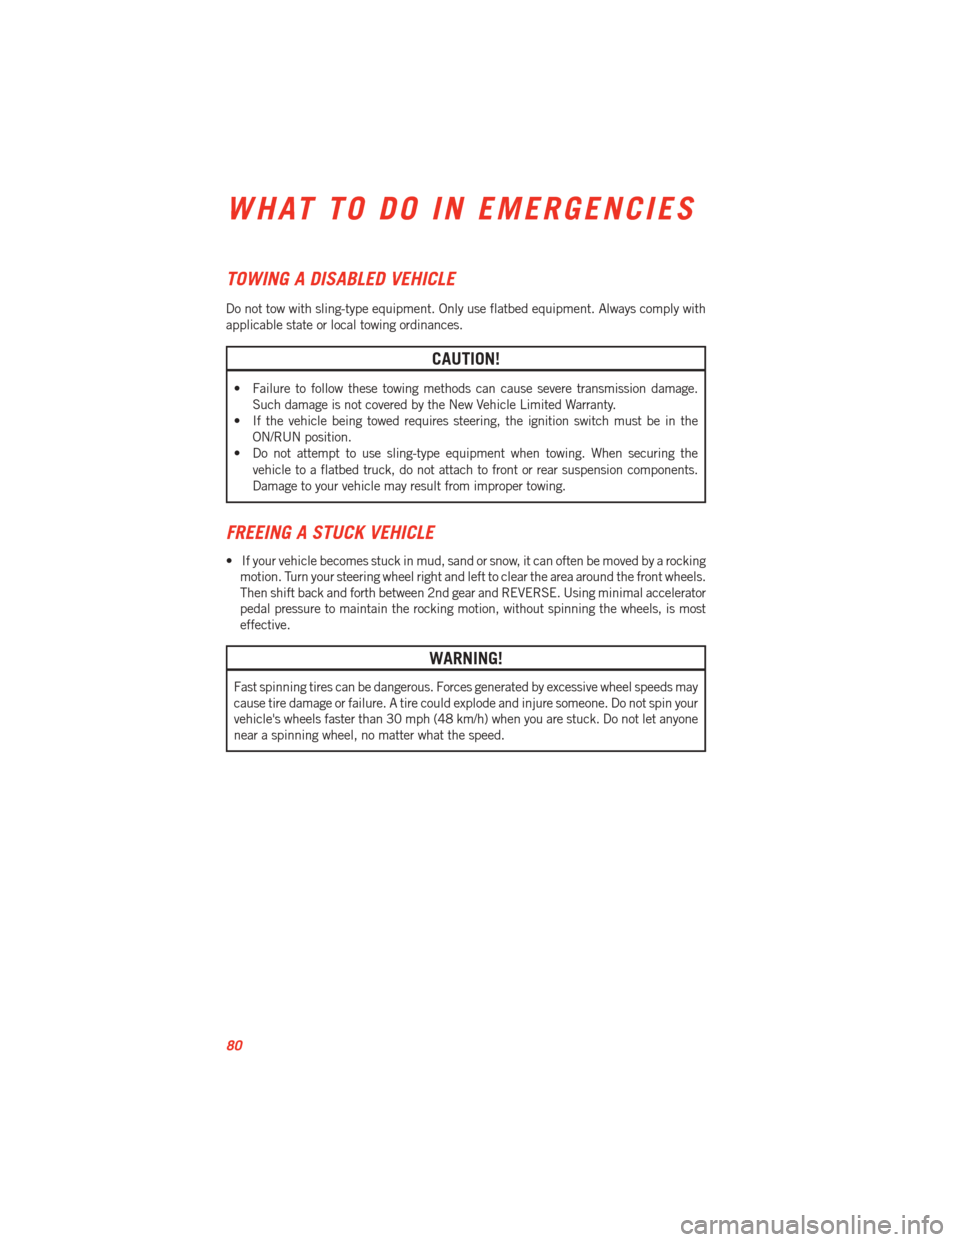
TOWING A DISABLED VEHICLE
Do not tow with sling-type equipment. Only use flatbed equipment. Always comply with
applicable state or local towing ordinances.
CAUTION!
• Failure to follow these towing methods can cause severe transmission damage.Such damage is not covered by the New Vehicle Limited Warranty.
• If the vehicle being towed requires steering, the ignition switch must be in the
ON/RUN position.
• Do not attempt to use sling-type equipment when towing. When securing the
vehicle to a flatbed truck, do not attach to front or rear suspension components.
Damage to your vehicle may result from improper towing.
FREEING A STUCK VEHICLE
• If your vehicle becomes stuck in mud, sand or snow, it can often be moved by a rockingmotion. Turn your steering wheel right and left to clear the area around the front wheels.
Then shift back and forth between 2nd gear and REVERSE. Using minimal accelerator
pedal pressure to maintain the rocking motion, without spinning the wheels, is most
effective.
WARNING!
Fast spinning tires can be dangerous. Forces generated by excessive wheel speeds may
cause tire damage or failure. A tire could explode and injure someone. Do not spin your
vehicle's wheels faster than 30 mph (48 km/h) when you are stuck. Do not let anyone
near a spinning wheel, no matter what the speed.
WHAT TO DO IN EMERGENCIES
80
Page 86 of 100

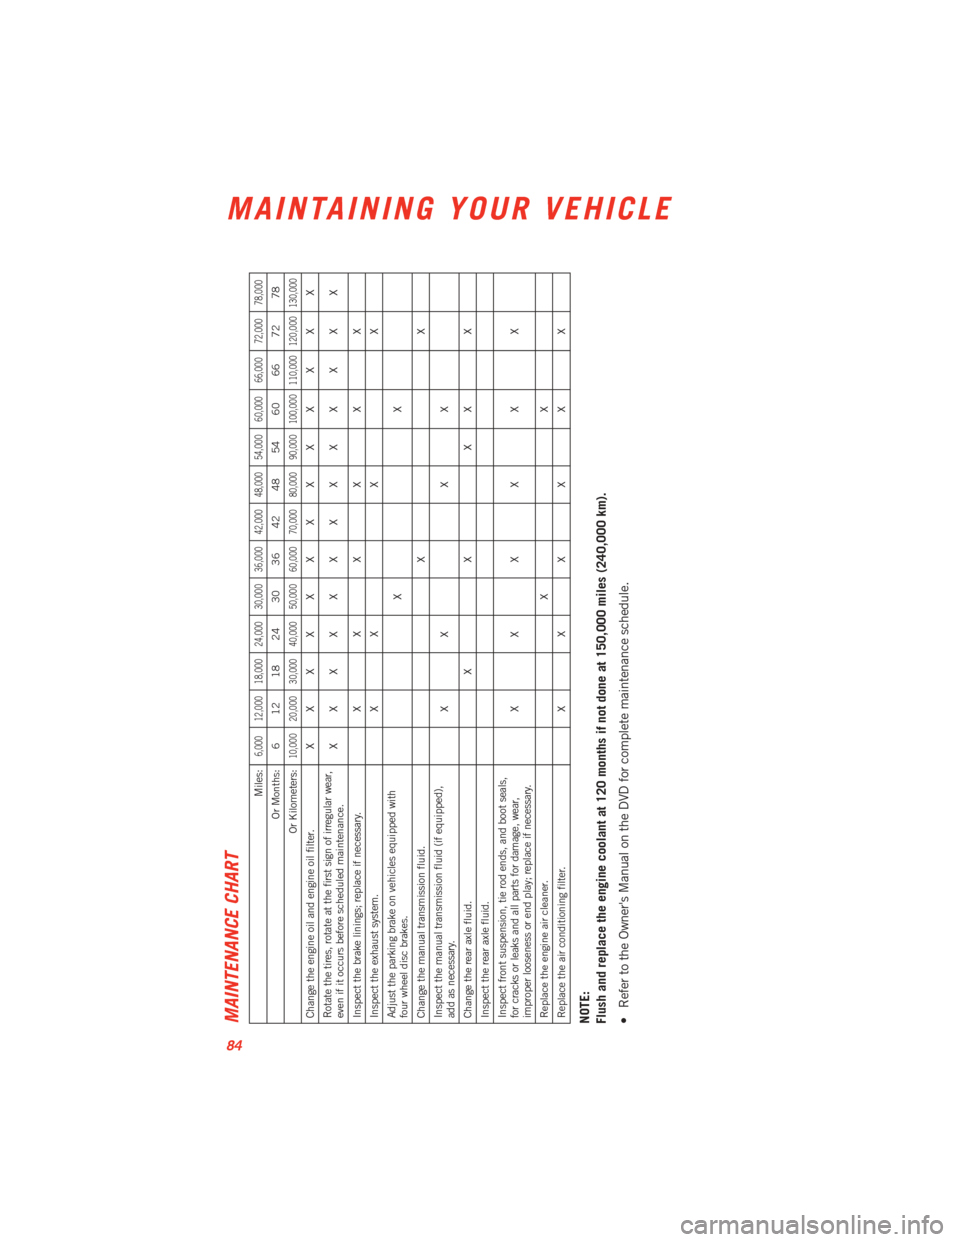
MAINTENANCE CHART
Miles:
6,000 12,000 18,000 24,000 30,000 36,000 42,000 48,000 54,000 60,000 66,000 72,000 78,000
Or Months: 6 12 18 24 30 36 42 48 54 60 66 72 78
Or Kilometers:
10,000 20,000 30,000 40,000 50,000 60,000 70,000 80,000 90,000 100,000 110,000 120,000 130,000
Change the engine oil and engine oil filter. XXXXXXXXX X X X X
Rotate the tires, rotate at the first sign of irregular wear,
even if it occurs before scheduled maintenance. XXXXXXXXX X X X X
Inspect the brake linings; replace if necessary. X X X X X X
Inspect the exhaust system. X X X X
Adjust the parking brake on vehicles equipped with
four wheel disc brakes. XX
Change the manual transmission fluid. X X
Inspect the manual transmission fluid (if equipped),
add as necessary. XX X X
Change the rear axle fluid. X X X X X
Inspect the rear axle fluid.
Inspect front suspension, tie rod ends, and boot seals,
for cracks or leaks and all parts for damage, wear,
improper looseness or end play; replace if necessary. XXXX X X
Replace the engine air cleaner. X X
Replace the air conditioning filter. X X X X X XNOTE:
Flush and replace the engine coolant at 120 months if not done at 150,000 miles (240,000 km).
• Refer to the Owner's Manual on the DVD for complete maintenance schedule.
MAINTAINING YOUR VEHICLE
84
Page 89 of 100

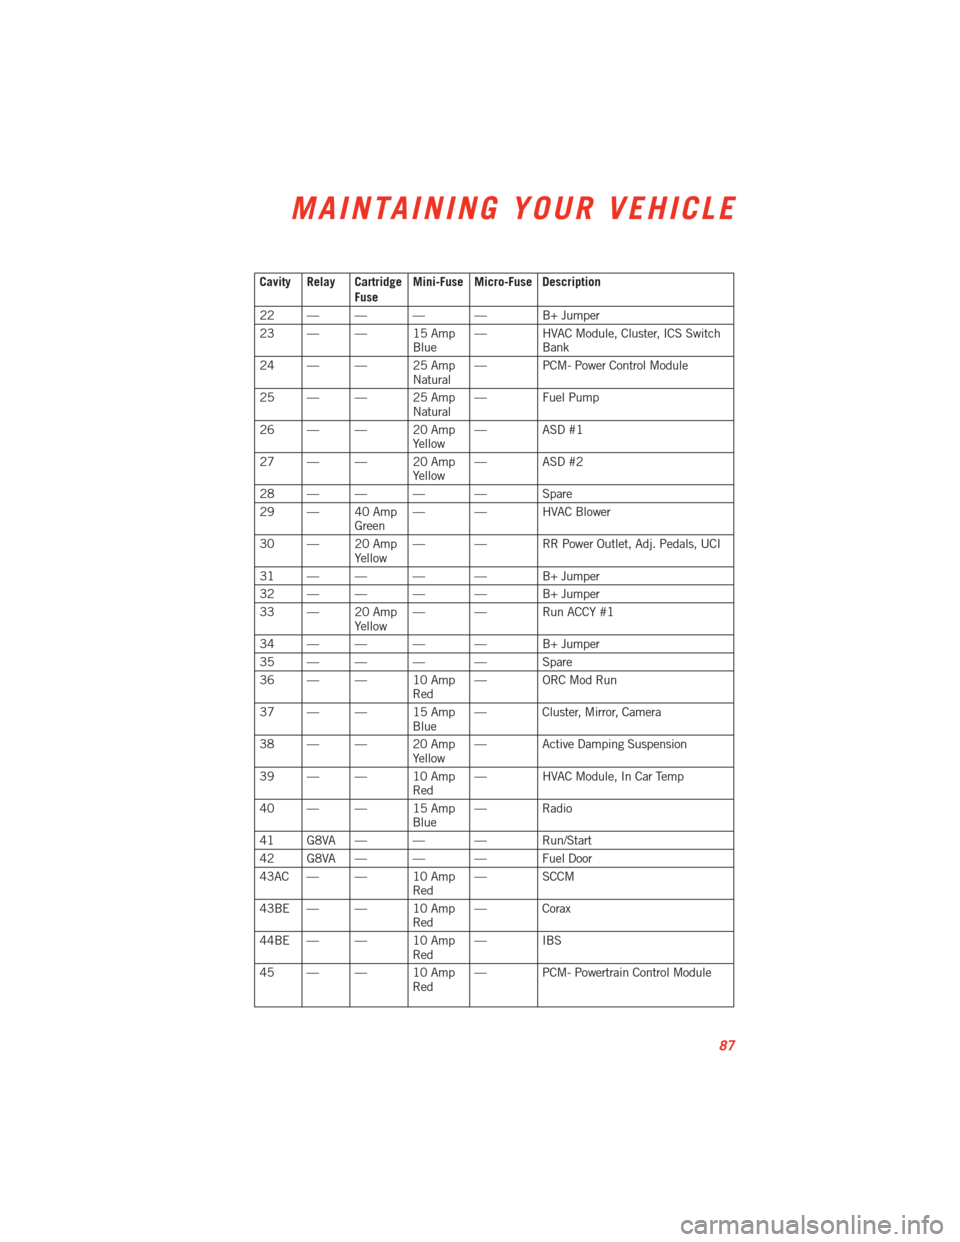
Cavity Relay CartridgeFuseMini-Fuse Micro-Fuse Description
22 — — — — B+ Jumper
23 — — 15 Amp Blue— HVAC Module, Cluster, ICS Switch
Bank
24 — — 25 Amp Natural— PCM- Power Control Module
25 — — 25 Amp Natural— Fuel Pump
26 — — 20 Amp Yellow— ASD #1
27 — — 20 Amp Yellow— ASD #2
28 — — — — Spare
29 — 40 Amp Green— — HVAC Blower
30 — 20 Amp Yellow— — RR Power Outlet, Adj. Pedals, UCI
31 — — — — B+ Jumper
32 — — — — B+ Jumper
33 — 20 Amp Yellow— — Run ACCY #1
34 — — — — B+ Jumper
35 — — — — Spare
36 — — 10 Amp Red— ORC Mod Run
37 — — 15 Amp Blue— Cluster, Mirror, Camera
38 — — 20 Amp Yellow— Active Damping Suspension
39 — — 10 Amp Red— HVAC Module, In Car Temp
40 — — 15 Amp Blue— Radio
41 G8VA — — — Run/Start
42 G8VA — — — Fuel Door
43AC — — 10 Amp Red— SCCM
43BE — — 10 Amp Red— Corax
44BE — — 10 Amp Red—IBS
45 — — 10 Amp Red— PCM- Powertrain Control Module
MAINTAINING YOUR VEHICLE
87