buttons DODGE VIPER SRT 2016 VX / 3.G Owner's Manual
[x] Cancel search | Manufacturer: DODGE, Model Year: 2016, Model line: VIPER SRT, Model: DODGE VIPER SRT 2016 VX / 3.GPages: 427, PDF Size: 3.02 MB
Page 207 of 427
System Information
After pressing the “System Information” button on the
touchscreen the following settings will be available:
•System Information
When System Information is selected, a System Informa-
tion screen will appear displaying the system software
version.
SRT Performance Pages
To access the SRT Performance Pages, press the “Apps”
button on the touchscreen then select the “SRT Perfor-
mance Pages” App from the list. Press the UP or DOWN
buttons on the touchscreen to cycle through the list.
WARNING!
Measurement of vehicle statistics with the SRT Per-
formance Pages is intended for off-highway or off-
road use only and should not be done on any public
roadways. It is recommended that these features be
used in a controlled environment and within the
limits of the law. The capabilities of the vehicle as
measured by the Performance Pages must never be
exploited in a reckless or dangerous manner, which
can jeopardize the user ’s safety or the safety of
others. Only a safe, attentive, and skillful driver can
prevent accidents.
CAUTION!
Check engine oil level at every fuel fill-up. Running
an engine with a low oil level can cause severe
(Continued)
4
UNDERSTANDING YOUR INSTRUMENT PANEL 205
Page 213 of 427
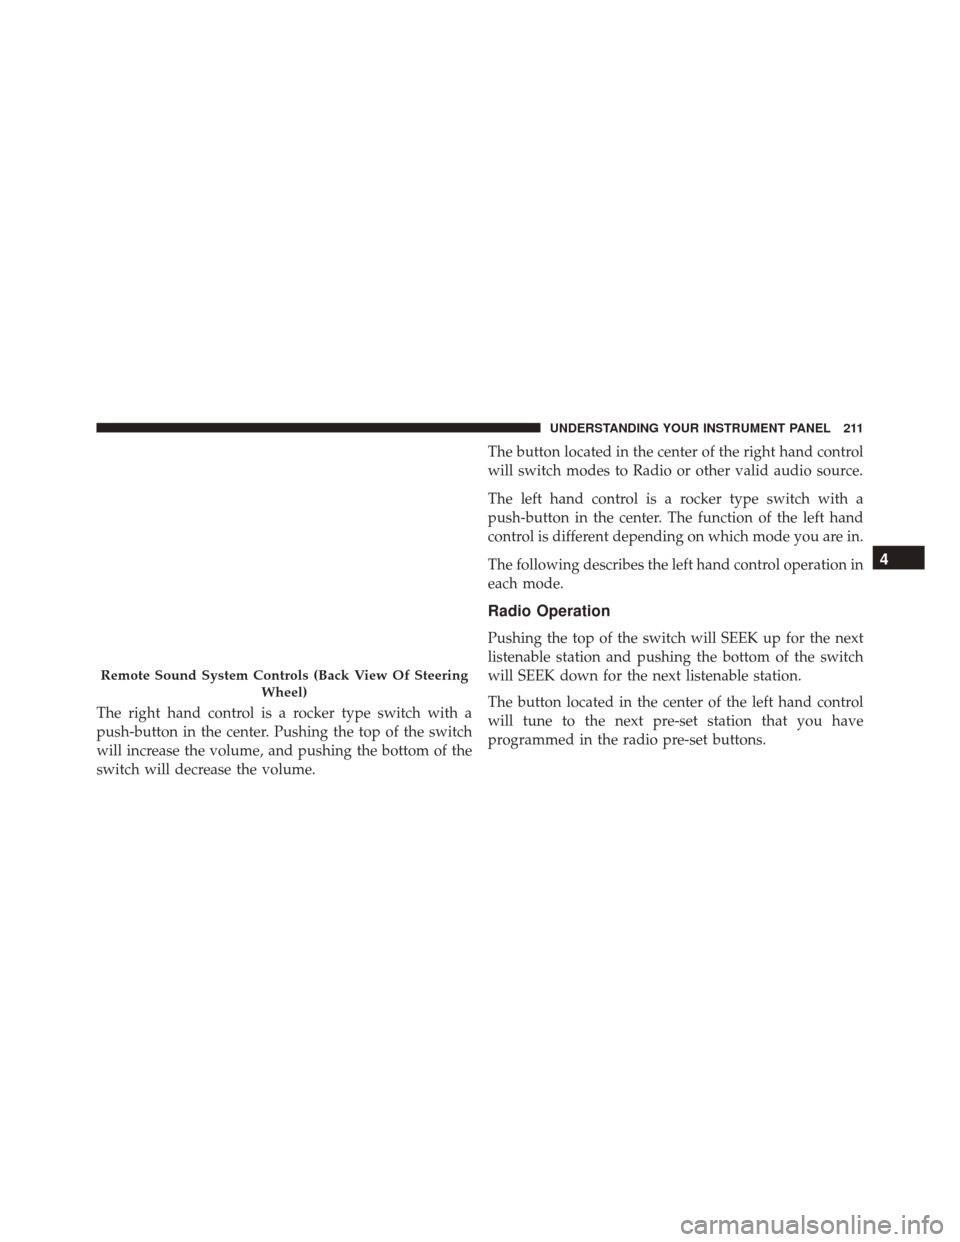
The right hand control is a rocker type switch with a
push-button in the center. Pushing the top of the switch
will increase the volume, and pushing the bottom of the
switch will decrease the volume.The button located in the center of the right hand control
will switch modes to Radio or other valid audio source.
The left hand control is a rocker type switch with a
push-button in the center. The function of the left hand
control is different depending on which mode you are in.
The following describes the left hand control operation in
each mode.
Radio Operation
Pushing the top of the switch will SEEK up for the next
listenable station and pushing the bottom of the switch
will SEEK down for the next listenable station.
The button located in the center of the left hand control
will tune to the next pre-set station that you have
programmed in the radio pre-set buttons.
Remote Sound System Controls (Back View Of Steering
Wheel)
4
UNDERSTANDING YOUR INSTRUMENT PANEL 211
Page 215 of 427
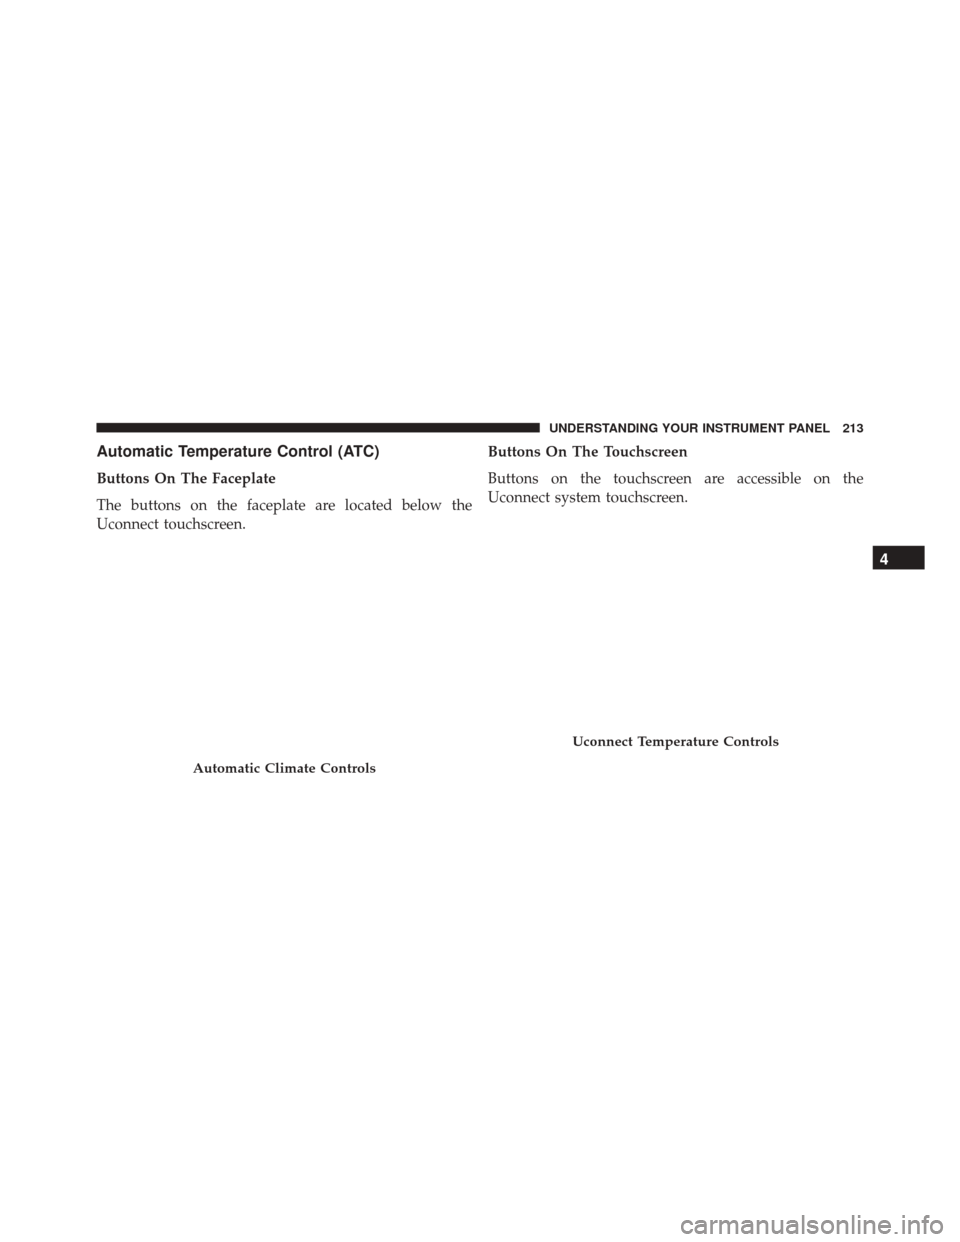
Automatic Temperature Control (ATC)
Buttons On The Faceplate
The buttons on the faceplate are located below the
Uconnect touchscreen.Buttons On The Touchscreen
Buttons on the touchscreen are accessible on the
Uconnect system touchscreen.
Automatic Climate Controls
Uconnect Temperature Controls
4
UNDERSTANDING YOUR INSTRUMENT PANEL 213
Page 216 of 427
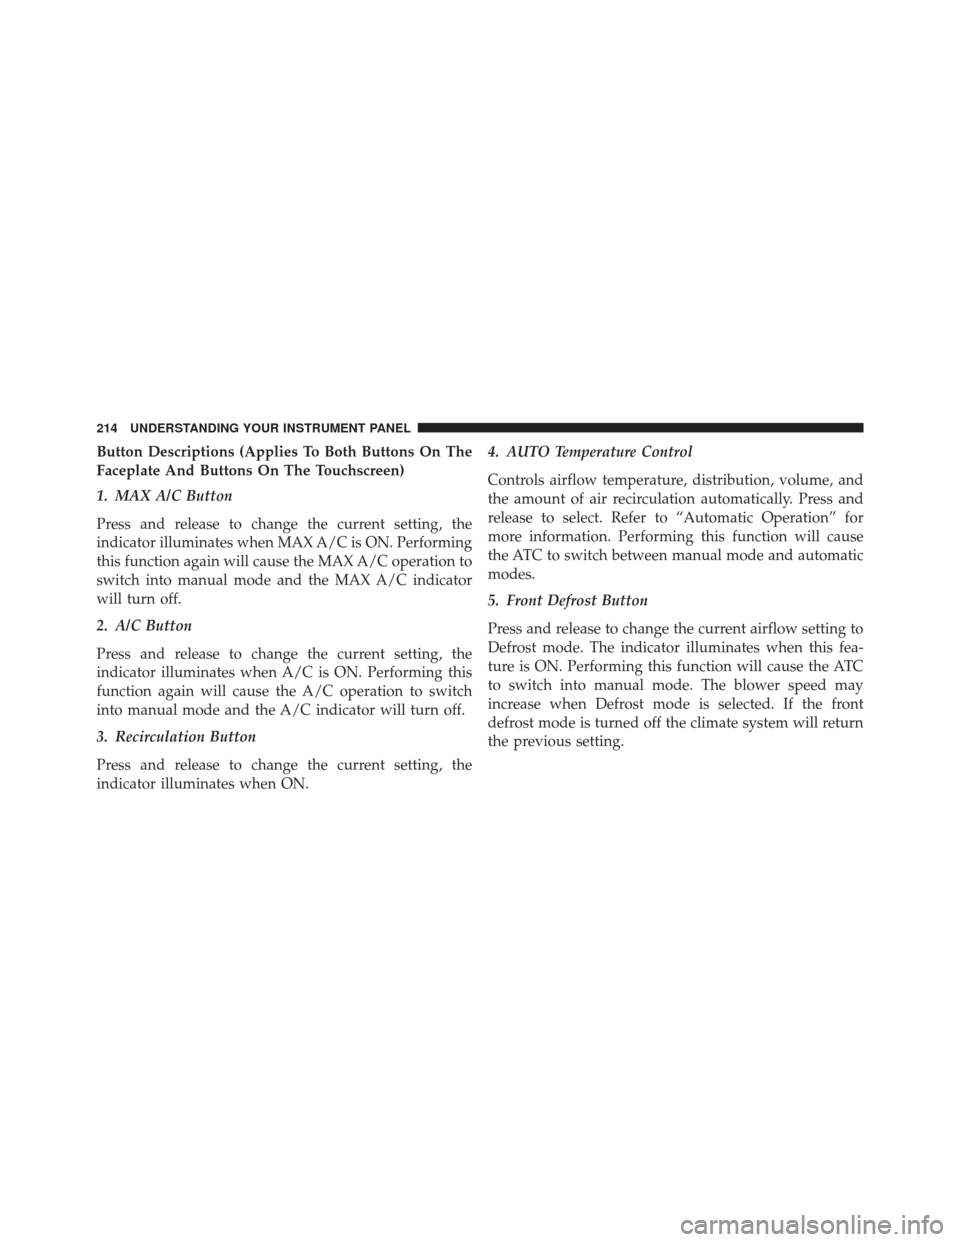
Button Descriptions (Applies To Both Buttons On The
Faceplate And Buttons On The Touchscreen)
1. MAX A/C Button
Press and release to change the current setting, the
indicator illuminates when MAX A/C is ON. Performing
this function again will cause the MAX A/C operation to
switch into manual mode and the MAX A/C indicator
will turn off.
2. A/C Button
Press and release to change the current setting, the
indicator illuminates when A/C is ON. Performing this
function again will cause the A/C operation to switch
into manual mode and the A/C indicator will turn off.
3. Recirculation Button
Press and release to change the current setting, the
indicator illuminates when ON.4. AUTO Temperature Control
Controls airflow temperature, distribution, volume, and
the amount of air recirculation automatically. Press and
release to select. Refer to “Automatic Operation” for
more information. Performing this function will cause
the ATC to switch between manual mode and automatic
modes.
5. Front Defrost Button
Press and release to change the current airflow setting to
Defrost mode. The indicator illuminates when this fea-
ture is ON. Performing this function will cause the ATC
to switch into manual mode. The blower speed may
increase when Defrost mode is selected. If the front
defrost mode is turned off the climate system will return
the previous setting.
214 UNDERSTANDING YOUR INSTRUMENT PANEL
Page 217 of 427
6. Rear Defrost Button
Press and release this button to turn on the rear window
defroster and the heated outside mirrors (if equipped).
An indicator will illuminate when the rear window
defroster is on. The rear window defroster automatically
turns off after 10 minutes.
CAUTION!
Failure to follow these cautions can cause damage to
the heating elements:
•Use care when washing the inside of the rear
window. Do not use abrasive window cleaners on
the interior surface of the window. Use a soft cloth
and a mild washing solution, wiping parallel to the
heating elements. Labels can be peeled off after
soaking with warm water.
(Continued)
CAUTION!
(Continued)
•Do not use scrapers, sharp instruments, or abrasive
window cleaners on the interior surface of the
window.
• Keep all objects a safe distance from the window.
7. Blower Control
Blower control is used to regulate the amount of air
forced through the climate system. There are seven
blower speeds available. Adjusting the blower will cause
automatic mode to switch to manual operation. The
speeds can be selected using either the buttons on the
faceplate or the buttons on the touchscreen as follows:
Button On The Faceplate
The blower speed increases as you turn the control
clockwise from the lowest blower setting. The blower
speed decreases as you turn the knob counterclockwise.
4
UNDERSTANDING YOUR INSTRUMENT PANEL 215
Page 219 of 427
•Mix Mode
Air comes from the floor, defrost and side
window demist outlets. This mode works best
in cold or snowy conditions.
9. Climate Control OFF Button
Press and release this button to turn the Climate Control
ON/OFF.
10. Temperature Control Down Button
Push the button for cooler temperature settings.
11. Temperature Control Up Button
Push the button for warmer temperature settings.
Automatic Operation
1. Push the AUTO button on the faceplate, or the AUTO button on the touchscreen on the Automatic Tempera-
ture Control (ATC) Panel. 2. Next, adjust the temperature you would like the
system to maintain by adjusting the driver and pas-
senger temperature control buttons. Once the desired
temperature is displayed, the system will achieve and
automatically maintain that comfort level.
3. When the system is set up for your comfort level, it is not necessary to change the settings. You will experi-
ence the greatest efficiency by simply allowing the
system to function automatically.
NOTE:
• It is not necessary to move the temperature settings for
cold or hot vehicles. The system automatically adjusts
the temperature, mode, and blower speed to provide
comfort as quickly as possible.
• The temperature can be displayed in U.S. or Metric
units by selecting the US/M customer-programmable
4
UNDERSTANDING YOUR INSTRUMENT PANEL 217
Page 225 of 427
Two buttons are all you need to control your Uconnect
system with your voice.Basic Voice Commands
The basic Voice Commands below can be given at any
point while using your Uconnect system.
Push the VR button
. After the beep, say:
•Cancel to stop a current voice session
• Help to hear a list of suggested Voice Commands
• Repeat to listen to the system prompts again
Voice Recognition (VR)/Phone Buttons
1 — Push To Begin Radio, Media, Navigation, Apps And Climate
Functions
2 — Push To Initiate Or To Answer A Phone Call, Send Or Re-
ceive A Text
4
UNDERSTANDING YOUR INSTRUMENT PANEL 223