trunk release FIAT 124 SPIDER 2017 2.G Owners Manual
[x] Cancel search | Manufacturer: FIAT, Model Year: 2017, Model line: 124 SPIDER, Model: FIAT 124 SPIDER 2017 2.GPages: 300, PDF Size: 121.24 MB
Page 15 of 300
GETTING TO KNOW YOUR VEHICLE
KEYS....................14
IGNITION SWITCH ............21
ADVANCED KEYLESS ENTRY
SYSTEM — IF EQUIPPED .......22
VEHICLE SECURITY ALARM
SYSTEM — IF EQUIPPED .......24
DOORS...................26
SEATS ...................33
NON-ADJUSTABLE HEAD
RESTRAINTS ...............34
STEERING WHEEL ...........35
MIRRORS .................36
EXTERIOR LIGHTS ...........38
WINDSHEILD WIPERS / WASHER . .42
CLIMATE CONTROL SYSTEM ....44
POWER WINDOWS ...........56
HOMELINK — IF EQUIPPED .....58
INTERNAL EQUIPMENT ........61
TRUNKLID ................66
TRUNK EMERGENCY RELEASE . . .68
HOOD ...................69
CONVERTIBLE TOP (SOFT TOP) . .70
ELECTRIC POWER STEERING ....74
ENVIRONMENT PROTECTION
SYSTEMS .................74
13
Page 19 of 300
Note:
The sound of the doors locking/
unlocking can be heard. After this, the
system changes the setting each time
the unlock
button is pushed (the
sound of the doors locking/unlocking
can be heard).
The setting change can be
completed by doing any one of the
following:
1. Placing the ignition in the ACC or
ON position.
2. Closing the driver’s door.
3. Opening the trunk lid.
4. Not operating the key fob for
10 seconds.
5. Pushing any button except the
unlock
button on the key fob.
6. Pushing a request switch on the
exterior door handle.
Auto Re-Lock Function: after
unlocking with the key fob, both doors,
trunk lid, and the fuel filler door will
automatically lock if any of the following
operations are not performed within
about 30 seconds. If your vehicle is
equipped with a Vehicle Security Alarm
System, the hazard warning lights will
flash for confirmation. The time required for the doors to lock automatically can
be changed. A door or the trunk lid is
opened and the ignition is placed in any
position other than OFF.
With Vehicle Security Alarm
System: when the doors are unlocked
by pushing the unlock
button on the
key fob while the Vehicle Security Alarm
System is turned off, the hazard
warning lights will flash twice to indicate
that the system is turned off.
Auto re-lock function: after
unlocking with the key fob, both doors
and the fuel filler door will automatically
lock if any of the following operations
are not performed within about
60 seconds. If your vehicle is equipped
with a Vehicle Security Alarm System,
the hazard warning lights will flash for
confirmation. The time required for the
doors to lock automatically can be
changed. A door or the trunk lid is
opened and the ignition is placed in any
position other than OFF.
With Vehicle Security Alarm
System: when the doors are unlocked
by pushing the unlock
button on the
key fob while the Vehicle Security Alarm
System is turned off, the hazard
warning lights will flash twice to indicate
that the system is turned off. Trunk Button
To open the trunk lid, push and hold the
trunk button
orHOLD
until
the trunk lid opens.
Panic Button
To turn the Panic Alarm feature ON or
OFF, push and hold the panic button
! HOLD on the key fob for at least one
second and release. When the Panic
Alarm is on, the headlights will turn on,
the park lights will flash, the horn will
pulse on and off, and the turn signal
lights will flash.
Note: The panic button will work
whether any door or the trunk lid is
open or closed.
Turning On The Alarm
Pushing the panic button for one
second or more will trigger the alarm for
about two minutes and thirty seconds,
and the following will occur:
The horn sounds intermittently.
The hazard warning lights flash.
Turning Off The Alarm
The alarm will stop by pushing any
button on the key fob.
17
Page 25 of 300
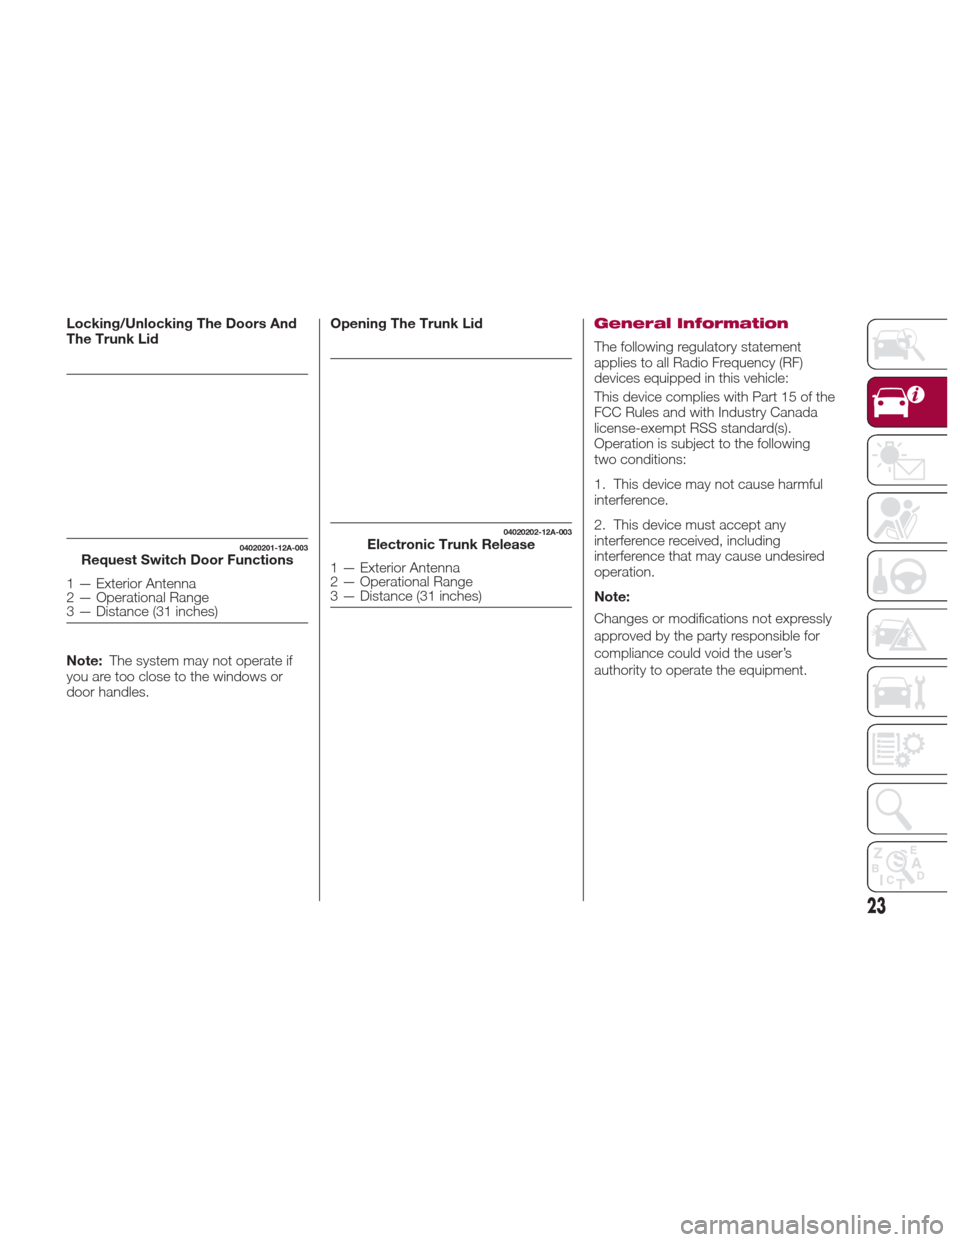
Locking/Unlocking The Doors And
The Trunk Lid
Note:The system may not operate if
you are too close to the windows or
door handles. Opening The Trunk LidGeneral Information
The following regulatory statement
applies to all Radio Frequency (RF)
devices equipped in this vehicle:
This device complies with Part 15 of the
FCC Rules and with Industry Canada
license-exempt RSS standard(s).
Operation is subject to the following
two conditions:
1. This device may not cause harmful
interference.
2. This device must accept any
interference received, including
interference that may cause undesired
operation.
Note:
Changes or modifications not expressly
approved by the party responsible for
compliance could void the user’s
authority to operate the equipment.
04020201-12A-003Request Switch Door Functions
1 — Exterior Antenna
2 — Operational Range
3 — Distance (31 inches)
04020202-12A-003Electronic Trunk Release
1 — Exterior Antenna
2 — Operational Range
3 — Distance (31 inches)
23
Page 27 of 300
Cycle the ignition off, and then restart
the engine. If the engine does not start
after three or more tries, contact an
Authorized Dealership.
Note:
If thewarning light flashes
continuously while you are driving, do
not turn the engine OFF. Contact an
Authorized Dealership and have it
checked. If the engine is shut off while
the
warning light is flashing, you
will not be able to restart it.
Because the electronic codes are
reset when the immobilizer system is
repaired, the keys are needed. Make
sure to bring all the key fobs to an
Authorized Dealership so that they can
be programmed.
Vehicle Security Alarm
System — If Equipped
If the Vehicle Security Alarm System
detects an inappropriate entry into the
vehicle or the intrusion sensor detects
movement in the vehicle which could
result in the vehicle or its contents
being stolen, the alarm alerts the
surrounding area of an abnormality by
sounding the siren/horn and flashing
the hazard warning lights.
The system will not function unless it's
properly armed. So when you leave the
vehicle, follow the arming procedure
correctly. Siren/Horn Triggering Conditions
The siren/horn sounds intermittently
and the hazard warning lights flash for
about 30 seconds when the system is
triggered by any one of the following:
Unlocking a door with an inside
door-lock knob.
Forcing open a door, the engine
compartment or the trunk lid.
Opening the hood by operating the
hood release handle.
Placing the ignition in the ON position
without starting the engine.
With the intrusion sensor: the
intrusion sensor detects a movement in
the vehicle.
The system will be triggered again (up
to 10 times) if one of the above
conditions remains.
The trunk lid will not open when the
Vehicle Security Alarm is activated.
If the battery becomes drained while
the Vehicle Security Alarm is armed, the
siren will activate and the hazard
warning lights will flash during the
battery charging or replacement
process. How To Arm The System
Close the windows and the
convertible top securely.
Place the ignition in the OFF position.
Make sure the engine compartment,
convertible top, the doors, and the
trunk lid are closed.
Push the lock button on the key fob
or lock the driver's door from the
outside with the emergency key. The
hazard warning lights will flash once.
With the Advanced Keyless Entry
function: push a request switch. The
warning light in the instrument
panel flashes twice per second for
20 seconds. After 20 seconds the
system is fully armed.
The Vehicle Security Alarm System can
also be armed by activating the auto
re-lock function with all the doors, the
trunk lid and the engine compartment
closed.
The system will disarm if one of the
following operations takes place within
20 seconds after pushing the lock
button: To rearm the system, preform
the arming procedure again.
1. Unlocking any door
2. Opening any door
3. Opening the engine compartment
4. Placing the ignition in the ON
position
25
Page 28 of 300
The hazard warning lights will flash
once to indicate that the Vehicle
Security Alarm System is armed when
the doors are locked by pushing the
lock button on the key fob, or using the
emergency key.
Note:
If any door or trunk lid remains
closed for 30 seconds, the doors, and
trunk lid automatically re-lock and the
Vehicle Security Alarm System arms
even if a window open or the
convertible top is left down.
To reactivate the intrusion sensor,
turn off the armed Vehicle Security
Alarm System and then rearm it.
The intrusion sensor is operational
when the Vehicle Security Alarm
System is armed. To cancel the
intrusion sensor, push the intrusion
sensor cancel button each time the
Vehicle Security Alarm System is
armed.
To Turn Off An Armed System
An armed system can be turned off
using any one of the following methods:
Pushing the unlock button on the key
fob.
Starting the engine with the keyless
ignition START/STOP button.
With the Advanced Keyless Entry
function: pushing a request switch on
the exterior door handles.
Note: When the doors are unlocked by
pushing the unlock
button on the key
fob while the Vehicle Security Alarm
System is turned off, the hazard
warning lights will flash twice to indicate
that the system is turned off.
To Stop The Alarm
A triggered alarm can be turned off
using any one of the following methods:
Pushing the unlockbutton on the
key fob
Starting the engine with the keyless
ignition START/STOP button
With the Advanced Keyless Entry
function: pushing a request switch on
the exterior door handles. Pushing the
electric trunk lid opener while the key
fob is being carried.
With the Advanced Keyless Entry
function: pushing a request switch on
the exterior door handles or the electric
trunk release while the key fob is being
carried.
The hazard warning lights will flash
twice.
DOORS
Lock / Unlock With
Emergency Key
Both doors, trunk lid, and fuel door lock
automatically when the driver's door is
locked using the emergency key.
Lock With Emergency Key — Insert
key into driver’s door and turn to the left
(toward front of car).
Unlock With Emergency Key —
Insert key into driver’s door and turn to
the right (toward back of car).
They both unlock when the driver's
door is unlocked using the emergency
key.
Turn the emergency key toward the
front to lock, toward the back to unlock.
Caution!
An unlocked vehicle is an invitation for
thieves. Always remove key fob from the
vehicle and lock all doors when leaving the
vehicle unattended.
Manual Lock/Unlock
Knob
Operation From Inside
To lock any door from the inside, push
the door-lock knob. To unlock, pull it
outward. This does not operate the
other door locks.
26
GETTING TO KNOW YOUR VEHICLE
Page 68 of 300
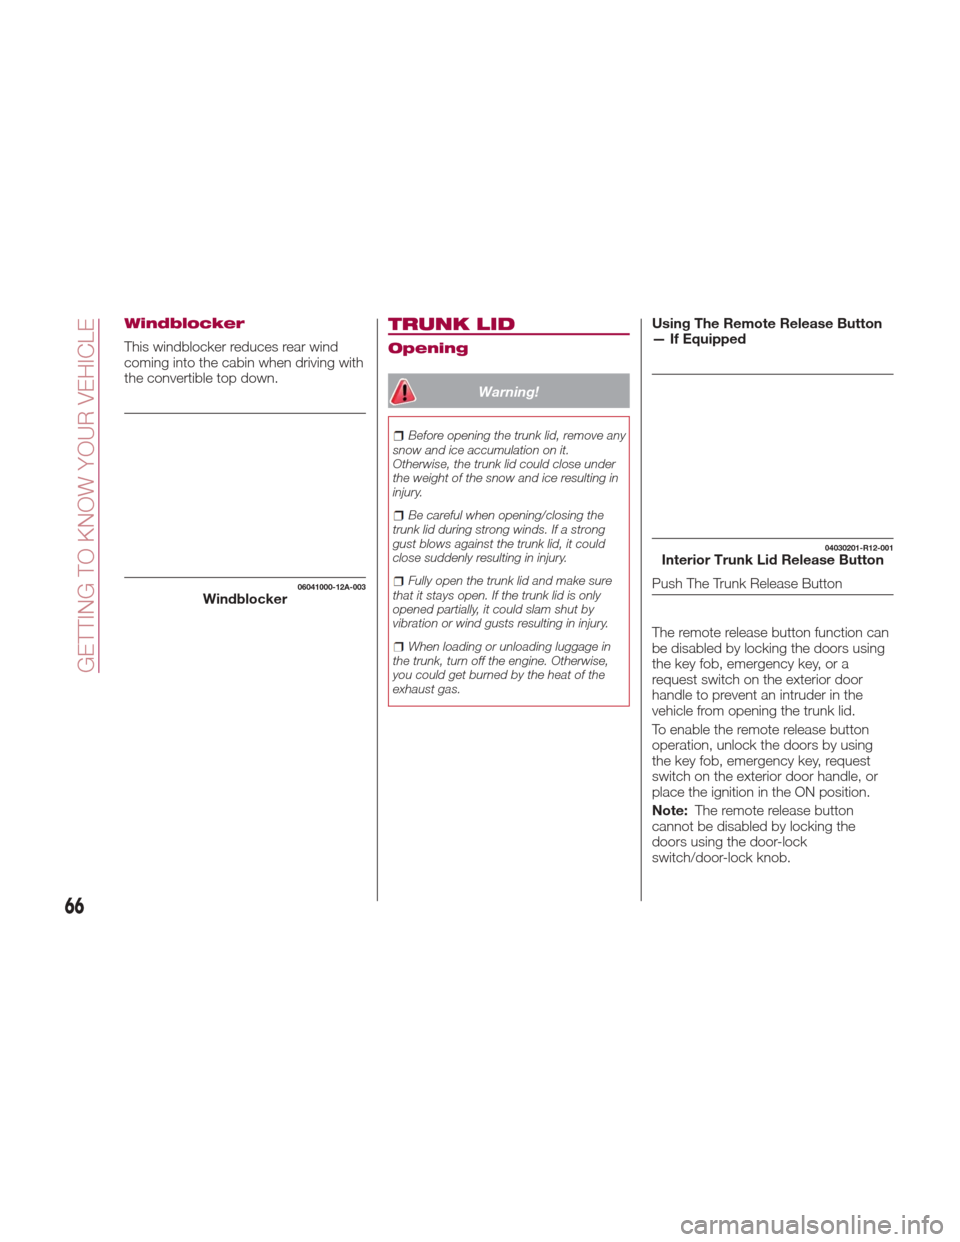
Windblocker
This windblocker reduces rear wind
coming into the cabin when driving with
the convertible top down.
TRUNK LID
Opening
Warning!
Before opening the trunk lid, remove any
snow and ice accumulation on it.
Otherwise, the trunk lid could close under
the weight of the snow and ice resulting in
injury.
Be careful when opening/closing the
trunk lid during strong winds. If a strong
gust blows against the trunk lid, it could
close suddenly resulting in injury.
Fully open the trunk lid and make sure
that it stays open. If the trunk lid is only
opened partially, it could slam shut by
vibration or wind gusts resulting in injury.
When loading or unloading luggage in
the trunk, turn off the engine. Otherwise,
you could get burned by the heat of the
exhaust gas.
Using The Remote Release Button
— If Equipped
The remote release button function can
be disabled by locking the doors using
the key fob, emergency key, or a
request switch on the exterior door
handle to prevent an intruder in the
vehicle from opening the trunk lid.
To enable the remote release button
operation, unlock the doors by using
the key fob, emergency key, request
switch on the exterior door handle, or
place the ignition in the ON position.
Note: The remote release button
cannot be disabled by locking the
doors using the door-lock
switch/door-lock knob.
06041000-12A-003Windblocker
04030201-R12-001Interior Trunk Lid Release Button
Push The Trunk Release Button
66
GETTING TO KNOW YOUR VEHICLE
Page 69 of 300
Using The Electric Trunk Lid
Opener
With the remote release button: a trunk
lid can also be opened while the key
fob is being carried.
Push the electric trunk lid button and
raise the trunk lid when the latch
releases
Without the remote release button:
unlock the doors and trunk lid, then
push the electric trunk lid opener and
raise it when the latch releases.
With The Advanced Keyless Entry
Function
A locked trunk lid can also be opened
while the key fob is being carried. When
opening the trunk lid with the doors
locked, it may require a few seconds for
the trunk lid latch to release after the
electric trunk lid opener is pushed.The trunk lid can be closed when the
doors are locked with the key fob left in
the vehicle. However, to prevent locking
the key fob in the vehicle, the trunk lid
can be opened by pushing the electric
trunk lid opener. If the trunk lid cannot
be opened despite doing this
procedure, push the electric trunk lid
opener to fully open the trunk lid after
pushing the trunk lid completely closed.
If the vehicle battery is discharged or
there is a malfunction in the electrical
system and the trunk lid cannot be
unlocked, the trunk lid can be opened
by performing the emergency
procedure.
When Trunk Lid Cannot
Be Opened
If the battery is discharged, the trunk lid
cannot be unlocked and opened. In this
case, the trunk can be unlocked by
taking care of the discharged battery
situation.
If the trunk lid cannot be unlocked even
if the discharged battery situation has
been resolved, the electrical system
may have a malfunction.
Proceed as follows:
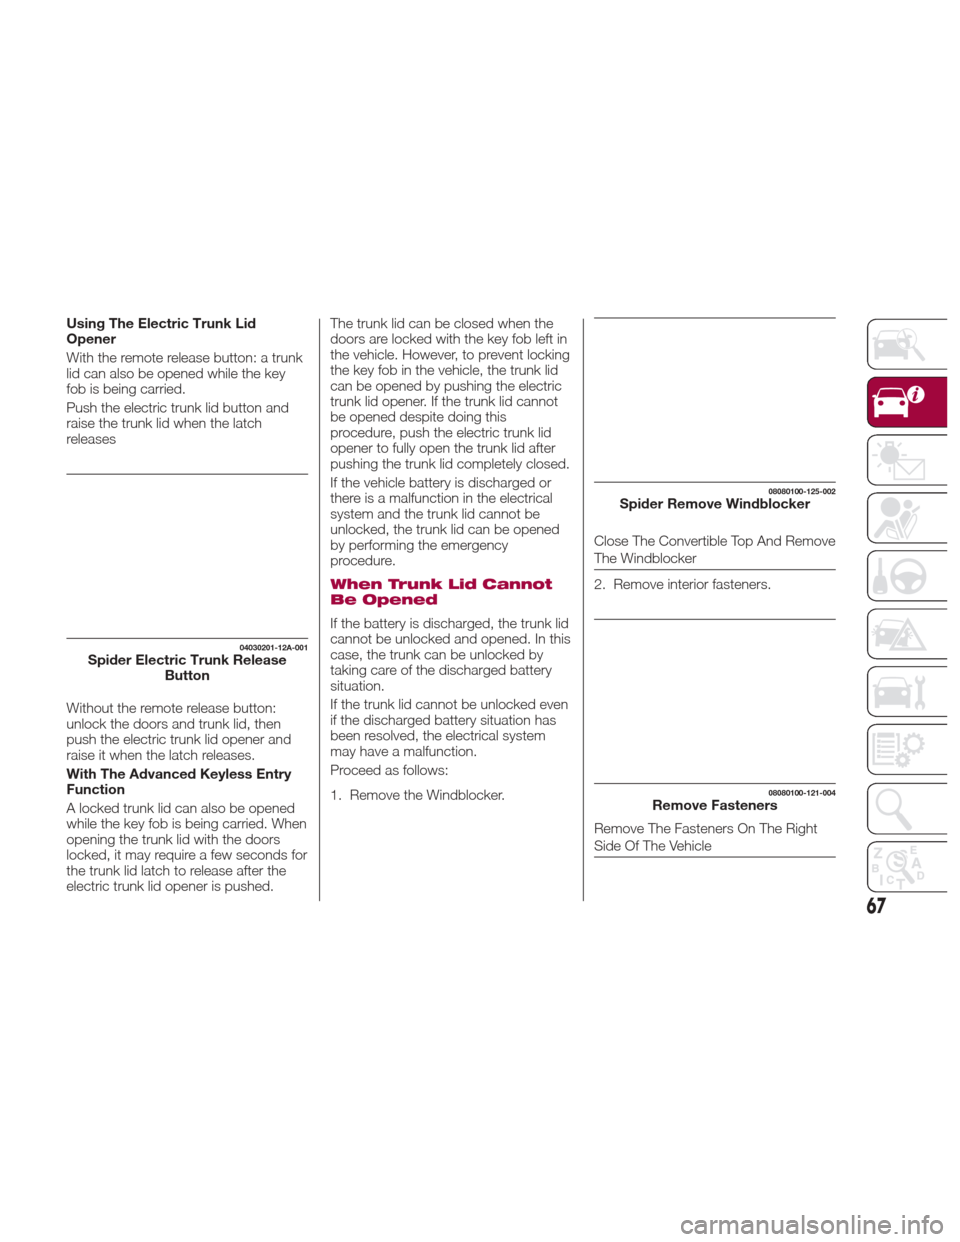
1. Remove the Windblocker.
Close The Convertible Top And Remove
The Windblocker
2. Remove interior fasteners.
04030201-12A-001Spider Electric Trunk Release
Button
08080100-125-002Spider Remove Windblocker
08080100-121-004Remove Fasteners
Remove The Fasteners On The Right
Side Of The Vehicle
67
Page 70 of 300
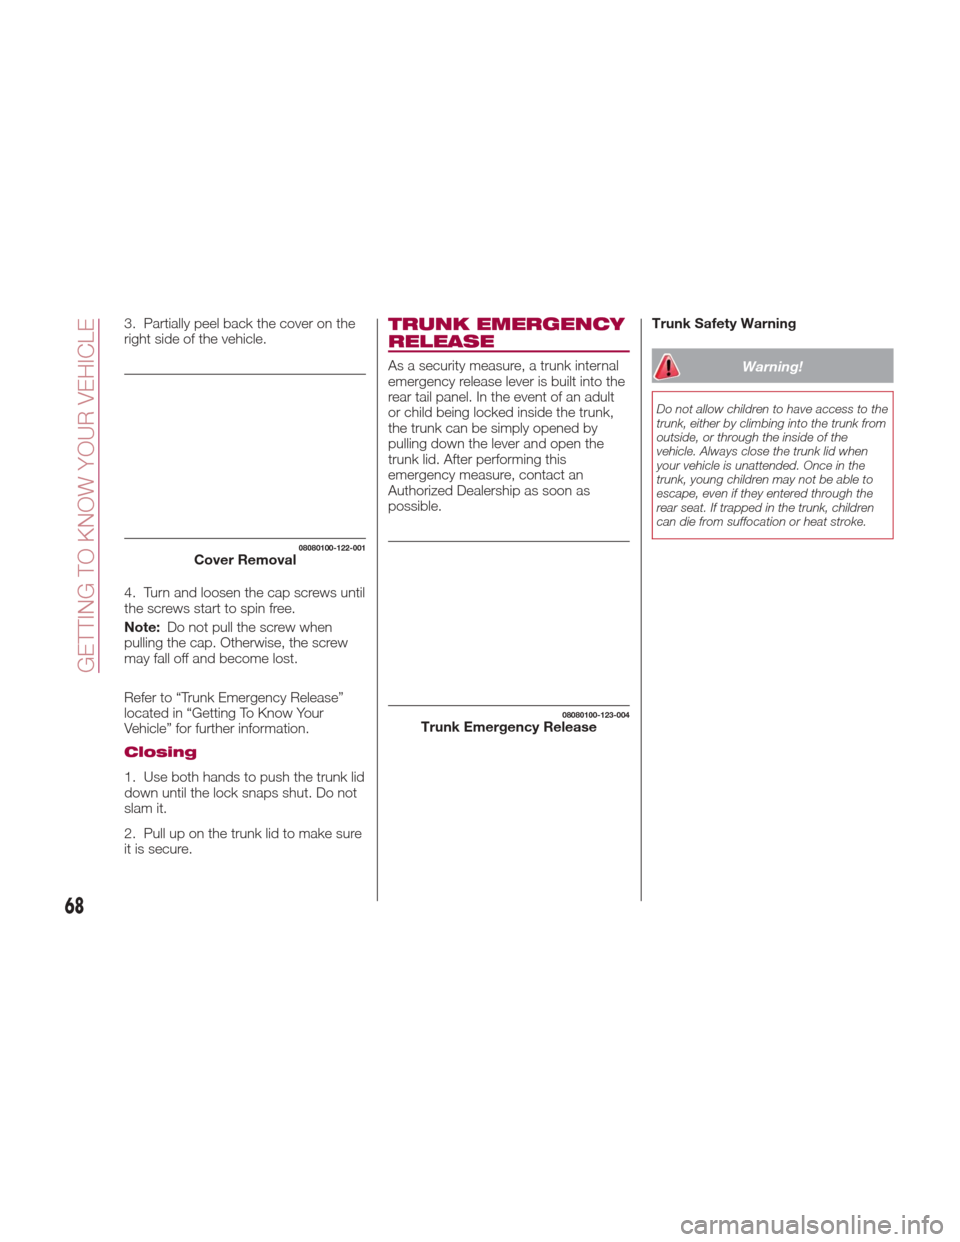
3. Partially peel back the cover on the
right side of the vehicle.
4. Turn and loosen the cap screws until
the screws start to spin free.
Note:Do not pull the screw when
pulling the cap. Otherwise, the screw
may fall off and become lost.
Refer to “Trunk Emergency Release”
located in “Getting To Know Your
Vehicle” for further information.
Closing
1. Use both hands to push the trunk lid
down until the lock snaps shut. Do not
slam it.
2. Pull up on the trunk lid to make sure
it is secure.
TRUNK EMERGENCY
RELEASE
As a security measure, a trunk internal
emergency release lever is built into the
rear tail panel. In the event of an adult
or child being locked inside the trunk,
the trunk can be simply opened by
pulling down the lever and open the
trunk lid. After performing this
emergency measure, contact an
Authorized Dealership as soon as
possible. Trunk Safety WarningWarning!
Do not allow children to have access to the
trunk, either by climbing into the trunk from
outside, or through the inside of the
vehicle. Always close the trunk lid when
your vehicle is unattended. Once in the
trunk, young children may not be able to
escape, even if they entered through the
rear seat. If trapped in the trunk, children
can die from suffocation or heat stroke.
08080100-122-001Cover Removal
08080100-123-004Trunk Emergency Release
68
GETTING TO KNOW YOUR VEHICLE
Page 178 of 300
Warning!
Never have any smoking materials lit in
or near the vehicle when the gas cap is
removed or the tank is being filled.
Never add fuel when the engine is
running. This is in violation of most state
and federal fire regulations and may cause
the MIL to turn on.
A fire may result if gasoline is pumped
into a portable container that is inside of a
vehicle. You could be burned. Always place
gas containers on the ground while filling
Do not apply any object/plug to the end
of the filler which is not provided for the
vehicle. The use of non-compliant
objects/plugs could cause a pressure
increase inside the tank, resulting in
dangerous situations.
Do not use a mobile phone near the
refueling pump: risk of fire.
Emergency Flap Opening
If the battery is discharged, the fuel filler
door cannot be opened. In this case,
the fuel filler door can be opened by
taking care of the discharged battery
situation.
If the fuel filler door cannot be opened
even if the discharged battery situation
has been resolved, the electrical system
may have a malfunction.
In this case, the fuel filler door can be
opened using the following procedure
as an emergency measure:
1. Open the trunk and pull the center
section of the plastic fastener and
remove the fastener. 2. Partially peel back the cover inside
the trunk, then pull the emergency
release lever.
08100100-121-002Trunk Interior
1 — Plastic Fasteners
2 — Cover
08100100-122-001Fuel Door Emergency Release
3 — Emergency Release Lever
176
STARTING AND OPERATING
Page 238 of 300
BATTERY
RECHARGING
BATTERY CHARGING
PROCEDURE
Warning!
Battery fluid is a corrosive acid solution
and can burn or even blind you. Do not
allow battery fluid to contact your eyes,
skin, or clothing. Do not lean over a battery
when attaching clamps. If acid splashes in
eyes or on skin, flush the area immediately
with large amounts of water. Refer to
“Jump-Starting” in “In Case Of Emergency”
for further information.
Battery gas is flammable and explosive.
Keep flame or sparks away from the
battery. Do not use a booster battery or
any other booster source with an output
greater than 12 Volts. Do not allow cable
clamps to touch each other.
Battery posts, terminals, and related
accessories contain lead and lead
compounds. Wash hands after handling.
Caution!
It is essential when replacing the cables
on the battery that the positive cable is
attached to the positive post and the
negative cable is attached to the negative
post. Battery posts are marked positive (+)
and negative (-) and are identified on the
battery case. Cable clamps should be tight
on the terminal posts and free of corrosion.
If a “fast charger” is used while the
battery is in the vehicle, disconnect both
vehicle battery cables before connecting
the charger to the battery. Do not use a
“fast charger” to provide starting voltage.
Charge battery as follows:
Before recharging the battery, turn off
all accessories and turn the engine off
by placing the ignition in the OFF mode.
Disconnect the negative battery cable.
Connect the charger cables to
the battery terminals, observing the
polarity (+,–).
Turn on the charger.
When finished, turn the charger off
before disconnecting the battery.
Reconnect the negative battery
terminal.
MAINTENANCE
PROCEDURES
The following pages contain
instructions on the required
maintenance from the technical
personnel who designed the vehicle.
In addition to these specific
maintenance instructions specified for
routine scheduled servicing, there are
other components which may require
periodic maintenance or replacement
over the vehicle’s life cycle.
Body Lubrication
Ensure that the locks and bodywork
junction points, including components
such as the seat guides, door hinges
(and rollers), trunk and hood are
periodically lubricated with lithium
based grease to ensure correct, silent
operation and to protect them from rust
and wear.
Thoroughly clean the components,
eliminating every trace of dirt and dust.
After lubricating, eliminate excess oil
and grease. Also pay particular
attention to the hood closing devices,
to ensure correct operation.
During operations on the hood, be sure
to perform with the engine cold, also
remember to check, clean and lubricate
the locking, release and safety devices.
Make sure the hood's secondary latch
keeps the hood from opening when the
primary latch is released.
236
SERVICING AND MAINTENANCE