low beam FIAT 124 SPIDER ABARTH 2017 2.G Owners Manual
[x] Cancel search | Manufacturer: FIAT, Model Year: 2017, Model line: 124 SPIDER ABARTH, Model: FIAT 124 SPIDER ABARTH 2017 2.GPages: 292, PDF Size: 121.25 MB
Page 42 of 292
Daytime Running Lights
(DRL)
The daytime running lights turn on
automatically when the vehicle starts
moving.
They turn off when the parking brake is
engaged or the gear selector is shifted
to the Park (P) position (if equipped with
automatic transmission).
Note:In some markets, the daytime
running lights can be deactivated. For
markets that allow deactivation, refer to
“Personalization Features” in “Knowing
Your Instrument Panel” for further
information.
High Beams
The headlights can be switched
between high and low beams by
moving the lever forward or backward.
When the headlight high-beams are on,
the
high beam indicator is
illuminated.
Flash To Pass
You can signal another vehicle with your
headlights by partially pulling the
headlight lever toward the steering
wheel. This will cause the high beam
headlights to turn on until the lever is
released.
The
high beam indicator in the
instrument cluster illuminates
simultaneously.
Automatic Lighting
When the headlight switch is in the
AUTO position and the ignition is
switched ON, the light will sense the
surrounding lightness or darkness and
automatically turns the headlights, other
exterior lights and dashboard
illumination on or off.
Note: Do not shade the light sensor by
placing a sticker or a label on the
windshield. Otherwise the light sensor
will not operate correctly.
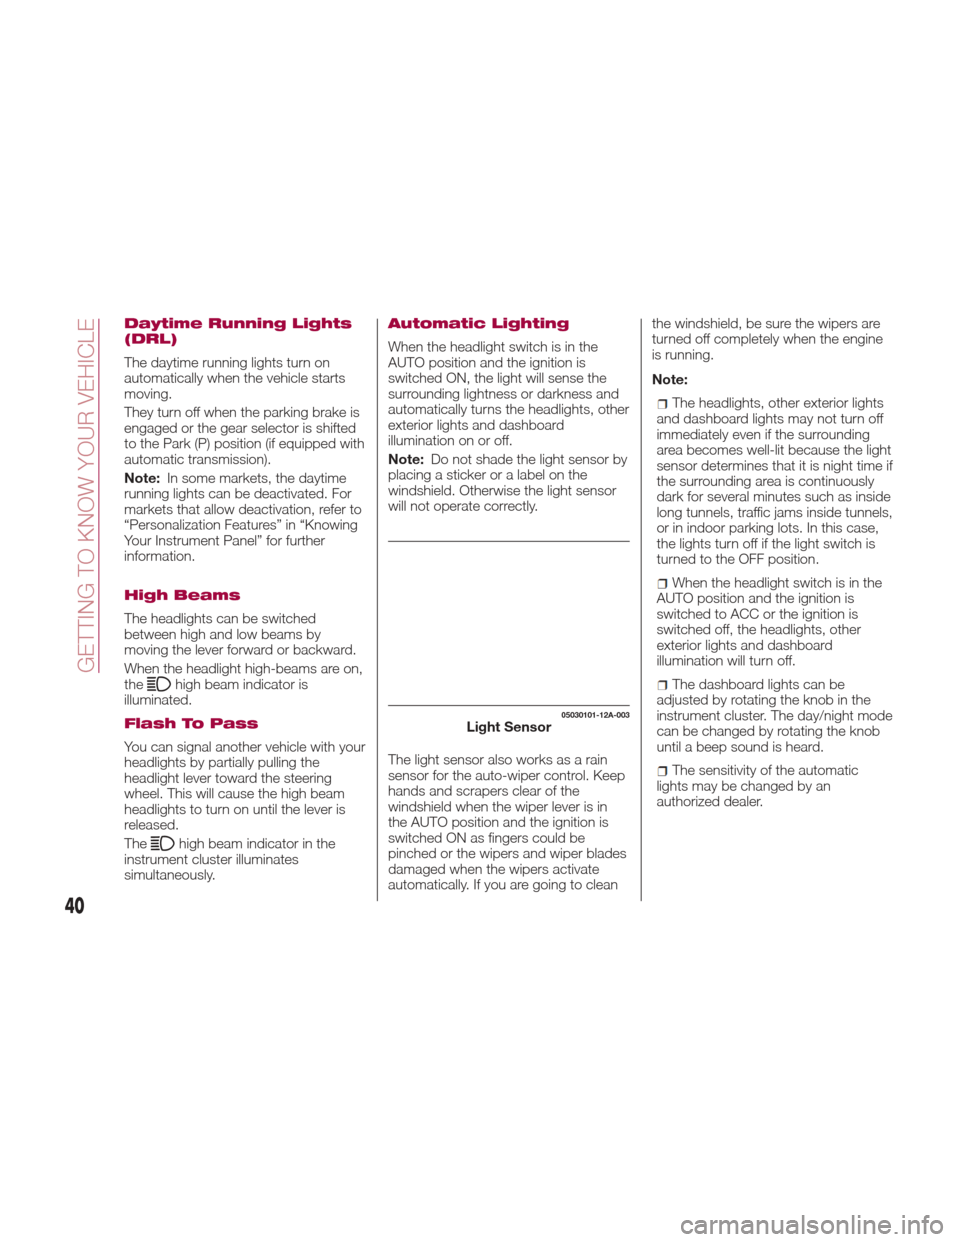
The light sensor also works as a rain
sensor for the auto-wiper control. Keep
hands and scrapers clear of the
windshield when the wiper lever is in
the AUTO position and the ignition is
switched ON as fingers could be
pinched or the wipers and wiper blades
damaged when the wipers activate
automatically. If you are going to clean the windshield, be sure the wipers are
turned off completely when the engine
is running.
Note:
The headlights, other exterior lights
and dashboard lights may not turn off
immediately even if the surrounding
area becomes well-lit because the light
sensor determines that it is night time if
the surrounding area is continuously
dark for several minutes such as inside
long tunnels, traffic jams inside tunnels,
or in indoor parking lots. In this case,
the lights turn off if the light switch is
turned to the OFF position.
When the headlight switch is in the
AUTO position and the ignition is
switched to ACC or the ignition is
switched off, the headlights, other
exterior lights and dashboard
illumination will turn off.
The dashboard lights can be
adjusted by rotating the knob in the
instrument cluster. The day/night mode
can be changed by rotating the knob
until a beep sound is heard.
The sensitivity of the automatic
lightsmaybechangedbyan
authorized dealer.
05030101-12A-003Light Sensor
40
GETTING TO KNOW YOUR VEHICLE
Page 43 of 292
Follow Me Home
The follow me home light system turns
on the headlights (low beams) when the
lever is operated.
System Activation
When the lever is pulled with the ignition
switched to ACC or OFF, the low beam
headlights turn on.
The headlights turn off after a certain
period of time has elapsed after the
doors are closed.
The time until the headlights turn off
after all of the doors are closed can be
changed. If no operations are done for
three minutes after the lever is pulled,
the headlights turn off.
The headlights turn off if the lever is
pulled again while the headlights are on.
Front Fog Lights
The front fog light can be used when
the ignition is switched to ON and the
headlights or parking lights are on.
Activation
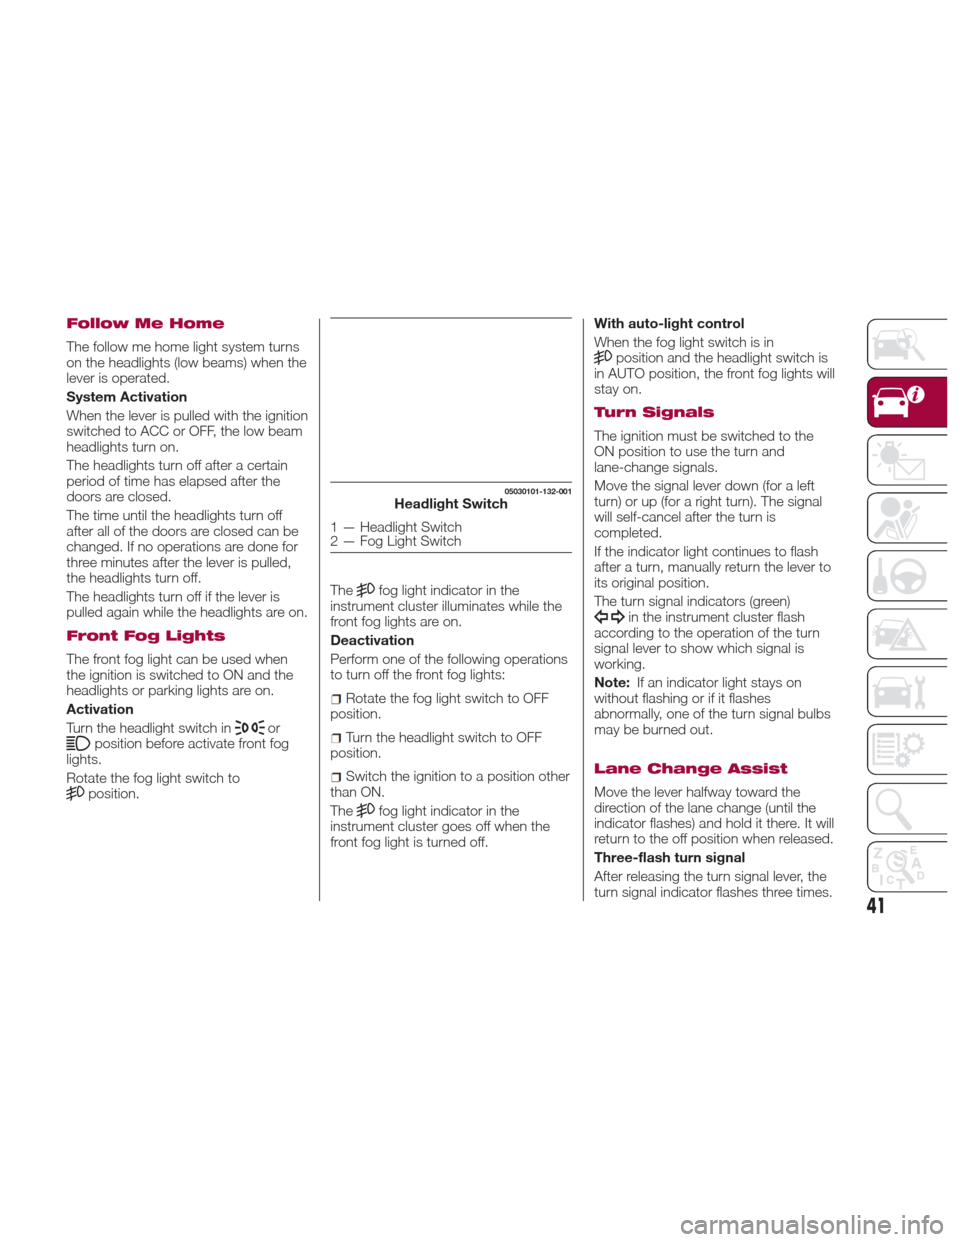
Turn the headlight switch in
orposition before activate front fog
lights.
Rotate the fog light switch to
position. The
fog light indicator in the
instrument cluster illuminates while the
front fog lights are on.
Deactivation
Perform one of the following operations
to turn off the front fog lights:
Rotate the fog light switch to OFF
position.
Turn the headlight switch to OFF
position.
Switch the ignition to a position other
than ON.
The
fog light indicator in the
instrument cluster goes off when the
front fog light is turned off. With auto-light control
When the fog light switch is in
position and the headlight switch is
in AUTO position, the front fog lights will
stay on.
Turn Signals
The ignition must be switched to the
ON position to use the turn and
lane-change signals.
Move the signal lever down (for a left
turn) or up (for a right turn). The signal
will self-cancel after the turn is
completed.
If the indicator light continues to flash
after a turn, manually return the lever to
its original position.
The turn signal indicators (green)
in the instrument cluster flash
according to the operation of the turn
signal lever to show which signal is
working.
Note: If an indicator light stays on
without flashing or if it flashes
abnormally, one of the turn signal bulbs
may be burned out.
Lane Change Assist
Move the lever halfway toward the
direction of the lane change (until the
indicator flashes) and hold it there. It will
return to the off position when released.
Three-flash turn signal
After releasing the turn signal lever, the
turn signal indicator flashes three times.
05030101-132-001Headlight Switch
1 — Headlight Switch
2 — Fog Light Switch
41
Page 44 of 292
The operation can be cancelled by
moving the lever in the direction
opposite to which it was operated.
The three-flash turn signal function can
be turned on or off using the
personalization function in the radio.
AFS (Adaptive Front
Lighting System) — If
Equipped
This system directs the main light beam
and adapts it to the driving conditions
around bends/when cornering,
continuously and automatically.
The system directs the light beam to
illuminate the road in the best way,
taking into account the speed of the
vehicle, the bend/corner angle and the
speed of steering.
The adaptive lights are automatically
activated when the vehicle is started.
Leaving Home Light
System
The leaving home light system turns on
the lights when the key fob unlock
button is pushed while away from the
vehicle.
Activation
When the ignition switch is in the OFF
position and the headlight switch is in
orposition, the headlights
will illuminate when the key fob unlock
button is pushed and the vehicle
receives the key fob signal. The headlights turn off after
30 seconds.
The following lights turn on when the
leaving home light system is operated:
low beams/parking lights/taillights/
license lights.
Operation of the leaving home light
system can be turned on or off.
When the key fobbutton is
pushed and the vehicle receives the key
fob signal, the headlights turn off.
When the headlight switch is in a
position other than
or,the
headlights turn off.
Headlamp Leveling
System — If Equipped
Automatic Headlamp Leveling
System
On some models, the angle of the
headlights will be automatically adjusted
when turning on the headlights.
Adjusting The Headlight
When Abroad
Dipped headlights are adjusted for
driving in the country where the vehicle
was originally purchased.
When travelling in countries with
opposite driving direction, to avoid
flashing the drivers on the other side of
the road, you need to cover areas of
the headlight. For this operation contact
an authorized dealer.
WINDSHIELD
WIPERS / WASHER
Windshield Wipers
Washer
The ignition must be in the ON position
to use the wipers.
Windshield Wipers
Turn the wipers on by pushing the lever
up or down.
With intermittent wiper
Switch positions:
or MIST: operation while
pulling up lever
OFF: stop
--- orINT: intermittent operation
— orLO: low speed operation
=or HI: high speed operation
05030101-122-001Windshield Wiper Switch
1 — Intermittent Switch
42
GETTING TO KNOW YOUR VEHICLE
Page 103 of 292
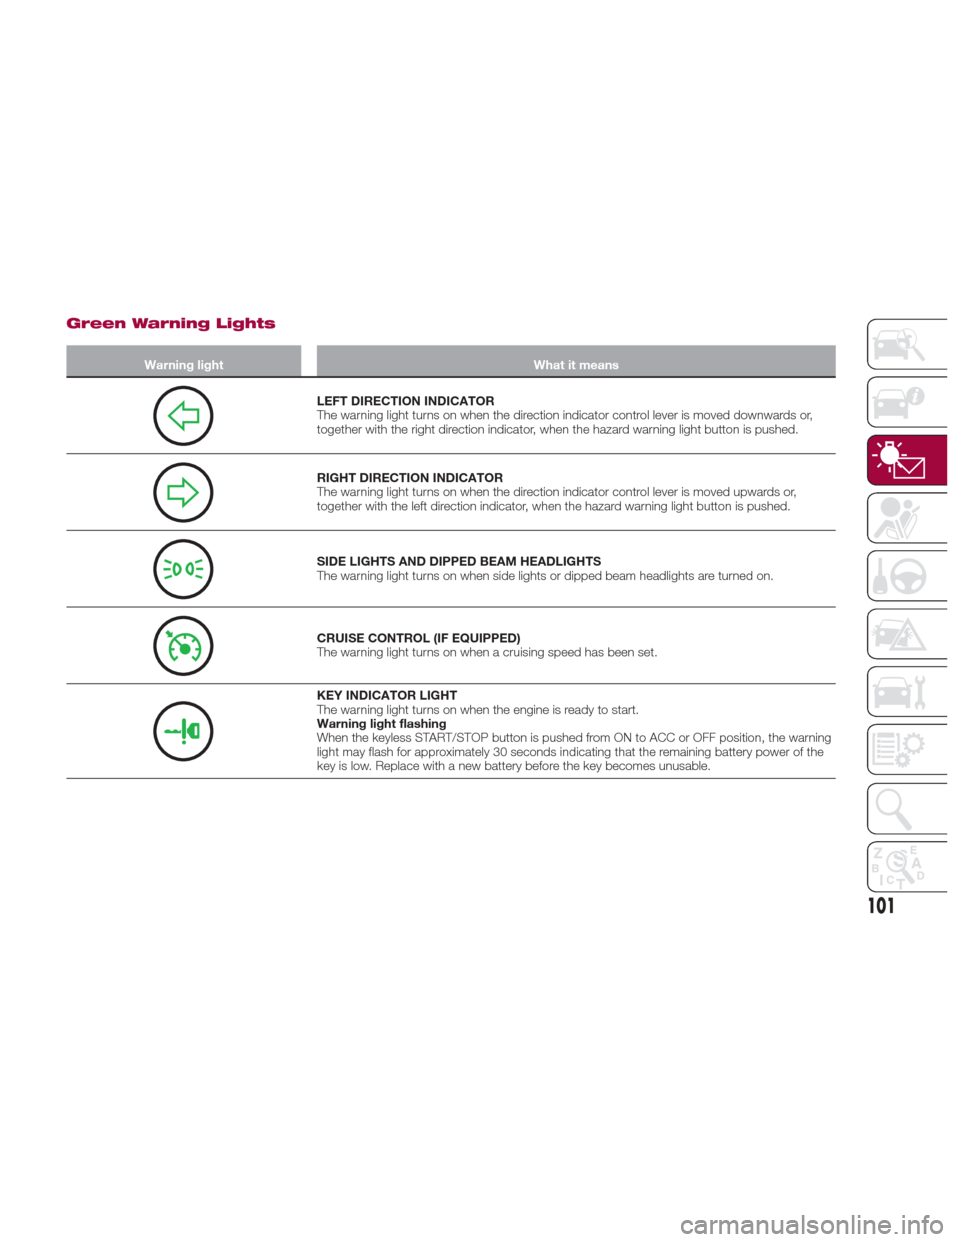
Green Warning Lights
Warning lightWhat it means
LEFT DIRECTION INDICATOR
The warning light turns on when the direction indicator control lever is moved downwards or,
together with the right direction indicator, when the hazard warning light button is pushed.
RIGHT DIRECTION INDICATOR
The warning light turns on when the direction indicator control lever is moved upwards or,
together with the left direction indicator, when the hazard warning light button is pushed.
SIDE LIGHTS AND DIPPED BEAM HEADLIGHTS
The warning light turns on when side lights or dipped beam headlights are turned on.
CRUISE CONTROL (IF EQUIPPED)
The warning light turns on when a cruising speed has been set.
KEY INDICATOR LIGHT
The warning light turns on when the engine is ready to start.
Warning light flashing
When the keyless START/STOP button is pushed from ON to ACC or OFF position, the warning
light may flash for approximately 30 seconds indicating that the remaining battery power of the
key is low. Replace with a new battery before the key becomes unusable.
101
Page 104 of 292
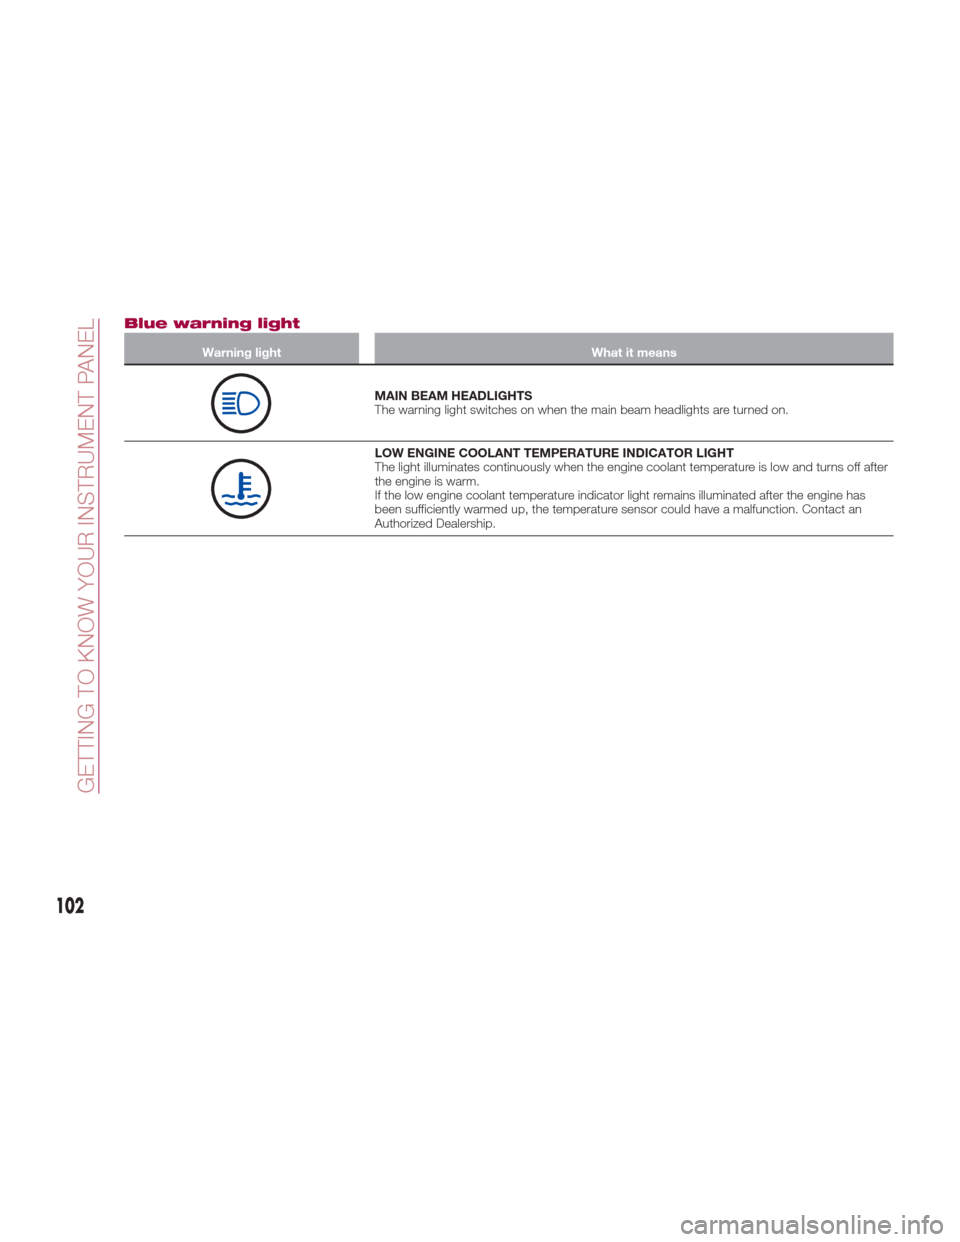
Blue warning light
Warning lightWhat it means
MAIN BEAM HEADLIGHTS
The warning light switches on when the main beam headlights are turned on.
LOW ENGINE COOLANT TEMPERATURE INDICATOR LIGHT
The light illuminates continuously when the engine coolant temperature is low and turns off after
the engine is warm.
If the low engine coolant temperature indicator light remains illuminated after the engine has
been sufficiently warmed up, the temperature sensor could have a malfunction. Contact an
Authorized Dealership.
102
GETTING TO KNOW YOUR INSTRUMENT PANEL
Page 169 of 292
If the vehicle has been involved in a
frontal, lateral or rear collision, the rear
parking camera’s alignment (location or
installation angle) may have been altered.
Contact a authorized dealer.
If the display shows "no video signal",
there may be a problem with the camera.
Contact an authorized dealer.
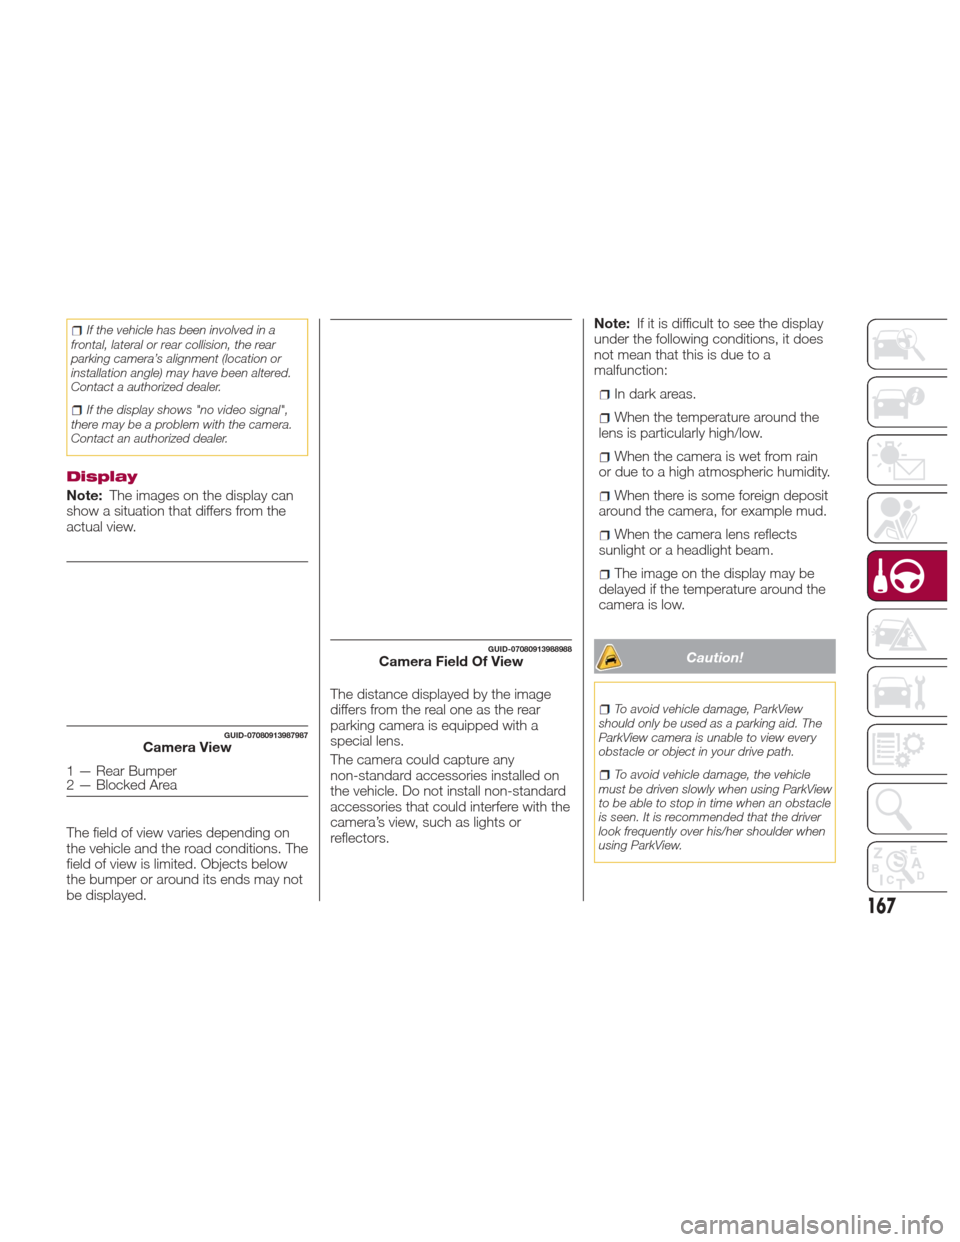
Display
Note: The images on the display can
show a situation that differs from the
actual view.
The field of view varies depending on
the vehicle and the road conditions. The
field of view is limited. Objects below
the bumper or around its ends may not
be displayed. The distance displayed by the image
differs from the real one as the rear
parking camera is equipped with a
special lens.
The camera could capture any
non-standard accessories installed on
the vehicle. Do not install non-standard
accessories that could interfere with the
camera’s view, such as lights or
reflectors.Note:
If it is difficult to see the display
under the following conditions, it does
not mean that this is due to a
malfunction:
In dark areas.
When the temperature around the
lens is particularly high/low.
When the camera is wet from rain
or due to a high atmospheric humidity.
When there is some foreign deposit
around the camera, for example mud.
When the camera lens reflects
sunlight or a headlight beam.
The image on the display may be
delayed if the temperature around the
camera is low.
Caution!
To avoid vehicle damage, ParkView
should only be used as a parking aid. The
ParkView camera is unable to view every
obstacle or object in your drive path.
To avoid vehicle damage, the vehicle
must be driven slowly when using ParkView
to be able to stop in time when an obstacle
is seen. It is recommended that the driver
look frequently over his/her shoulder when
using ParkView.
GUID-07080913987987Camera View
1 — Rear Bumper
2 — Blocked Area
GUID-07080913988988Camera Field Of View
167
Page 187 of 292
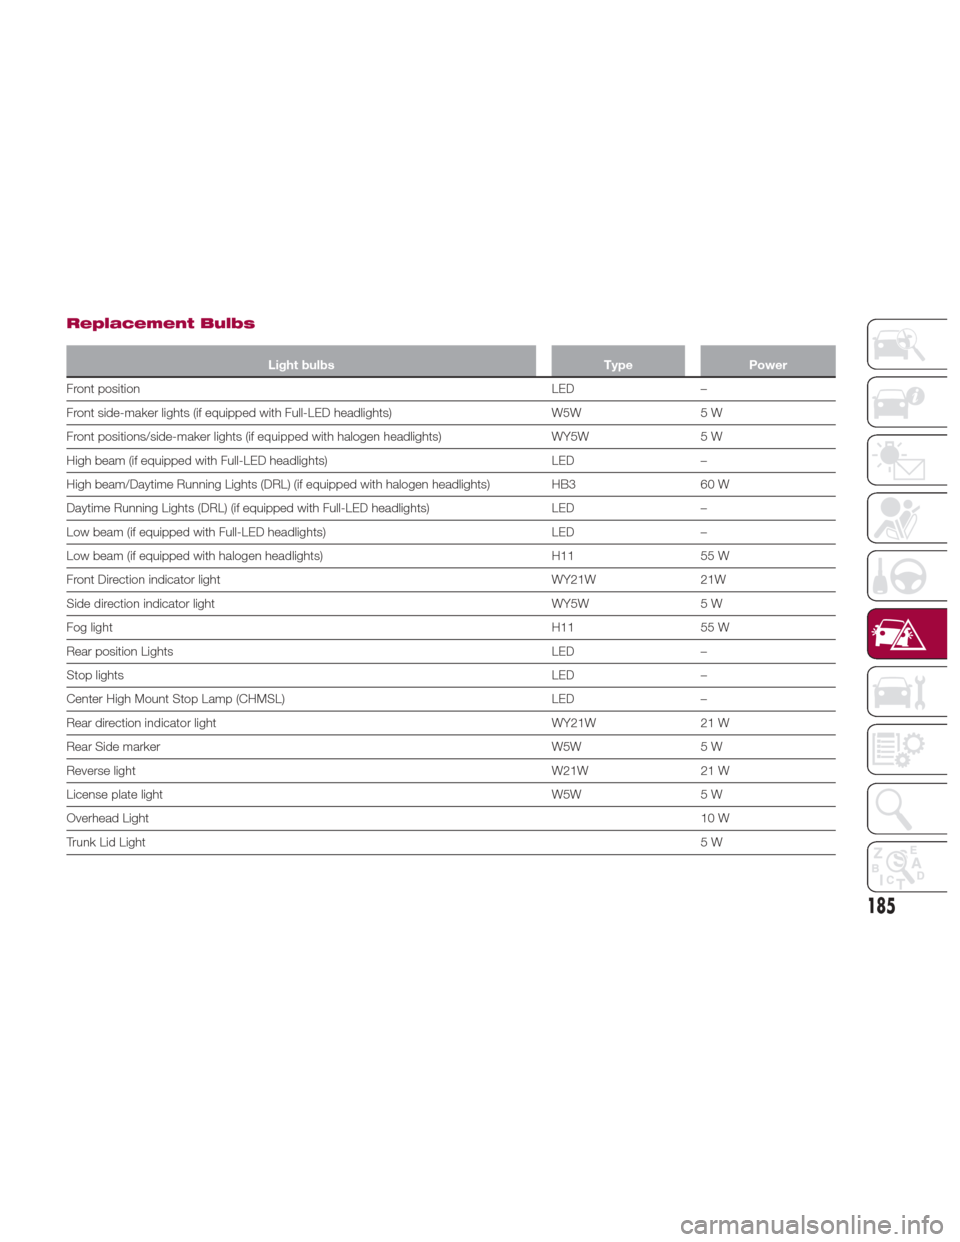
Replacement Bulbs
Light bulbsTypePower
Front position LED
–
Front side-maker lights (if equipped with Full-LED headlights) W5W5 W
Front positions/side-maker lights (if equipped with halogen headlights) WY5W5 W
High beam (if equipped with Full-LED headlights) LED–
High beam/Daytime Running Lights (DRL) (if equipped with halogen headlights) HB3 60 W
Daytime Running Lights (DRL) (if equipped with Full-LED headlights) LED–
Low beam (if equipped with Full-LED headlights) LED–
Low beam (if equipped with halogen headlights) H1155 W
Front Direction indicator light WY21W21W
Side direction indicator light WY5W5 W
Fog light H1155 W
Rear position Lights LED–
Stop lights LED–
Center High Mount Stop Lamp (CHMSL) LED–
Rear direction indicator light WY21W21 W
Rear Side marker W5W5 W
Reverse light W21W21 W
License plate light W5W5 W
Overhead Light 10 W
Trunk Lid Light 5W
185
Page 188 of 292
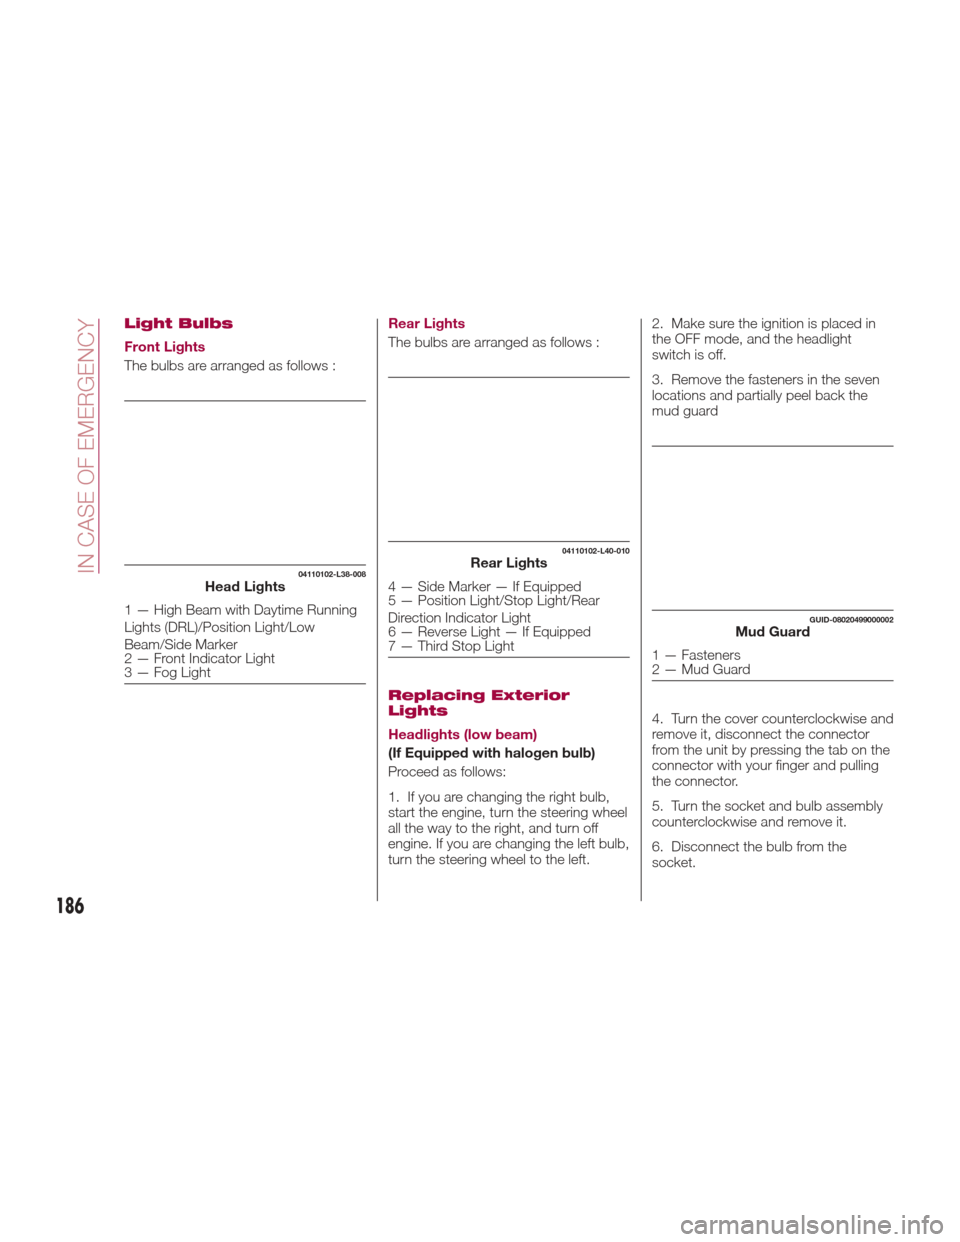
Light Bulbs
Front Lights
The bulbs are arranged as follows :Rear Lights
The bulbs are arranged as follows :
Replacing Exterior
Lights
Headlights (low beam)
(If Equipped with halogen bulb)
Proceed as follows:
1. If you are changing the right bulb,
start the engine, turn the steering wheel
all the way to the right, and turn off
engine. If you are changing the left bulb,
turn the steering wheel to the left.2. Make sure the ignition is placed in
the OFF mode, and the headlight
switch is off.
3. Remove the fasteners in the seven
locations and partially peel back the
mud guard
4. Turn the cover counterclockwise and
remove it, disconnect the connector
from the unit by pressing the tab on the
connector with your finger and pulling
the connector.
5. Turn the socket and bulb assembly
counterclockwise and remove it.
6. Disconnect the bulb from the
socket.
04110102-L38-008Head Lights
1 — High Beam with Daytime Running
Lights (DRL)/Position Light/Low
Beam/Side Marker
2 — Front Indicator Light
3 — Fog Light
04110102-L40-010Rear Lights
4 — Side Marker — If Equipped
5 — Position Light/Stop Light/Rear
Direction Indicator Light
6 — Reverse Light — If Equipped
7 — Third Stop Light
GUID-08020499000002Mud Guard
1 — Fasteners
2 — Mud Guard
186
IN CASE OF EMERGENCY
Page 189 of 292
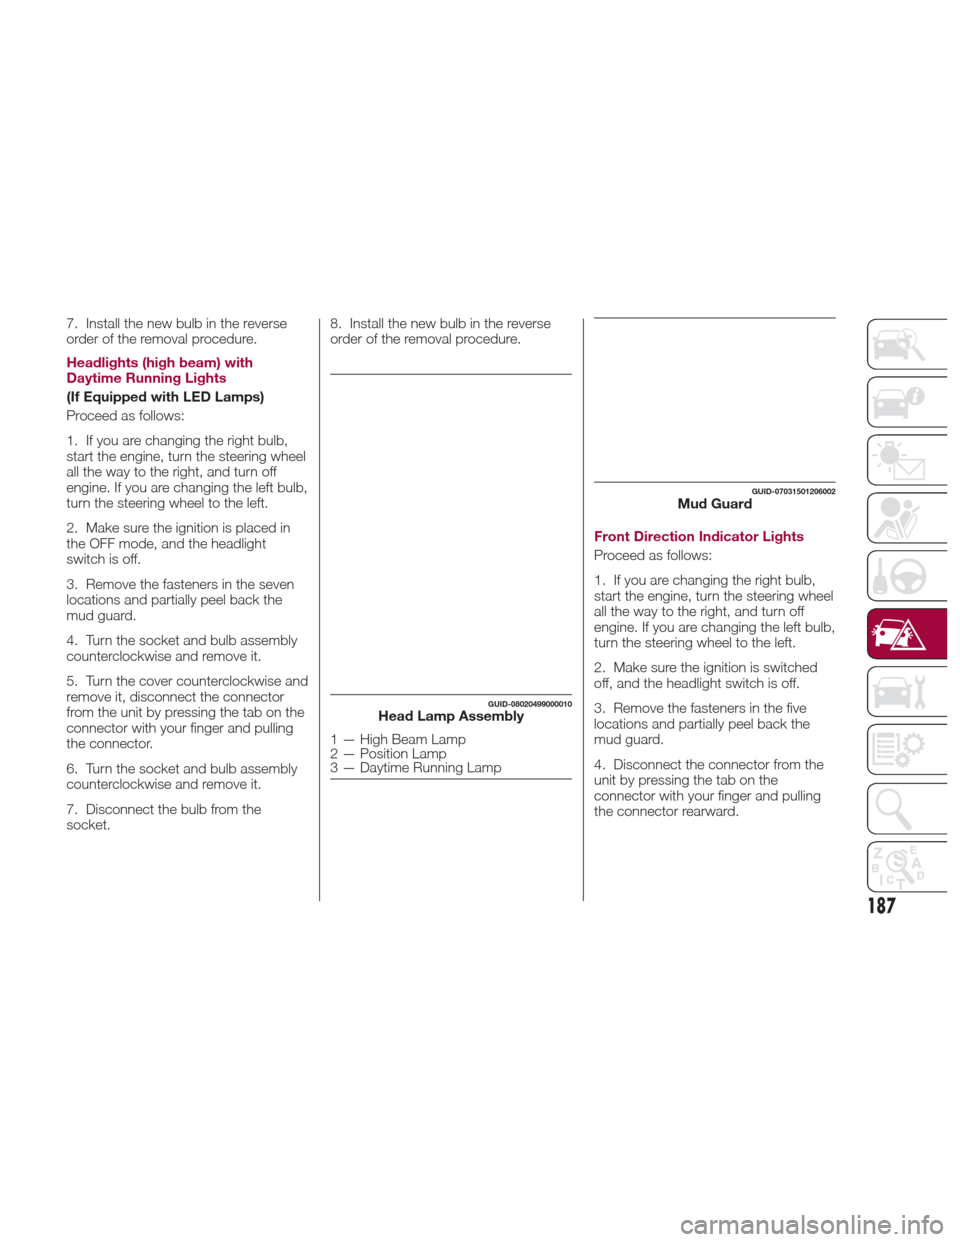
7. Install the new bulb in the reverse
order of the removal procedure.
Headlights (high beam) with
Daytime Running Lights
(If Equipped with LED Lamps)
Proceed as follows:
1. If you are changing the right bulb,
start the engine, turn the steering wheel
all the way to the right, and turn off
engine. If you are changing the left bulb,
turn the steering wheel to the left.
2. Make sure the ignition is placed in
the OFF mode, and the headlight
switch is off.
3. Remove the fasteners in the seven
locations and partially peel back the
mud guard.
4. Turn the socket and bulb assembly
counterclockwise and remove it.
5. Turn the cover counterclockwise and
remove it, disconnect the connector
from the unit by pressing the tab on the
connector with your finger and pulling
the connector.
6. Turn the socket and bulb assembly
counterclockwise and remove it.
7. Disconnect the bulb from the
socket.8. Install the new bulb in the reverse
order of the removal procedure.
Front Direction Indicator Lights
Proceed as follows:
1. If you are changing the right bulb,
start the engine, turn the steering wheel
all the way to the right, and turn off
engine. If you are changing the left bulb,
turn the steering wheel to the left.
2. Make sure the ignition is switched
off, and the headlight switch is off.
3. Remove the fasteners in the five
locations and partially peel back the
mud guard.
4. Disconnect the connector from the
unit by pressing the tab on the
connector with your finger and pulling
the connector rearward.
GUID-08020499000010Head Lamp Assembly
1 — High Beam Lamp
2 — Position Lamp
3 — Daytime Running Lamp
GUID-07031501206002Mud Guard
187
Page 287 of 292
Electronic Vehicle Information
Center (EVIC) Setup Menu.....78
EVIC Display ..............78
Emergency flap opening ........174
Emergency Key ..............19
Emergency, In Case Of .........207
Hazard Warning Flasher ......183
Jacking ..........202,203,237
Jump Starting ............217
Overheating .............219
Towing ............. .220,221
Emission control system .........75
Engine .................. .266
Exhaust Gas Caution ........173
Fails To Start .............218
Flooded, Starting ..........218
Jump Starting ............217
Overheating .............219
Starting ..............21,218
Engine compartment ..........230
Engine coolant (level check) ......231
Engine oil (level check) .........231
Environment protection systems ....75
Essential information ............3
Ethanol .................. .172
Event Data Recorder ..........145
Exhaust Gas Caution ..........173
Exterior Lights ...............38Flash-To-Pass...............40
Flashers Hazard Warning ...........183
Turn Signal ...............41
Flooded Engine Starting ........218
Fluid And Lubricants ..........274
Fluid Capacities .............273
Fog Lights ..................41
Follow Me Home .............41
Front lights (light bulbs) .........186
Front Wipers Wiper Operation ...........42
Fuel Additives ...............173
Clean Air ...............172
Ethanol ............... .172
Materials Added ...........173
Methanol ...............172
Fuel Consumption Display ........88
Fuel Economy Monitor ..........87
Fuel filler cap ...............174
Fuel filler door ...............173
Fuse block (engine compartment) . .196
Fuse block (interior) ...........200
Fuses (interior) ..............194
Fuses (underhood) ............195
Gasoline, Clean Air...........172
Gasoline, Reformulated ........172Gear selector positions
.........153
GVWR .................. .175
Hazard Warning Flasher........183
Hazardous driving ............177
Head Restraints ............34,35
Headlight ..................38
Headlights Adjusting The Headlight
Abroad..................42
High Beam ...............40
Passing .................40
Heavy-duty use of the vehicle (scheduled servicing) ........224
HomeLink (Garage Door Opener) ........59
Hood Release ...............69
How to use this manual ..........3
Identification Data............263
Inside Rearview Mirror ..........36
Instrument Cluster Display DID Menu Items . . . .79,80,82,83,84
EVIC Menu Items . . .79,80,82,83,84
Interior Lights ................63
Interiors ................. .259
Internal Equipment ............61
Jack Location..............202
Jack Operation ........202,203,237
Jump Starting ...............217