steering FIAT 500 2019 Owner handbook (in English)
[x] Cancel search | Manufacturer: FIAT, Model Year: 2019, Model line: 500, Model: FIAT 500 2019Pages: 228, PDF Size: 6.01 MB
Page 91 of 228
95)When the child restraint system is not
used, secure it with the seat belt or with
the ISOFIX anchorages, or remove it from
the vehicle. Do not leave it unsecured
inside the passenger compartment. This
way, in the case of sudden braking or
an accident, it will not cause injuries to the
occupants.
96)After installing a child restraint system,
do not move the seat: always remove
the child restraint system before making
any adjustment.
97)If a Universal Isofix child seat is not
fixed to all three anchorages, the child seat
will not be able to protect the child
correctly. In a crash, the child could be
seriously or fatally injured.
98)Fit the child restraint system when the
car is stationary. The child restraint system
is correctly fixed to the brackets when
you hear the click. Follow the instructions
for assembly, disassembly and positioning
that the Manufacturer must supply with
the child restraint system.
99)Always make sure that the diagonal
section of the seat belt does not pass
under the arms or behind the back of the
child. In the event of an accident the seat
belt will not be able to secure the child,
with the risk of injury, including fatal injury.
Therefore the child must always wear
the seat belt correctly.
100)Do not use the same lower anchoring
to install more than one child restraint
system.
101)Fit the child restraint system
according to the instructions, which must
be included.SUPPLEMENTARY
RESTRAINT SYSTEM
(SRS) - AIRBAG
The car may be equipped with:
front driver airbag;
front passenger airbag;
driver's side knee bag;
driver and passenger front side bags
for pelvis, chest and shoulder
protection;
window bags for head protection of
front seat passengers and rear side
seat passengers.
FRONT AIRBAGS
102)
The front driver/passenger airbags and
the driver's knee bag (for versions/
markets, where provided) protect the
front seat occupants in the event of
frontal impacts of medium/high severity,
by placing the bag between the
occupant and the steering wheel or
dashboard.
Therefore non-activation of airbags in
other types of collisions (side impacts,
rear shunts, roll-overs, etc.) does not
indicate a system malfunction.
An electronic control unit will make the
bag inflate in the event of a frontal
impact.The bag will inflate instantaneously
placing itself between the front
occupants body and the structures
which could cause injury. It will deflate
immediately afterwards.
Front airbags are not a replacement of
but complementary to the seat belts,
which you are recommended to always
wear, as specified by law in Europe
and most non-European countries.
In the event of an impact, someone not
wearing a seat belt could move forward
and come into contact with a bag
which is still opening. The protection
offered by the bag is compromised
in these circumstances.
The front airbags may not be deployed
in the following cases: frontal impact
against highly deformable objects
not involving the front surface of the car
(e.g. wing collision against guard rail);
in the case of the car wedging under
other vehicles or protective barriers
(e.g. under trucks or guard rails).
Failure to activate in the conditions
described above is due to the fact that
they may not provide any additional
protection compared with seat belts, so
their activation would be inappropriate.
In these cases, non-deployment does
not indicate a system malfunction.
89
Page 92 of 228
The front airbags (driver, passenger,
driver's knee bags) are designed and
calibrated to protect front seat
passengers wearing seat belts. Their
volume at the moment of maximum
inflation fills most of the space between
the steering wheel and the driver,
between the lower post guard and the
knees on passenger side and between
the dashboard and the passenger.
The airbags are not deployed in the
event of minor frontal impacts (for
which the restraining action of the seat
belts is sufficient). Seat belts must
always be worn. In the event of a frontal
collision, they ensure the correct
positioning of the occupant.
Front airbag driver's side
103)
This consists of an instantly inflating
bag contained in a special
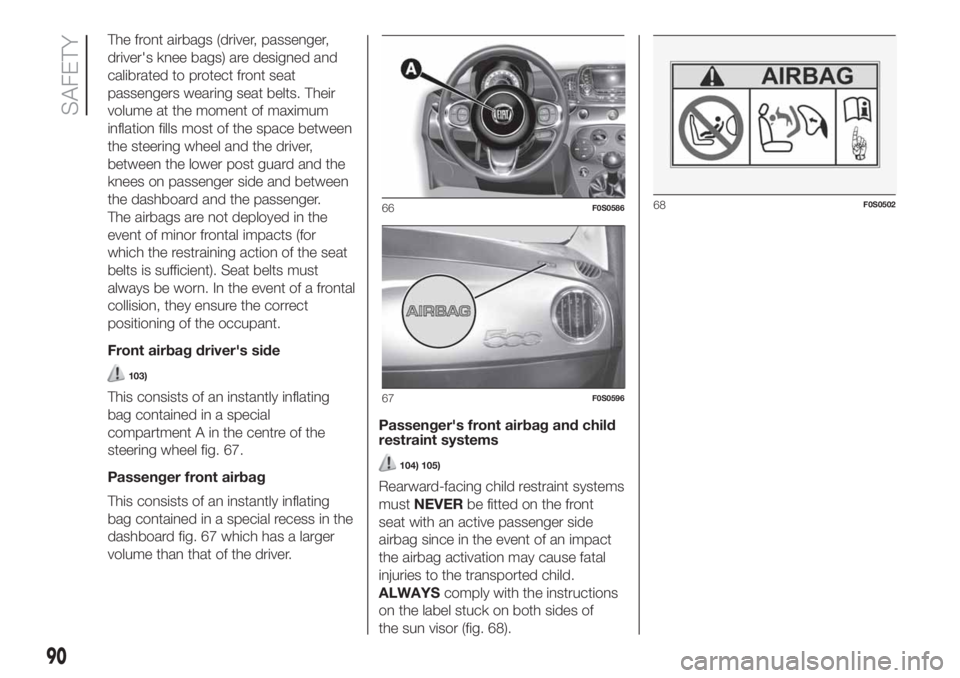
compartment A in the centre of the
steering wheel fig. 67.
Passenger front airbag
This consists of an instantly inflating
bag contained in a special recess in the
dashboard fig. 67 which has a larger
volume than that of the driver.Passenger's front airbag and child
restraint systems
104) 105)
Rearward-facing child restraint systems
mustNEVERbe fitted on the front
seat with an active passenger side
airbag since in the event of an impact
the airbag activation may cause fatal
injuries to the transported child.
ALWAYScomply with the instructions
on the label stuck on both sides of
the sun visor (fig. 68).
66F0S0586
67F0S0596
68F0S0502
90
SAFETY
Page 94 of 228
Driver knee bag
(for versions/markets, where provided)
It consists of an instantly inflating bag
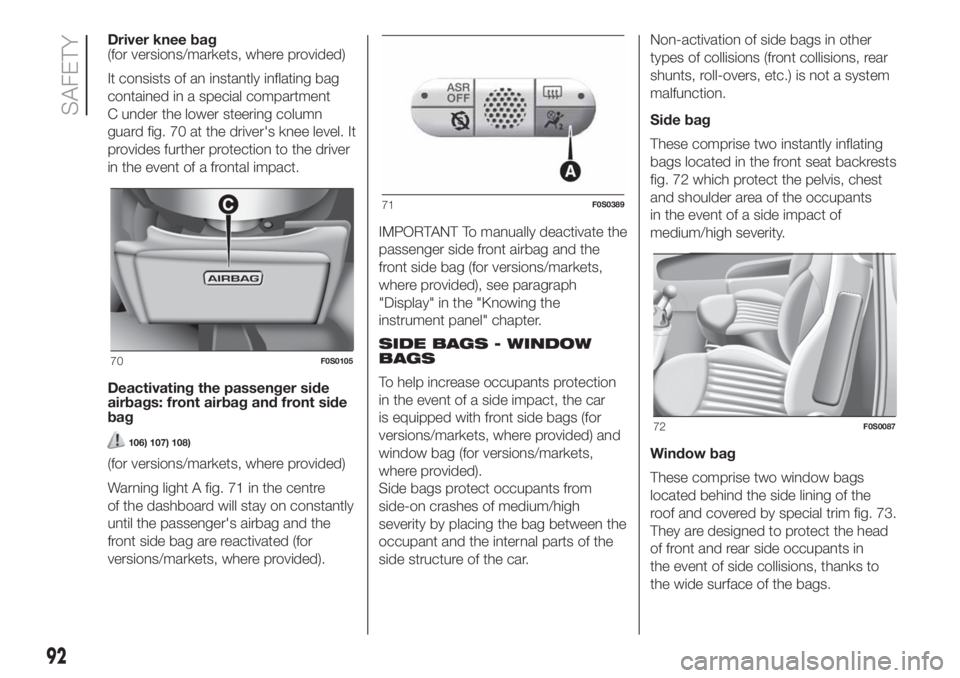
contained in a special compartment
C under the lower steering column
guard fig. 70 at the driver's knee level. It
provides further protection to the driver
in the event of a frontal impact.
Deactivating the passenger side
airbags: front airbag and front side
bag
106) 107) 108)
(for versions/markets, where provided)
Warning light A fig. 71 in the centre
of the dashboard will stay on constantly
until the passenger's airbag and the
front side bag are reactivated (for
versions/markets, where provided).IMPORTANT To manually deactivate the
passenger side front airbag and the
front side bag (for versions/markets,
where provided), see paragraph
"Display" in the "Knowing the
instrument panel" chapter.
SIDE BAGS - WINDOW
BAGS
To help increase occupants protection
in the event of a side impact, the car
is equipped with front side bags (for
versions/markets, where provided) and
window bag (for versions/markets,
where provided).
Side bags protect occupants from
side-on crashes of medium/high
severity by placing the bag between the
occupant and the internal parts of the
side structure of the car.Non-activation of side bags in other
types of collisions (front collisions, rear
shunts, roll-overs, etc.) is not a system
malfunction.
Side bag
These comprise two instantly inflating
bags located in the front seat backrests
fig. 72 which protect the pelvis, chest
and shoulder area of the occupants
in the event of a side impact of
medium/high severity.
Window bag
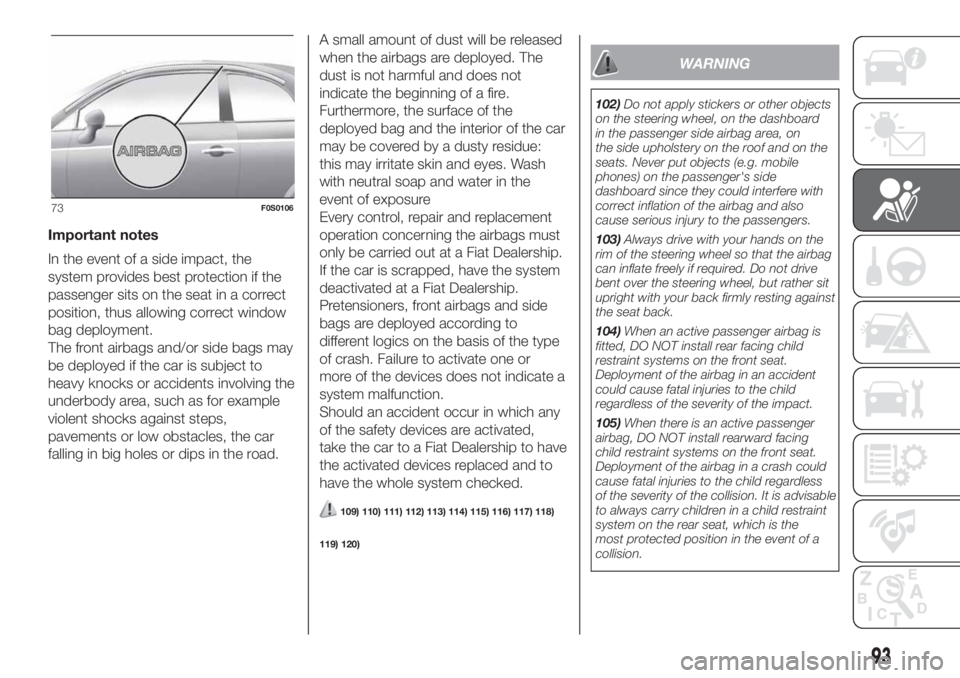
These comprise two window bags
located behind the side lining of the
roof and covered by special trim fig. 73.
They are designed to protect the head
of front and rear side occupants in
the event of side collisions, thanks to
the wide surface of the bags.
70F0S0105
71F0S0389
72F0S0087
92
SAFETY
Page 95 of 228
Important notes
In the event of a side impact, the
system provides best protection if the
passenger sits on the seat in a correct
position, thus allowing correct window
bag deployment.
The front airbags and/or side bags may
be deployed if the car is subject to
heavy knocks or accidents involving the
underbody area, such as for example
violent shocks against steps,
pavements or low obstacles, the car
falling in big holes or dips in the road.A small amount of dust will be released
when the airbags are deployed. The
dust is not harmful and does not
indicate the beginning of a fire.
Furthermore, the surface of the
deployed bag and the interior of the car
may be covered by a dusty residue:
this may irritate skin and eyes. Wash
with neutral soap and water in the
event of exposure
Every control, repair and replacement
operation concerning the airbags must
only be carried out at a Fiat Dealership.
If the car is scrapped, have the system
deactivated at a Fiat Dealership.
Pretensioners, front airbags and side
bags are deployed according to
different logics on the basis of the type
of crash. Failure to activate one or
more of the devices does not indicate a
system malfunction.
Should an accident occur in which any
of the safety devices are activated,
take the car to a Fiat Dealership to have
the activated devices replaced and to
have the whole system checked.
109) 110) 111) 112) 113) 114) 115) 116) 117) 118)
119) 120)
WARNING
102)Do not apply stickers or other objects
on the steering wheel, on the dashboard
in the passenger side airbag area, on
the side upholstery on the roof and on the
seats. Never put objects (e.g. mobile
phones) on the passenger's side
dashboard since they could interfere with
correct inflation of the airbag and also
cause serious injury to the passengers.
103)Always drive with your hands on the
rim of the steering wheel so that the airbag
can inflate freely if required. Do not drive
bent over the steering wheel, but rather sit
upright with your back firmly resting against
the seat back.
104)When an active passenger airbag is
fitted, DO NOT install rear facing child
restraint systems on the front seat.
Deployment of the airbag in an accident
could cause fatal injuries to the child
regardless of the severity of the impact.
105)When there is an active passenger
airbag, DO NOT install rearward facing
child restraint systems on the front seat.
Deployment of the airbag in a crash could
cause fatal injuries to the child regardless
of the severity of the collision. It is advisable
to always carry children in a child restraint
system on the rear seat, which is the
most protected position in the event of a
collision.
73F0S0106
93
Page 98 of 228
STARTING AND DRIVING
Let’s get to the "heart" of the vehicle:
seeing how you can exploit all of its
potential to the full.
We’ll look at how to drive it safely in any
situation, so that it can be a welcome
companion, with our comfort and
our wallets in mind.STARTING THE ENGINE ................. 97
PARKING THE VEHICLE ................. 98
MANUAL TRANSMISSION .............. 99
DUALOGIC TRANSMISSION...........100
DUALDRIVE ELECTRIC POWER
STEERING ......................................101
START&STOP SYSTEM ..................102
SPEED LIMITER ..............................103
ELECTRONIC CRUISE CONTROL ..105
PARKING SENSORS.......................106
SUGGESTIONS FOR DRIVING........108
REFUELLING THE VEHICLE ...........109
TOWING TRAILERS ........................112
96
STARTING AND DRIVING
Page 99 of 228
STARTING THE
ENGINE
121) 122)
36) 37) 39) 40)
Before starting the engine, adjust the
seat, the interior rear view mirrors,
the door mirrors and fasten the seat
belt correctly.
Never press the accelerator pedal for
starting the engine.
The Start&Stop, ECO and AUTO
functions are activated automatically
whenever the engine is started.
PETROL VERSIONS
Starting the engine
Proceed as follows:
engage the handbrake and put the
gear lever in neutral;
fully depress the clutch pedal
without touching the accelerator;
turn the ignition key to AVV and
release it as soon as the engine starts.
If the engine does not start at the
first attempt, return the ignition key to
STOP before repeating the starting
procedure.If, when the ignition key is at MAR, the
instrument panel warning light or the
symbol
remains lit together with
warning light
turn the key to STOP
and then back to MAR. If the warning
light remains on, try with the other keys
provided with the car.
Contact a Fiat Dealership if you still
cannot start the engine.
VERSIONS WITH
DUALOGIC
TRANSMISSION
123)
The system allows the engine to be
started both with a gear engaged and
with the transmission in neutral (N).
However, the brake pedal must always
be pressed first if neutral is not
engaged. It is therefore advisable to
position the gear lever at N before
starting the engine.
LPG VERSIONS
The engine always starts up on petrol
independently of the previously
selected mode.
38)
WARNING
121)It is dangerous to run the engine in
enclosed areas. The engine consumes
oxygen and engine exhaust contains
carbon dioxide, carbon monoxide and
other toxic gasses.
122)Remember that the brake servo and
electrical power steering system are not
operational until the engine is started,
therefore a greater effort will be required to
press the brake pedal or turn the steering
wheel.
123)If the engine fails to start with a gear
engaged, the potentially dangerous
situation due to the fact that the gearbox is
automatically placed in neutral will be
signalled by an acoustic signal.
WARNING
36)It is advisable not to demand maximum
performance from your car (e.g. excessive
acceleration, long distances at maximum
rpm, excessively intense braking, etc.)
when it is first used.
37)When the engine is switched off never
leave the key turned to MAR to prevent
useless current absorption from draining
the battery.
38)There must therefore always be
enough petrol in the tank to protect the
petrol pump and to guarantee temporary
switching from LPG to petrol operation.
97
Page 102 of 228
DUALOGIC
TRANSMISSION
(for versions/markets, where provided)
42) 44)
OPERATING MODE
MANUAL MODE
In this mode, the driver decides when
to shift gear;
Proceed as follows:
press the brake pedal;
start the engine;
push the lever A fig. 76 for the
gearbox towards (+) to engage the first
gear (if it is coming from N or R, simply
position the lever in the middle position)
or in R to engage reverse gear;
release the brake pedal and press
the accelerator pedal;
in driving conditions, push lever A of
the gearbox towards (+) to engage
the next gear up or towards (–) to
engage the next gear down.
AUTOMATIC MODE (AUTO)
In this mode, the system directly
decides when to shift gear.
Proceed as follows:
press the brake pedal
start the engine
push the gear lever to A/M to
engage automatic mode or to R to
engage reverse gear
release the brake pedal and press
the accelerator pedal.
ECO function
The ECO function, which optimises the
gearbox and reduces fuel consumption,
can only be activated with automatic
mode on. To turn the function on, press
the button E fig. 76 on the gearbox
panel.
With the ECO function active, the
display will show the current gear and
the words AUTO and ECO; the system
will select the most suitable gear
depending on the car speed, engine
rpm and intensity with which the
accelerator pedal is pressed, with the
aim of limiting fuel consumption.The ECO and AUTO functions are
activated automatically whenever the
engine is started.
STEERING WHEEL
PADDLES
(for versions/markets, where provided)
43) 44) 43)
Shifting can be managed sequentially
via the shift paddles on the steering
wheel fig. 77.
To use the steering wheel paddles, the
gear lever must be in the middle
position between + and –:
pull the paddle + (towards the
driver): shift up;
pull the paddle – (towards driver):
shift down.
NOTE Shifting up (or down) is only
permitted if the engine rpm allow it.
NOTE For correct use of the system,
you are advised only to use your right
foot to operate the pedal unit.
76F0S0576
77F0S0577
100
STARTING AND DRIVING
Page 103 of 228
WARNING
42)Avoid keeping your hand placed on this
lever in between gear changes or
Auto/Manual mode.
43)Using the paddles incorrectly (paddles
pushed towards the dashboard) could
break them.
44)If the transmission is faulty, contact a
Fiat Dealership as soon as possible to have
the system checked.
45)Using the paddles incorrectly (paddles
pushed towards the dashboard) could
break them.
DUALDRIVE
ELECTRIC POWER
STEERING
(for versions/markets, where provided)
Turning on/off (CITY function)
Press button A fig. 78 to turn the
function on/off.
When the function is active, the CITY
text on the display turns on.
When the CITY function is on, the
steering wheel effort is lighter, making
parking easier: therefore, this function is
particularly useful for driving in city
centres.
To deactivate the function press the
button again.
128) 129)
ECO FUNCTION
(for versions/markets, where provided)
With the ignition key at MAR, press
button ECO B fig. 78 to activate the
function. The word ECO on the display
will light up or, according to the version,
a dedicated screen will be displayed.
When the function is activated,
the car is set for city driving,
characterised by less effort on the
steering wheel (Dualdrive system on)
and reduced fuel consumption.
Press the button again to deactivate
the function.
This function is not stored, so the
system will restart with the function on
when the engine is restarted.
WARNING
128)It is absolutely forbidden to carry out
any after-market operation involving
steering system or steering column
modifications (e.g. installation of anti-theft
device) that could adversely affect
performance and safety, invalidate the
warranty and also result in the car not
meeting type-approval requirements.
78F0S0650
101
Page 104 of 228
129)Before starting any servicing
operation, stop the engine and remove the
key from the ignition switch to operate
the steering lock, particularly when the
wheels do not touch the ground. If this is
not possible (for example if the key needs
to be turned to MAR or the engine must be
running), remove the main fuse that
protects the electric power steering.START&STOP
SYSTEM
130) 131) 132) 133)
46)
(for versions/markets, where provided)
The Start&Stop system automatically
stops the engine each time the car
is stationary and starts it again when
the driver wants to move off.
In this way, the vehicle efficiency is
increased, by reducing consumption,
dangerous gas emissions and sound
pollution.
OPERATING MODE
Stopping the engine
With manual transmission: with the car
stationary, the engine stops with the
transmission in neutral and the clutch
pedal released.
With Dualogic gearbox: the engine
stops if the car is at a standstill and the
brake pedal is pressed. This condition
can be maintained even if the brake
pedal is not depressed, if the gear lever
is in position N (Neutral).NOTE The engine can only be stopped
automatically over about 10 km/h, to
prevent the engine from being
repeatedly stopped when driving at
walking pace.
Stopping of the engine is indicated by
the warning light or the symbol
on
the instrument panel switching on
(on some versions, together with a
message on the display).
Restarting the engine
With manual transmission: press the
clutch pedal.
With Dualogic gearbox: if the gear lever
is in position N (Neutral), place it in
any other gear, otherwise release the
brake pedal or move the gear lever
to+,–or R (Reverse).
MANUAL SYSTEM
ACTIVATION/
DEACTIVATION
The system can be activated/
deactivated by pressing the button A
fig. 79 on the dashboard.
With the system off, the warning light or
the symbol
appear on the
instrument panel (with a message for
versions with colour display).
Start&Stop mode will be active
whenever the engine is started.
102
STARTING AND DRIVING
Page 129 of 228
WARNING
148)If the replaced fuse blows again,
contact a Fiat Dealership.
149)Never replace a fuse with metal wires
or anything else.
150)Never replace a fuse with another with
a higher amp rating; DANGER OF FIRE.
151)If a general fuse (MEGA-FUSE,
MIDI-FUSE, MAXI-FUSE) blows contact a
Fiat Dealership.
152)Before replacing a fuse, make sure
that the ignition key has been removed and
that all the other services are switched off
and/or disengaged.
153)Contact Fiat Dealership if a safety
system (airbags, brakes), engine system
(engine, gearbox) or steering system
general protection fuse blows.
WARNING
52)If you need to wash the engine
compartment, take care not to directly hit
the engine compartment fuse box with
the water jet.
REPLACING A
WHEEL
GENERAL
INSTRUCTIONS
154) 155) 156) 157) 158) 159) 160) 161) 162)
JACK
Please note that:
the jack weight is 1.76 kg;
the jack requires no adjustment;
the jack cannot be repaired and in
the event of a fault it must be replaced
by another genuine one;
no tool other than its cranking
device may be fitted on the jack.
MAINTENANCE
prevent any dirt from depositing on
the "worm screw"
keep the "worm screw" lubricated
never modify the jack.
CONDITIONS OF
NON-USE
at temperatures lower than -40°C on
a sandy or muddy ground
on uneven ground
on steep roads
in extreme weather conditions:
thunderstorms, typhoons, hurricanes,
blizzards, storms, etc.
in direct contact with the engine or
for repairs under the car
on boats.
RAISING WITH A JACK
AND REPLACING A
WHEEL
To change a wheel, proceed as follows:
stop the car in a position that is
not dangerous for oncoming traffic
where you can change the wheel safely.
The ground must be flat and sufficiently
compact;
stop the engine, pull up the
handbrake and engage the first gear or
reverse. Wear the reflective safety
jacket (compulsory by law) before
getting out of the car;
raise the mat on the floor of the
luggage compartment;
undo the fastener B fig. 112;
take out the tool box C fig. 112 and
place it next to the wheel to be
changed;
take the space-saver wheel D fig.
112;
for vehicles with wheel cap: use the
screwdriver provided, applying leverage
to the dedicated opening on the outer
edge;
127