wheel FIAT 500 ABARTH 2015 2.G Owner's Manual
[x] Cancel search | Manufacturer: FIAT, Model Year: 2015, Model line: 500 ABARTH, Model: FIAT 500 ABARTH 2015 2.GPages: 108, PDF Size: 2.63 MB
Page 66 of 108
Tire Service Kit Usage Precautions
• Replace the Tire Service Kit Sealant Bottle (1) and Sealant Hose (6) prior to the
expiration date (printed on the bottle label) to assure optimum operation of the
system. Refer to “Sealing A Tire With Tire Service Kit” section (F) “Sealant Bottle
and Hose Replacement.”
• The Sealant Bottle (1) and Sealant Hose (6) are a one tire application use. After
each use, always replace these components immediately at an authorized dealer.
• When the Tire Service Kit sealant is in a liquid form, clean water, and a damp
cloth will remove the material from the vehicle or tire and wheel components.
Once the sealant dries, it can easily be peeled off and properly discarded.
• For optimum performance, make sure the valve stem on the wheel is free of de-
bris before connecting the Tire Service Kit.
• You can use the Tire Service Kit air pump to inflate bicycle tires. The kit also
comes with two needles, located in the Accessory Storage Compartment (on the
bottom of the air pump) for inflating sport balls, rafts, or similar inflatable items.
However, use only the Air Pump Hose (7) and make sure the Mode Select Knob
(5) is in the Air Mode when inflating such items to avoid injecting sealant into
them. The Tire Service Kit Sealant is only intended to seal punctures less than
1/4 inch (6 mm) diameter in the tread of your vehicle.
• Do not lift or carry the Tire Service Kit by the hoses.
Sealing A Tire With Tire Service Kit
(A) Whenever You Stop To Use Tire Service Kit:
1. Pull over to a safe location and turn on the vehicle’s Hazard Warning flashers.
2. Verify that the valve stem (on the wheel with the deflated tire) is in a position that
is near to the ground. This will allow the Tire Service Kit Hoses (6) and (7) to
reach the valve stem and keep the Tire Service Kit flat on the ground. This will
provide the best positioning of the kit when injecting the sealant into the deflated
tire and running the air pump. Move the vehicle as necessary to place the valve
stem in this position before proceeding.
3. Place the transmission in PARK (auto transmission) or in Gear (manual transmis-
sion) and cycle the ignition to the OFF position.
4. Set the parking brake.
WHAT TO DO IN EMERGENCIES
64
Page 70 of 108
NOTE:
• The metal end fitting from Power Plug (8) may get hot after use, so it should be
handled carefully.
• Failure to reinstall the cap on the fitting at the end of the Sealant Hose (6) can re-
sult in sealant contacting your skin, clothing, and the vehicle’s interior. It can also
result in sealant contacting internal Tire Service Kit components which may cause
permanent damage to the kit.
WARNING!
• Do not attempt to seal a tire on the side of the vehicle closest to traffic. Pull
far enough off the road to avoid the danger of being hit when using the Tire
Service Kit.
• Do not use the Tire Service Kit or drive the vehicle under the following cir-
cumstances:
• If the puncture in the tire tread is approximately 1/4”. (6 mm) or larger.
• If the tire has any sidewall damage.
• If the tire has any damage from driving with extremely low tire pressure.
• If the tire has any damage from driving on a flat tire.
• If the wheel has any damage.
• If you are unsure of the condition of the tire or the wheel.
• Keep the Tire Service Kit away from open flames or heat source.
• A loose Tire Service Kit thrown forward in a collision or hard stop could en-
danger the occupants of the vehicle. Always stow the Tire Service Kit in the
place provided. Failure to follow these warnings can result in injuries that are
serious or fatal to you, your passengers, and others around you.
• Take care not to allow the contents of the Tire Service Kit to come in contact
with hair, eyes, or clothing. The Tire Service Kit is harmful if inhaled, swal-
lowed, or absorbed through the skin. It causes skin, eye, and respiratory
irritation. Flush immediately with plenty of water if there is any contact with
eyes or skin. Change clothing as soon as possible, if there is any contact
with clothing.
• The Tire Service Kit Sealant solution contains latex. In case of an allergic re-
action or rash, consult a physician immediately. Keep the Tire Service Kit out
of reach of children. If swallowed, rinse mouth immediately with plenty of
water and drink plenty of water. Do not induce vomiting! Consult a physician
immediately.
• The Tire Service Kit is not a permanent flat tire repair. Have the tire inspected
and repaired or replaced after using the Tire Service Kit. Do not exceed
55 mph (88 km/h) until the tire is repaired or replaced. Failure to follow this
warning can result in injuries that are serious or fatal to you, your passen-
gers, and others around you.
WHAT TO DO IN EMERGENCIES
68
Page 74 of 108
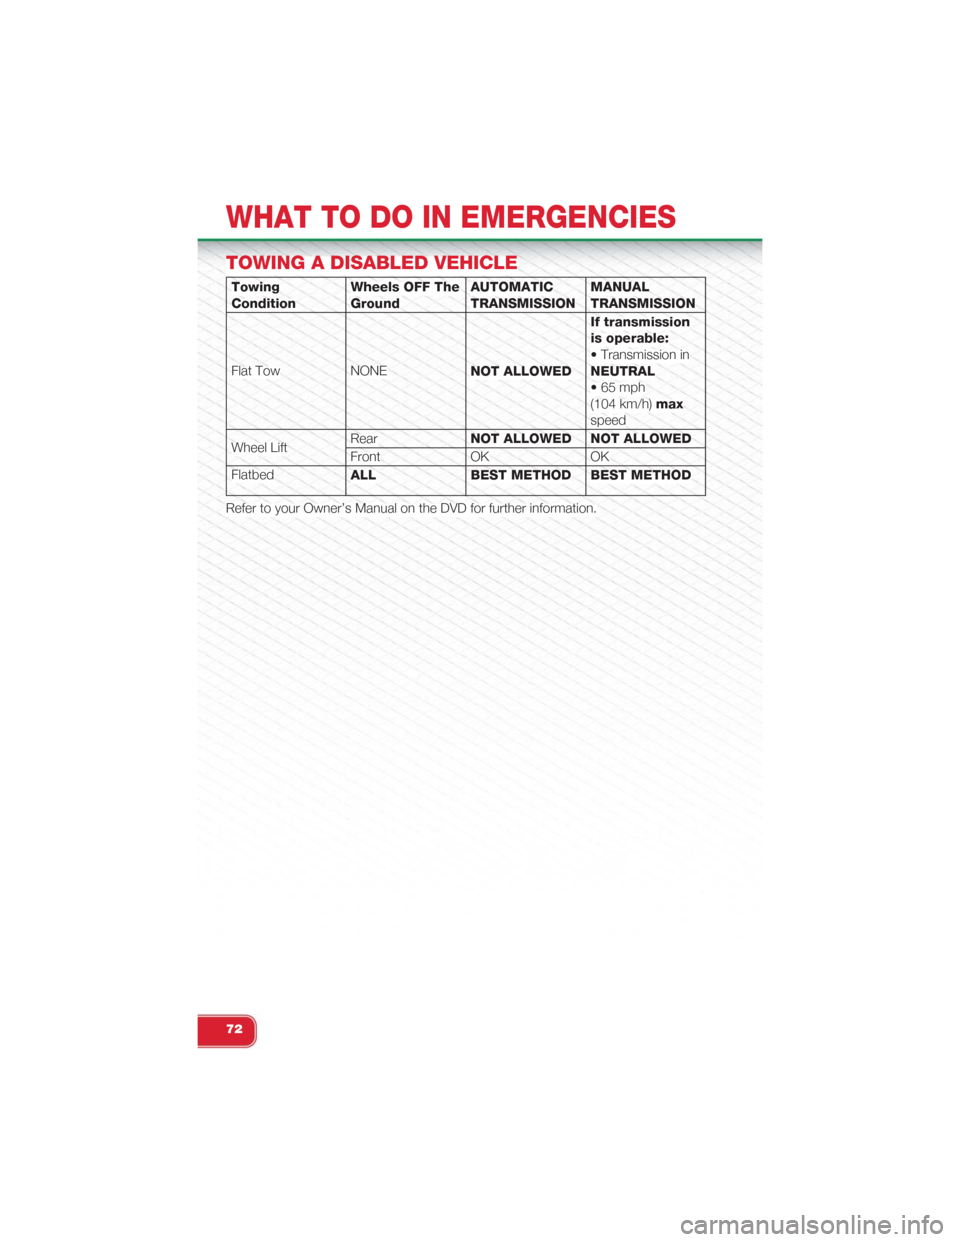
TOWING A DISABLED VEHICLE
Towing
Condition
Wheels OFF The
Ground
AUTOMATIC
TRANSMISSION
MANUAL
TRANSMISSION
Flat Tow NONENOT ALLOWED
If transmission
is operable:
• Transmission in
NEUTRAL
• 65 mph
(104 km/h)max
speed
Wheel LiftRearNOT ALLOWED NOT ALLOWED
Front OK OK
FlatbedALL BEST METHOD BEST METHOD
Refer to your Owner’s Manual on the DVD for further information.
WHAT TO DO IN EMERGENCIES
72
Page 77 of 108
FREEING A STUCK VEHICLE
• If your vehicle becomes stuck in mud, sand or snow, it can often be moved by a
rocking motion. Turn your steering wheel right and left to clear the area around
the front wheels. Then shift back and forth between 2nd gear and REVERSE.
Using minimal accelerator pedal pressure to maintain the rocking motion, without
spinning the wheels, is most effective.
NOTE:If your vehicle is equipped with Traction Control or Electronic Stability Control (ESC), turnthe system OFF before attempting to “rock” the vehicle.
CAUTION!
• Racing the engine or spinning the wheels may lead to transmission overheat-
ing and failure. Allow the engine to idle with the shift lever in NEUTRAL for at
least one minute after every five rocking-motion cycles. This will minimize
overheating and reduce the risk of transmission failure during prolonged ef-
forts to free a stuck vehicle.
•When “rocking” a stuck vehicle by moving between 1st and REVERSE, do not
spin the wheels faster than 15 mph (24 km/h), or drivetrain damage may result.
• Revving the engine or spinning the wheels too fast may lead to transmission
overheating and failure. It can also damage the tires. Do not spin the wheels
above 30 mph (48 km/h) while in gear (no transmission shifting occurring).
WARNING!
Fast spinning tires can be dangerous. Forces generated by excessive wheel
speeds may cause tire damage or failure. A tire could explode and injure some-
one. Do not spin your vehicle's wheels faster than 30 mph (48 km/h) when you
are stuck. Do not let anyone near a spinning wheel, no matter what the speed.
WHAT TO DO IN EMERGENCIES
75
Page 92 of 108
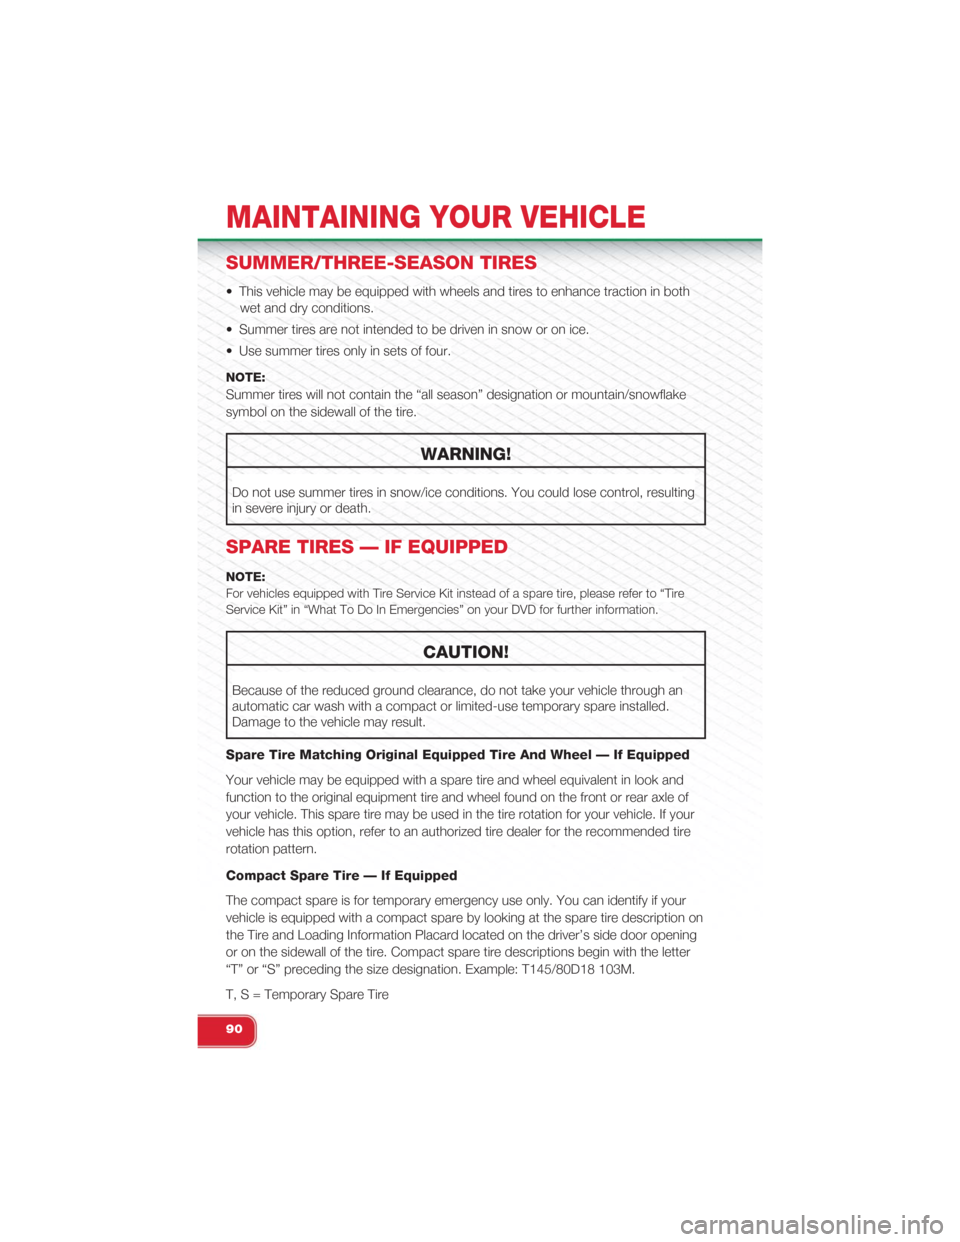
SUMMER/THREE-SEASON TIRES
• This vehicle may be equipped with wheels and tires to enhance traction in both
wet and dry conditions.
• Summer tires are not intended to be driven in snow or on ice.
• Use summer tires only in sets of four.
NOTE:
Summer tires will not contain the “all season” designation or mountain/snowflake
symbol on the sidewall of the tire.
WARNING!
Do not use summer tires in snow/ice conditions. You could lose control, resulting
in severe injury or death.
SPARE TIRES — IF EQUIPPED
NOTE:
For vehicles equipped with Tire Service Kit instead of a spare tire, please refer to “Tire
Service Kit” in “What To Do In Emergencies” on your DVD for further information.
CAUTION!
Because of the reduced ground clearance, do not take your vehicle through an
automatic car wash with a compact or limited-use temporary spare installed.
Damage to the vehicle may result.
Spare Tire Matching Original Equipped Tire And Wheel — If Equipped
Your vehicle may be equipped with a spare tire and wheel equivalent in look and
function to the original equipment tire and wheel found on the front or rear axle of
your vehicle. This spare tire may be used in the tire rotation for your vehicle. If your
vehicle has this option, refer to an authorized tire dealer for the recommended tire
rotation pattern.
Compact Spare Tire — If Equipped
The compact spare is for temporary emergency use only. You can identify if your
vehicle is equipped with a compact spare by looking at the spare tire description on
the Tire and Loading Information Placard located on the driver’s side door opening
or on the sidewall of the tire. Compact spare tire descriptions begin with the letter
“T” or “S” preceding the size designation. Example: T145/80D18 103M.
T, S = Temporary Spare Tire
MAINTAINING YOUR VEHICLE
90
Page 93 of 108
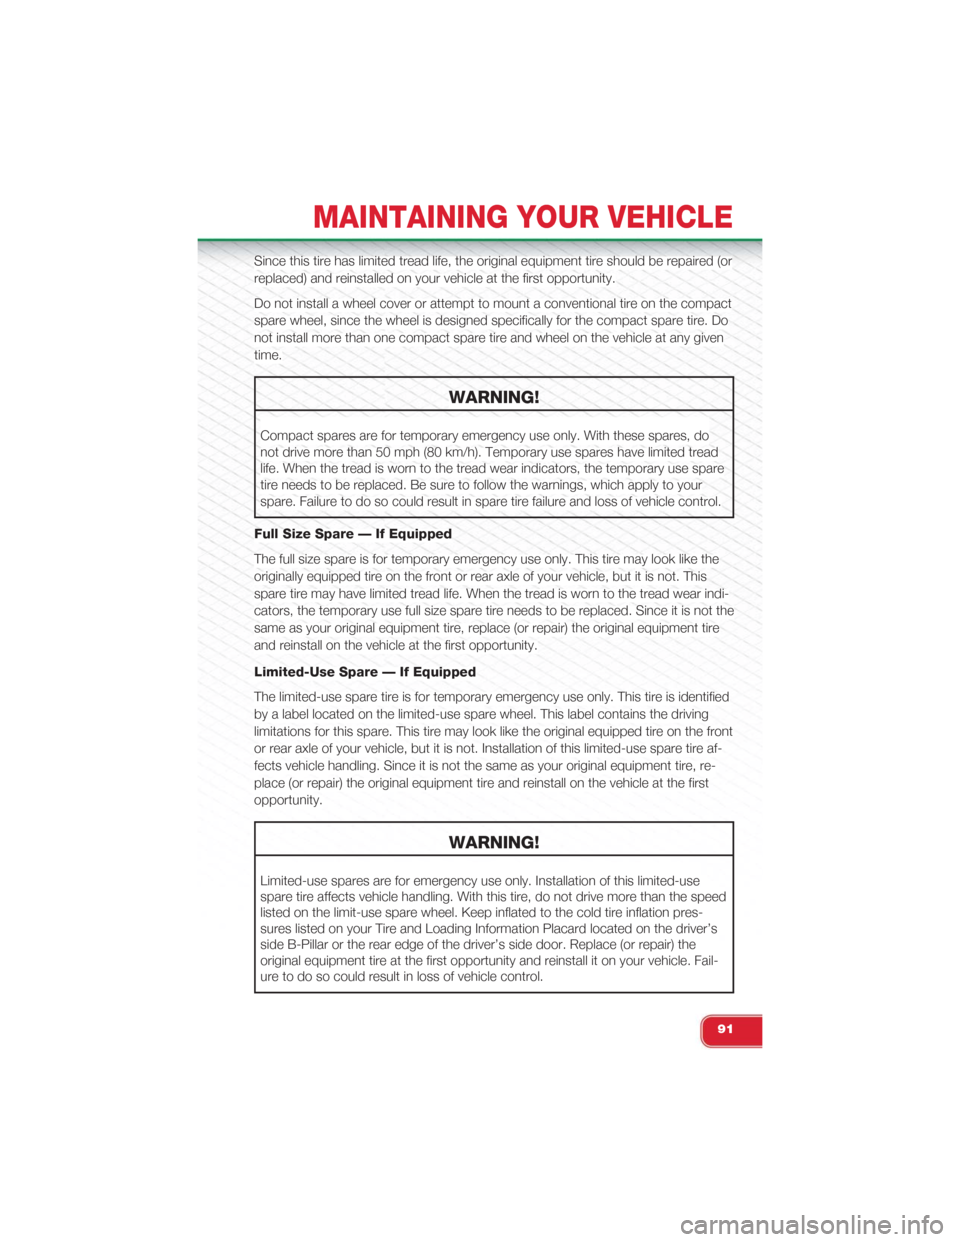
Since this tire has limited tread life, the original equipment tire should be repaired (or
replaced) and reinstalled on your vehicle at the first opportunity.
Do not install a wheel cover or attempt to mount a conventional tire on the compact
spare wheel, since the wheel is designed specifically for the compact spare tire. Do
not install more than one compact spare tire and wheel on the vehicle at any given
time.
WARNING!
Compact spares are for temporary emergency use only. With these spares, do
not drive more than 50 mph (80 km/h). Temporary use spares have limited tread
life. When the tread is worn to the tread wear indicators, the temporary use spare
tire needs to be replaced. Be sure to follow the warnings, which apply to your
spare. Failure to do so could result in spare tire failure and loss of vehicle control.
Full Size Spare — If Equipped
The full size spare is for temporary emergency use only. This tire may look like the
originally equipped tire on the front or rear axle of your vehicle, but it is not. This
spare tire may have limited tread life. When the tread is worn to the tread wear indi-
cators, the temporary use full size spare tire needs to be replaced. Since it is not the
same as your original equipment tire, replace (or repair) the original equipment tire
and reinstall on the vehicle at the first opportunity.
Limited-Use Spare — If Equipped
The limited-use spare tire is for temporary emergency use only. This tire is identified
by a label located on the limited-use spare wheel. This label contains the driving
limitations for this spare. This tire may look like the original equipped tire on the front
or rear axle of your vehicle, but it is not. Installation of this limited-use spare tire af-
fects vehicle handling. Since it is not the same as your original equipment tire, re-
place (or repair) the original equipment tire and reinstall on the vehicle at the first
opportunity.
WARNING!
Limited-use spares are for emergency use only. Installation of this limited-use
spare tire affects vehicle handling. With this tire, do not drive more than the speed
listed on the limit-use spare wheel. Keep inflated to the cold tire inflation pres-
sures listed on your Tire and Loading Information Placard located on the driver’s
side B-Pillar or the rear edge of the driver’s side door. Replace (or repair) the
original equipment tire at the first opportunity and reinstall it on your vehicle. Fail-
ure to do so could result in loss of vehicle control.
MAINTAINING YOUR VEHICLE
91
Page 94 of 108
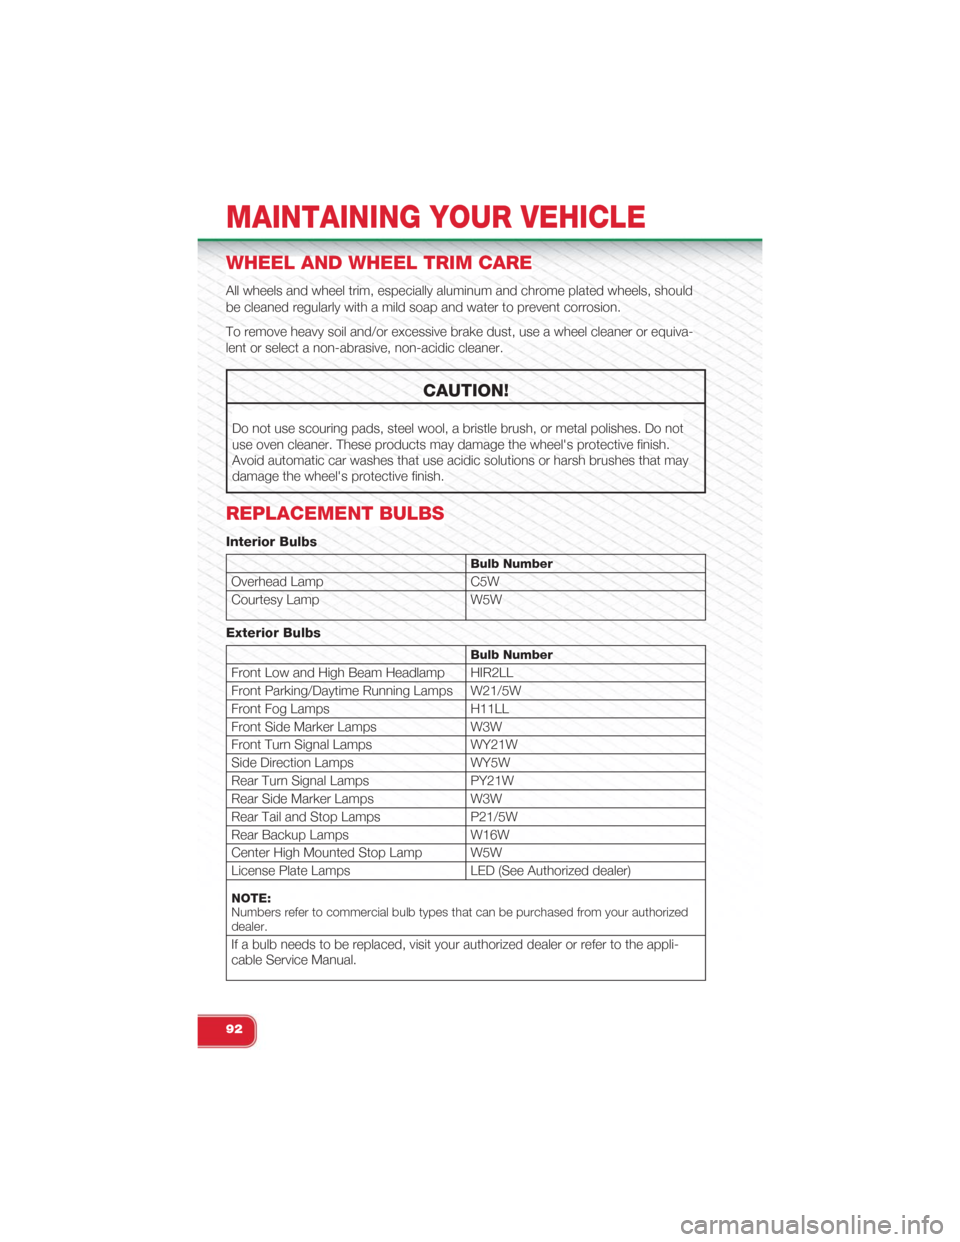
WHEEL AND WHEEL TRIM CARE
All wheels and wheel trim, especially aluminum and chrome plated wheels, should
be cleaned regularly with a mild soap and water to prevent corrosion.
To remove heavy soil and/or excessive brake dust, use a wheel cleaner or equiva-
lent or select a non-abrasive, non-acidic cleaner.
CAUTION!
Do not use scouring pads, steel wool, a bristle brush, or metal polishes. Do not
use oven cleaner. These products may damage the wheel's protective finish.
Avoid automatic car washes that use acidic solutions or harsh brushes that may
damage the wheel's protective finish.
REPLACEMENT BULBS
Interior Bulbs
Bulb Number
Overhead Lamp C5W
Courtesy Lamp W5W
Exterior Bulbs
Bulb Number
Front Low and High Beam Headlamp HIR2LL
Front Parking/Daytime Running Lamps W21/5W
Front Fog Lamps H11LL
Front Side Marker Lamps W3W
Front Turn Signal Lamps WY21W
Side Direction Lamps WY5W
Rear Turn Signal Lamps PY21W
Rear Side Marker Lamps W3W
Rear Tail and Stop Lamps P21/5W
Rear Backup Lamps W16W
Center High Mounted Stop Lamp W5W
License Plate Lamps LED (See Authorized dealer)
NOTE:Numbers refer to commercial bulb types that can be purchased from your authorizeddealer.
If a bulb needs to be replaced, visit your authorized dealer or refer to the appli-cable Service Manual.
MAINTAINING YOUR VEHICLE
92
Page 99 of 108
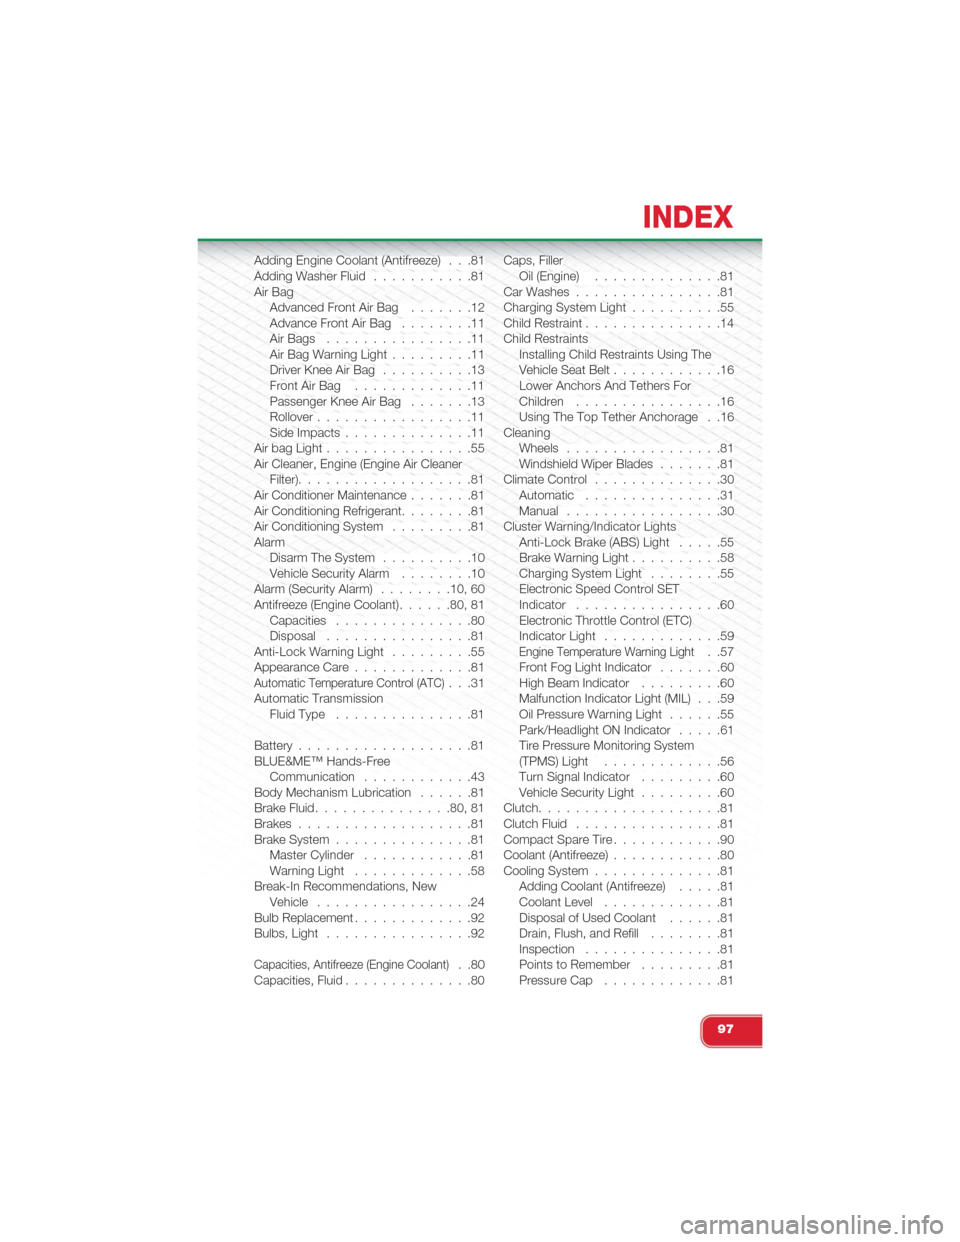
Adding Engine Coolant (Antifreeze) . . .81Adding Washer Fluid. . . . . . . . . . .81Air BagAdvanced Front Air Bag . . . . . . .12Advance Front Air Bag. . . . . . . .11Air Bags. . . . . . . . . . . . . . . .11Air Bag Warning Light. . . . . . . . .11Driver Knee Air Bag. . . . . . . . . .13Front Air Bag. . . . . . . . . . . . .11Passenger Knee Air Bag . . . . . . .13Rollover. . . . . . . . . . . . . . . . .11Side Impacts. . . . . . . . . . . . . .11Air bag Light. . . . . . . . . . . . . . . .55Air Cleaner, Engine (Engine Air CleanerFilter). . . . . . . . . . . . . . . . . . .81Air Conditioner Maintenance . .. . . . .81Air Conditioning Refrigerant. . . . . . . .81Air Conditioning System. . . . . . . . .81AlarmDisarm The System. . . . . . . . . .10Vehicle Security Alarm .. . . . . . .10Alarm (Security Alarm)........10, 60Antifreeze (Engine Coolant) . .. . . .80, 81Capacities. . . . . . . . . . . . . . .80Disposal. . . . . . . . . . . . . . . .81Anti-Lock Warning Light. . . . . . . . .55Appearance Care. . . . . . . . . . . . .81Automatic Temperature Control (ATC). . .31Automatic TransmissionFluid Type. . . . . . . . . . . . . . .81
Battery. . . . . . . . . . . . . . . . . . .81BLUE&ME™ Hands-FreeCommunication. . . . . . . . . . . .43Body Mechanism Lubrication. . . . . .81Brake Fluid...............80, 81Brakes. . . . . . . . . . . . . . . . . . .81Brake System. . . . . . . . . . . . . . .81Master Cylinder. . . . . . . . . . . .81Warning Light. . . . . . . . . . . . .58Break-In Recommendations, NewVehicle. . . . . . . . . . . . . . . . .24Bulb Replacement. . . . . . . . . . . . .92Bulbs, Light. . . . . . . . . . . . . . . .92
Capacities, Antifreeze (Engine Coolant). .80Capacities, Fluid. . . . . . . . . . . . . .80
Caps, FillerOil (Engine) . .. . . . . . . . . . . .81Car Washes . .. . . . . . . . . . . . . .81Charging System Light . .. . . . . . . .55Child Restraint . . .. . . . . . . . . . . .14Child RestraintsInstalling Child Restraints Using TheVehicle Seat Belt . .. . . . . . . . . .16Lower Anchors And Tethers ForChildren. . . . . . . . . . . . . . . .16Using The Top Tether Anchorage . .16CleaningWheels. . . . . . . . . . . . . . . . .81Windshield Wiper Blades. . . . . . .81Climate Control . .. . . . . . . . . . . .30Automatic. . . . . . . . . . . . . . .31Manual. . . . . . . . . . . . . . . . .30Cluster Warning/Indicator LightsAnti-Lock Brake (ABS) Light. . . . .55Brake Warning Light . .. . . . . . . .58Charging System Light . . .. . . . .55Electronic Speed Control SETIndicator . .. . . . . . . . . . . . . .60Electronic Throttle Control (ETC)Indicator Light. . . . . . . . . . . . .59Engine Temperature Warning Light. .57Front Fog Light Indicator. . . . . . .60High Beam Indicator. . . . . . . . .60Malfunction Indicator Light (MIL) . . .59Oil Pressure Warning Light. . . . . .55Park/Headlight ON Indicator. . . . .61Tire Pressure Monitoring System(TPMS) Light. . . . . . . . . . . . .56Turn Signal Indicator. . . . . . . . .60Vehicle Security Light . .. . . . . . .60Clutch.. . . . . . . . . . . . . . . . . . .81Clutch Fluid .. . . . . . . . . . . . . . .81Compact Spare Tire . . . . . . .. . . . .90Coolant (Antifreeze) . .. . . . . . . . . .80Cooling System . . .. . . . . . . . . . .81Adding Coolant (Antifreeze). . . . .81Coolant Level .. . . . . . . . . . . .81Disposal of Used Coolant. . . . . .81Drain, Flush, and Refill . . .. . . . .81Inspection. . . . . . . . . . . . . . .81Points to Remember . .. . . . . . .81Pressure Cap . .. . . . . . . . . . .81
INDEX
97
Page 101 of 108
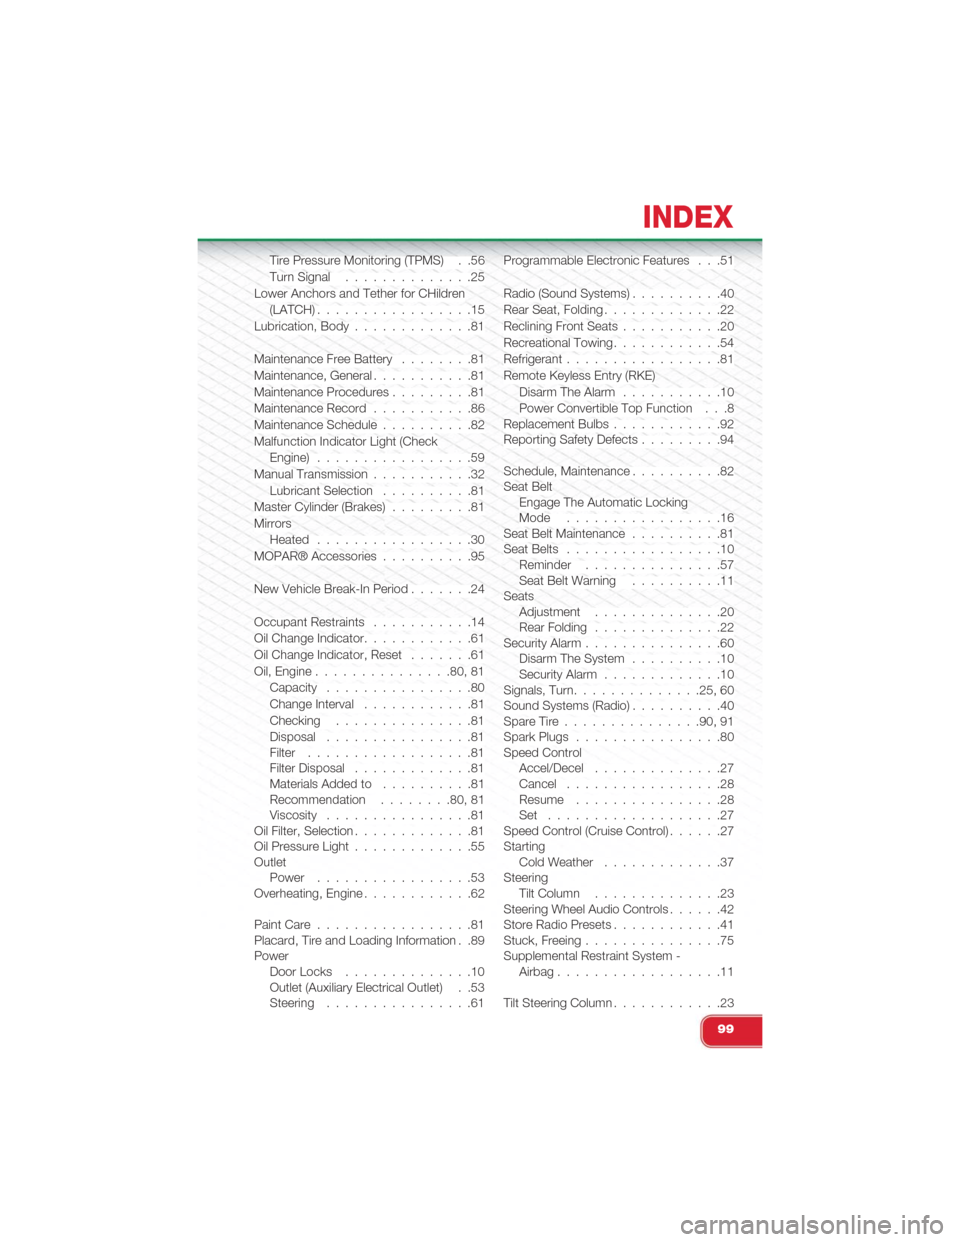
Tire Pressure Monitoring (TPMS) . .56
Turn Signal. . . . . . . . . . . . . .25
Lower Anchors and Tether for CHildren
(LATCH). . . . . . . . . . . . . . . . .15
Lubrication, Body. . . . . . . . . . . . .81
Maintenance Free Battery . . . . . . . .81
Maintenance, General. . . . . . . . . . .81
Maintenance Procedures . . . .. . . . .81
Maintenance Record. . . . . . . . . . .86
Maintenance Schedule . .. . . . . . . .82
Malfunction Indicator Light (Check
Engine). . . . . . . . . . . . . . . . .59
Manual Transmission. . . . . . . . . . .32
Lubricant Selection. . . . . . . . . .81
Master Cylinder (Brakes). . . . . . . . .81
Mirrors
Heated. . . . . . . . . . . . . . . . .30
MOPAR® Accessories . . .. . . . . . .95
New Vehicle Break-In Period. . . . . . .24
Occupant Restraints. . . . . . . . . . .14
Oil Change Indicator. . . . . . . . . . . .61
Oil Change Indicator, Reset . . .. . . .61
Oil, Engine...............80, 81
Capacity. . . . . . . . . . . . . . . .80
Change Interval. . . . . . . . . . . .81
Checking. . . . . . . . . . . . . . .81
Disposal. . . . . . . . . . . . . . . .81Filter. . . . . . . . . . . . . . . . . .81Filter Disposal. . . . . . . . . . . . .81Materials Added to. . . . . . . . . .81Recommendation........80, 81Viscosity. . . . . . . . . . . . . . . .81Oil Filter, Selection. . . . . . . . . . . . .81Oil Pressure Light. . . . . . . . . . . . .55OutletPower. . . . . . . . . . . . . . . . .53Overheating, Engine. . . . . . . . . . . .62
Paint Care. . . . . . . . . . . . . . . . .81Placard, Tire and Loading Information . .89PowerDoor Locks. . . . . . . . . . . . . .10Outlet (Auxiliary Electrical Outlet) . .53Steering. . . . . . . . . . . . . . . .61
Programmable Electronic Features . . .51
Radio (Sound Systems). . . . . . . . . .40
Rear Seat, Folding. . . . . . . . . . . . .22
Reclining Front Seats. . . . . . . . . . .20
Recreational Towing.. . . . . . . . . . .54
Refrigerant . . .. . . . . . . . . . . . . .81
Remote Keyless Entry (RKE)
Disarm The Alarm . .. . . . . . . . .10
Power Convertible Top Function . . .8Replacement Bulbs. . . . . . . . . . . .92Reporting Safety Defects . . . . .. . . .94
Schedule, Maintenance. . . . . . . . . .82Seat BeltEngage The Automatic LockingMode . . . . . . . . .. . . . . . . .16Seat Belt Maintenance . . .. . . . . . .81Seat Belts. . . . . . . . . . . . . . . . .10Reminder. . . . . . . . . . . . . . .57Seat Belt Warning . .. . . . . . . .11SeatsAdjustment . . . . . . .. . . . . . .20Rear Folding. . . . . . . . . . . . . .22Security Alarm. . . . . . . . . . . . . . .60Disarm The System .. . . . . . . . .10Security Alarm. . . . . . . . . . . . .10Signals, Turn..............25, 60Sound Systems (Radio). . . . . . . . . .40Spare Tire...............90, 91Spark Plugs . . . .. . . . . . . . . . . .80Speed ControlAccel/Decel. . . . . . . . . . . . . .27Cancel . .. . . . . . . . . . . . . . .28Resume. . . . . . . . . . . . . . . .28Set . . . . . . . . . . . . . . . . . . .27Speed Control (Cruise Control). . . . . .27StartingCold Weather. . . . . . . . . . . . .37SteeringTilt Column .. . . . . . . . . . . . .23Steering Wheel Audio Controls .. . . . .42Store Radio Presets . .. . . . . . . . . .41Stuck, Freeing .. . . . . . . . . . . . . .75Supplemental Restraint System -Airbag. . . . . . . . . . . . . . . . . .11
Tilt Steering Column. . . . . . . . . . . .23
INDEX
99
Page 102 of 108
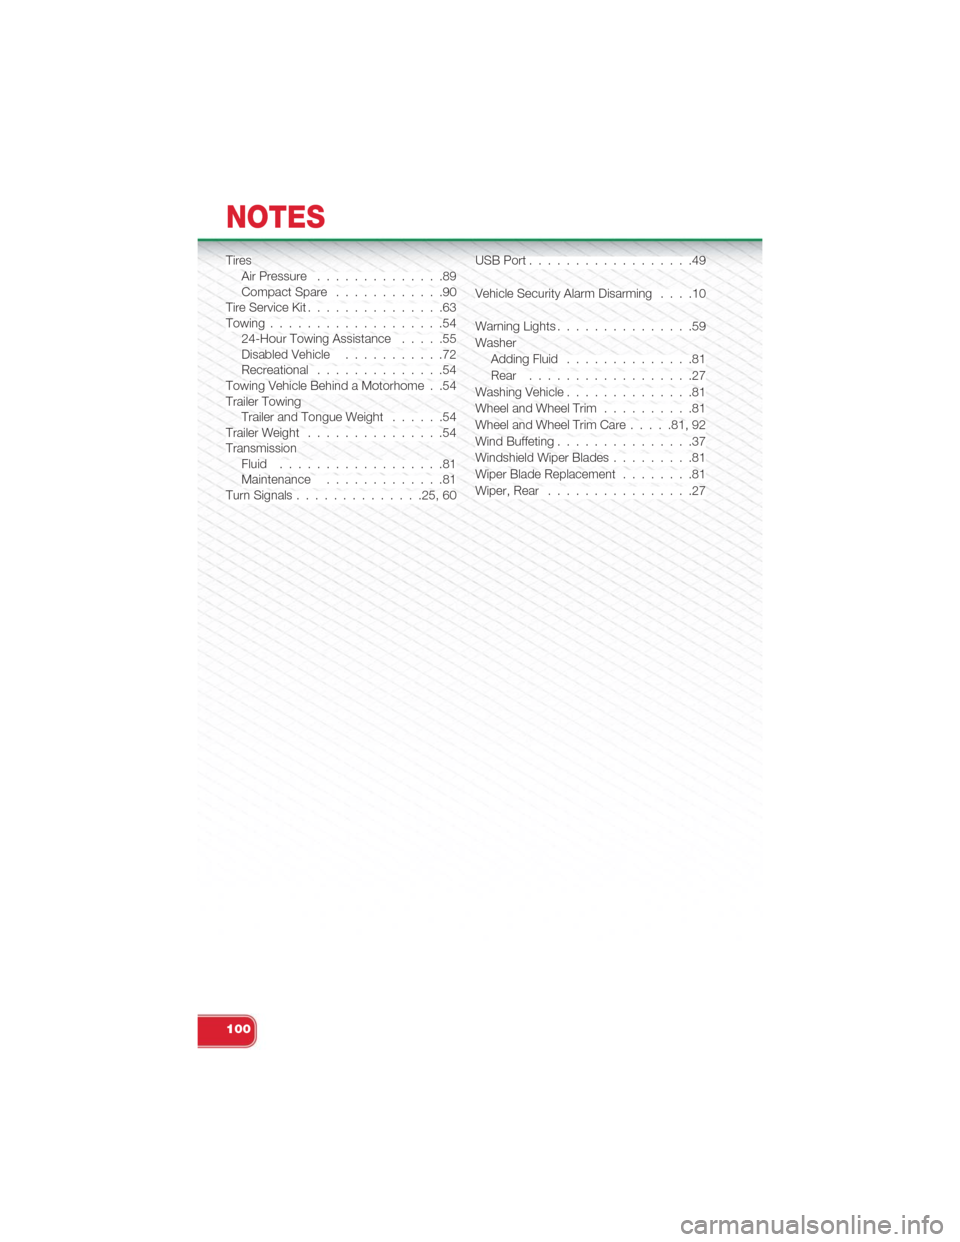
TiresAir Pressure. . . . . . . . . . . . . .89Compact Spare. . . . . . . . . . . .90Tire Service Kit. . . . . . . . . . . . . . .63Towing. . . . . . . . . . . . . . . . . . .5424-Hour Towing Assistance . . . . .55Disabled Vehicle. . . . . . . . . . .72Recreational. . . . . . . . . . . . . .54Towing Vehicle Behind a Motorhome . .54Trailer TowingTrailer and Tongue Weight. . . . . .54Trailer Weight. . . . . . . . . . . . . . .54TransmissionFluid. . . . . . . . . . . . . . . . . .81Maintenance. . . . . . . . . . . . .81Turn Signals..............25, 60
USB Port . . . . .. . . . . . . . . . . . .49
Vehicle Security Alarm Disarming . . . .10
Warning Lights . .. . . . . . . . . . . . .59
Washer
Adding Fluid .. . . . . . . . . . . . .81
Rear. . . . . . . . . . . . . . . . . .27
Washing Vehicle . . .. . . . . . . . . . .81
Wheel and Wheel Trim . .. . . . . . . .81
Wheel and Wheel Trim Care.....81, 92
Wind Buffeting. . . . . . . . . . . . . . .37
Windshield Wiper Blades . . . . . . . . .81
Wiper Blade Replacement . .. . . . . .81
Wiper, Rear .. . . . . . . . . . . . . . .27
NOTES
100