lights FIAT 500 ABARTH 2015 2.G User Guide
[x] Cancel search | Manufacturer: FIAT, Model Year: 2015, Model line: 500 ABARTH, Model: FIAT 500 ABARTH 2015 2.GPages: 108, PDF Size: 2.63 MB
Page 3 of 108
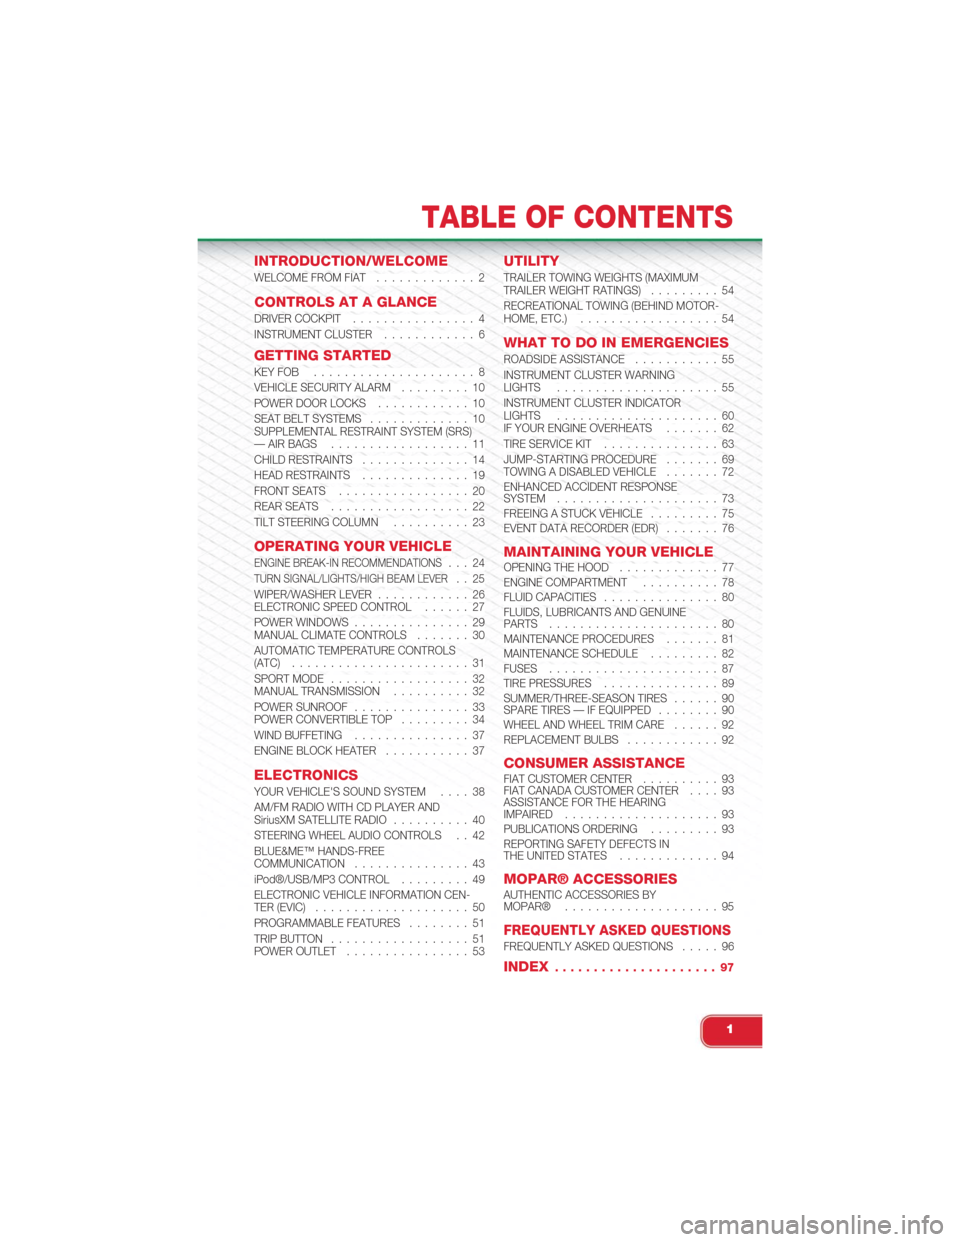
INTRODUCTION/WELCOME
WELCOME FROM FIAT............. 2
CONTROLS AT A GLANCE
DRIVER COCKPIT................ 4INSTRUMENT CLUSTER............ 6
GETTING STARTED
KEY FOB . . . . . . . . . . . . . . . . . . . . . 8VEHICLE SECURITY ALARM. . . . . . . . . 10POWER DOOR LOCKS. . . . . . . . . . . . 10SEAT BELT SYSTEMS. . . . . . . . . . . . . 10SUPPLEMENTAL RESTRAINT SYSTEM (SRS)— AIR BAGS. . . . . . . . . . . . . . . . . . 11CHILD RESTRAINTS. . . . . . . . . . . . . . 14HEAD RESTRAINTS. . . . . . . . . . . . . . 19FRONT SEATS. . . . . . . . . . . . . . . . . 20REAR SEATS. . . . . . . . . . . . . . . . . . 22TILT STEERING COLUMN. . . . . . . . . . 23
OPERATING YOUR VEHICLE
ENGINE BREAK-IN RECOMMENDATIONS. . . 24TURN SIGNAL/LIGHTS/HIGH BEAM LEVER. . 25WIPER/WASHER LEVER. . . . . . . . . . . . 26ELECTRONIC SPEED CONTROL. . . . . . 27POWER WINDOWS. . . . . . . . . . . . . . . 29MANUAL CLIMATE CONTROLS. . . . . . . 30AUTOMATIC TEMPERATURE CONTROLS(ATC). . . . . . . . . . . . . . . . . . . . . . . 31SPORT MODE. . . . . . . . . . . . . . . . . . 32MANUAL TRANSMISSION. . . . . . . . . . 32POWER SUNROOF. . . . . . . . . . . . . . . 33POWER CONVERTIBLE TOP. . . . . . . . . 34WIND BUFFETING. . . . . . . . . . . . . . . 37ENGINE BLOCK HEATER. . . . . . . . . . . 37
ELECTRONICS
YOUR VEHICLE'S SOUND SYSTEM. . . . 38AM/FM RADIO WITH CD PLAYER ANDSiriusXM SATELLITE RADIO. . . . . . . . . . 40STEERING WHEEL AUDIO CONTROLS . . 42BLUE&ME™ HANDS-FREECOMMUNICATION. . . . . . . . . . . . . . . 43iPod®/USB/MP3 CONTROL. . . . . . . . . 49ELECTRONIC VEHICLE INFORMATION CEN-TER (EVIC). . . . . . . . . . . . . . . . . . . . 50PROGRAMMABLE FEATURES. . . . . . . . 51TRIP BUTTON. . . . . . . . . . . . . . . . . . 51POWER OUTLET. . . . . . . . . . . . . . . . 53
UTILITY
TRAILER TOWING WEIGHTS (MAXIMUMTRAILER WEIGHT RATINGS). . . . . . . . . 54RECREATIONAL TOWING (BEHIND MOTOR-HOME, ETC.). . . . . . . . . . . . . . . . . . 54
WHAT TO DO IN EMERGENCIES
ROADSIDE ASSISTANCE. . . . . . . . . . . 55INSTRUMENT CLUSTER WARNINGLIGHTS. . . . . . . . . . . . . . . . . . . . . 55INSTRUMENT CLUSTER INDICATORLIGHTS. . . . . . . . . . . . . . . . . . . . . 60IF YOUR ENGINE OVERHEATS. . . . . . . 62TIRE SERVICE KIT. . . . . . . . . . . . . . . 63JUMP-STARTING PROCEDURE. . . . . . . 69TOWING A DISABLED VEHICLE. . . . . . . 72ENHANCED ACCIDENT RESPONSESYSTEM. . . . . . . . . . . . . . . . . . . . . 73FREEING A STUCK VEHICLE. . . . . . . . . 75EVENT DATA RECORDER (EDR). . . . . . . 76
MAINTAINING YOUR VEHICLEOPENING THE HOOD. . . . . . . . . . . . . 77ENGINE COMPARTMENT. . . . . . . . . . 78FLUID CAPACITIES. . . . . . . . . . . . . . . 80FLUIDS, LUBRICANTS AND GENUINEPARTS. . . . . . . . . . . . . . . . . . . . . . 80MAINTENANCE PROCEDURES. . . . . . . 81MAINTENANCE SCHEDULE. . . . . . . . . 82FUSES. . . . . . . . . . . . . . . . . . . . . . 87TIRE PRESSURES. . . . . . . . . . . . . . . 89SUMMER/THREE-SEASON TIRES. . . . . . 90SPARE TIRES — IF EQUIPPED. . . . . . . . 90WHEEL AND WHEEL TRIM CARE. . . . . . 92REPLACEMENT BULBS. . . . . . . . . . . . 92
CONSUMER ASSISTANCEFIAT CUSTOMER CENTER. . . . . . . . . . 93FIAT CANADA CUSTOMER CENTER. . . . 93ASSISTANCE FOR THE HEARINGIMPAIRED. . . . . . . . . . . . . . . . . . . . 93PUBLICATIONS ORDERING. . . . . . . . . 93REPORTING SAFETY DEFECTS INTHE UNITED STATES. . . . . . . . . . . . . 94
MOPAR® ACCESSORIESAUTHENTIC ACCESSORIES BYMOPAR®. . . . . . . . . . . . . . . . . . . . 95
FREQUENTLY ASKED QUESTIONSFREQUENTLY ASKED QUESTIONS. . . . . 96
INDEX. . . . . . . . . . . . . . . . . . . . . 97
TABLE OF CONTENTS
1
Page 6 of 108
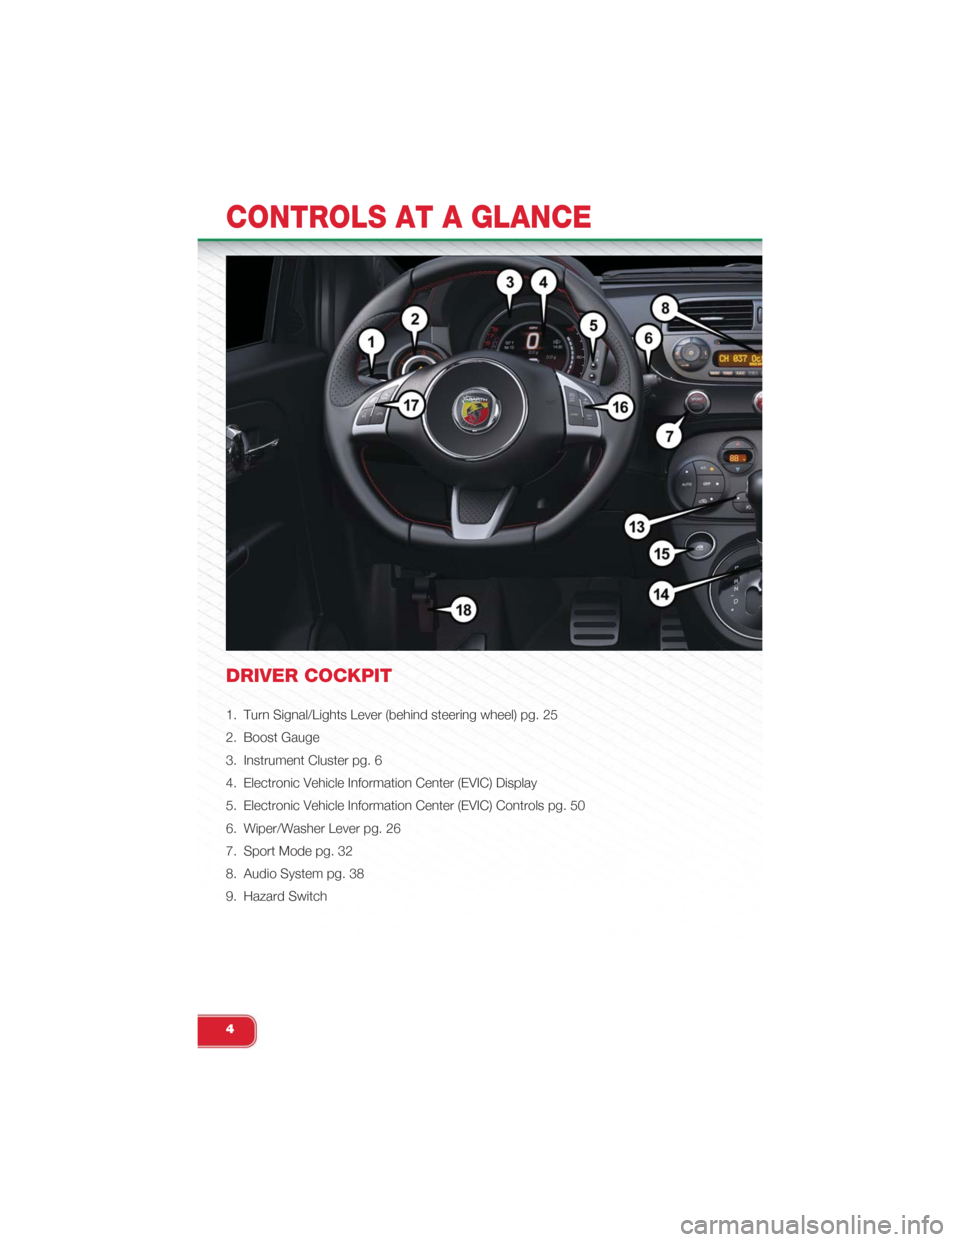
DRIVER COCKPIT
1. Turn Signal/Lights Lever (behind steering wheel) pg. 25
2. Boost Gauge
3. Instrument Cluster pg. 6
4. Electronic Vehicle Information Center (EVIC) Display
5. Electronic Vehicle Information Center (EVIC) Controls pg. 50
6. Wiper/Washer Lever pg. 26
7. Sport Mode pg. 32
8. Audio System pg. 38
9. Hazard Switch
CONTROLS AT A GLANCE
4
Page 8 of 108
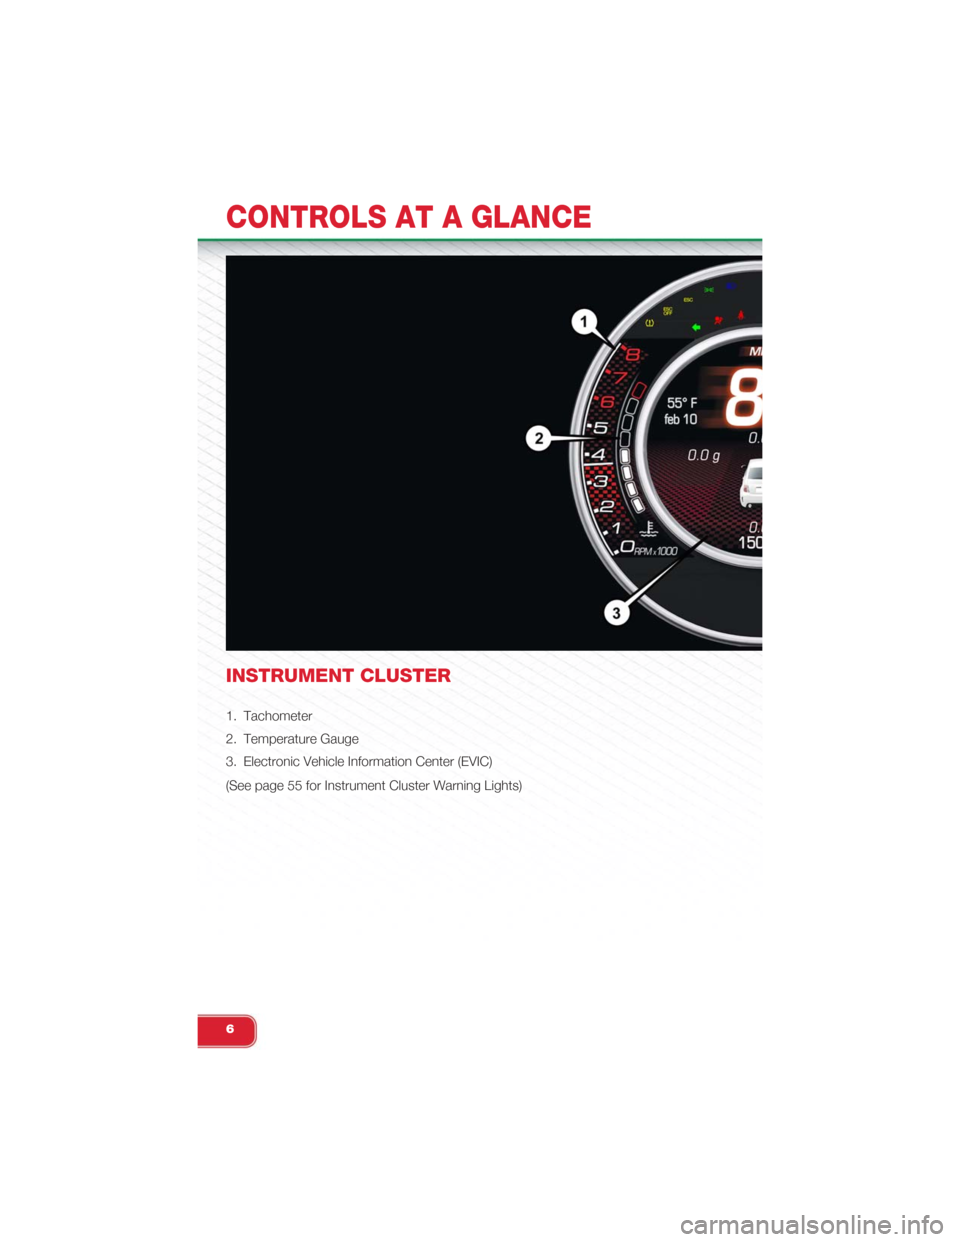
INSTRUMENT CLUSTER
1. Tachometer
2. Temperature Gauge
3. Electronic Vehicle Information Center (EVIC)
(See page 55 for Instrument Cluster Warning Lights)
CONTROLS AT A GLANCE
6
Page 9 of 108
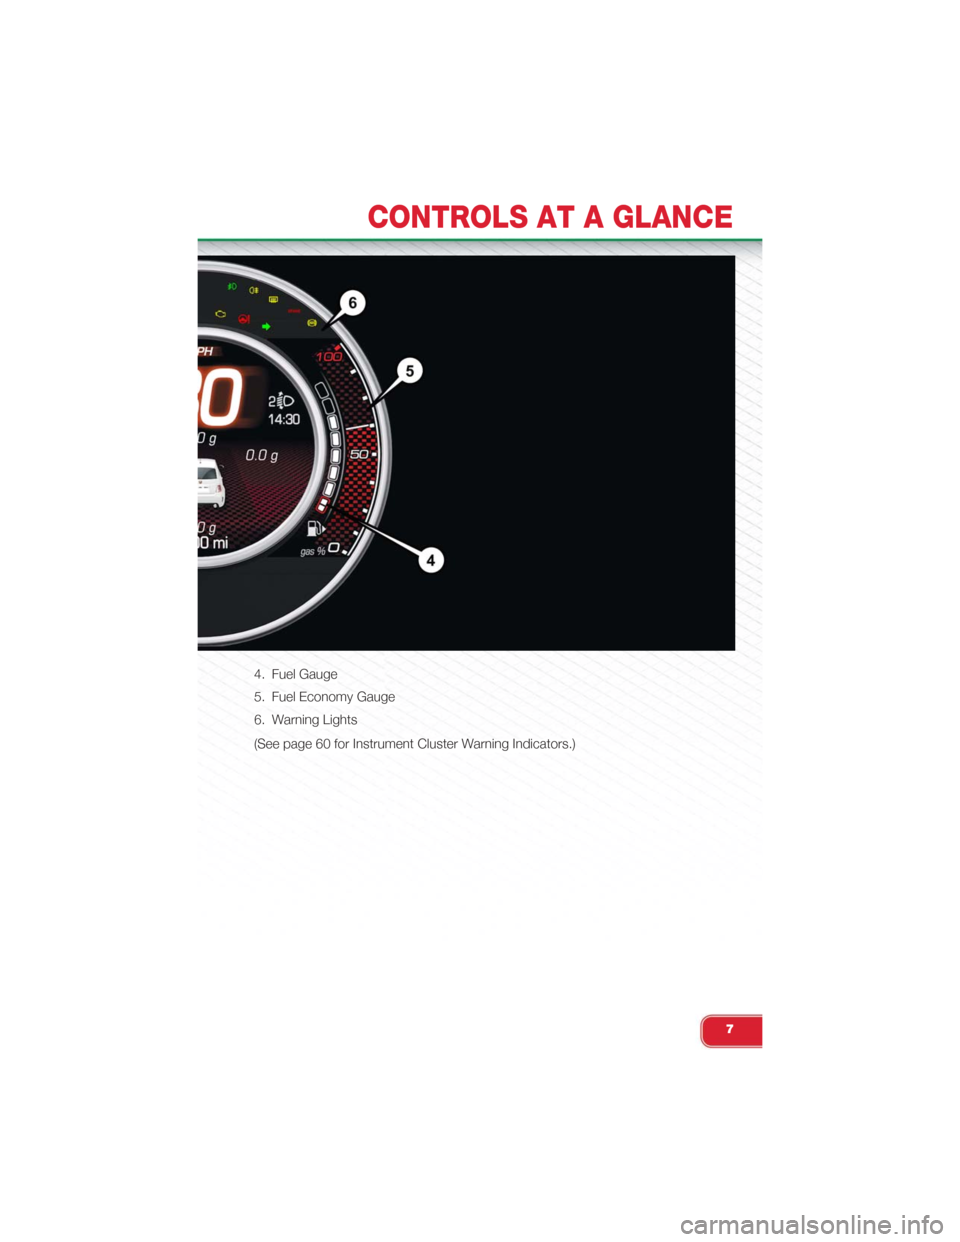
4. Fuel Gauge
5. Fuel Economy Gauge
6. Warning Lights
(See page 60 for Instrument Cluster Warning Indicators.)
CONTROLS AT A GLANCE
7
Page 12 of 108
VEHICLE SECURITY ALARM
The Vehicle Security Alarm monitors the vehicle doors for unauthorized entry and
the Keyless Enter-N-Go™ START/STOP button for unauthorized operation. While
the Vehicle Security Alarm is armed, interior switches for door locks and decklid
release are disabled. If something triggers the alarm, the Vehicle Security Alarm will
provide the following audible and visible signals: the horn will pulse, the park lamps
and/or turn signals will flash, and the Vehicle Security Light in the instrument cluster
will flash.
To Arm:
Push the Key Fob LOCK button.
To Disarm The System:
Push the Key Fob UNLOCK button or cycle the ignition to the ON/RUN position.
The Vehicle Security Alarm is designed to protect your vehicle. However, you can
create conditions where the Vehicle Security Alarm will give you a false alarm. If one
of the previously described arming sequences has occurred, the Vehicle Security
Alarm will arm regardless of whether you are in the vehicle or not. If you remain in
the vehicle and open a door, the alarm will sound. If this occurs, disarm the Vehicle
Security Alarm.
If the Vehicle Security Alarm is armed and the battery becomes disconnected, the
Vehicle Security Alarm will remain armed when the battery is reconnected. The ex-
terior lights will flash, and the horn will sound. If this occurs, disarm the Vehicle Se-
curity Alarm.
POWER DOOR LOCKS
The vehicles power door locks are activated by moving the inside door handles.
Push or pull the driver’s door handle to lock or unlock the doors and liftgate when
the doors are closed.
SEAT BELT SYSTEMS
Lap/Shoulder Belts
• All seating positions in your vehicle are equipped with lap/shoulder belts.
• Be sure everyone in your vehicle is in a seat and using a seat belt properly.
• Position the lap belt so that it is snug and lies low across your hips, below your
abdomen. To remove slack in the lap belt portion, pull up on the shoulder belt. To
loosen the lap belt if it is too tight, tilt the latch plate and pull on the lap belt. A
snug seat belt reduces the risk of sliding under the seat belt in a collision.
• Position the shoulder belt across the shoulder and chest with minimal, if any slack
so that it is comfortable and not resting on your neck. The retractor will withdraw
any slack in the shoulder belt.
GETTING STARTED
10
Page 27 of 108
TURN SIGNAL/LIGHTS/HIGH BEAM LEVER
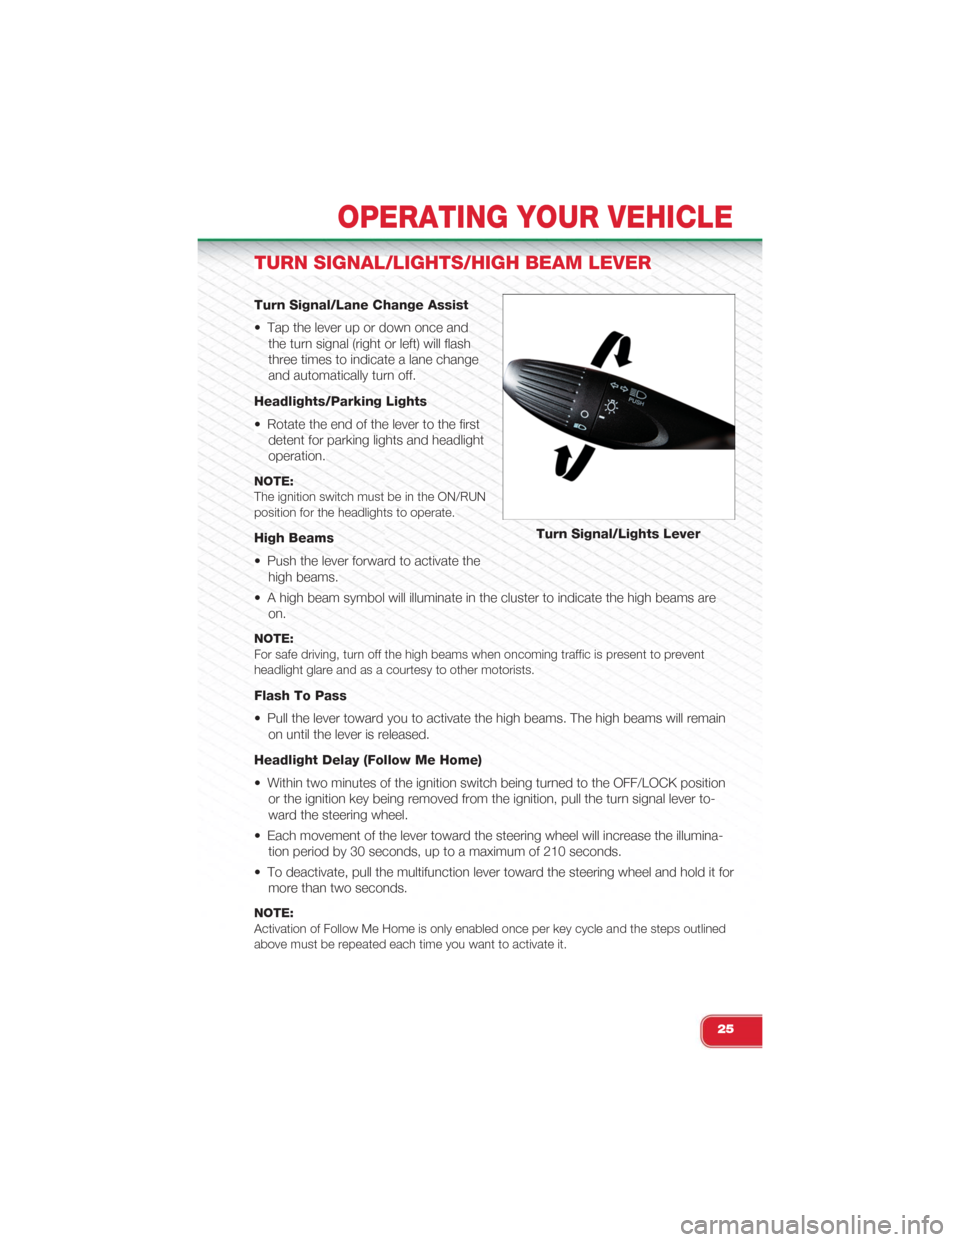
Turn Signal/Lane Change Assist
• Tap the lever up or down once and
the turn signal (right or left) will flash
three times to indicate a lane change
and automatically turn off.
Headlights/Parking Lights
• Rotate the end of the lever to the first
detent for parking lights and headlight
operation.
NOTE:The ignition switch must be in the ON/RUNposition for the headlights to operate.
High Beams
• Push the lever forward to activate the
high beams.
• A high beam symbol will illuminate in the cluster to indicate the high beams are
on.
NOTE:For safe driving, turn off the high beams when oncoming traffic is present to preventheadlight glare and as a courtesy to other motorists.
Flash To Pass
• Pull the lever toward you to activate the high beams. The high beams will remain
on until the lever is released.
Headlight Delay (Follow Me Home)
• Within two minutes of the ignition switch being turned to the OFF/LOCK position
or the ignition key being removed from the ignition, pull the turn signal lever to-
ward the steering wheel.
• Each movement of the lever toward the steering wheel will increase the illumina-
tion period by 30 seconds, up to a maximum of 210 seconds.
• To deactivate, pull the multifunction lever toward the steering wheel and hold it for
more than two seconds.
NOTE:Activation of Follow Me Home is only enabled once per key cycle and the steps outlinedabove must be repeated each time you want to activate it.
Turn Signal/Lights Lever
OPERATING YOUR VEHICLE
25
Page 28 of 108
Fog Lights
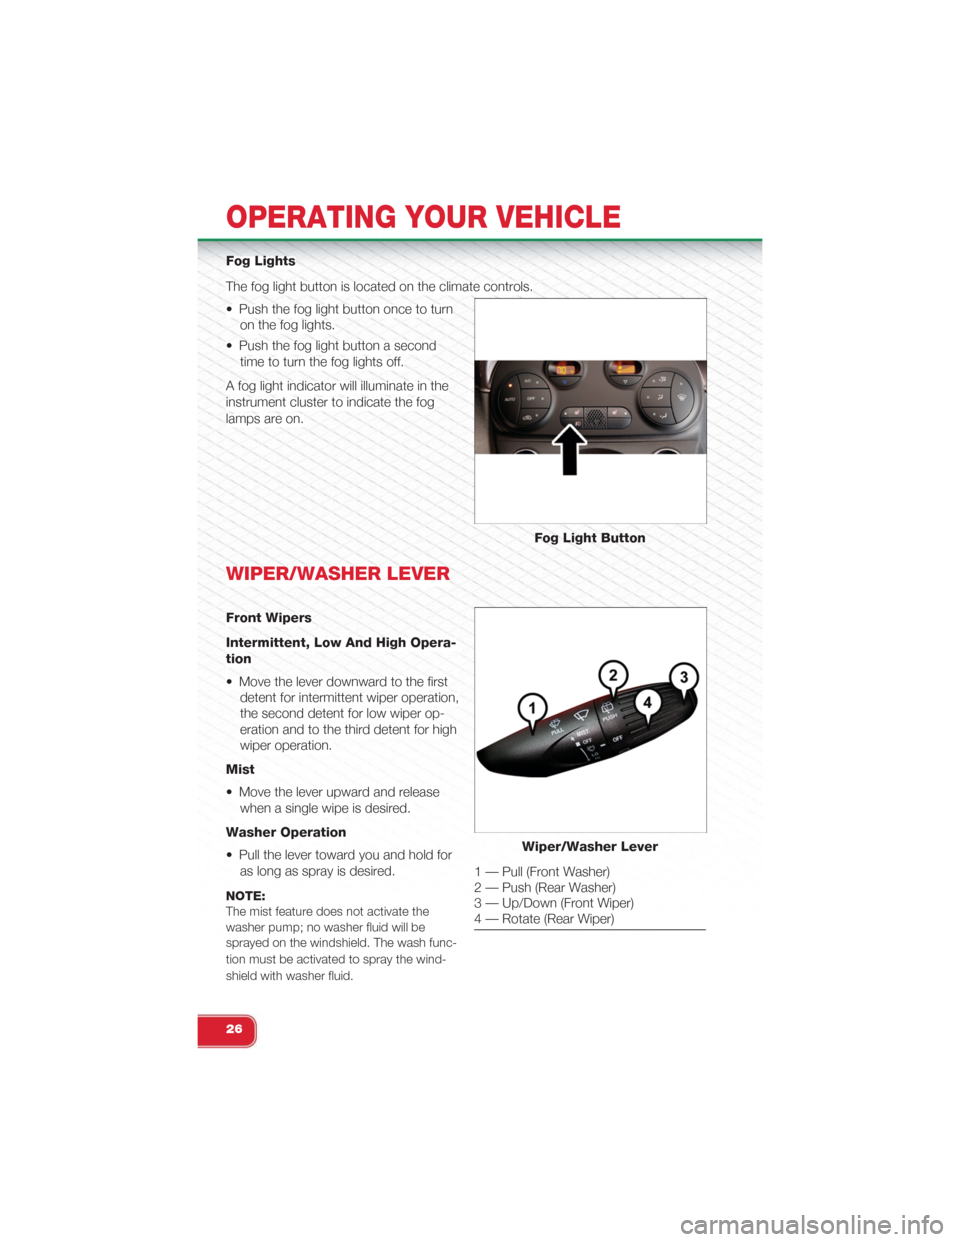
The fog light button is located on the climate controls.
• Push the fog light button once to turn
on the fog lights.
• Push the fog light button a second
time to turn the fog lights off.
A fog light indicator will illuminate in the
instrument cluster to indicate the fog
lamps are on.
WIPER/WASHER LEVER
Front Wipers
Intermittent, Low And High Opera-
tion
• Move the lever downward to the first
detent for intermittent wiper operation,
the second detent for low wiper op-
eration and to the third detent for high
wiper operation.
Mist
• Move the lever upward and release
when a single wipe is desired.
Washer Operation
• Pull the lever toward you and hold for
as long as spray is desired.
NOTE:The mist feature does not activate thewasher pump; no washer fluid will besprayed on the windshield. The wash func-
tion must be activated to spray the wind-
shield with washer fluid.
Fog Light Button
Wiper/Washer Lever
1 — Pull (Front Washer)2 — Push (Rear Washer)3 — Up/Down (Front Wiper)4 — Rotate (Rear Wiper)
OPERATING YOUR VEHICLE
26
Page 53 of 108
PROGRAMMABLE FEATURES
Electronic Vehicle Information Center (EVIC)
• The EVIC can be used to program the following Personal Settings. Push the
MENU button until menu is displayed, then push the UPor DOWNbut-
tons to scroll through the settings.
• Once the menu setting is shown in the EVIC display push the MENU button to
access the setting and use the UPor DOWNbuttons to change the
current setting. The menu includes the following functions:
• Speed Beep • Buzzer Volume
• Trip B Data • Button Volume
• Set Time • Hill Start Assist
• Set Date • Daylights (D.R.L)
• See Radio (Repeat Audio Informa-tion)• Hill Start
• Speed Display • Tire Pressure
• Autoclose • Unlock Driver Door First
• Units • Unlock All Doors
• Language • Exit Menu
TRIP BUTTON
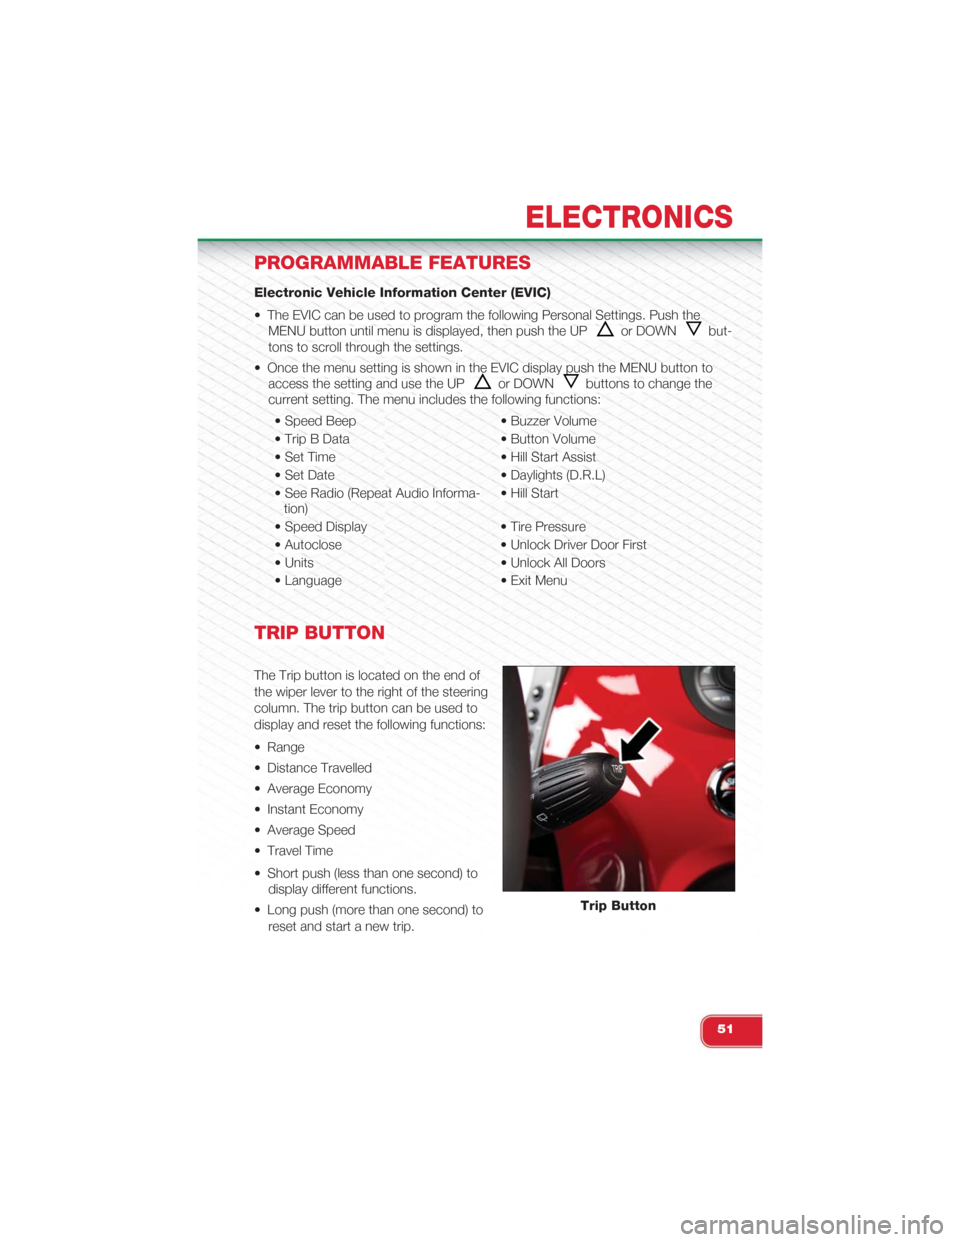
The Trip button is located on the end of
the wiper lever to the right of the steering
column. The trip button can be used to
display and reset the following functions:
• Range
• Distance Travelled
• Average Economy
• Instant Economy
• Average Speed
• Travel Time
• Short push (less than one second) to
display different functions.
• Long push (more than one second) to
reset and start a new trip.
Trip Button
ELECTRONICS
51
Page 57 of 108
ROADSIDE ASSISTANCE
• If your Abarth requires jump start assistance, out of gas/fuel delivery, tire service,
lockout service or towing due to a defect covered under the Basic Limited War-
ranty, dial toll-free 1-888-242-6342 or 1-800-363-4869 for Canadian Residents.
See your Warranty booklet for further details.
• Provide your name, vehicle identification number and license plate number.
• Provide your location, including telephone number, from which you are calling.
• Briefly describe the nature of the problem and answer a few simple questions.
• You will be given the name of the service provider and an estimated time of ar-
rival. If you feel you are in an “unsafe situation,” please let us know. With your
consent, we will contact local police or safety authorities.
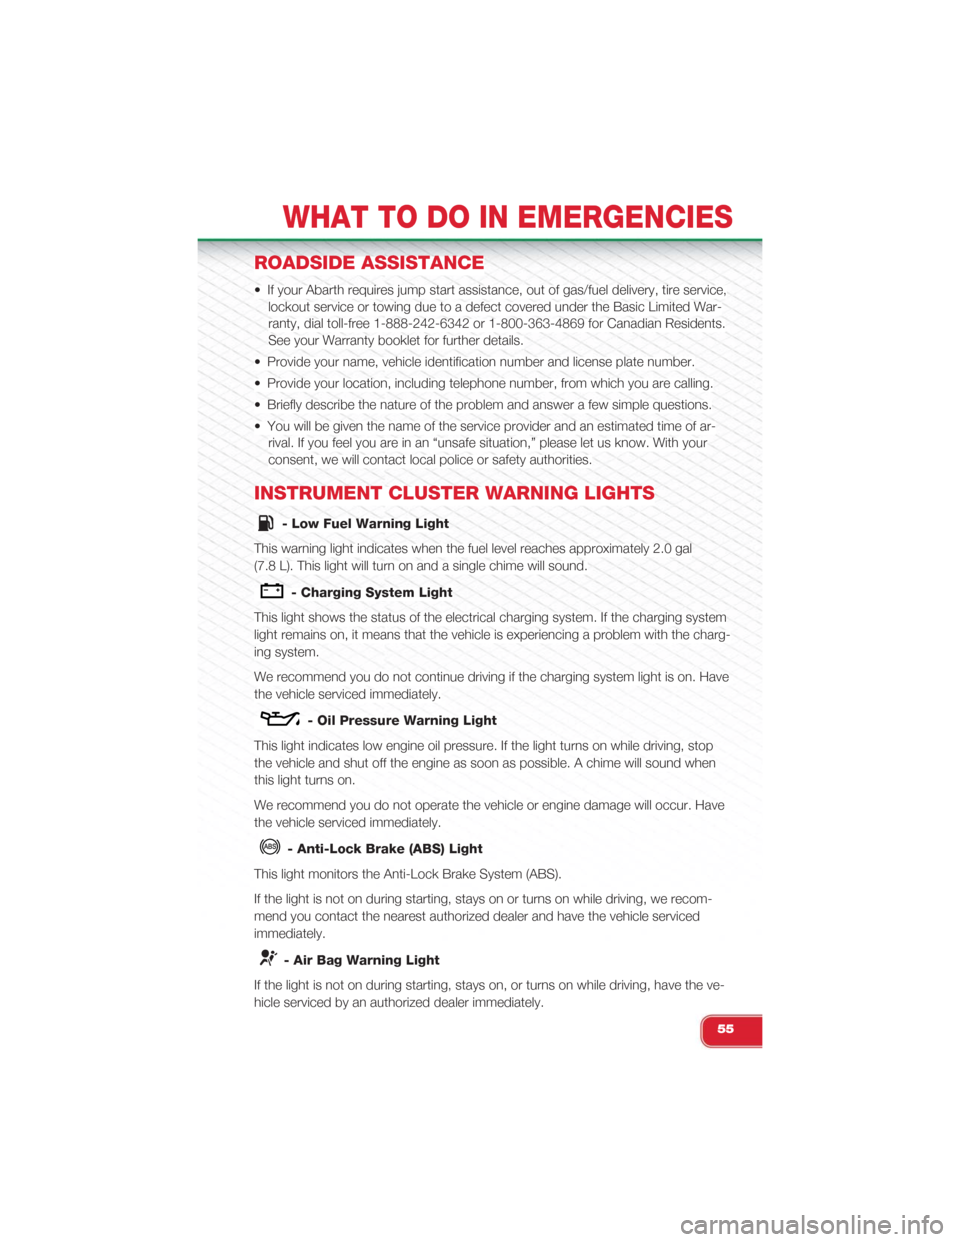
INSTRUMENT CLUSTER WARNING LIGHTS
- Low Fuel Warning Light
This warning light indicates when the fuel level reaches approximately 2.0 gal
(7.8 L). This light will turn on and a single chime will sound.
- Charging System Light
This light shows the status of the electrical charging system. If the charging system
light remains on, it means that the vehicle is experiencing a problem with the charg-
ing system.
We recommend you do not continue driving if the charging system light is on. Have
the vehicle serviced immediately.
- Oil Pressure Warning Light
This light indicates low engine oil pressure. If the light turns on while driving, stop
the vehicle and shut off the engine as soon as possible. A chime will sound when
this light turns on.
We recommend you do not operate the vehicle or engine damage will occur. Have
the vehicle serviced immediately.
- Anti-Lock Brake (ABS) Light
This light monitors the Anti-Lock Brake System (ABS).
If the light is not on during starting, stays on or turns on while driving, we recom-
mend you contact the nearest authorized dealer and have the vehicle serviced
immediately.
- Air Bag Warning Light
If the light is not on during starting, stays on, or turns on while driving, have the ve-
hicle serviced by an authorized dealer immediately.
WHAT TO DO IN EMERGENCIES
55
Page 62 of 108
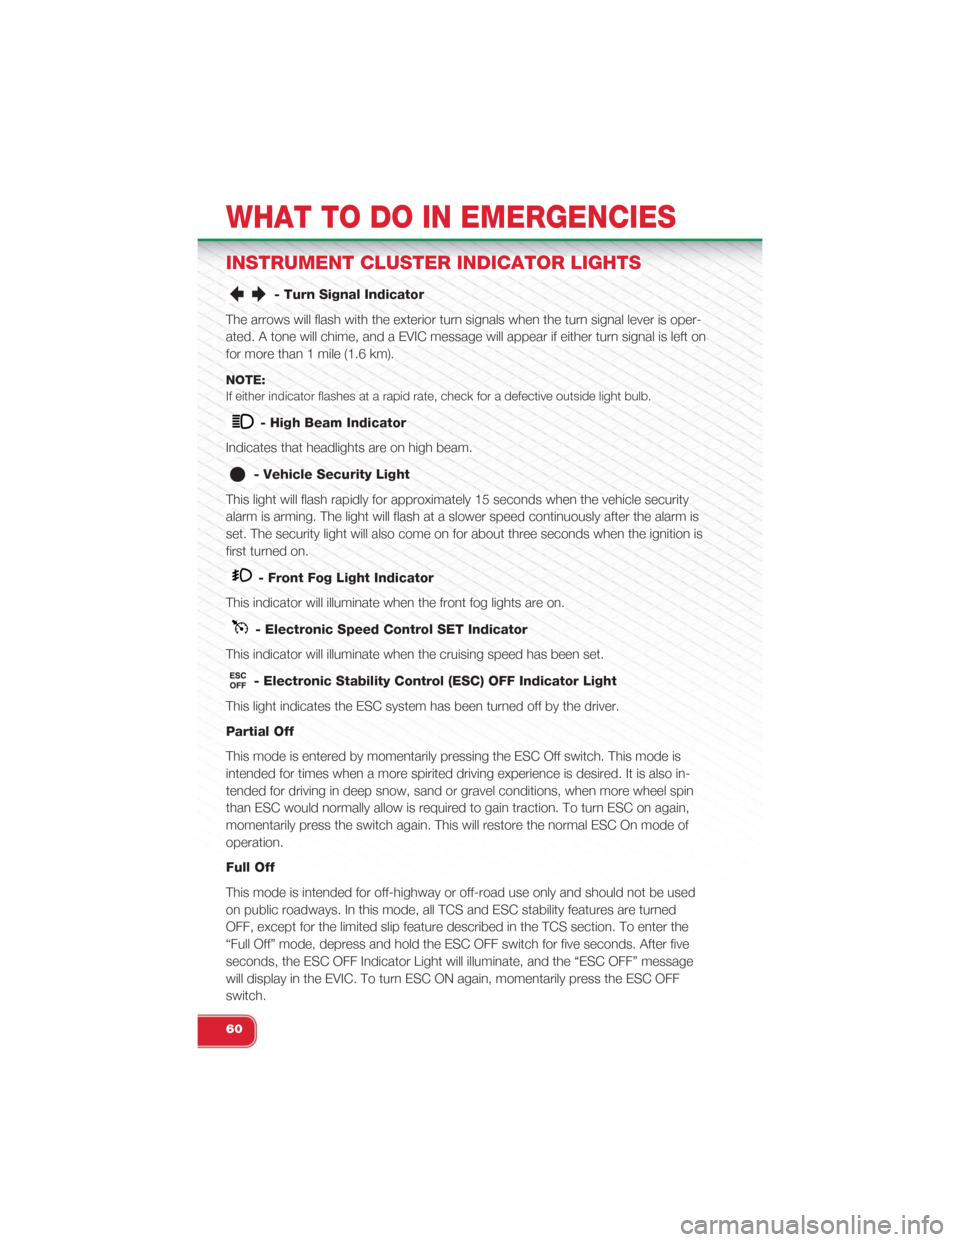
INSTRUMENT CLUSTER INDICATOR LIGHTS
- Turn Signal Indicator
The arrows will flash with the exterior turn signals when the turn signal lever is oper-
ated. A tone will chime, and a EVIC message will appear if either turn signal is left on
for more than 1 mile (1.6 km).
NOTE:
If either indicator flashes at a rapid rate, check for a defective outside light bulb.
- High Beam Indicator
Indicates that headlights are on high beam.
- Vehicle Security Light
This light will flash rapidly for approximately 15 seconds when the vehicle security
alarm is arming. The light will flash at a slower speed continuously after the alarm is
set. The security light will also come on for about three seconds when the ignition is
first turned on.
- Front Fog Light Indicator
This indicator will illuminate when the front fog lights are on.
- Electronic Speed Control SET Indicator
This indicator will illuminate when the cruising speed has been set.
- Electronic Stability Control (ESC) OFF Indicator Light
This light indicates the ESC system has been turned off by the driver.
Partial Off
This mode is entered by momentarily pressing the ESC Off switch. This mode is
intended for times when a more spirited driving experience is desired. It is also in-
tended for driving in deep snow, sand or gravel conditions, when more wheel spin
than ESC would normally allow is required to gain traction. To turn ESC on again,
momentarily press the switch again. This will restore the normal ESC On mode of
operation.
Full Off
This mode is intended for off-highway or off-road use only and should not be used
on public roadways. In this mode, all TCS and ESC stability features are turned
OFF, except for the limited slip feature described in the TCS section. To enter the
“Full Off” mode, depress and hold the ESC OFF switch for five seconds. After five
seconds, the ESC OFF Indicator Light will illuminate, and the “ESC OFF” message
will display in the EVIC. To turn ESC ON again, momentarily press the ESC OFF
switch.
WHAT TO DO IN EMERGENCIES
60