audio FIAT 500E 2016 2.G Owner's Manual
[x] Cancel search | Manufacturer: FIAT, Model Year: 2016, Model line: 500E, Model: FIAT 500E 2016 2.GPages: 132, PDF Size: 4.59 MB
Page 74 of 132
Select The Android Mobile Phone's Priority Level
When the pairing process has successfully completed, the system will prompt you to
choose whether or not this is your favorite mobile phone.Selecting “Yes” will make this
mobile phone the highest priority.This mobile phone will take precedence over other
paired mobile phones within range and will connect to the Uconnect system automati-
cally when entering the vehicle.Only one mobile phone and/or one Bluetooth audio de-
vice can be connected to the Uconnect system at a time.If “No” is selected, simply se-
lect “Uconnect” from the mobile phone/audio device Bluetooth screen, and the Uconnect
system will reconnect to the Bluetooth device.
You are now ready to make hands-free calls.Press the Uconnect “Phone” button
on your steering wheel to begin.
NOTE:
Refer to UconnectPhone.com website for additional information on mobile phone pairing
and for a list of compatible phones.
Common Phone Commands (Examples)
•“Call John Smith”
•“Call John Smith mobile”
•“Dial 1 248 555 1212”
•“Redial”
Mute (Or Unmute) Microphone During Call
During a call, press the “Mute” button on the Phone main screen to mute and unmute
the call.
Transfer Ongoing Call Between Handset And Vehicle
During an on-going call, press the “Transfer” button on the Phone main screen to transfer
an on-going call between handset and vehicle.
Phonebook
The Uconnect system will automatically sync your phonebook from your paired phone, if
this feature is supported by your phone.Phonebook contacts are updated each time that
the phone is connected.If your phone book entries do not appear, check the settings on
your phone.Some phones require you to enable this feature manually.
•Your phonebook can be browsed on the Uconnect system touchscreen, but editing can
only be done on your phone.To browse, press the “Phone” button on the touch-
screen, then the “Phonebook” button on the touchscreen.
Favorite phonebook entries can be saved as Favorites for quicker access.Favorites are
shown at the top of the main phone screen.
ELECTRONICS
72
Page 75 of 132
Voice Command Tips
•Speaking complete names (i.e.Call John Doe vs.Call John) will result in greater system
accuracy.
•You can “link” commands together for faster results.Say “Call John Doe, mobile,” for
example.
•If you are listening to available voice command options, you do not have to listen to
the entire list.When you hear the command that you need, push the
button
on the steering wheel, wait for the beep and say your command.
Changing The Volume
•Start a dialogue by pushing the Phone button, then say a command for example
- "Help".
•Use the radio VOLUME/MUTE rotary knob to adjust the volume to a comfortable
level while the Uconnect system is speaking.
NOTE:
The volume setting for Uconnect is different than the audio system.
NOTE:
To access help, push the Uconnect Phone button
on the steering wheel and say
"help." Push the Uconnect Phone Pickup button
or the VR buttonand say "can-
cel" or push the Uconnect phone Hangup button
to cancel the help session.
Incoming Text Messages
After pairing your Uconnect system with a Bluetooth enabled mobile device with the
Message Access Profile (MAP), the Uconnect system can announce a new incoming text
message and read it to you over the vehicle’s audio system.
NOTE:
Only incoming text messages received during the current ignition cycle can be viewed/
read.
To enable incoming text messaging:
iPhone
1.Press the settings button on the mobile phone.
2.Select Bluetooth.
•Ensure Bluetooth is enabled, and the mobile phone is paired to the Uconnect system.
3.Select
located under DEVICES next to Uconnect.
ELECTRONICS
73
Page 77 of 132
Voice Text Reply (Not Compatible With iPhone)
NOTE:
Voice texting reply and voice texting features require a compatible mobile device enabled
with Bluetooth Message Access Profile (MAP).iPhone, and some other smartphones, may
not entirely support Bluetooth MAP.Visit UconnectPhone.com for the latest system and
device compatibility.
•Due to the extremely large number of mobile phone manufacturers, your mobile de-
vice may not be listed.For further assistance, contact Uconnect Customer Care @
1-877-855-8400 for U.S.residents or, 1-800-465-2001 (English) / 1-800-387-9983
(French) for Canadian residents.
Once your Uconnect system is paired with a compatible mobile device, the system can
announce a new incoming text message, and read it to your over the vehicle audio sys-
tem.You can reply to the message using Voice Recognition by selecting, or saying, one of
the 18 pre-defined messages.
Here’s How:
1.Push the Uconnect Phone button
and wait for the beep, then say “reply.”
Uconnect will give the following prompt: “Please say the message you would like to
send.”
2.Wait for the beep and say one of the pre-defined messages.(If you are not sure, you
can say “help”).Uconnect will then read the pre-defined messages allowed.
3.As soon as you hear the message you would like to send, you can interrupt the list of
prompts by pushing the Uconnect phone button and saying the phrase.Uconnect will
confirm the message by reading it back to you.
4.Push the Phone button and say “Send.”
PRE-DEFINED VOICE TEXT REPLY RESPONSES
Ye s.Stuck in Traffic.See you later.
No.Start without me.I’ll be Late.
Okay.Where are you?
I will be <5, 10, 15,...etc.>
minutes late.
Call me.Are you there yet?
I’ll call you later.I need directions.
See you in <5, 10, 15,...etc.>
of minutes.
I’m on my way.
Can’t talk right now.
I’m lost.Thanks.
NOTE:
To make the SMS voice reading function available, the SMS notification option on phone
must be enabled; this option is usually available on the phone, in the Bluetooth connec-
tions menu for a device registered as Uconnect.After enabling this function on the mo-
bile phone, it must be disconnected and reconnected with the Uconnect system in order
to make it effective.
ELECTRONICS
75
Page 79 of 132
STEERING WHEEL AUDIO CONTROLS
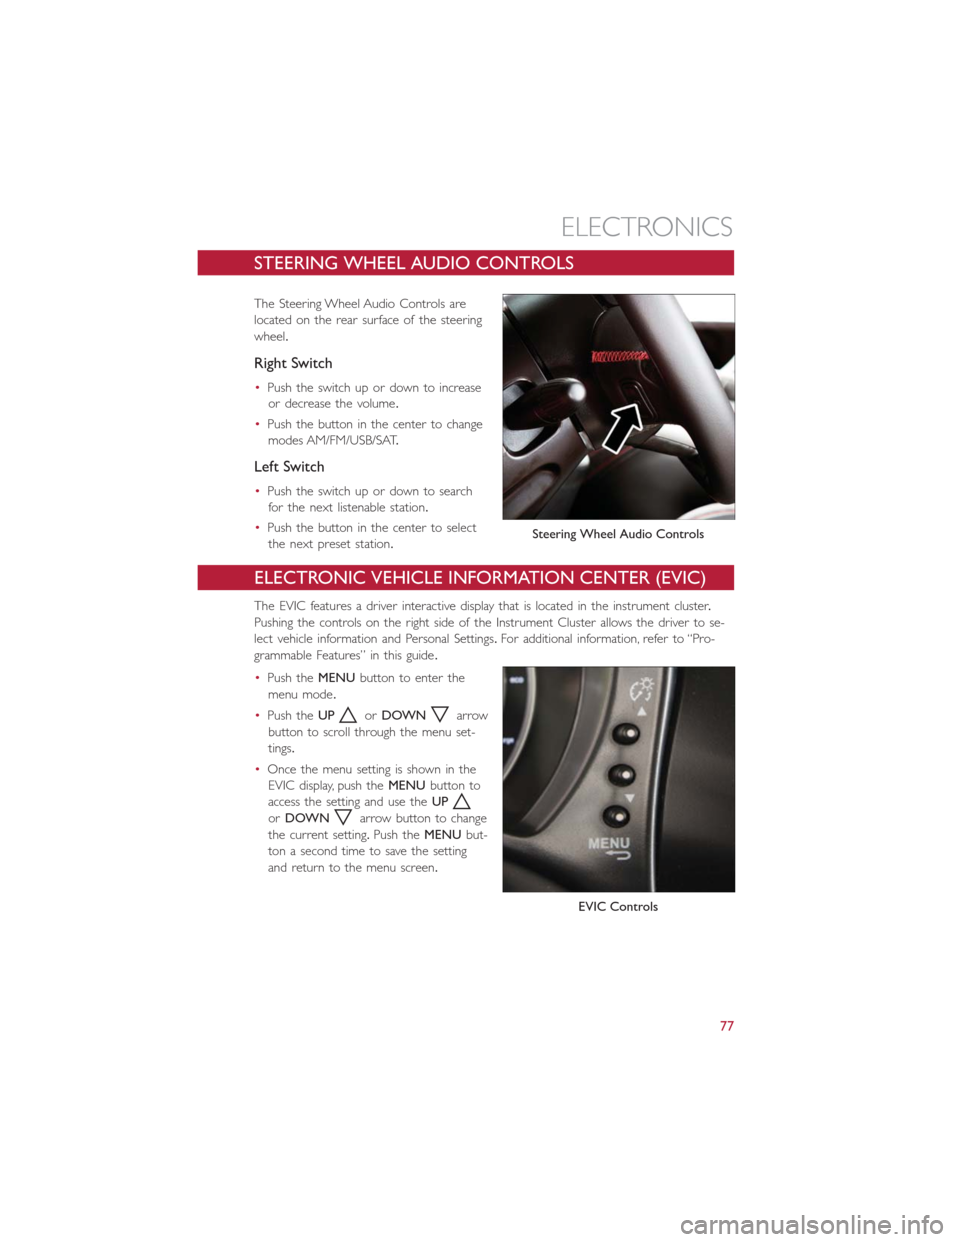
The Steering Wheel Audio Controls are
located on the rear surface of the steering
wheel.
Right Switch
•Push the switch up or down to increase
or decrease the volume.
•Push the button in the center to change
modes AM/FM/USB/SAT.
Left Switch
•Push the switch up or down to search
for the next listenable station.
•Push the button in the center to select
the next preset station.
ELECTRONIC VEHICLE INFORMATION CENTER (EVIC)
The EVIC features a driver interactive display that is located in the instrument cluster.
Pushing the controls on the right side of the Instrument Cluster allows the driver to se-
lect vehicle information and Personal Settings.For additional information, refer to “Pro-
grammable Features” in this guide.
•Push theMENUbutton to enter the
menu mode.
•Push theUP
orDOWNarrow
button to scroll through the menu set-
tings.
•Once the menu setting is shown in the
EVIC display, push theMENUbutton to
access the setting and use theUP
orDOWNarrow button to change
the current setting.Push theMENUbut-
ton a second time to save the setting
and return to the menu screen.
Steering Wheel Audio Controls
EVIC Controls
ELECTRONICS
77
Page 81 of 132
Uconnect Customer Programmable Features
The Uconnect system allows you to access Customer Programmable feature settings.
To change a setting:
1.Push the SETTINGS
button located on the right side of the display.
2.Select a programmable feature you would like to adjust.
3.Make your selection highlighting the button.
Depending on the vehicles options, the following feature settings are available:
•Display•Audio
•Clock & Date•Phone/Bluetooth
•Safety/Assistance•SiriusXM Setup
•Lights•Voice
•Doors & Locks•Restore Settings
•Engine Off Options•Units
•Clear Personal Data•Charging Schedule
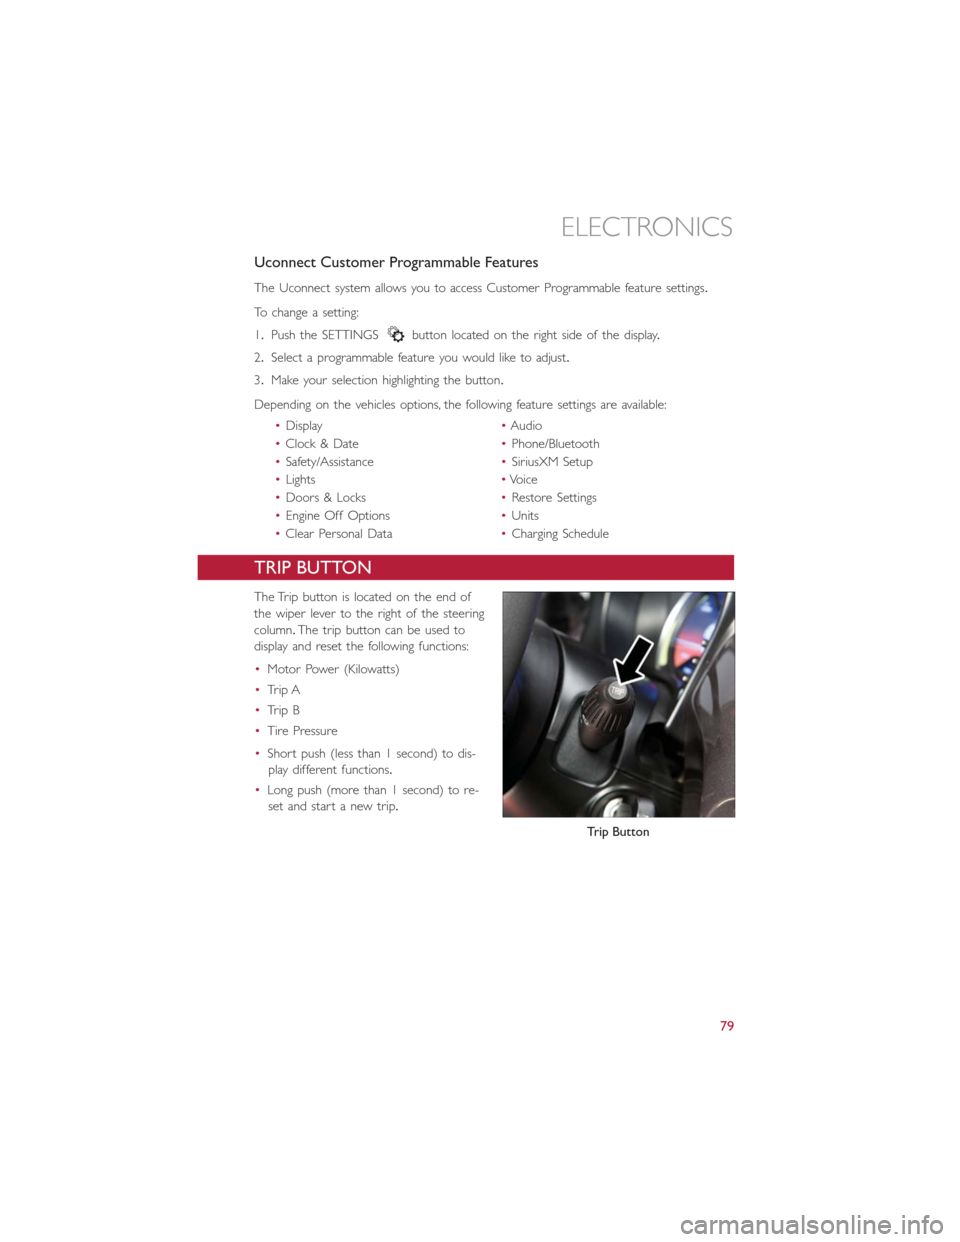
TRIP BUTTON
The Trip button is located on the end of
the wiper lever to the right of the steering
column.The trip button can be used to
display and reset the following functions:
•Motor Power (Kilowatts)
•Trip A
•Trip B
•Tire Pressure
•Short push (less than 1 second) to dis-
play different functions.
•Long push (more than 1 second) to re-
set and start a new trip.
Trip Button
ELECTRONICS
79
Page 113 of 132
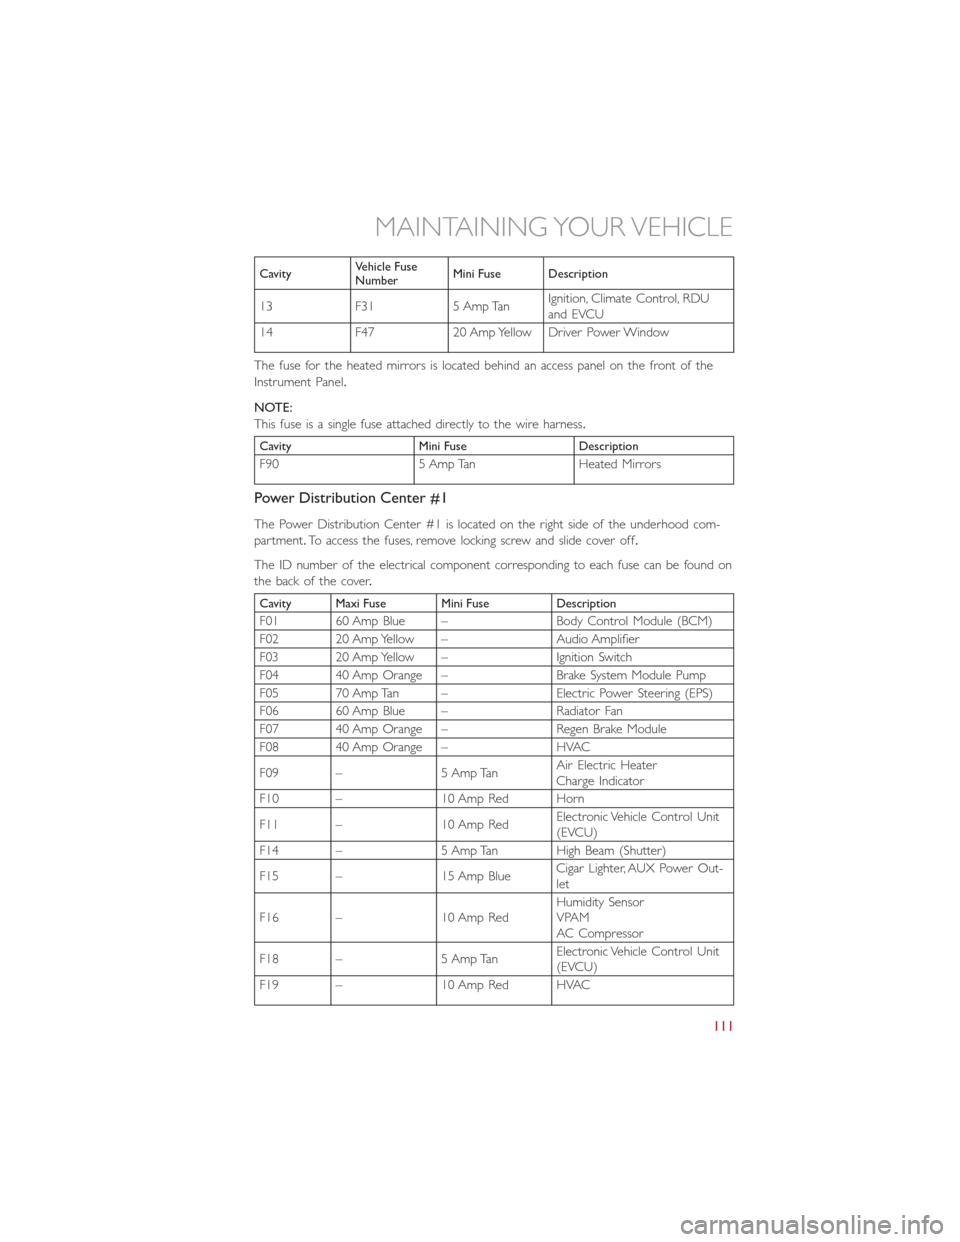
CavityVehicle Fuse
NumberMini Fuse Description
13 F31 5 Amp TanIgnition, Climate Control, RDU
and EVCU
14 F47 20 Amp Yellow Driver Power Window
The fuse for the heated mirrors is located behind an access panel on the front of the
Instrument Panel.
NOTE:
This fuse is a single fuse attached directly to the wire harness.
Cavity Mini Fuse Description
F90 5 Amp Tan Heated Mirrors
Power Distribution Center #1
The Power Distribution Center #1 is located on the right side of the underhood com-
partment.To access the fuses, remove locking screw and slide cover off.
The ID number of the electrical component corresponding to each fuse can be found on
thebackofthecover.
Cavity Maxi Fuse Mini Fuse Description
F01 60 Amp Blue – Body Control Module (BCM)
F02 20 Amp Yellow – Audio Amplifier
F03 20 Amp Yellow – Ignition Switch
F04 40 Amp Orange – Brake System Module Pump
F05 70 Amp Tan – Electric Power Steering (EPS)
F06 60 Amp Blue – Radiator Fan
F07 40 Amp Orange – Regen Brake Module
F08 40 Amp Orange – HVAC
F09 – 5 Amp TanAir Electric Heater
Charge Indicator
F10 – 10 Amp Red Horn
F11 – 10 Amp RedElectronic Vehicle Control Unit
(EVCU)
F14 – 5 Amp Tan High Beam (Shutter)
F15 – 15 Amp BlueCigar Lighter, AUX Power Out-
let
F16 – 10 Amp RedHumidity Sensor
VPAM
AC Compressor
F18 – 5 Amp TanElectronic Vehicle Control Unit
(EVCU)
F19 – 10 Amp Red HVAC
MAINTAINING YOUR VEHICLE
111
Page 123 of 132
Adding Washer Fluid............107
Air Bag
Advanced Front Air Bag.........23
Advance Front Air Bag.........23
Air Bags.................23
Air Bag Warning Light........23, 26
Driver Knee Air Bag...........24
Enhanced Accident Response......25
Event Data Recorder (EDR)......26
Front Air Bag..............23
Passenger Knee Air Bag.........24
Rollover.................23
Side Impacts...............23
Air Bag Light...............26, 84
Air Conditioner Maintenance.......107
Air Conditioning Refrigerant........107
Air Conditioning System..........107
Alarm
Disarm The System...........21
Vehicle Security Alarm.........21
Alarm (Security Alarm).........21, 88
Anti-Lock Warning Light...........84
Appearance Care.............107
Audio Systems (Radio)...........58
Automatic Temperature Control (ATC)...48
Battery...................107
Body Mechanism Lubrication........107
Brake Fluid.................106
Brakes...................107
Brake System................107
Master Cylinder............107
Warning Light..............85
Bulb Replacement.............117
Bulbs, Light.................117
Capacities, Fluid...............106
Car Washes................107
Charging...................16
Child Restraints...............27
Installing Child Restraints Using The
Vehicle Seat Belt.............29
Lower Anchors And Tethers For
Children.................29
Using The Top Tether Anchorage....29
Child Seat Installation............27
Cleaning
Wheels................107Windshield Wiper Blades.......107
Climate Control
Automatic................48
Clock....................57
Clock Setting................57
Cluster Warning/Indicator Lights
Anti-Lock Brake (ABS) Light......84
Brake Warning Light...........85
Electronic Speed Control SET
Indicator.................88
Front Fog Light Indicator........88
High Beam Indicator..........88
Park/Headlight ON Indicator......88
Turn Signal Indicator..........88
Vehicle Security Light..........88
Compact Spare Tire............114
Cooling System...............107
Adding Coolant (Antifreeze).....107
Coolant Capacity...........106
Coolant Level.............107
Disposal Of Used Coolant......107
Drain, Flush, And Refill.........107
Inspection...............107
Points To Remember.........107
Pressure Cap.............107
Selection Of Coolant
(Antifreeze)...........106, 107
Corrosion Protection...........107
Customer Assistance............
118
Customer Programmable Features.....79
Daytime Running Lights...........40
Defects, Reporting.............118
Disarming, Security System.........21
Door Locks.................20
Electronics
Your Vehicle's Sound System......52
Electronic Speed Control
(Cruise Control).............44
Electronic Vehicle Information Center
(EVIC)................77, 78
Emergency, In Case Of
Towing.................100
Engine...................104
Enhanced Accident Response
Feature...............25, 100
Event Data Recorder............102
INDEX
121
Page 124 of 132
Extending Driving Range..........39
FAQ....................120
Flashers
Turn Signal...............88
Fluids, Lubricants And Genuine Parts...106
Fog Lights................42, 88
Freeing A Stuck Vehicle...........101
Fuses....................110
General Maintenance............107
Glass Cleaning...............107
Hands-Free Phone (Uconnect).......68
Headlights..................40
Cleaning................107
Passing.................40
Switch..................40
Heated Mirrors...............49
Heated Seats................36
High Beam Indicator.............88
High Voltage Battery.............16
Hood Release...............103
Identifying Your Radio............55
Installing A Child Restraint With ALR....29
Installing Child Restraints Using The LATCH
Lower Anchorages............29
Instrument Cluster
Indicators.................8
Instrument Cluster Warning Lights.....83
Instrument Panel Cover..........107
Instrument Panel Lens Cleaning......107
Interior And Instrument Lights.......6, 7
Interior Appearance Care.........107
Interior Lighting...............41
iPod/USB/MP3 Control
Bluetooth Streaming Audio.......68
Key Fo b...................20
Disarm The Alarm............21
Lane Change Assist
.............41
Lap/Shoulder Belts..............22
LATCH (Lower Anchors And Tether For
CHildren)...............28, 30
Level 1 Charging...............13
Level 2 Charging...............13Liftgate....................20
Light Bulbs.................117
Lights....................40
Air Bag.................26
Fog...................88
High Beam...............40
High Beam Indicator..........88
Park...................40
Passing.................40
Seat Belt Reminder...........84
Security Alarm.............88
Turn Signal...............41
Locks
Key s...................20
Liftgate, Tailgate.............20
Lower Anchors And Tether For CHildren
(LATCH).................28
Lubrication, Body..............107
Maintenance Free Battery.........107
Maintenance, General...........107
Maintenance Procedures..........107
Maintenance Record............109
Maintenance Schedule...........107
Master Cylinder (Brakes)..........107
Mirrors
Heated.................49
MOPAR Accessories............119
Multi-Function Control Lever........40
Outlet
Power..................80
Paint Care.................107
Passing Light
.................40
Phone, Hands-Free (Uconnect).......68
Phone (Pairing)...............69
Phone (Uconnect)..............68
Placard, Tire And Loading Information...113
Power
Door Locks...............21
Outlet (Auxiliary Electrical Outlet)...80
Steering.................84
Sunroof.................50
Programmable Electronic Features.....78
Radio
Presets..................58
INDEX
122
Page 125 of 132
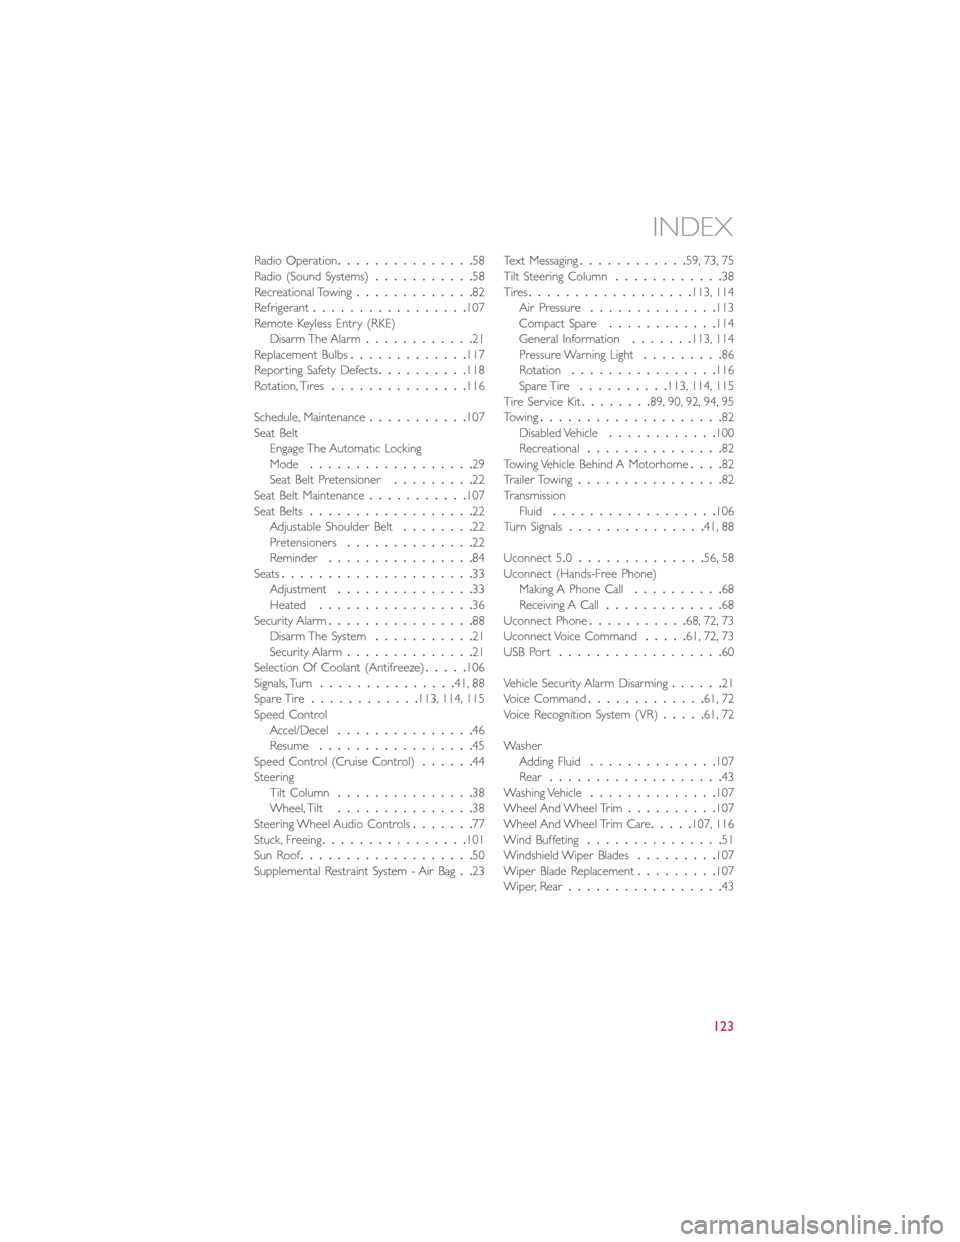
Radio Operation...............58
Radio (Sound Systems)...........58
Recreational Towing.............82
Refrigerant.................107
Remote Keyless Entry (RKE)
Disarm The Alarm............21
Replacement Bulbs.............117
Reporting Safety Defects..........118
Rotation, Tires...............116
Schedule, Maintenance...........107
Seat Belt
Engage The Automatic Locking
Mode..................29
Seat Belt Pretensioner.........22
Seat Belt Maintenance...........107
Seat Belts..................22
Adjustable Shoulder Belt........22
Pretensioners..............22
Reminder................84
Seats.....................33
Adjustment...............33
Heated.................36
Security Alarm................88
Disarm The System...........21
Security Alarm..............21
Selection Of Coolant (Antifreeze).....106
Signals, Turn...............41, 88
Spare Tire............113, 114, 115
Speed Control
Accel/Decel...............46
Resume.................45
Speed Control (Cruise Control)......44
Steering
Tilt Column...............38
Wheel, Tilt...............38
Steering Wheel Audio Controls.......77
Stuck, Freeing................101
Sun Roof
...................50
Supplemental Restraint System - Air Bag..23Text Messaging............59, 73, 75
Tilt Steering Column............38
Tires..................113, 114
Air Pressure..............113
Compact Spare............114
General Information.......113, 114
Pressure Warning Light.........86
Rotation................116
Spare Tire..........113, 114, 115
Tire Service Kit........89, 90, 92, 94, 95
Towing....................82
Disabled Vehicle............100
Recreational...............82
Towing Vehicle Behind A Motorhome....82
Trailer Towing................82
Transmission
Fluid..................106
Turn Signals...............41, 88
Uconnect 5.0..............56, 58
Uconnect (Hands-Free Phone)
Making A Phone Call..........68
Receiving A Call.............68
Uconnect Phone...........68, 72, 73
Uconnect Voice Command.....61, 72, 73
USB Port..................60
Vehicle Security Alarm Disarming......21
Voice Command.............61, 72
Voice Recognition System (VR).....61, 72
Washer
Adding Fluid..............107
Rear...................43
Washing Vehicle..............107
Wheel And Wheel Trim..........107
Wheel And Wheel Trim Care
.....107, 116
Wind Buffeting...............51
Windshield Wiper Blades.........107
Wiper Blade Replacement.........107
Wiper, Rear.................43
INDEX
123