key FIAT 500E 2016 2.G Owner's Manual
[x] Cancel search | Manufacturer: FIAT, Model Year: 2016, Model line: 500E, Model: FIAT 500E 2016 2.GPages: 132, PDF Size: 4.59 MB
Page 63 of 132
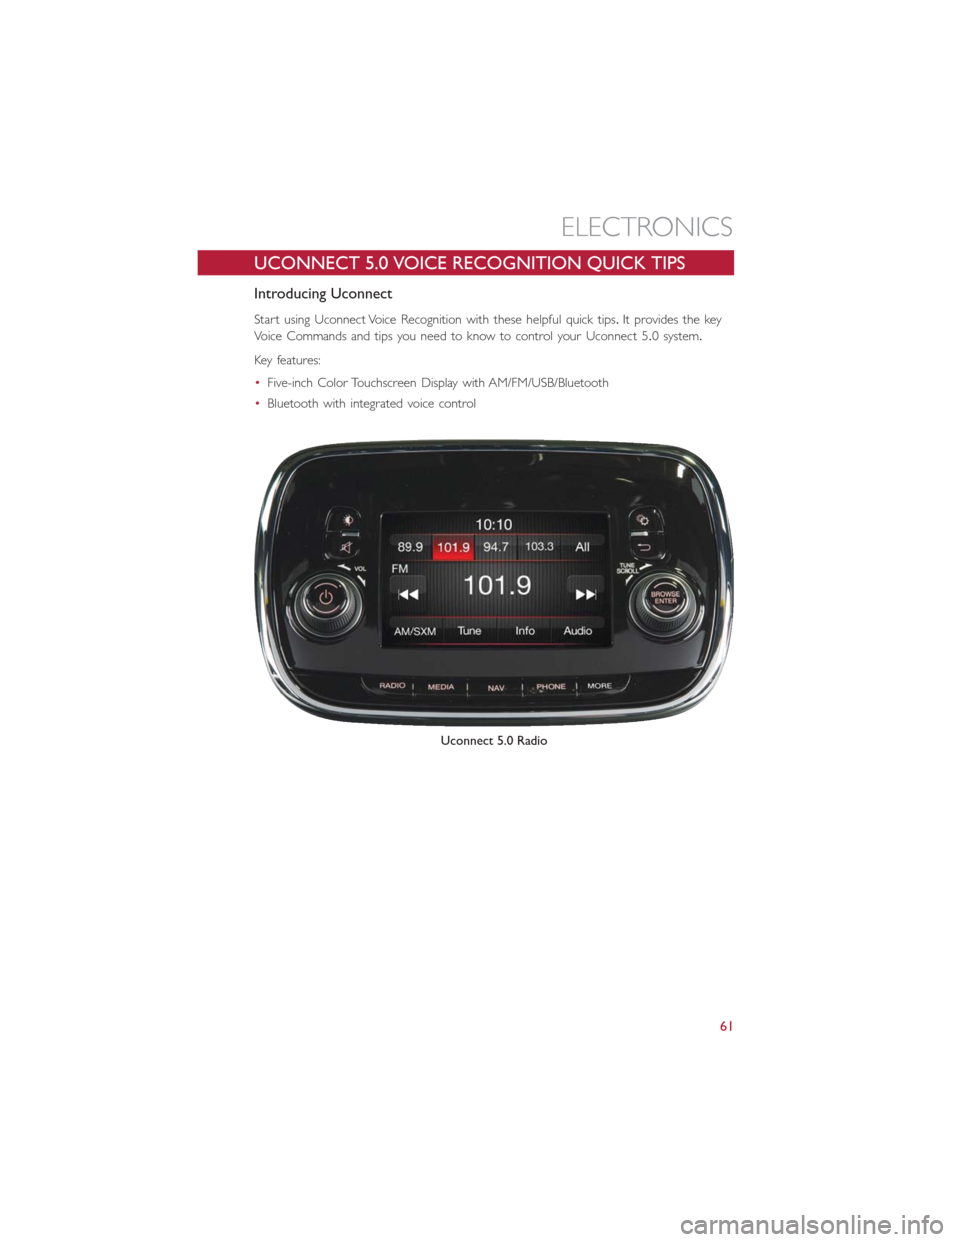
UCONNECT 5.0 VOICE RECOGNITION QUICK TIPS
Introducing Uconnect
Start using Uconnect Voice Recognition with these helpful quick tips.It provides the key
Voice Commands and tips you need to know to control your Uconnect 5.0 system.
Key features:
•Five-inch Color Touchscreen Display with AM/FM/USB/Bluetooth
•Bluetooth with integrated voice control
Uconnect 5.0 Radio
ELECTRONICS
61
Page 73 of 132
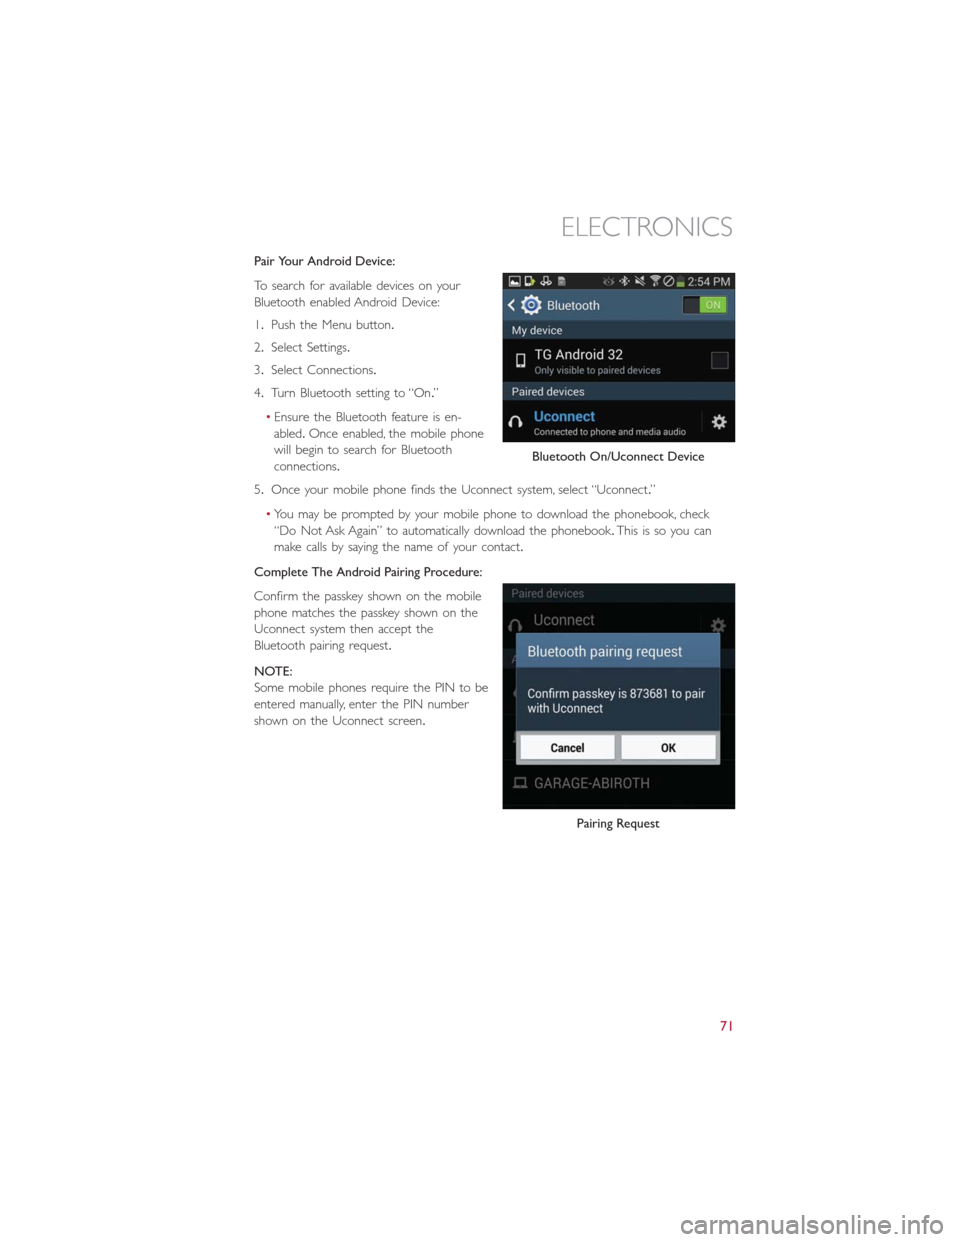
Pair Your Android Device:
To search for available devices on your
Bluetooth enabled Android Device:
1.Push the Menu button.
2.Select Settings.
3.Select Connections.
4.Turn Bluetooth setting to “On.”
•Ensure the Bluetooth feature is en-
abled.Once enabled, the mobile phone
will begin to search for Bluetooth
connections.
5.Once your mobile phone finds the Uconnect system, select “Uconnect.”
•You may be prompted by your mobile phone to download the phonebook, check
“Do Not Ask Again” to automatically download the phonebook.This is so you can
make calls by saying the name of your contact.
Complete The Android Pairing Procedure:
Confirm the passkey shown on the mobile
phone matches the passkey shown on the
Uconnect system then accept the
Bluetooth pairing request.
NOTE:
Some mobile phones require the PIN to be
entered manually, enter the PIN number
shown on the Uconnect screen.
Bluetooth On/Uconnect Device
Pairing Request
ELECTRONICS
71
Page 82 of 132
New Trip
•A new trip can be reset or restarted by:
•“Manual” resetting by the user, by pushing the Trip button
•“Automatically” resetting, when the “Trip distance” reaches 999.9 miles or when the
“Travel time” reaches 29 (29 hours and 59 minutes)
Start Of Trip Procedure
•With the ignition key on, push and hold the TRIP button for over one second to reset
Trip A or Trip B.
Exit Trip
•The Trip function is over when all the values have been displayed or by pushing the
TRIP button until exit.
•Menu button does not exit the Trip.
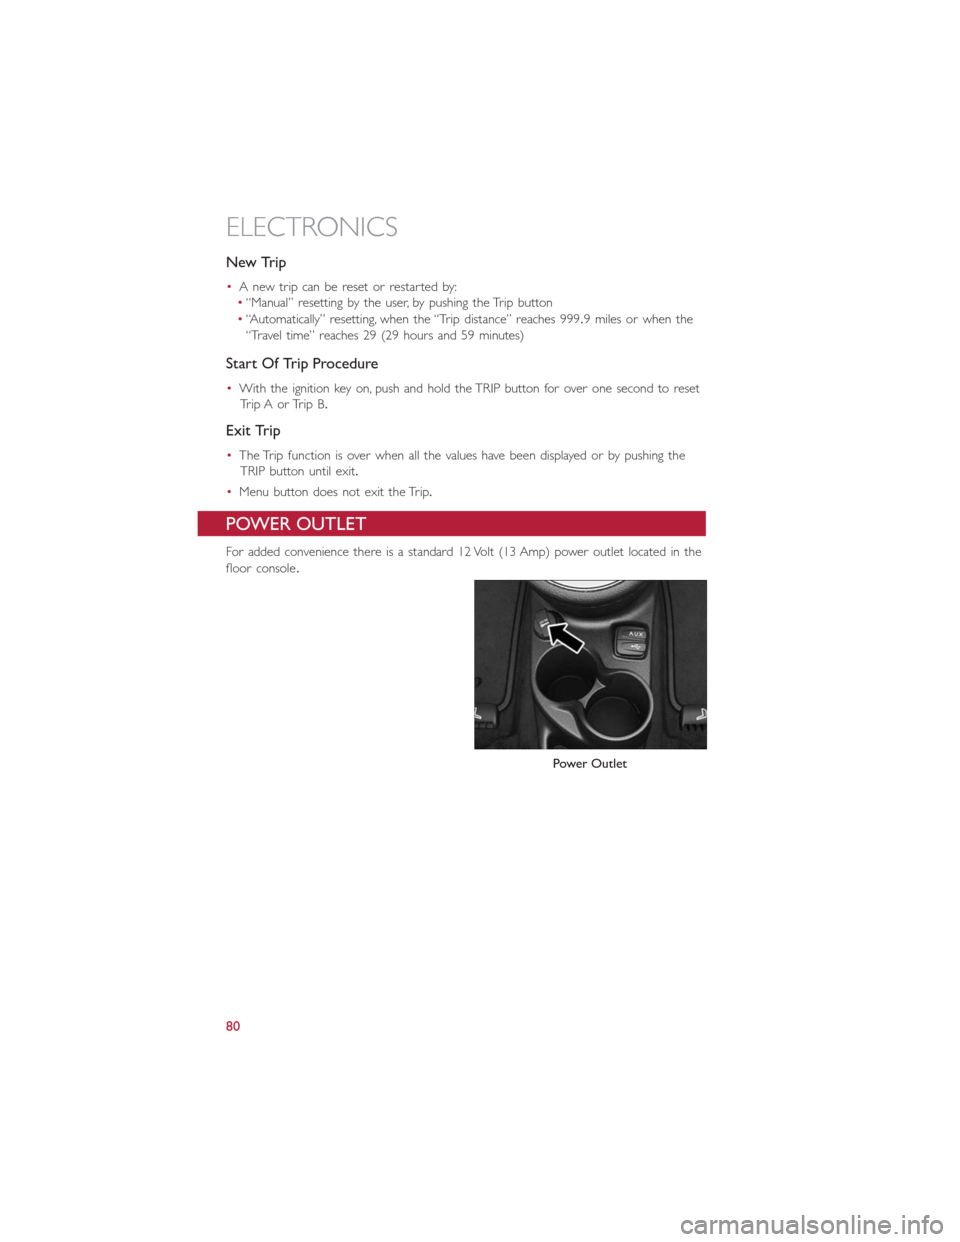
POWER OUTLET
For added convenience there is a standard 12 Volt (13 Amp) power outlet located in the
floor console.
Power Outlet
ELECTRONICS
80
Page 100 of 132
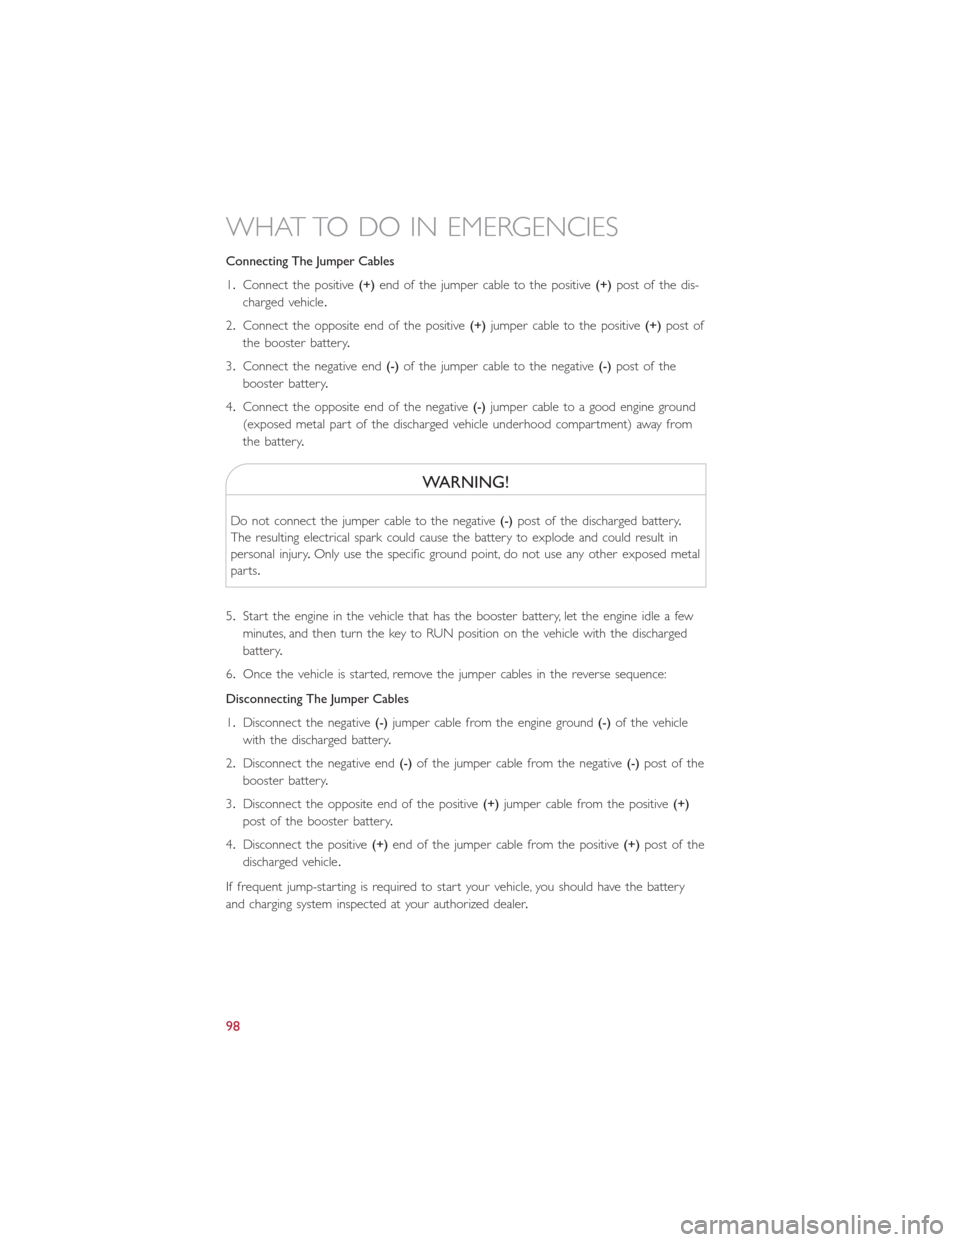
Connecting The Jumper Cables
1.Connect the positive(+)end of the jumper cable to the positive(+)post of the dis-
charged vehicle.
2.Connect the opposite end of the positive(+)jumper cable to the positive(+)post of
the booster battery.
3.Connect the negative end(-)of the jumper cable to the negative(-)post of the
booster battery.
4.Connect the opposite end of the negative(-)jumper cable to a good engine ground
(exposed metal part of the discharged vehicle underhood compartment) away from
the battery.
WARNING!
Do not connect the jumper cable to the negative(-)post of the discharged battery.
The resulting electrical spark could cause the battery to explode and could result in
personal injury.Only use the specific ground point, do not use any other exposed metal
parts.
5.Start the engine in the vehicle that has the booster battery, let the engine idle a few
minutes, and then turn the key to RUN position on the vehicle with the discharged
battery.
6.Once the vehicle is started, remove the jumper cables in the reverse sequence:
Disconnecting The Jumper Cables
1.Disconnect the negative(-)jumper cable from the engine ground(-)of the vehicle
with the discharged battery.
2.Disconnect the negative end(-)of the jumper cable from the negative(-)post of the
booster battery.
3.Disconnect the opposite end of the positive(+)jumper cable from the positive(+)
post of the booster battery.
4.Disconnect the positive(+)end of the jumper cable from the positive(+)post of the
discharged vehicle.
If frequent jump-starting is required to start your vehicle, you should have the battery
and charging system inspected at your authorized dealer.
WHAT TO DO IN EMERGENCIES
98
Page 102 of 132
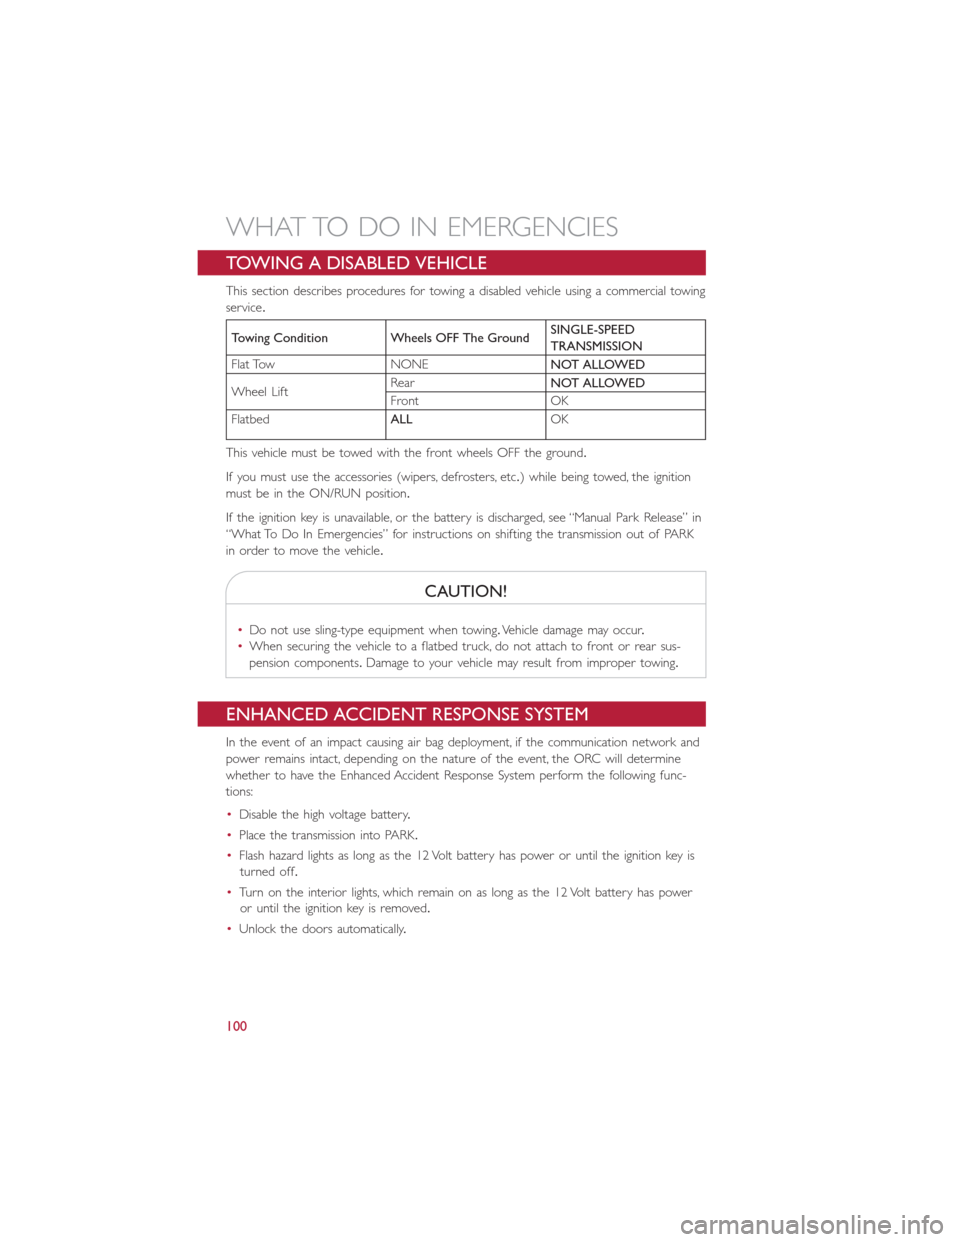
TOWING A DISABLED VEHICLE
This section describes procedures for towing a disabled vehicle using a commercial towing
service.
Towing Condition Wheels OFF The GroundSINGLE-SPEED
TRANSMISSION
Flat Tow NONE
NOT ALLOWED
Wheel LiftRear
NOT ALLOWED
Front OK
Flatbed
ALLOK
This vehicle must be towed with the front wheels OFF the ground.
If you must use the accessories (wipers, defrosters, etc.) while being towed, the ignition
must be in the ON/RUN position.
If the ignition key is unavailable, or the battery is discharged, see “Manual Park Release” in
“What To Do In Emergencies” for instructions on shifting the transmission out of PARK
in order to move the vehicle.
CAUTION!
•Do not use sling-type equipment when towing.Vehicle damage may occur.
•When securing the vehicle to a flatbed truck, do not attach to front or rear sus-
pension components.Damage to your vehicle may result from improper towing.
ENHANCED ACCIDENT RESPONSE SYSTEM
In the event of an impact causing air bag deployment, if the communication network and
power remains intact, depending on the nature of the event, the ORC will determine
whether to have the Enhanced Accident Response System perform the following func-
tions:
•Disable the high voltage battery.
•Place the transmission into PARK.
•Flash hazard lights as long as the 12 Volt battery has power or until the ignition key is
turned off.
•Turn on the interior lights, which remain on as long as the 12 Volt battery has power
or until the ignition key is removed.
•Unlock the doors automatically.
WHAT TO DO IN EMERGENCIES
100
Page 121 of 132
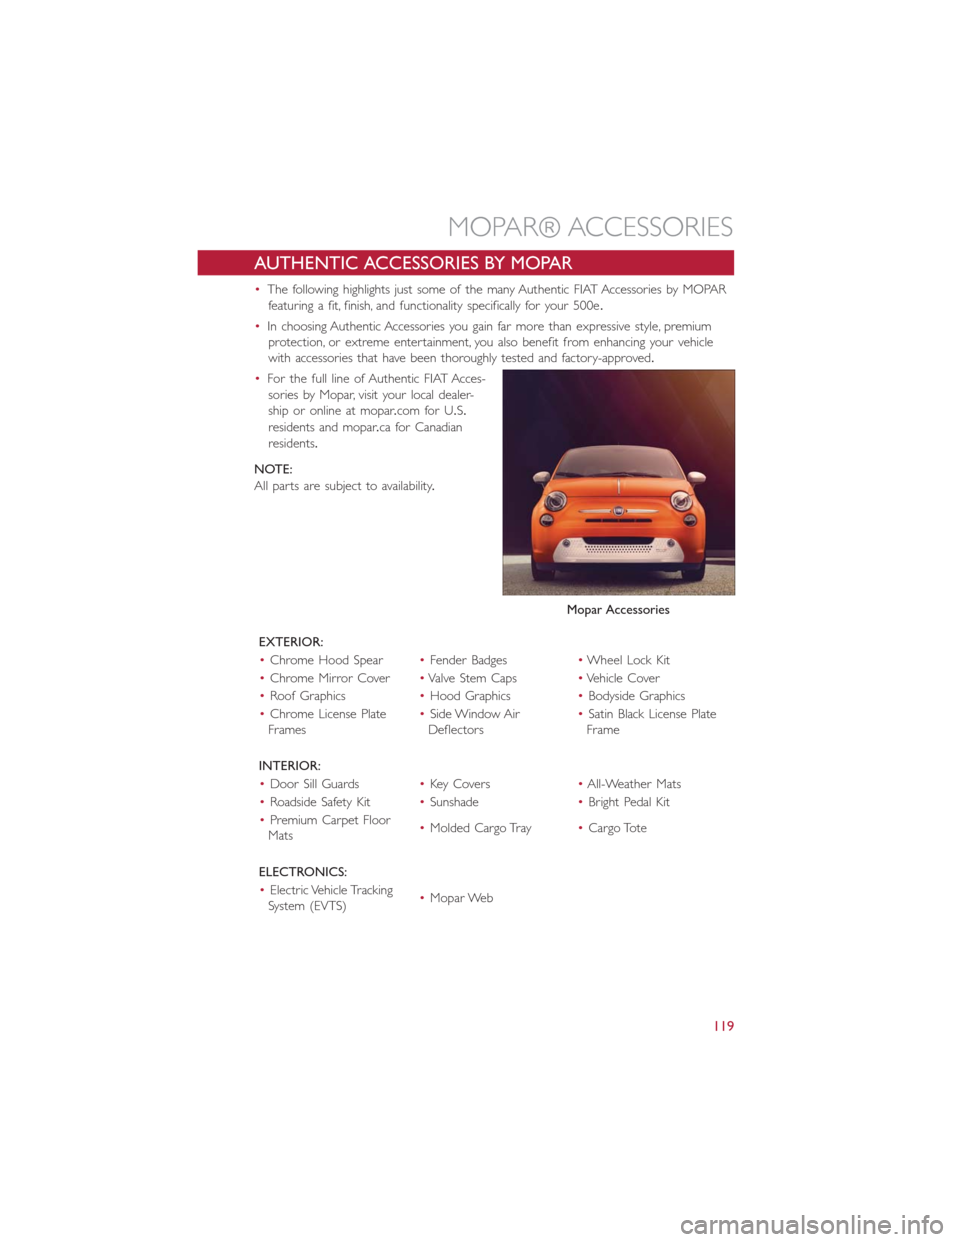
AUTHENTIC ACCESSORIES BY MOPAR
•The following highlights just some of the many Authentic FIAT Accessories by MOPAR
featuring a fit, finish, and functionality specifically for your 500e.
•In choosing Authentic Accessories you gain far more than expressive style, premium
protection, or extreme entertainment, you also benefit from enhancing your vehicle
with accessories that have been thoroughly tested and factory-approved.
•For the full line of Authentic FIAT Acces-
sories by Mopar, visit your local dealer-
ship or online at mopar.com for U.S.
residents and mopar.ca for Canadian
residents.
NOTE:
All parts are subject to availability.
EXTERIOR:
•Chrome Hood Spear•Fender Badges•Wheel Lock Kit
•Chrome Mirror Cover•ValveStemCaps•Vehicle Cover
•Roof Graphics•Hood Graphics•Bodyside Graphics
•Chrome License Plate
Frames•Side Window Air
Deflectors•Satin Black License Plate
Frame
INTERIOR:
•Door Sill Guards•Key Covers•All-Weather Mats
•Roadside Safety Kit•Sunshade•Bright Pedal Kit
•Premium Carpet Floor
Mats•Molded Cargo Tray•Cargo Tote
ELECTRONICS:
•Electric Vehicle Tracking
System (EVTS)•Mopar Web
Mopar Accessories
MOPAR® ACCESSORIES
119
Page 124 of 132
Extending Driving Range..........39
FAQ....................120
Flashers
Turn Signal...............88
Fluids, Lubricants And Genuine Parts...106
Fog Lights................42, 88
Freeing A Stuck Vehicle...........101
Fuses....................110
General Maintenance............107
Glass Cleaning...............107
Hands-Free Phone (Uconnect).......68
Headlights..................40
Cleaning................107
Passing.................40
Switch..................40
Heated Mirrors...............49
Heated Seats................36
High Beam Indicator.............88
High Voltage Battery.............16
Hood Release...............103
Identifying Your Radio............55
Installing A Child Restraint With ALR....29
Installing Child Restraints Using The LATCH
Lower Anchorages............29
Instrument Cluster
Indicators.................8
Instrument Cluster Warning Lights.....83
Instrument Panel Cover..........107
Instrument Panel Lens Cleaning......107
Interior And Instrument Lights.......6, 7
Interior Appearance Care.........107
Interior Lighting...............41
iPod/USB/MP3 Control
Bluetooth Streaming Audio.......68
Key Fo b...................20
Disarm The Alarm............21
Lane Change Assist
.............41
Lap/Shoulder Belts..............22
LATCH (Lower Anchors And Tether For
CHildren)...............28, 30
Level 1 Charging...............13
Level 2 Charging...............13Liftgate....................20
Light Bulbs.................117
Lights....................40
Air Bag.................26
Fog...................88
High Beam...............40
High Beam Indicator..........88
Park...................40
Passing.................40
Seat Belt Reminder...........84
Security Alarm.............88
Turn Signal...............41
Locks
Key s...................20
Liftgate, Tailgate.............20
Lower Anchors And Tether For CHildren
(LATCH).................28
Lubrication, Body..............107
Maintenance Free Battery.........107
Maintenance, General...........107
Maintenance Procedures..........107
Maintenance Record............109
Maintenance Schedule...........107
Master Cylinder (Brakes)..........107
Mirrors
Heated.................49
MOPAR Accessories............119
Multi-Function Control Lever........40
Outlet
Power..................80
Paint Care.................107
Passing Light
.................40
Phone, Hands-Free (Uconnect).......68
Phone (Pairing)...............69
Phone (Uconnect)..............68
Placard, Tire And Loading Information...113
Power
Door Locks...............21
Outlet (Auxiliary Electrical Outlet)...80
Steering.................84
Sunroof.................50
Programmable Electronic Features.....78
Radio
Presets..................58
INDEX
122
Page 125 of 132
Radio Operation...............58
Radio (Sound Systems)...........58
Recreational Towing.............82
Refrigerant.................107
Remote Keyless Entry (RKE)
Disarm The Alarm............21
Replacement Bulbs.............117
Reporting Safety Defects..........118
Rotation, Tires...............116
Schedule, Maintenance...........107
Seat Belt
Engage The Automatic Locking
Mode..................29
Seat Belt Pretensioner.........22
Seat Belt Maintenance...........107
Seat Belts..................22
Adjustable Shoulder Belt........22
Pretensioners..............22
Reminder................84
Seats.....................33
Adjustment...............33
Heated.................36
Security Alarm................88
Disarm The System...........21
Security Alarm..............21
Selection Of Coolant (Antifreeze).....106
Signals, Turn...............41, 88
Spare Tire............113, 114, 115
Speed Control
Accel/Decel...............46
Resume.................45
Speed Control (Cruise Control)......44
Steering
Tilt Column...............38
Wheel, Tilt...............38
Steering Wheel Audio Controls.......77
Stuck, Freeing................101
Sun Roof
...................50
Supplemental Restraint System - Air Bag..23Text Messaging............59, 73, 75
Tilt Steering Column............38
Tires..................113, 114
Air Pressure..............113
Compact Spare............114
General Information.......113, 114
Pressure Warning Light.........86
Rotation................116
Spare Tire..........113, 114, 115
Tire Service Kit........89, 90, 92, 94, 95
Towing....................82
Disabled Vehicle............100
Recreational...............82
Towing Vehicle Behind A Motorhome....82
Trailer Towing................82
Transmission
Fluid..................106
Turn Signals...............41, 88
Uconnect 5.0..............56, 58
Uconnect (Hands-Free Phone)
Making A Phone Call..........68
Receiving A Call.............68
Uconnect Phone...........68, 72, 73
Uconnect Voice Command.....61, 72, 73
USB Port..................60
Vehicle Security Alarm Disarming......21
Voice Command.............61, 72
Voice Recognition System (VR).....61, 72
Washer
Adding Fluid..............107
Rear...................43
Washing Vehicle..............107
Wheel And Wheel Trim..........107
Wheel And Wheel Trim Care
.....107, 116
Wind Buffeting...............51
Windshield Wiper Blades.........107
Wiper Blade Replacement.........107
Wiper, Rear.................43
INDEX
123