key FIAT 500E 2016 2.G User Guide
[x] Cancel search | Manufacturer: FIAT, Model Year: 2016, Model line: 500E, Model: FIAT 500E 2016 2.GPages: 132, PDF Size: 4.59 MB
Page 3 of 132

INTRODUCTION/WELCOMEWELCOME FROM FIAT...............2
IMPORTANT VEHICLE INFORMATION......4
CONTROLS AT A GLANCEDRIVER COCKPIT..................6
INSTRUMENT CLUSTER..............8
GETTING STARTEDELECTRIC VEHICLE FEATURES..........10
ELECTRIC SYSTEM OPERATION.........13
CHARGING THE HIGH VOLTAGE BATTERY...16
STARTING YOUR 500e...............19
KEY FOB......................20
VEHICLE SECURITY ALARM...........21
POWER DOOR LOCKS..............21
OCCUPANT RESTRAINT SYSTEMS........21
HEAD RESTRAINTS.................31
SEATS........................33
REAR SEATS.....................37
TILT STEERING COLUMN.............38
OPERATING YOUR VEHICLEEXTENDING YOUR DRIVING RANGE PER
CHARGE.......................39
LIGHTS.......................40
WIPER/WASHER LEVER..............43
ELECTRONIC SPEED CONTROL........44
POWER WINDOWS................47
AUTOMATIC TEMPERATURE CONTROLS
(ATC).........................48
REAR PARK ASSIST.................49
POWER SUNROOF.................50
ELECTRONICSYOUR VEHICLE'S SOUND SYSTEM........52
CYBERSECURITY..................54
IDENTIFYING YOUR RADIO............55
UCONNECT 5.0..................56
USB/AUX CONTROL................60
UCONNECT 5.0 VOICE RECOGNITION
QUICK TIPS.....................61
UCONNECT PHONE...............68
STEERING WHEEL AUDIO CONTROLS.....77
ELECTRONIC VEHICLE INFORMATION
CENTER (EVIC)...................77
PROGRAMMABLE FEATURES...........78
TRIP BUTTON....................79
POWER OUTLET.................80
UTILITY
TRAILER TOWING.................82
RECREATIONAL TOWING (BEHIND
MOTORHOME, ETC.)...............82
WHAT TO DO IN EMERGENCIES
ROADSIDE ASSISTANCE..............83
WARNING AND INDICATOR LIGHTS......83
TIRE SERVICE KIT..................89
JUMP-STARTING PROCEDURE
(12 VOLT BATTERY ONLY)............96
MANUAL PARK RELEASE.............99
TOWING A DISABLED VEHICLE.........100
ENHANCED ACCIDENT RESPONSE SYSTEM..100
FREEING A STUCK VEHICLE...........101
EVENT DATA RECORDER (EDR)........102
MAINTAINING YOUR VEHICLE
OPENING THE HOOD..............103
ENGINE COMPARTMENT — ELECTRIC....104
FLUID CAPACITIES................106
FLUIDS, LUBES, AND GENUINE PARTS.....106
MAINTENANCE PROCEDURES.........107
MAINTENANCE SCHEDULE..........107
FUSES.......................110
TIRES — GENERAL INFORMATION......113
TIRE ROTATION RECOMMENDATIONS....116
REPLACEMENT BULBS..............117
CUSTOMER ASSISTANCE
FIAT CUSTOMER CENTER............118
ASSISTANCE FOR THE HEARING
IMPAIRED.....................118
PUBLICATIONS ORDERING...........118
REPORTING SAFETY DEFECTS IN THE
UNITED STATES..................118
MOPAR® ACCESSORIES
AUTHENTIC ACCESSORIES BY MOPAR....119
FAQ ’s
FREQUENTLY ASKED QUESTIONS.......120
INDEX......................121
TABLE OF CONTENTS
1
Page 5 of 132
WARNING!
•Pedals that cannot move freely can cause loss of vehicle control and increase the
risk of serious personal injury.
•Always make sure that objects cannot fall into the driver foot well while the ve-
hicle is moving.Objects can become trapped under the brake pedal and accelera-
tor pedal causing a loss of vehicle control.
•Failure to properly follow floor mat installation or mounting can cause interference
with the brake pedal and accelerator pedal operation causing loss of control of
the vehicle.
•Never leave children alone in a vehicle, or with access to an unlocked vehicle.Al-
lowing children to be in a vehicle unattended is dangerous for a number of rea-
sons.A child or others could be seriously or fatally injured.Children should be
warned not to touch the parking brake, brake pedal or the transmission gear se-
lector.
•Do not leave the key fob in or near the vehicle, or in a location accessible to chil-
dren.A child could operate power windows, other controls, or move the vehicle.
•Never use the ‘PARK’ position as a substitute for the parking brake.Always apply
the parking brake fully when parked to guard against vehicle movement and pos-
sible injury or damage.
•Refer to your Owner's Manual on the DVD for further details.
USE OF AFTERMARKET PRODUCTS (ELECTRONICS)
The use of aftermarket devices including cell phones, MP3 players, GPS systems, or char-
gers may affect the performance of on-board wireless features including Keyless Enter-
N-Go and Remote Start range.If you are experiencing difficulties with any of your wire-
less features, try disconnecting your aftermarket devices to see if the situation improves.If
your symptoms persist, please see an authorized dealer.
When it comes to service, remember that your authorized dealer knows your vehicle
best, has factory-trained technicians and genuine MOPAR® parts, and cares about your
satisfaction.
INTRODUCTION/WELCOME
3
Page 12 of 132
ELECTRIC VEHICLE FEATURES
Auto Park
The Auto Park feature automatically places the vehicle into PARK if there is any indication
that the driver may leave the vehicle while the drive mode indicator is in the D (DRIVE),
N (NEUTRAL) or R (REVERSE) modes.
Auto Park is enabled under the following conditions:
– READY mode (12 Volt ON and High Voltage ON).
– Vehicle speed is below 2 mph (3 km/h).
NOTE:
•Auto Park feature only occurs once per key cycle.
•Auto Park is disabled above 2 mph (3 km/h) and the drive mode range will be
maintained.
The instrument cluster will display an Auto Shift To Park message and chime once when
Auto Park action occurs.
Mode Of Operation With Key ON
Auto Park will be engaged when the drive mode is in DRIVE, NEUTRAL or REVERSE
and the following conditions are detected:
•Seat Belt is unlatched
•Brake pedal is released
•Driver's door is ajar
•Vehicle speed is below 2 mph (3 km/h)
Mode Of Operation With Key OFF
Auto Park will engage as you turn off the key while in gear/neutral and speed is less than
2 mph (3 km/h).
Audible Pedestrian Warning System
Your vehicle is equipped with an Audible Pedestrian Warning System.The Audible Pedes-
trian Warning System uses distinct sounds to alert pedestrians that your vehicle is ap-
proaching.
The audible warning system uses an in-car sound synthesizer with a speaker located in
the underhood compartment.The warning system is automatically activated when select-
ing D (DRIVE) or R (REVERSE).
In D (DRIVE) range, the system will remain active until the vehicle reaches a speed of
approximately 22 mph (35.5 km/h).At approximately 22 mph (35.5 km/h) the warning
system is deactivated and will automatically be active when the vehicle returns to approxi-
mately 20 mph (32 km/h).
GETTING STARTED
10
Page 21 of 132
STARTING YOUR 500e
•Before starting your vehicle, adjust your seat, adjust both inside and outside mirrors,
and fasten your seat belts.
WARNING!
•Never leave children alone in a vehicle, or with access to an unlocked vehicle.
•Allowing children to be in a vehicle unattended is dangerous for a number of rea-
sons.A child or others could be seriously or fatally injured.Children should be
warned not to touch the parking brake, brake pedal or the transmission gear se-
lector buttons.
•Do not leave the key fob in or near the vehicle (or in a location accessible to chil-
dren).A child could operate power windows, other controls, or move the vehicle.
NOTE:
Make sure the EVSE is not plugged into the vehicle.
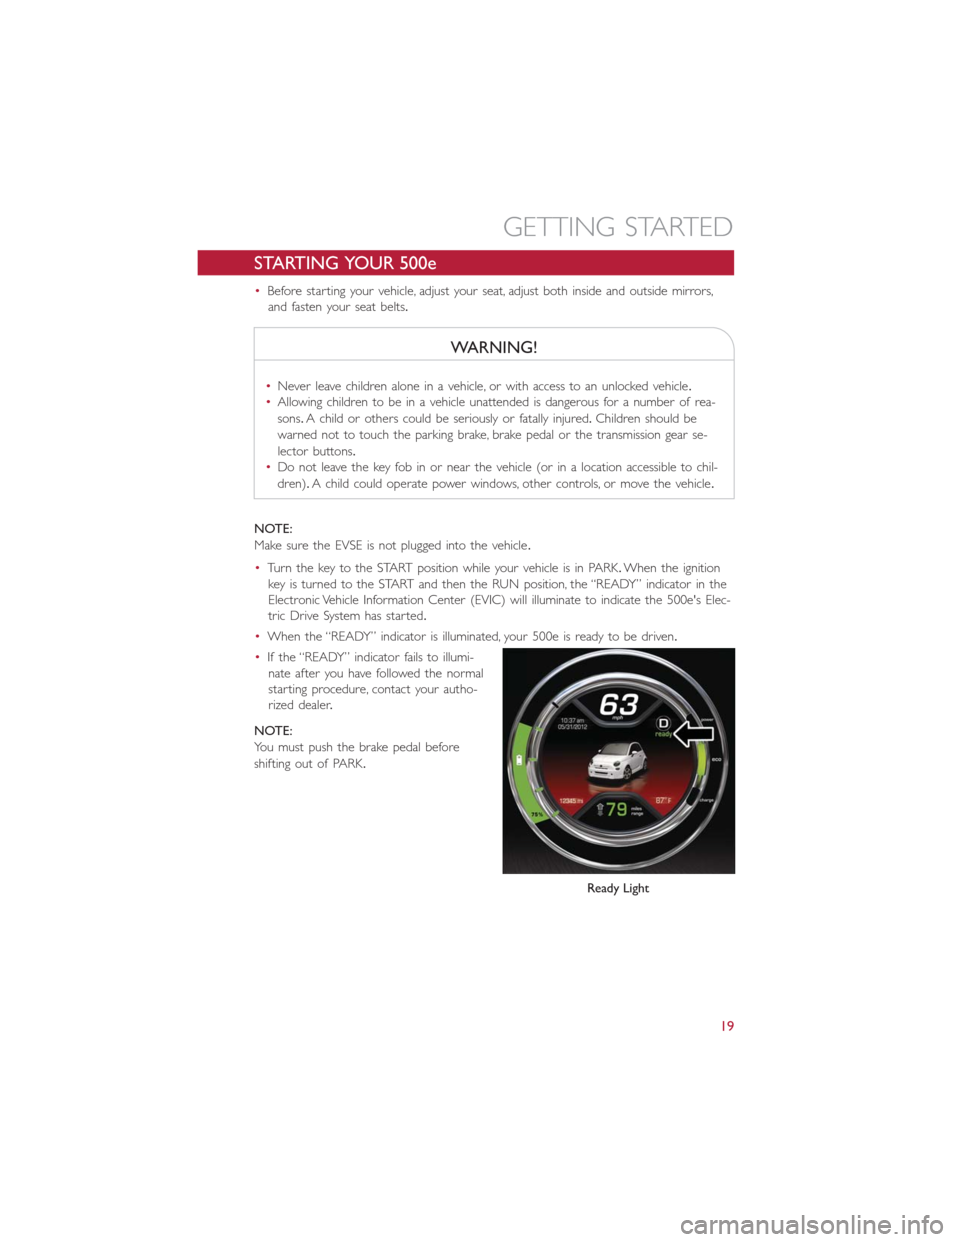
•Turn the key to the START position while your vehicle is in PARK.When the ignition
key is turned to the START and then the RUN position, the “READY” indicator in the
Electronic Vehicle Information Center (EVIC) will illuminate to indicate the 500e's Elec-
tric Drive System has started.
•When the “READY” indicator is illuminated, your 500e is ready to be driven.
•If the “READY” indicator fails to illumi-
nate after you have followed the normal
starting procedure, contact your autho-
rized dealer.
NOTE:
You must push the brake pedal before
shifting out of PARK.
Ready Light
GETTING STARTED
19
Page 22 of 132
KEY FOB
Locking And Unlocking The Doors
And Liftgate
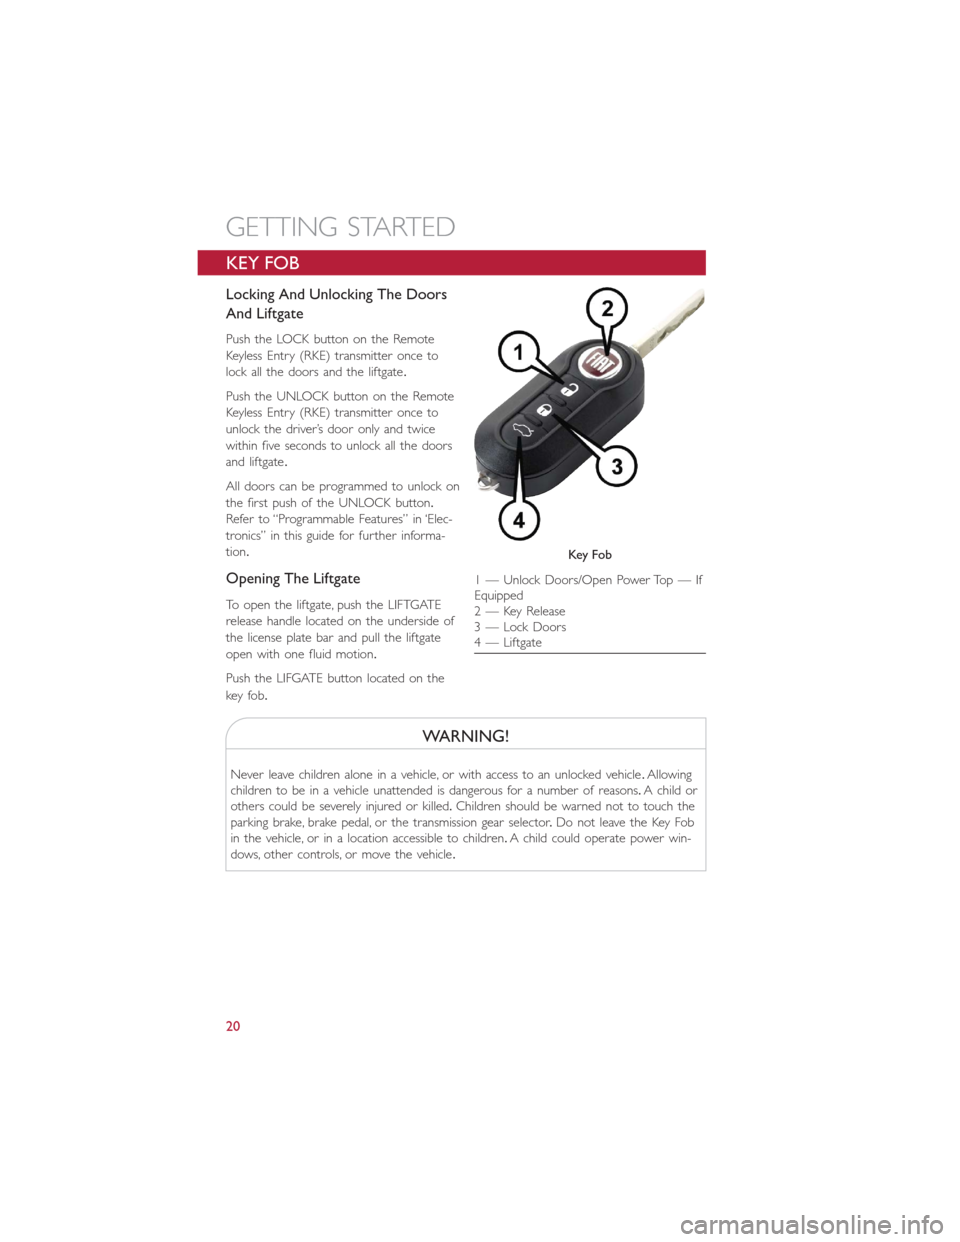
Push the LOCK button on the Remote
Keyless Entry (RKE) transmitter once to
lock all the doors and the liftgate.
Push the UNLOCK button on the Remote
Keyless Entry (RKE) transmitter once to
unlock the driver’s door only and twice
within five seconds to unlock all the doors
and liftgate.
All doors can be programmed to unlock on
the first push of the UNLOCK button.
Refer to “Programmable Features” in ‘Elec-
tronics” in this guide for further informa-
tion.
Opening The Liftgate
To open the liftgate, push the LIFTGATE
release handle located on the underside of
the license plate bar and pull the liftgate
open with one fluid motion.
Push the LIFGATE button located on the
key fob.
WARNING!
Never leave children alone in a vehicle, or with access to an unlocked vehicle.Allowing
children to be in a vehicle unattended is dangerous for a number of reasons.A child or
others could be severely injured or killed.Children should be warned not to touch the
parking brake, brake pedal, or the transmission gear selector.Do not leave the Key Fob
in the vehicle, or in a location accessible to children.A child could operate power win-
dows, other controls, or move the vehicle.
Key Fo b
1 — Unlock Doors/Open Power Top — If
Equipped
2 — Key Release
3 — Lock Doors
4 — Liftgate
GETTING STARTED
20
Page 23 of 132
VEHICLE SECURITY ALARM
The Vehicle Security Alarm monitors the vehicle doors for unauthorized entry and the
ignition for unauthorized operation.If something triggers the alarm, the Vehicle Security
Alarm will provide the following audible and visible signals: the horn will pulse, the park
lamps and/or turn signals will flash, and the Vehicle Security Light in the instrument cluster
will flash.
To Arm The System:
Push the Key Fob LOCK button.
To Disarm The System:
Push the Key Fob UNLOCK button or cycle the ignition to the ON/RUN position.
The Vehicle Security Alarm is designed to protect your vehicle.However, you can create
conditions where the Vehicle Security Alarm will give you a false alarm.If one of the pre-
viously described arming sequences has occurred, the Vehicle Security Alarm will arm re-
gardless of whether you are in the vehicle or not.If you remain in the vehicle and open
a door, the alarm will sound.If this occurs, disarm the Vehicle Security Alarm.
If the Vehicle Security Alarm is armed and the battery becomes disconnected, the Vehicle
Security Alarm will remain armed when the battery is reconnected.The exterior lights
will flash, and the horn will sound.If this occurs, disarm the Vehicle Security Alarm.
POWER DOOR LOCKS
The vehicles power door locks are activated by moving the inside door handles.
Push or pull the driver’s door handle to lock or unlock the doors and liftgate when the
doors are closed.
OCCUPANT RESTRAINT SYSTEMS
Some of the most important safety features in your vehicle are the restraint systems:
•Seat Belt Systems
•Supplemental Restraint Systems (SRS) Air Bags
•Child Restraints
GETTING STARTED
21
Page 42 of 132
LIGHTS
MULTIFUNCTION LEVER
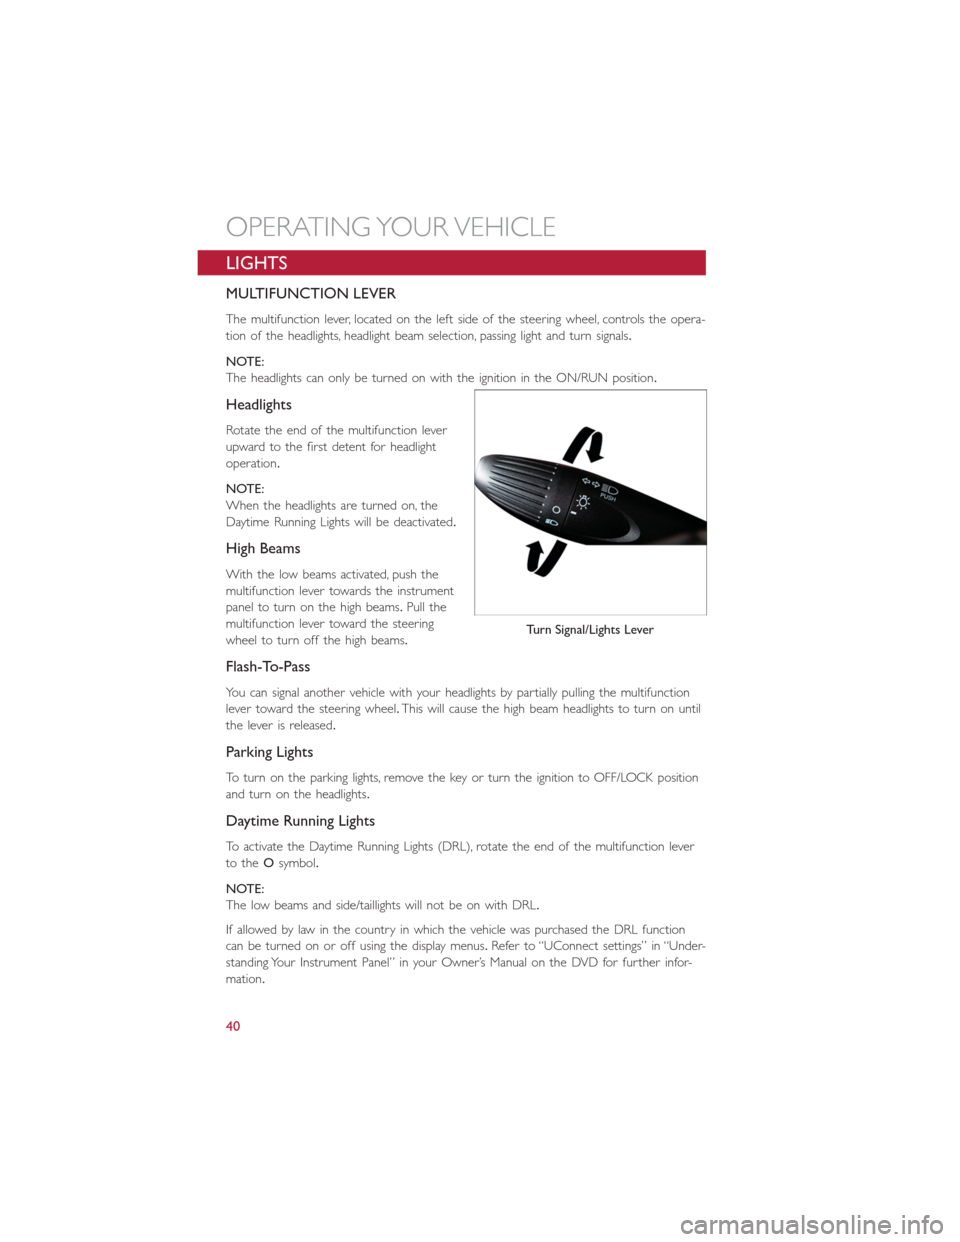
The multifunction lever, located on the left side of the steering wheel, controls the opera-
tion of the headlights, headlight beam selection, passing light and turn signals.
NOTE:
The headlights can only be turned on with the ignition in the ON/RUN position.
Headlights
Rotate the end of the multifunction lever
upward to the first detent for headlight
operation.
NOTE:
When the headlights are turned on, the
Daytime Running Lights will be deactivated.
High Beams
With the low beams activated, push the
multifunction lever towards the instrument
panel to turn on the high beams.Pull the
multifunction lever toward the steering
wheel to turn off the high beams.
Flash-To-Pass
You can signal another vehicle with your headlights by partially pulling the multifunction
lever toward the steering wheel.This will cause the high beam headlights to turn on until
the lever is released.
Parking Lights
To turn on the parking lights, remove the key or turn the ignition to OFF/LOCK position
and turn on the headlights.
Daytime Running Lights
To activate the Daytime Running Lights (DRL), rotate the end of the multifunction lever
to theOsymbol.
NOTE:
The low beams and side/taillights will not be on with DRL.
If allowed by law in the country in which the vehicle was purchased the DRL function
can be turned on or off using the display menus.Refer to “UConnect settings” in “Under-
standing Your Instrument Panel” in your Owner’s Manual on the DVD for further infor-
mation.
Turn Signal/Lights Lever
OPERATING YOUR VEHICLE
40
Page 43 of 132
Turn Signals
Push the multifunction lever upward to signal a right turn or downward to signal a left
turn.The corresponding indicator in the instrument cluster will blink to indicate the op-
eration of the turn signal.
NOTE:
The indicators will automatically turn off when the turn has been completed and the
steering wheel is returned to a straight position.
Lane Change Assist
Tap the lever up or down once, without moving beyond the detent, and the turn signal
(right or left) will flash three times then automatically turn off.
Follow Me Home/Headlight Delay
When this feature is selected the driver can choose to have the headlights remain on for
a preset period of time.
Activation
Remove the key or turn the ignition to the OFF/LOCK position, and pull the multifunc-
tion lever toward the steering wheel, within two minutes.Each time the lever is pulled,
the activation of the lights will be extended by 30 seconds.The activation of the lights
can be extended to a maximum of 210 seconds.
Deactivation
Pull the multifunction lever toward the steering wheel and hold it for more than two
seconds.
Interior Lights
The interior light switches are located in the overhead console.The interior lights can be
set to three different positions (Off/Left Position, Center Position, On/Right Position).
Using the switch on the left overhead, push the switch to the right from its center posi-
tion and the lights are always on.Push the switch to the left from its center position and
the lights are always off.Leave the switch in the center position, and the lights are turned
on and off when the doors are opened or closed.The switch on the right side of the
overhead console controls the map or reading function of the lights.Push the switch to
the right to turn on the right light and push the switch to the left to turn on the left
light.
CAUTION!
Before getting out of the vehicle be sure that the switch is in the center position or
that the lights are off to avoid draining the battery.
OPERATING YOUR VEHICLE
41
Page 44 of 132
Interior Light Timing (Center Position)
There are four different modes of operation that can be activated in this position:
•When one door is opened a three minute timer is activated.
•When the key is removed from the ignition (within two minutes of the ignition being
turned off ), a 10 second timer is activated.
•When the doors are unlocked with the Key Fob a 10 second timer is activated.
•When the doors are locked with the Key Fob the lights will turn off.
Interior Light Timing (On/Right Position)
•When all doors are closed a 15 minute timer is activated.
NOTE:
The timer is deactivated when the key is moved into the ON/RUN position.
Fog Lights — If Equipped
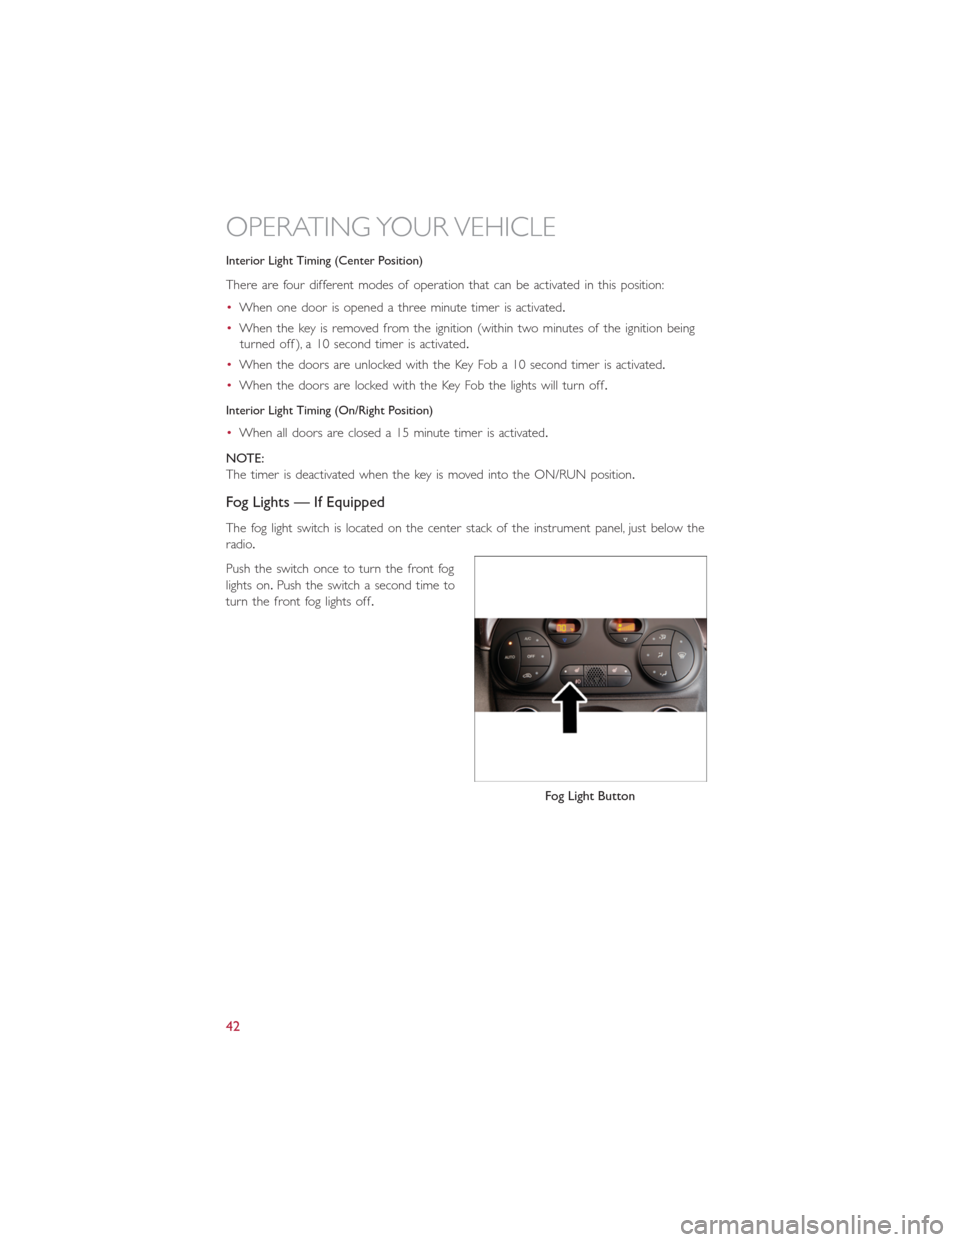
The fog light switch is located on the center stack of the instrument panel, just below the
radio.
Push the switch once to turn the front fog
lights on.Push the switch a second time to
turn the front fog lights off.
Fog Light Button
OPERATING YOUR VEHICLE
42
Page 52 of 132
POWER SUNROOF
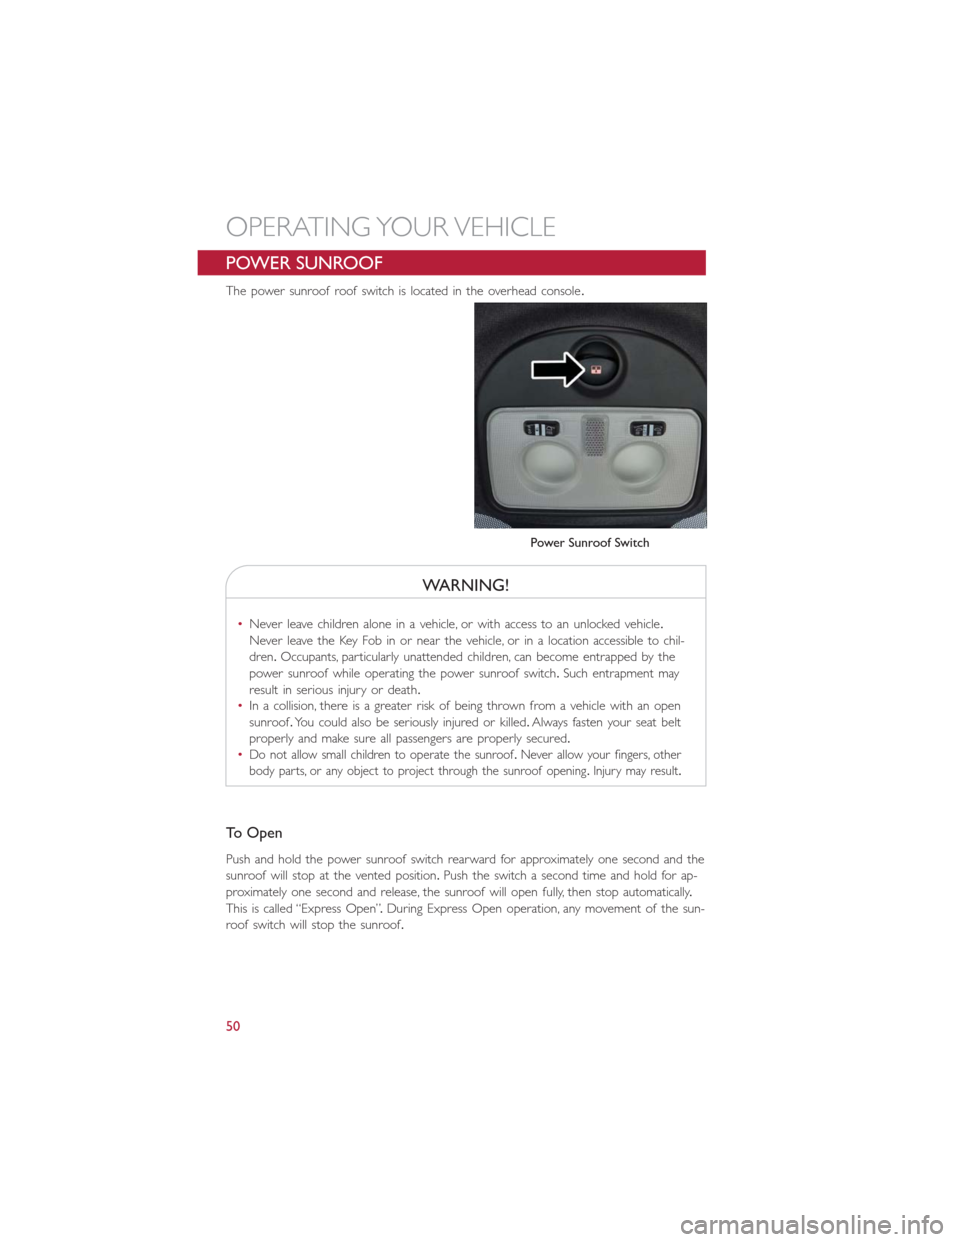
The power sunroof roof switch is located in the overhead console.
WARNING!
•Never leave children alone in a vehicle, or with access to an unlocked vehicle.
Never leave the Key Fob in or near the vehicle, or in a location accessible to chil-
dren.Occupants, particularly unattended children, can become entrapped by the
power sunroof while operating the power sunroof switch.Such entrapment may
result in serious injury or death.
•In a collision, there is a greater risk of being thrown from a vehicle with an open
sunroof.You could also be seriously injured or killed.Always fasten your seat belt
properly and make sure all passengers are properly secured.
•
Do not allow small children to operate the sunroof.Never allow your fingers, other
body parts, or any object to project through the sunroof opening.Injury may result.
To Open
Push and hold the power sunroof switch rearward for approximately one second and the
sunroof will stop at the vented position.Push the switch a second time and hold for ap-
proximately one second and release, the sunroof will open fully, then stop automatically.
This is called “Express Open”.During Express Open operation, any movement of the sun-
roof switch will stop the sunroof.
Power Sunroof Switch
OPERATING YOUR VEHICLE
50