tow FIAT 500L 2014 2.G User Guide
[x] Cancel search | Manufacturer: FIAT, Model Year: 2014, Model line: 500L, Model: FIAT 500L 2014 2.GPages: 116, PDF Size: 4.53 MB
Page 3 of 116
INTRODUCTION/WELCOME
WELCOME FROM FIAT...............2
CONTROLS AT A GLANCE
DRIVER COCKPIT..................4
INSTRUMENT CLUSTER...............6
GETTING STARTED
KEY FOB.......................8
VEHICLE SECURITY ALARM............8
POWER DOOR LOCKS...............9
SEAT BELT......................10
SUPPLEMENTAL RESTRAINT SYSTEM (SRS) —
AIR BAGS......................11
CHILD RESTRAINTS................12
FRONT SEATS....................16
REAR SEATS.....................17
HEATED SEATS...................18
TILT/TELESCOPING STEERING COLUMN...18
OPERATING YOUR VEHICLE
ENGINE BREAK-IN RECOMMENDATIONS...19
TURN SIGNAL/LIGHTS/HIGH BEAM LEVER...19
WIPER/WASHER LEVER..............21
SPEED CONTROL..................22
MANUAL CLIMATE CONTROLS.........24
AUTOMATIC TEMPERATURE CONTROLS
(ATC).........................25
REAR PARK ASSIST.................26
POWER SUNROOF.................26
WIND BUFFETING.................27
EURO TWIN CLUTCH SIX-SPEED
TRANSMISSION...................27
ADDING FUEL...................30
ELECTRONIC STABILITY CONTROL (ESC)...31
ELECTRONICSYOUR VEHICLE'S SOUND SYSTEM.......32
IDENTIFYING YOUR RADIO............34
Uconnect® 5.0...................35
Uconnect® 6.5N..................45
STEERING WHEEL AUDIO CONTROLS.....62
ELECTRONIC VEHICLE INFORMATION
CENTER (EVIC)...................62
PROGRAMMABLE FEATURES...........63UNIVERSAL GARAGE DOOR OPENER
(HomeLink®)....................64
POWER INVERTER.................66
POWER OUTLETS.................67
UTILITYTRAILER TOWING.................68
RECREATIONAL TOWING (BEHIND
MOTORHOME, ETC.)...............68
WHAT TO DO IN EMERGENCIES24-HOUR ROADSIDE ASSISTANCE........69
INSTRUMENT CLUSTER WARNING LIGHTS..69
IF YOUR ENGINE OVERHEATS..........74
JACKING AND TIRE CHANGING.........75
TIREFIT KIT......................81
JUMP-STARTING PROCEDURE..........86
SHIFT LEVER OVERRIDE..............89
TOWING A DISABLED VEHICLE.........90
FREEING A STUCK VEHICLE............91
EVENT DATA RECORDER (EDR).........92
CAP-LESS FUEL FILL FUNNEL...........92
MAINTAINING YOUR VEHICLEOPENING THE HOOD..............93
ENGINE COMPARTMENT.............94
FLUIDS AND CAPACITIES.............95
MAINTENANCE SCHEDULE...........96
FUSES........................100
TIRE PRESSURES.................103
WHEEL AND WHEEL TRIM CARE.......104
EXTERIOR BULBS.................104
CONSUMER ASSISTANCEFIAT CUSTOMER CENTER............105
FIAT CANADA CUSTOMER CENTER......105
ASSISTANCE FOR THE HEARING IMPAIRED...105
PUBLICATIONS ORDERING...........105
REPORTING SAFETY DEFECTS IN THE
UNITED STATES..................106
MOPAR ACCESSORIESAUTHENTIC ACCESSORIES BY MOPAR®...107
FAQ ’sFREQUENTLY ASKED QUESTIONS.......108
INDEX......................109
TABLE OF CONTENTS
1
Page 20 of 116
HEATED SEATS
Front Heated Seats
The controls for the front heated seats are located on the outboard side of the seat.
•Press the switch once to turn on the heated seat.
•Press the switch a second time to turn off the heated seat.
WARNING!
•Persons who are unable to feel pain to the skin because of advanced age, chronic
illness, diabetes, spinal cord injury, medication, alcohol use, exhaustion or other
physical conditions must exercise care when using the seat heater.It may cause
burns even at low temperatures, especially if used for long periods of time.
•Do not place anything on the seat that insulates against heat, such as a blanket or
cushion.This may cause the seat heater to overheat.Sitting in a seat that has been
overheated could cause serious burns due to the increased surface temperature of
the seat.
TILT/TELESCOPING STEERING COLUMN
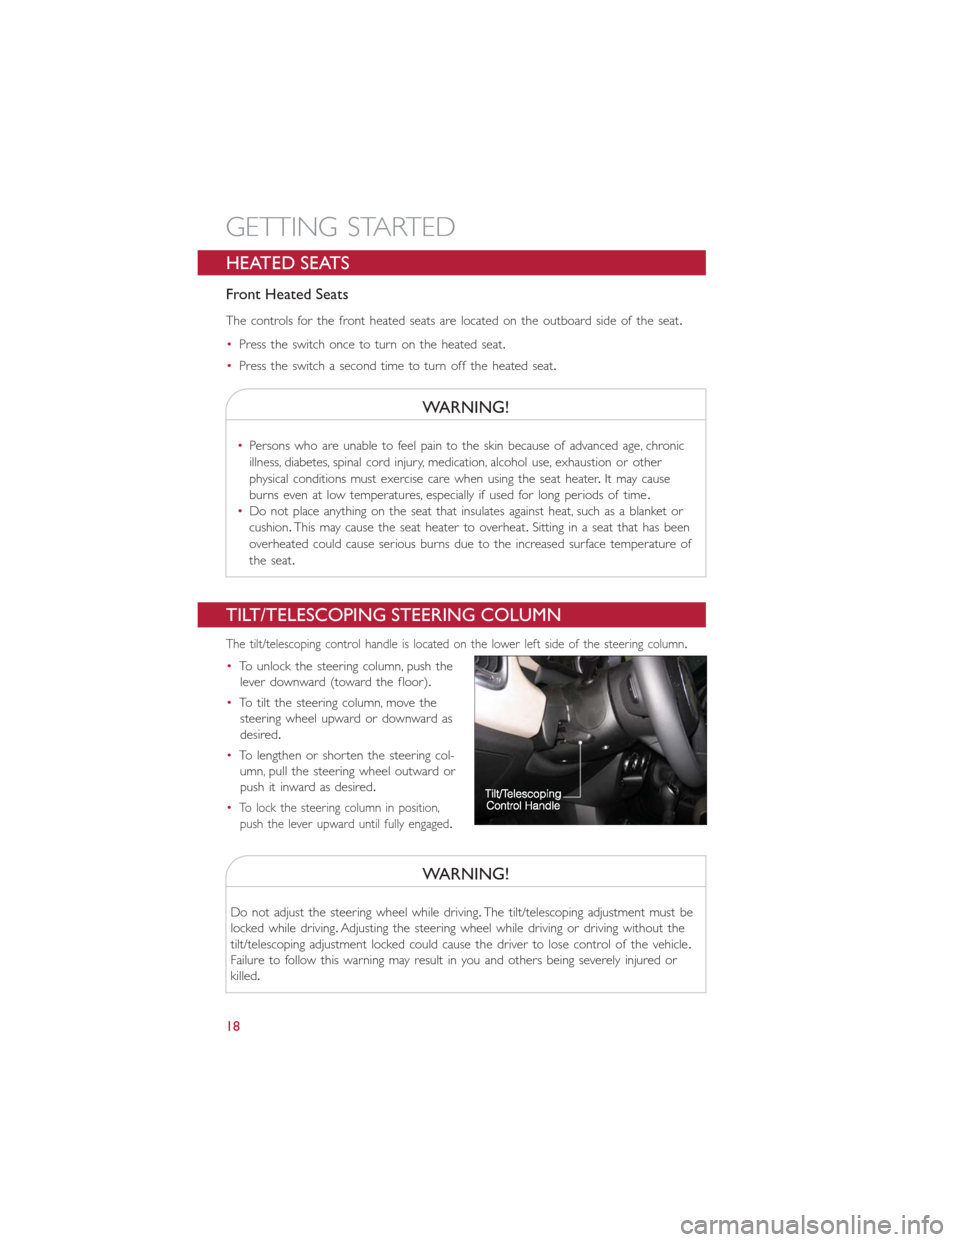
The tilt/telescoping control handle is located on the lower left side of the steering column.
•To unlock the steering column, push the
lever downward (toward the floor).
•To tilt the steering column, move the
steering wheel upward or downward as
desired.
•To lengthen or shorten the steering col-
umn, pull the steering wheel outward or
push it inward as desired.
•
To lock the steering column in position,
push the lever upward until fully engaged.
WARNING!
Do not adjust the steering wheel while driving.The tilt/telescoping adjustment must be
locked while driving.Adjusting the steering wheel while driving or driving without the
tilt/telescoping adjustment locked could cause the driver to lose control of the vehicle.
Failure to follow this warning may result in you and others being severely injured or
killed.
GETTING STARTED
18
Page 22 of 116
High Beams
•Pull the lever rearward to activate the high beams.
•A high beam symbol will illuminate in the cluster to indicate the high beams are on.
NOTE:
For safe driving, turn off the high beams when oncoming traffic is present to prevent
headlight glare and as a courtesy to other motorists.
Flash To Pass
•Pull the lever toward you to activate the high beams.The high beams will remain on
until the lever is released.
Headlight Delay (Follow Me Home)
•Within two minutes of the ignition switch being turned to the OFF/LOCK position or
the ignition key being removed from the ignition, pull the turn signal lever toward the
steering wheel.
•Each movement of the lever toward the steering wheel will increase the illumination
period by 30 seconds, up to a maximum of 210 seconds.
•To deactivate, pull the multifunction lever toward the steering wheel and hold it for
more than two seconds.
NOTE:
Activation of Follow Me Home is only enabled once per key cycle and the steps outlined
above must be repeated each time you want to activate it.
Fog Lights
•Push the fog light button, located on the center stack of the instrument panel just be-
low the radio, once to turn on the fog lights.
•Push the button a second time to turn the fog lights off.
OPERATING YOUR VEHICLE
20
Page 23 of 116
WIPER/WASHER LEVER
Front Wipers
Intermittent, Low And High Operation
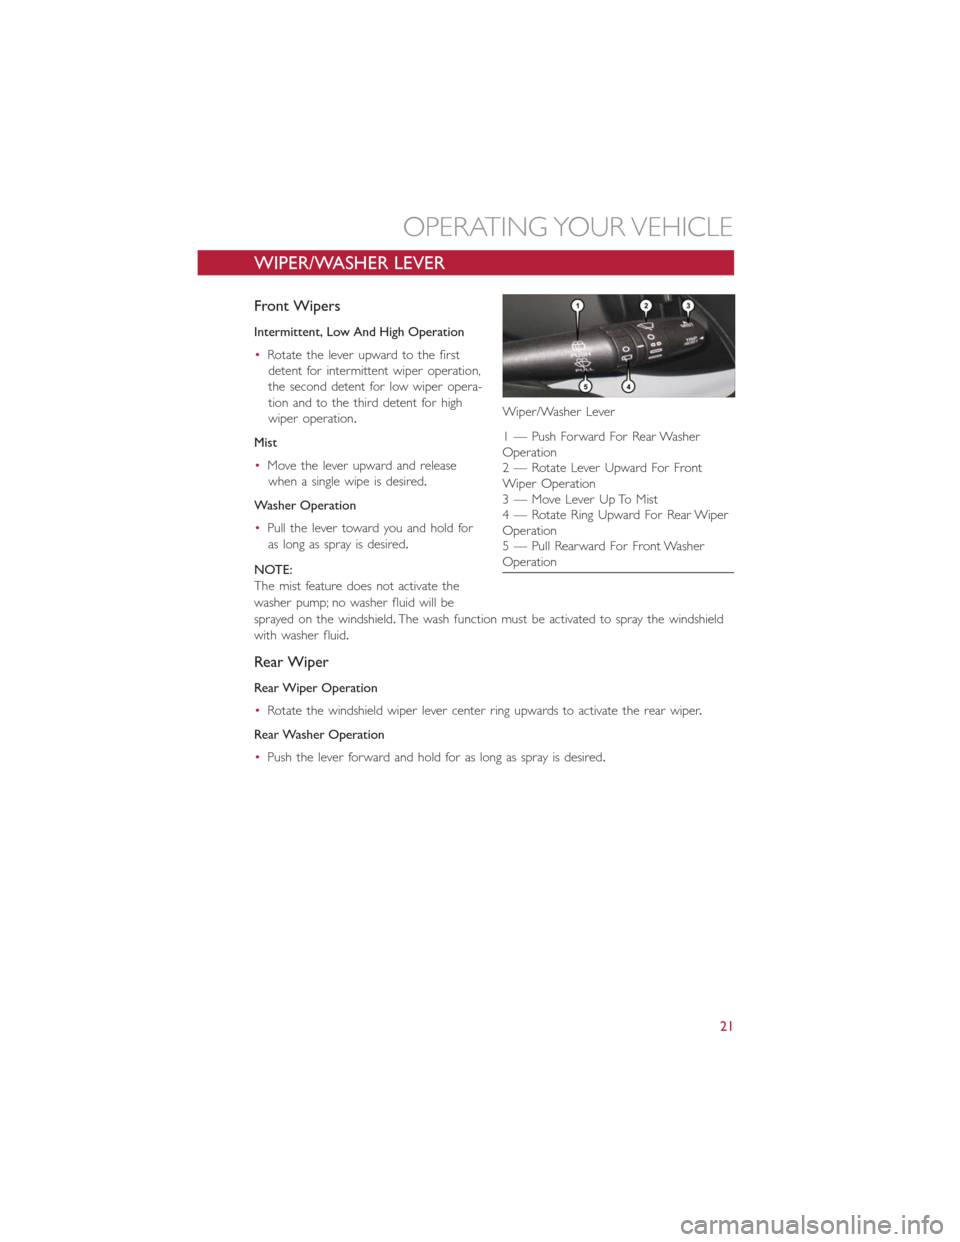
•Rotate the lever upward to the first
detent for intermittent wiper operation,
the second detent for low wiper opera-
tion and to the third detent for high
wiper operation.
Mist
•Move the lever upward and release
when a single wipe is desired.
Washer Operation
•Pull the lever toward you and hold for
as long as spray is desired.
NOTE:
The mist feature does not activate the
washer pump; no washer fluid will be
sprayed on the windshield.The wash function must be activated to spray the windshield
with washer fluid.
Rear Wiper
Rear Wiper Operation
•Rotate the windshield wiper lever center ring upwards to activate the rear wiper.
Rear Washer Operation
•Push the lever forward and hold for as long as spray is desired.
Wiper/Washer Lever
1 — Push Forward For Rear Washer
Operation
2 — Rotate Lever Upward For Front
Wiper Operation
3 — Move Lever Up To Mist
4 — Rotate Ring Upward For Rear Wiper
Operation
5 — Pull Rearward For Front Washer
Operation
OPERATING YOUR VEHICLE
21
Page 28 of 116
REAR PARK ASSIST
If an object is detected behind the rear bumper while the vehicle is in REVERSE, a chime
will sound.The chime rate will change depending on the distance of the object, getting
faster as the object gets closer to the bumper.The chime will become continuous when
the distance between the vehicle and the obstacle is less than 12 inches (30 cm).
POWER SUNROOF
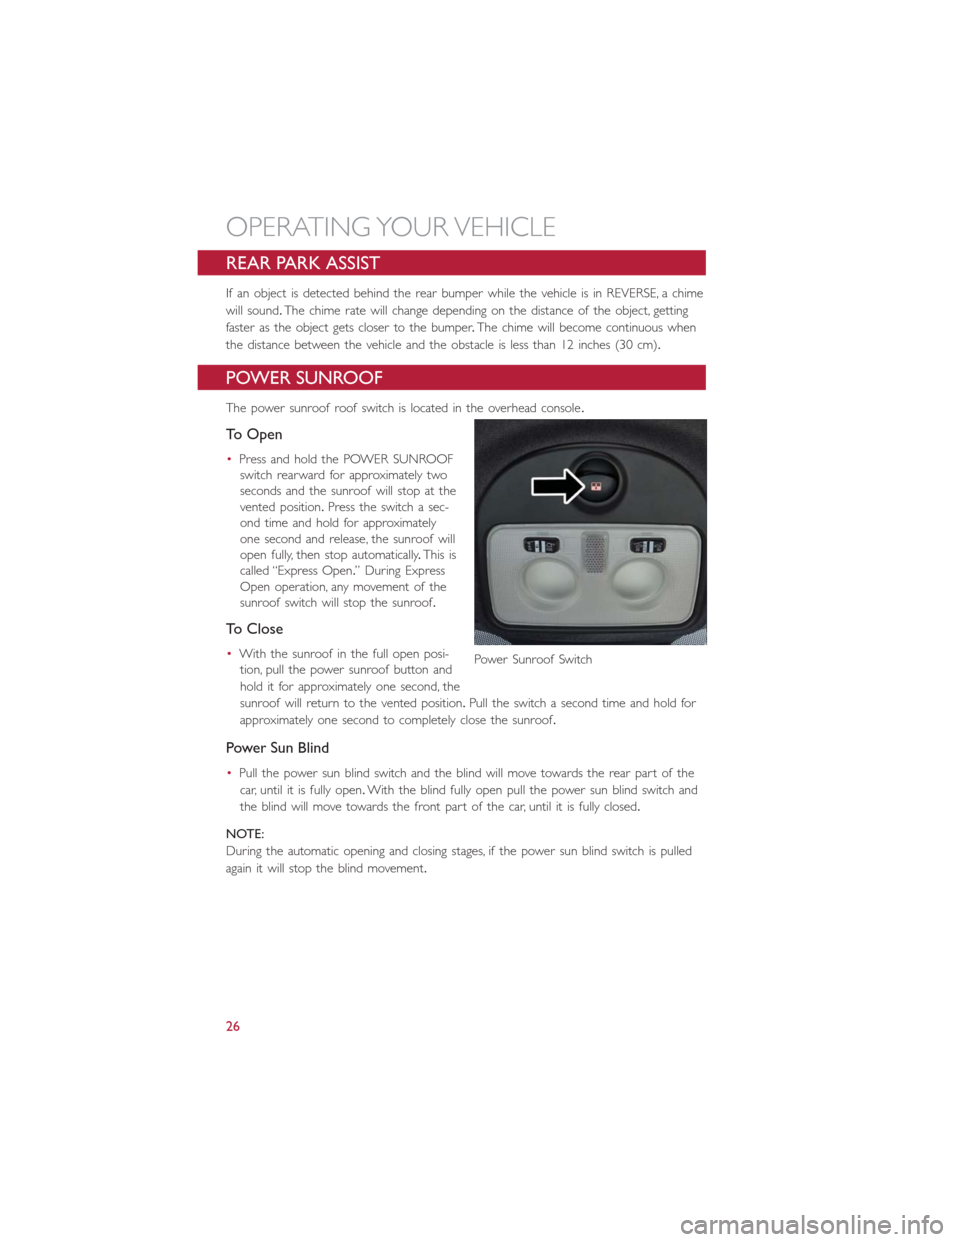
The power sunroof roof switch is located in the overhead console.
To Open
•Press and hold the POWER SUNROOF
switch rearward for approximately two
seconds and the sunroof will stop at the
vented position.Press the switch a sec-
ond time and hold for approximately
one second and release, the sunroof will
open fully, then stop automatically.This is
called “Express Open.” During Express
Open operation, any movement of the
sunroof switch will stop the sunroof.
To Close
•With the sunroof in the full open posi-
tion, pull the power sunroof button and
hold it for approximately one second, the
sunroof will return to the vented position.Pull the switch a second time and hold for
approximately one second to completely close the sunroof.
Power Sun Blind
•Pull the power sun blind switch and the blind will move towards the rear part of the
car, until it is fully open.With the blind fully open pull the power sun blind switch and
the blind will move towards the front part of the car, until it is fully closed.
NOTE:
During the automatic opening and closing stages, if the power sun blind switch is pulled
again it will stop the blind movement.
Power Sunroof Switch
OPERATING YOUR VEHICLE
26
Page 42 of 116
Making A Phone Call
•Press the Uconnect® Phone button.
•After the BEEP, say “dial” then the number (or “call” then the name as listed in your
phone; see Phonebook).
NOTE:
You can also initiate a call by using the touchscreen on the Phone main screen.
Receiving A Call — Accept (And End)
•When an incoming call rings/is announced on Uconnect®, press the Phone button
.
•To end a call, press the Hang Up or Phone button.
Mute (Or Unmute) Microphone During Call
•During a call, press the “Mute” button on the touchscreen on the Phone main screen
to mute and unmute the call.
Transfer Ongoing Call Between Handset And Vehicle
•During an on-going call, touch the “Transfer” soft-key on the Phone main screen to
transfer an on-going call between handset and vehicle.
Common Phone Commands (Examples)
•“Call John Smith”
•“Call John Smith mobile”
•“Dial 1 248 555 1212”
•“Call Emergency”
•“Call Towing Assistance”
•“Redial”
Phonebook
•Uconnect® radios automatically downloads your phonebook from your paired phone,
if this feature is supported by your phone.Entries are updated each time that the
phone is connected.If your phone book entries do not appear, check the settings on
your phone.Some phones require you to enable this feature manually.
•Your phonebook can be browsed on your radio screen, but editing can only be done
on your phone.To browse, touch the “Phone” soft-key, then the “Phonebook” soft-key.
•Favorite phonebook entries can be saved as Favorites for quicker access.Favorites are
shown at the top of your main phone screen.
ELECTRONICS
40
Page 58 of 116
Select The Mobile Phone's Priority Level
•When the pairing process has successfully completed, the system will prompt you to
choose whether or not this is your favorite phone.Selecting Yes will make this phone
the highest priority.This phone will take precedence over other paired phones within
range.Only one phone can be paired at a time.
•You are now ready to make hands-free calls.Press the Uconnect® Phone button on
your steering wheel to begin.
Making A Phone Call
•Press the Uconnect® Phone button.
•After the BEEP, say “dial” then the number (or “call” then the name as listed in your
phone; see Phonebook).
NOTE:
You can also initiate a call by using the touchscreen on the Phone main screen.
Receiving A Call — Accept (And End)
•When an incoming call rings/is announced on Uconnect®, press the Phone button
.
•To end a call, press the Hang Up or Phone button.
Mute (Or Unmute) Microphone During Call
•During a call, touch the “Mute” soft-key on the Phone main screen to mute and
unmute the microphone.
Transfer Ongoing Call Between Handset And Vehicle
•During an on-going call, touch the “Transfer” soft-key on the Phone main screen to
transfer an on-going call between handset and vehicle.
Common Phone Commands (Examples)
•“Call John Smith”
•“Call John Smith mobile”
•“Dial 1 248 555 1212”
•“Call Emergency”
•“Call Towing Assistance”
•“Redial”
ELECTRONICS
56
Page 70 of 116
TRAILER TOWING
•Trailer towing with this vehicle is not recommended.
RECREATIONAL TOWING (BEHIND MOTORHOME, ETC.)
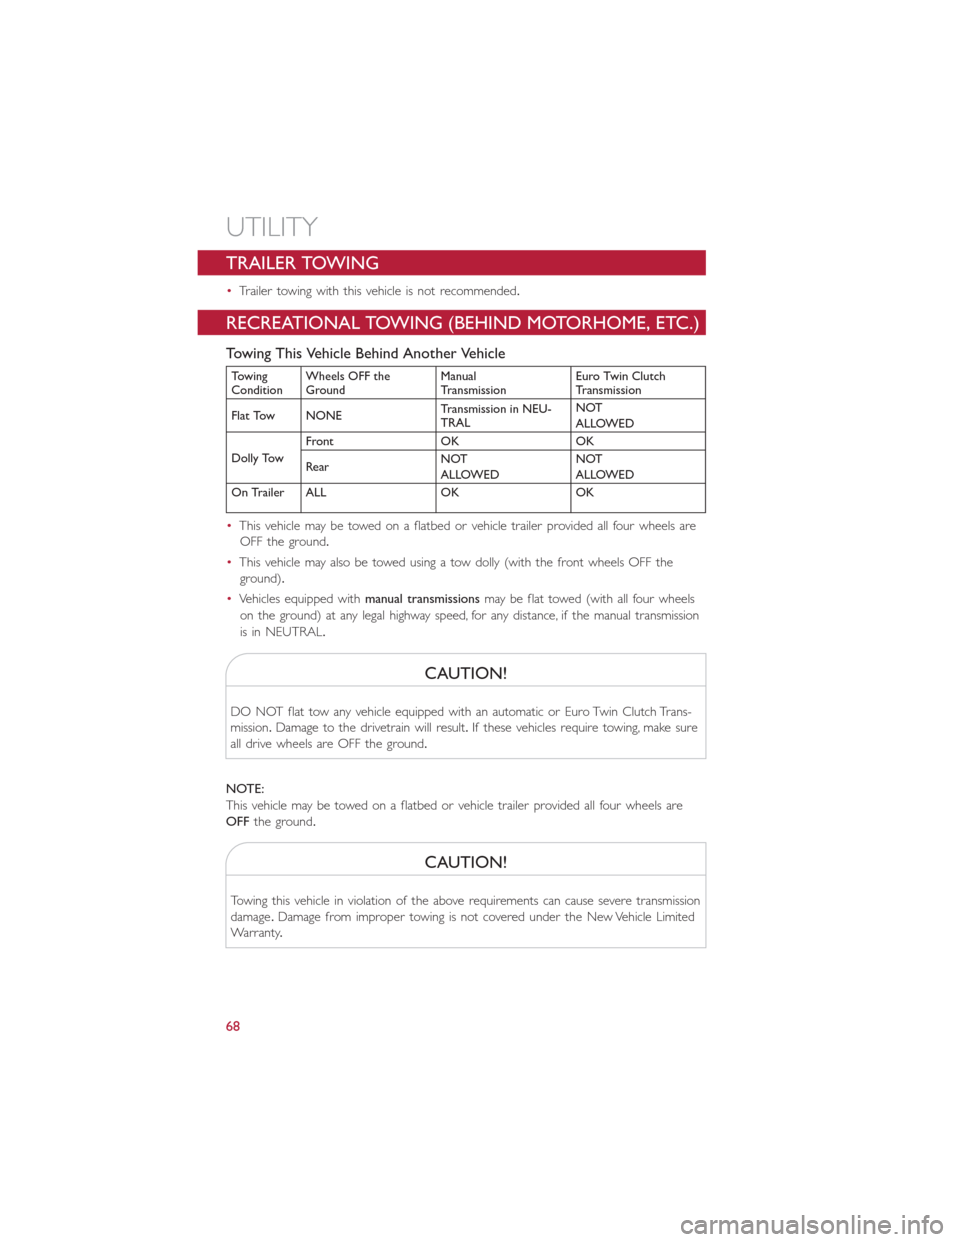
Towing This Vehicle Behind Another Vehicle
Towing
ConditionWheels OFF the
GroundManual
TransmissionEuro Twin Clutch
Transmission
Flat Tow NONETransmission in NEU-
TRALNOT
ALLOWED
Dolly TowFront OK OK
RearNOT
ALLOWEDNOT
ALLOWED
On Trailer ALL OK OK
•This vehicle may be towed on a flatbed or vehicle trailer provided all four wheels are
OFF the ground.
•This vehicle may also be towed using a tow dolly (with the front wheels OFF the
ground).
•Vehicles equipped withmanual transmissionsmay be flat towed (with all four wheels
on the ground) at any legal highway speed, for any distance, if the manual transmission
is in NEUTRAL.
CAUTION!
DO NOT flat tow any vehicle equipped with an automatic or Euro Twin Clutch Trans-
mission.Damage to the drivetrain will result.If these vehicles require towing, make sure
all drive wheels are OFF the ground.
NOTE:
This vehicle may be towed on a flatbed or vehicle trailer provided all four wheels are
OFFthe ground.
CAUTION!
Towing this vehicle in violation of the above requirements can cause severe transmission
damage.Damage from improper towing is not covered under the New Vehicle Limited
Warranty.
UTILITY
68
Page 71 of 116
24-HOUR ROADSIDE ASSISTANCE
•If your FIAT 500 L requires jump start assistance, out of gas/fuel delivery, tire service,
lockout service or towing due to a defect covered under the Basic Limited Warranty,
dial toll-free 1-888-242-6342 or 1-800-363-4869 for Canadian Residents.See your
Warranty booklet for further details.
•Provide your name, vehicle identification number and license plate number.
•Provide your location, including telephone number, from which you are calling.
•Briefly describe the nature of the problem and answer a few simple questions.
•You will be given the name of the service provider and an estimated time of arrival.
If you feel you are in an “unsafe situation,” please let us know.With your consent,
we will contact local police or safety authorities.
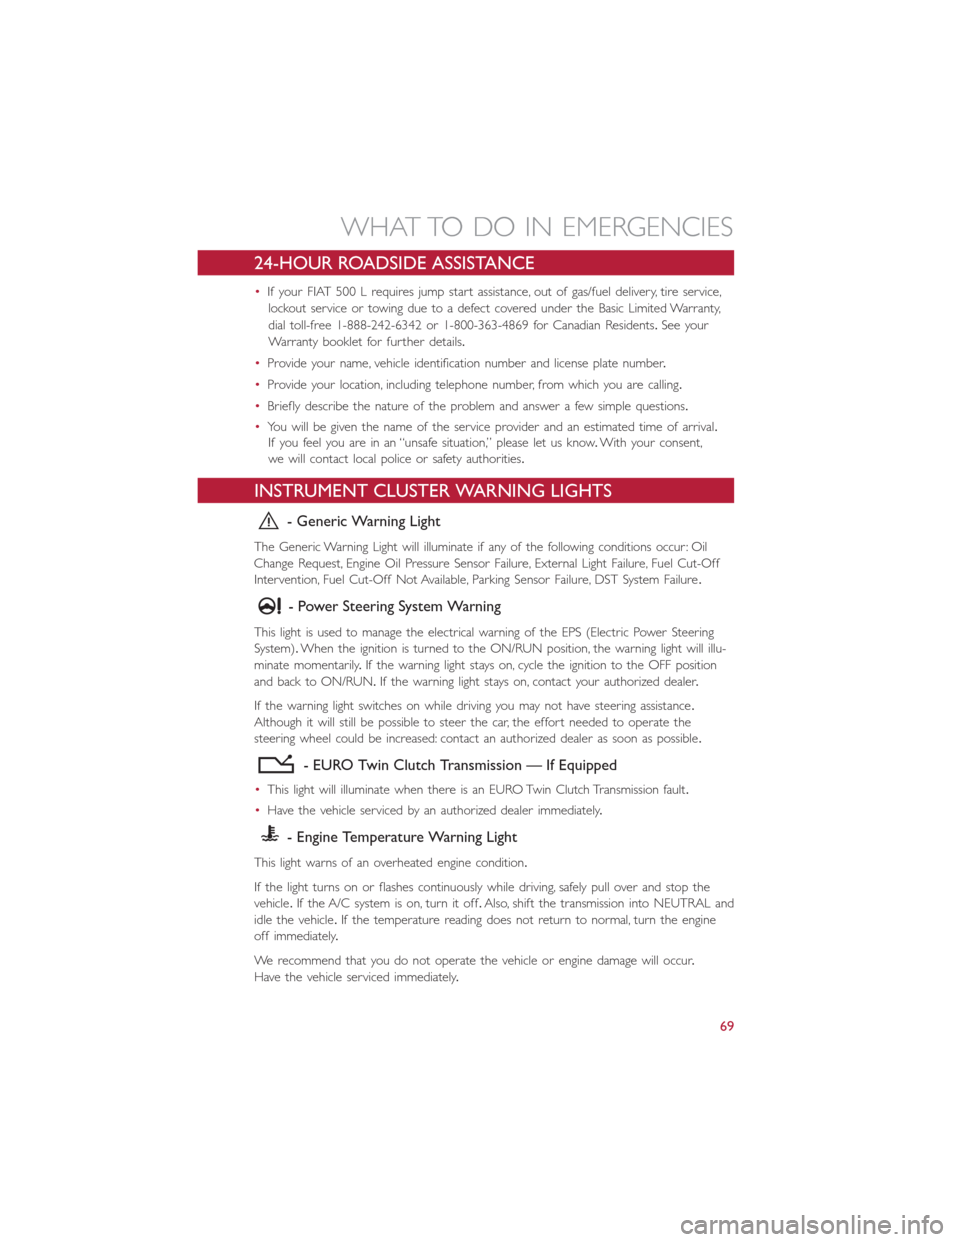
INSTRUMENT CLUSTER WARNING LIGHTS
- Generic Warning Light
The Generic Warning Light will illuminate if any of the following conditions occur: Oil
Change Request, Engine Oil Pressure Sensor Failure, External Light Failure, Fuel Cut-Off
Intervention, Fuel Cut-Off Not Available, Parking Sensor Failure, DST System Failure.
- Power Steering System Warning
This light is used to manage the electrical warning of the EPS (Electric Power Steering
System).When the ignition is turned to the ON/RUN position, the warning light will illu-
minate momentarily.If the warning light stays on, cycle the ignition to the OFF position
and back to ON/RUN.If the warning light stays on, contact your authorized dealer.
If the warning light switches on while driving you may not have steering assistance.
Although it will still be possible to steer the car, the effort needed to operate the
steering wheel could be increased: contact an authorized dealer as soon as possible.
- EURO Twin Clutch Transmission — If Equipped
•This light will illuminate when there is an EURO Twin Clutch Transmission fault.
•Have the vehicle serviced by an authorized dealer immediately.
- Engine Temperature Warning Light
This light warns of an overheated engine condition.
If the light turns on or flashes continuously while driving, safely pull over and stop the
vehicle.If the A/C system is on, turn it off.Also, shift the transmission into NEUTRAL and
idle the vehicle.If the temperature reading does not return to normal, turn the engine
off immediately.
We recommend that you do not operate the vehicle or engine damage will occur.
Have the vehicle serviced immediately.
WHAT TO DO IN EMERGENCIES
69
Page 72 of 116
WARNING!
A hot engine cooling system is dangerous.You or others could be badly burned by
steam or boiling coolant.
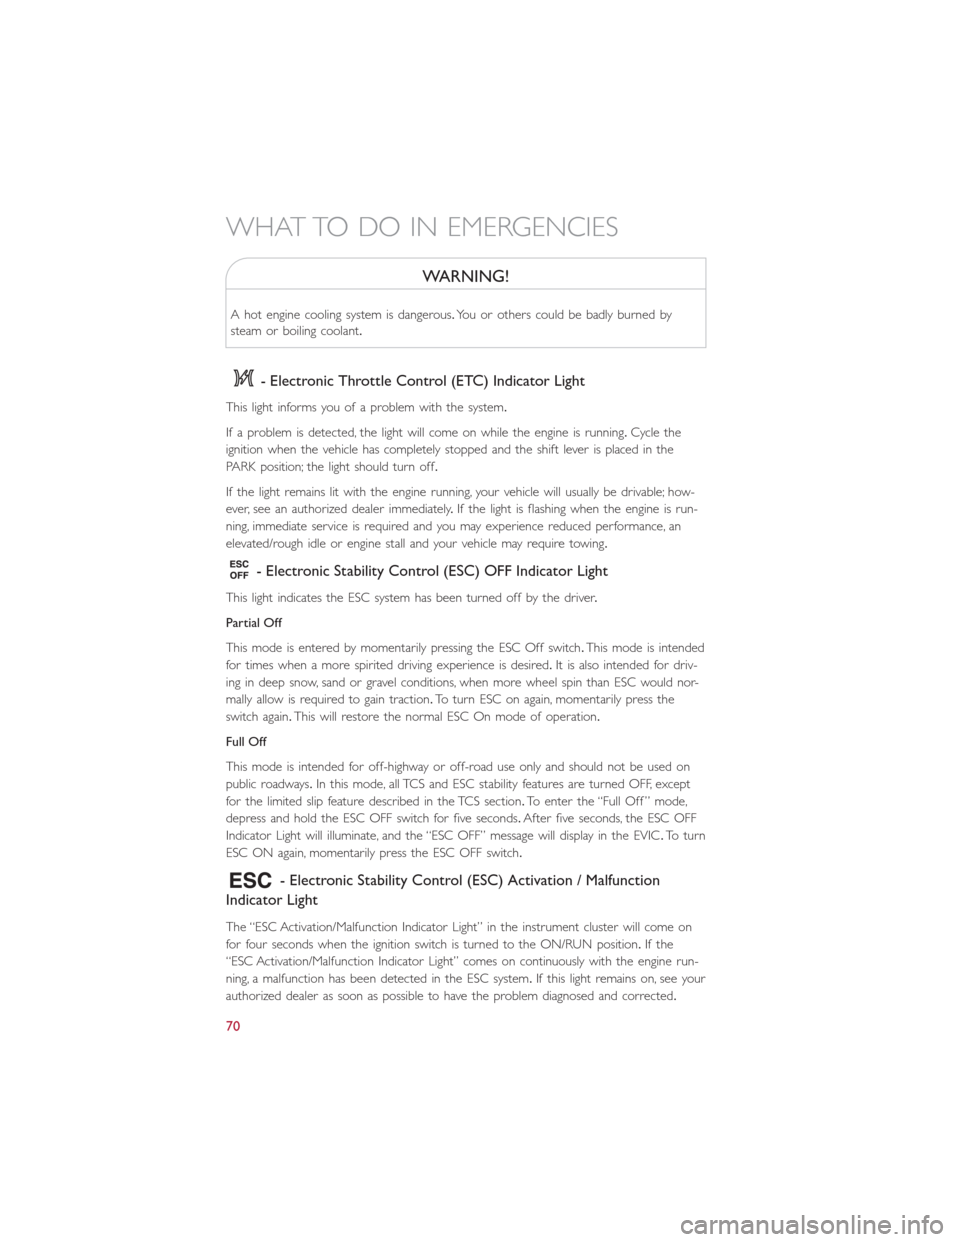
- Electronic Throttle Control (ETC) Indicator Light
This light informs you of a problem with the system.
If a problem is detected, the light will come on while the engine is running.Cycle the
ignition when the vehicle has completely stopped and the shift lever is placed in the
PARK position; the light should turn off.
If the light remains lit with the engine running, your vehicle will usually be drivable; how-
ever, see an authorized dealer immediately.If the light is flashing when the engine is run-
ning, immediate service is required and you may experience reduced performance, an
elevated/rough idle or engine stall and your vehicle may require towing.
- Electronic Stability Control (ESC) OFF Indicator Light
This light indicates the ESC system has been turned off by the driver.
Partial Off
This mode is entered by momentarily pressing the ESC Off switch.This mode is intended
for times when a more spirited driving experience is desired.It is also intended for driv-
ing in deep snow, sand or gravel conditions, when more wheel spin than ESC would nor-
mally allow is required to gain traction.To turn ESC on again, momentarily press the
switch again.This will restore the normal ESC On mode of operation.
Full Off
This mode is intended for off-highway or off-road use only and should not be used on
public roadways.In this mode, all TCS and ESC stability features are turned OFF, except
for the limited slip feature described in the TCS section.To enter the “Full Off ” mode,
depress and hold the ESC OFF switch for five seconds.After five seconds, the ESC OFF
Indicator Light will illuminate, and the “ESC OFF” message will display in the EVIC.To turn
ESC ON again, momentarily press the ESC OFF switch.
- Electronic Stability Control (ESC) Activation / Malfunction
Indicator Light
The “ESC Activation/Malfunction Indicator Light” in the instrument cluster will come on
for four seconds when the ignition switch is turned to the ON/RUN position.If the
“ESC Activation/Malfunction Indicator Light” comes on continuously with the engine run-
ning, a malfunction has been detected in the ESC system.If this light remains on, see your
authorized dealer as soon as possible to have the problem diagnosed and corrected.
WHAT TO DO IN EMERGENCIES
70