change time FIAT 500L 2015 2.G User Guide
[x] Cancel search | Manufacturer: FIAT, Model Year: 2015, Model line: 500L, Model: FIAT 500L 2015 2.GPages: 148, PDF Size: 3.77 MB
Page 4 of 148
WELCOME FROM FIAT
Congratulations on selecting your new FIAT vehicle.Be assured that it represents preci-
sion workmanship, distinctive styling, and high quality - all essentials that are traditional to
our vehicles.
Your new FIAT vehicle has characteristics to enhance the driver's control under some
driving conditions.These are to assist the driver and are never a substitute for attentive
driving.They can never take the driver's place.Always drive carefully.
Your new vehicle has many features for the comfort and convenience of you and your
passengers.Some of these should not be used when driving because they take your eyes
from the road or your attention from driving.Never text while driving or take your eyes
more than momentarily off the road.
This guide illustrates and describes the operation of features and equipment that are ei-
ther standard or optional on this vehicle.This guide may also include a description of fea-
tures and equipment that are no longer available or were not ordered on this vehicle.
Please disregard any features and equipment described in this guide that are not available
on this vehicle.FCA US LLC reserves the right to make changes in design and specifica-
tions and/or make additions to or improvements to its products without imposing any
obligation upon itself to install them on products previously manufactured.
This User Guide has been prepared to help you quickly become acquainted with the im-
portant features of your vehicle.It contains most things you will need to operate and
maintain the vehicle, including emergency information.
The DVD includes a computer application containing detailed owner's information which
can be viewed on a personal computer or MAC computer.The multimedia DVD also
includes videos which can be played on any standard DVD player.Additional DVD opera-
tional information is located on the back of the DVD sleeve.
For complete owner information, refer to your Owner's Manual on the DVD in the
owner’s kit provided at the time of new vehicle purchase.For your convenience, the in-
formation contained on the DVD may also be printed and saved for future reference.
We are committed to protecting our environment and natural resources.By converting
from paper to electronic delivery for the majority of the user information for your ve-
hicle, together we greatly reduce the demand for tree-based products and lessen the
stress on our environment.
INTRODUCTION/WELCOME
2
Page 28 of 148
ENGINE BREAK-IN RECOMMENDATIONS
A long break-in period is not required for the engine and drivetrain (transmission and
axle) in your vehicle.
Drive moderately during the first 300 miles (500 km).After the initial 60 miles (100 km),
speeds up to 50 or 55 mph (80 or 90 km/h) are desirable.
While cruising, brief full-throttle acceleration within the limits of local traffic laws contrib-
utes to a good break-in.Wide-open throttle acceleration in low gear can be detrimental
and should be avoided.
The engine oil installed in the engine at the factory is a high-quality energy conserving
type lubricant.Oil changes should be consistent with anticipated climate conditions under
which vehicle operations will occur.Refer to “Maintaining Your Vehicle”, for the recom-
mended viscosity and quality grades.
NOTE:
A new engine may consume some oil during its first few thousand miles (kilometers) of
operation.This should be considered a normal part of the break-in and not interpreted
as an indication of an engine problem or malfunction.
CAUTION!
Never use Non-Detergent Oil or Straight Mineral Oil in the engine or damage may
result.
TURN SIGNAL/LIGHTS/HIGH BEAM LEVER
Turn Signal/Lane Change Assist
•Tap the lever up or down once and the
turn signal (right or left) will flash three
times to indicate a lane change and auto-
matically turn off.
Headlights/Parking Lights
•Rotate the end of the lever to the first
detent for parking lights and headlight
operation.
NOTE:
The ignition switch must be in the ON/
RUN position for the headlights to oper-
ate.Turn Signal/Lights Lever
OPERATING YOUR VEHICLE
26
Page 35 of 148
Heated Mirrors
•The mirrors are heated to melt frost or ice.This feature is activated whenever you
turn on the rear window defroster.
REAR PARK ASSIST
If an object is detected behind the rear bumper while the vehicle is in REVERSE, a visual
warning will display in the instrument cluster and an audible tone will sound.The audible
tone rate will change depending on the distance of the object, getting faster as the object
gets closer to the bumper.The audible tone will become continuous when the distance
between the vehicle and the obstacle is less than 12 inches (30 cm).
POWER SUNROOF
The sunroof has two glass panels (the front one is operational and the rear one fixed)
and is equipped with an electrically operated sun blind.
The power sunroof and the power sun blind can be operated only with the ignition key
turned to the ON/RUN position.
The power sunroof and power sun blind switches are located in the overhead console.
WARNING!
•Never leave children alone in a vehicle, or with access to an unlocked vehicle.
Never leave the Key Fob in or near the vehicle or in a location accessible to chil-
dren.Occupants, particularly unattended children, can become entrapped by the
power sunroof while operating the power sunroof switch.Such entrapment may
result in serious injury or death.
•In a collision, there is greater risk of being thrown from a vehicle with an open
sunroof.You could also be seriously injured or killed.Always fasten your seat belt
properly and make sure all passengers are properly secured too.
•Do not allow small children to operate the sunroof.Never allow your fingers,
other body parts, or any object to project through the sunroof opening.Injury
may result.
To Open
•Pull the power sunroof switch for approximately one second and the sunroof will stop
at the vented position.Pull the power sunroof switch a second time for approximately
one second and release, the sunroof will open fully, then stop automatically.This is
called “Express Open”.
NOTE:
During Express Open operation, any movement of the sunroof switch will stop the sun-
roof.
OPERATING YOUR VEHICLE
33
Page 36 of 148
To Close
•With the sunroof in the full open position, pull and hold the power sunroof switch for
approximately one second.
NOTE:
During Express close any movement of the sunroof switch will stop the sunroof.
Wind Buffeting
Wind buffeting can be described as the perception of pressure on the ears or a
helicopter-type sound in the ears.Your vehicle may exhibit wind buffeting with the win-
dows down, or the sunroof (if equipped) in certain open or partially open positions.This
is a normal occurrence and can be minimized.If the buffeting occurs with the rear win-
dows open, open the front and rear windows together to minimize the buffeting.If the
buffeting occurs with the sunroof open, adjust the sunroof opening to minimize the buf-
feting or open any window.
Power Sun Blind
•Pull the power sun blind switch and the blind will move towards the rear part of the
car, until it is fully open.
With the blind fully open pull the power sun blind switch and the blind will move to-
wards the front part of the car, until it is fully closed.
NOTE:
During the automatic opening and closing stages, if the power sun blind switch is pulled
again it will stop the blind movement.
EURO TWIN CLUTCH SIX-SPEED TRANSMISSION
•This vehicle may be equipped with a fuel efficient Euro Twin Clutch Six Speed Transmis-
sion.This transmission offers a sportier driving experience with faster AutoStick shifting.
•During low-speed driving conditions in first gear, vehicle momentum changes may feel
exaggerated in response to changes in accelerator pedal position.This behavior is nor-
mal and is similar to vehicles equipped with a manual transmission.
NOTE:
•Very aggressive driving may result in some clutch odor similar to a manual transmission.
An active warning message will display in the Instrument Cluster if cool down actions
are needed.
•The first few shifts on a new vehicle may be somewhat abrupt.This is a normal condi-
tion, and precision shifts will develop within a few hundred miles (kilometers).
•At low speeds you may hear mechanical noises similar to a manual transmission as the
transmission changes gears.These noises are normal and will not damage the transmission.
•Before and after the engine is started, you may hear a hydraulic pump for a short pe-
riod of time.This noise is normal and will not damage the transmission.
OPERATING YOUR VEHICLE
34
Page 37 of 148
Shifting The Transmission
•The transmission shift lever position (PRND) is displayed both on the shift lever and in
the Electronic Vehicle Information Center (EVIC).
•To drive, depress the brake pedal, press the button on the front of the shift lever and
move the shift lever from PARK or NEUTRAL to the DRIVE position.
•Manual shifts can also be made using the AutoStick shift control.
•This transmission is programmed to prevent shifting from REVERSE to DRIVE or
DRIVE to REVERSE, if vehicle speed is above 6 mph (10 km/h).This safety feature
helps protect your transmission from damage.
NOTE:
•When stopped on an incline, it is recommended that you always hold the vehicle in
place using the brakes.On steep inclines, Hill Start Assist (HSA) will temporarily hold
the car in position when the brake pedal is released.If the accelerator pedal is not
applied after a short time, the car will roll back.Either reapply the brake (to hold the
vehicle) or press the accelerator to climb the hill.
•During acceleration, gear changes will feel smooth compared to a vehicle with a tradi-
tional manual transmission.This is a benefit of the Euro Twin Clutch Transmission de-
sign that avoids power loss during up-shifts.
Instrument Cluster Messages
Messages will be displayed in the instrument cluster to alert the driver when certain un-
usual conditions occur.These messages are described below.
MESSAGE DESCRIPTION
GEAR UNAVAILABLE In AutoStick mode, the gear selected bythe driver is not available due to a faultcondition.See your authorized dealer fordiagnosis and service.
SHIFT NOT ALLOWED The gear position requested by the driveris currently blocked.This occurs if RE-VERSE is requested while moving (at6 mph [10 km/h] or faster), or if DRIVE isrequested while moving backwards (at 6mph [10 km/h] or faster).Make sure thevehicle is stopped before engaging DRIVEor REVERSE.
OPERATING YOUR VEHICLE
35
Page 63 of 148
USB Port
Connect your iPod® or compatible device using a USB cable into the USB Port.USB
Memory sticks with audio files can also be used.Then, audio from the device can be
played on the vehicles sound system while providing metadata (artist, track title, album,
etc.) information on the radio display.
When connected, the iPod®/compatible USB device can be controlled using the radio or
Steering Wheel Audio Controls to play, skip to the next or previous track, browse, and list
the contents.
The iPod® battery charges when plugged into the USB port (if supported by the specific
device).
•To route the USB/iPod® cable out of the center console, use the access cut out.
NOTE:
•When connecting your iPod® device for the first time, the system may take several
minutes to read your music, depending on the number of files.For example, the sys-
tem will take approximately five minutes for every 1,000 songs loaded on the device.
Also during the reading process, the Shuffle and Browse functions will be disabled.This
process ensures the full use of your iPod® features and only happens the first time it
is connected.After the first time, the reading process of your iPod® will take consider-
ably less time unless changes are made or new songs are added to the play list.
•The USB port supports certain Mini, Classic, Nano, Touch, and iPhone® devices.The
USB port also supports playing music from compatible external USB Mass Storage
Class memory devices.Some iPod® software versions may not fully support the USB
port features.Please visit Apple’s website for iPod® software updates.
ELECTRONICS
61
Page 86 of 148
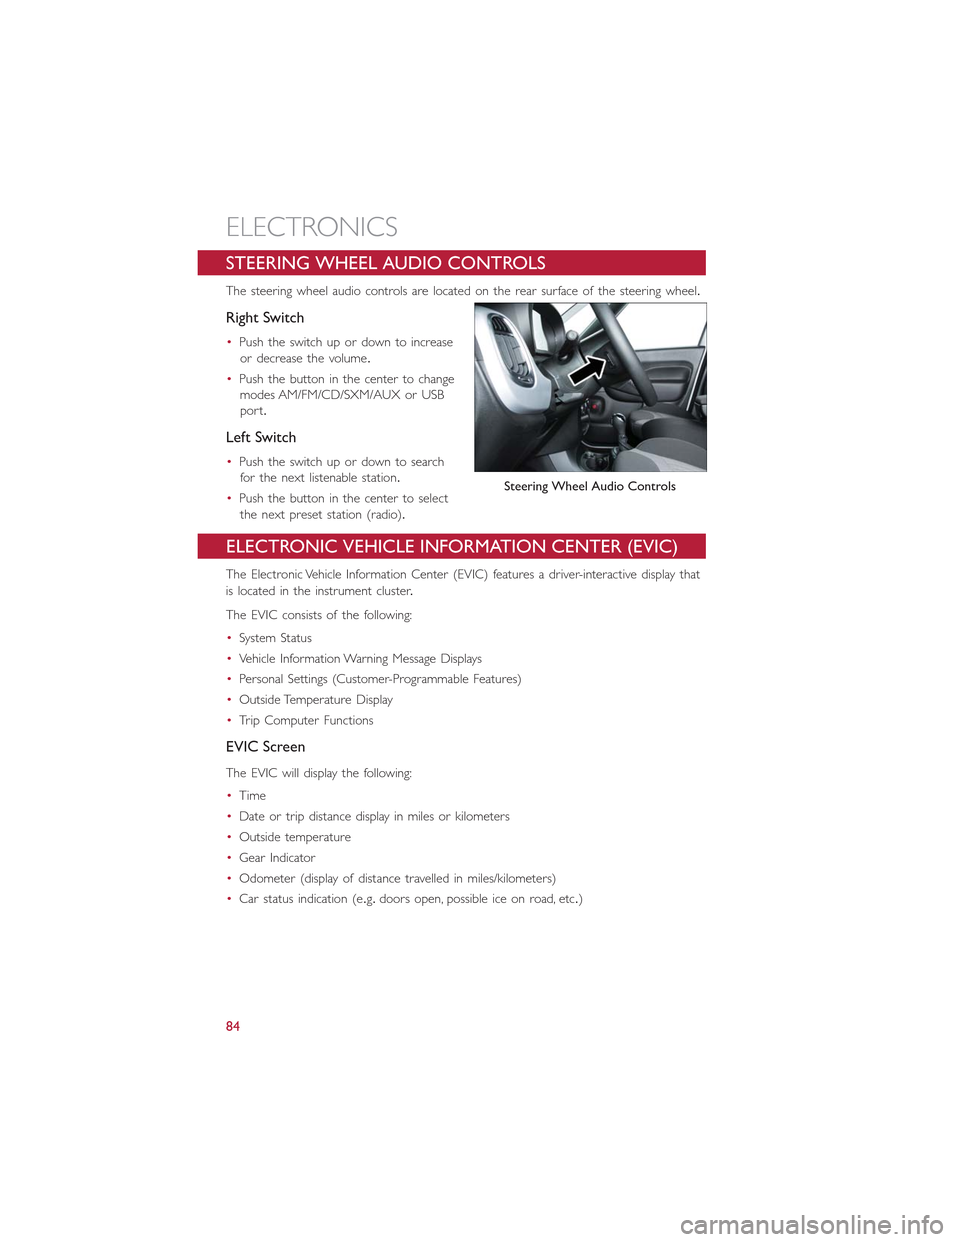
STEERING WHEEL AUDIO CONTROLS
The steering wheel audio controls are located on the rear surface of the steering wheel.
Right Switch
•Push the switch up or down to increase
or decrease the volume.
•Push the button in the center to change
modes AM/FM/CD/SXM/AUX or USB
port.
Left Switch
•Push the switch up or down to search
for the next listenable station.
•Push the button in the center to select
the next preset station (radio).
ELECTRONIC VEHICLE INFORMATION CENTER (EVIC)
The Electronic Vehicle Information Center (EVIC) features a driver-interactive display that
is located in the instrument cluster.
The EVIC consists of the following:
•System Status
•Vehicle Information Warning Message Displays
•Personal Settings (Customer-Programmable Features)
•Outside Temperature Display
•Trip Computer Functions
EVIC Screen
The EVIC will display the following:
•Time
•Date or trip distance display in miles or kilometers
•Outside temperature
•Gear Indicator
•Odometer (display of distance travelled in miles/kilometers)
•Car status indication (e.g.doors open, possible ice on road, etc.)
Steering Wheel Audio Controls
ELECTRONICS
84
Page 89 of 148
4.Continue to hold both buttons and observe the indicator light.The HomeLink® indi-
cator will flash slowly and then rapidly after HomeLink® has received the frequency
signal from the hand-held transmitter.Release both buttons after the indicator light
changes from slow to rapid.
5.At the garage door opener motor (in the garage), locate the “LEARN” or “TRAIN-
ING” button.This can usually be found where the hanging antenna wire is attached to
the garage door opener motor.Firmly push and release the “LEARN” or “TRAINING”
button.
NOTE:
You have 30 seconds in which to initiate the next step after the LEARN button has been
pushed.
6.Return to the vehicle and push the programmed HomeLink® button twice (holding
the button for two seconds each time).If the device is plugged in and activates, pro-
gramming is complete.
NOTE:
If the device does not activate, push the button a third time (for two seconds) to com-
plete the training.
7.To program the remaining two HomeLink® buttons, repeat each step for each re-
maining button.DO NOT erase the channels.
Programming A Non-Rolling Code
NOTE:
For programming Garage Door Openers manufactured before 1995.
1.Turn the ignition switch to the ON/RUN position.
2.Place the hand-held transmitter 1 to 3 inches (3 to 8 cm) away from the HomeLink®
button you wish to program while keeping the HomeLink® indicator light in view.
3.Push and hold the HomeLink® button you want to program while you push and hold
the hand-held transmitter button.
4.Continue to hold both buttons and observe the indicator light.The HomeLink® indi-
cator will flash slowly and then rapidly after HomeLink® has received the frequency
signal from the hand-held transmitter.Release both buttons after the indicator light
changes from slow to rapid.
5.Push and hold the programmed HomeLink® button and observe the indicator light.If
the indicator light stays on constantly, programming is complete and the garage door
(or device) should activate when the HomeLink® button is pushed.
6.To program the two remaining HomeLink® buttons, repeat each step for each re-
maining button.DO NOT erase the channels.
ELECTRONICS
87
Page 98 of 148
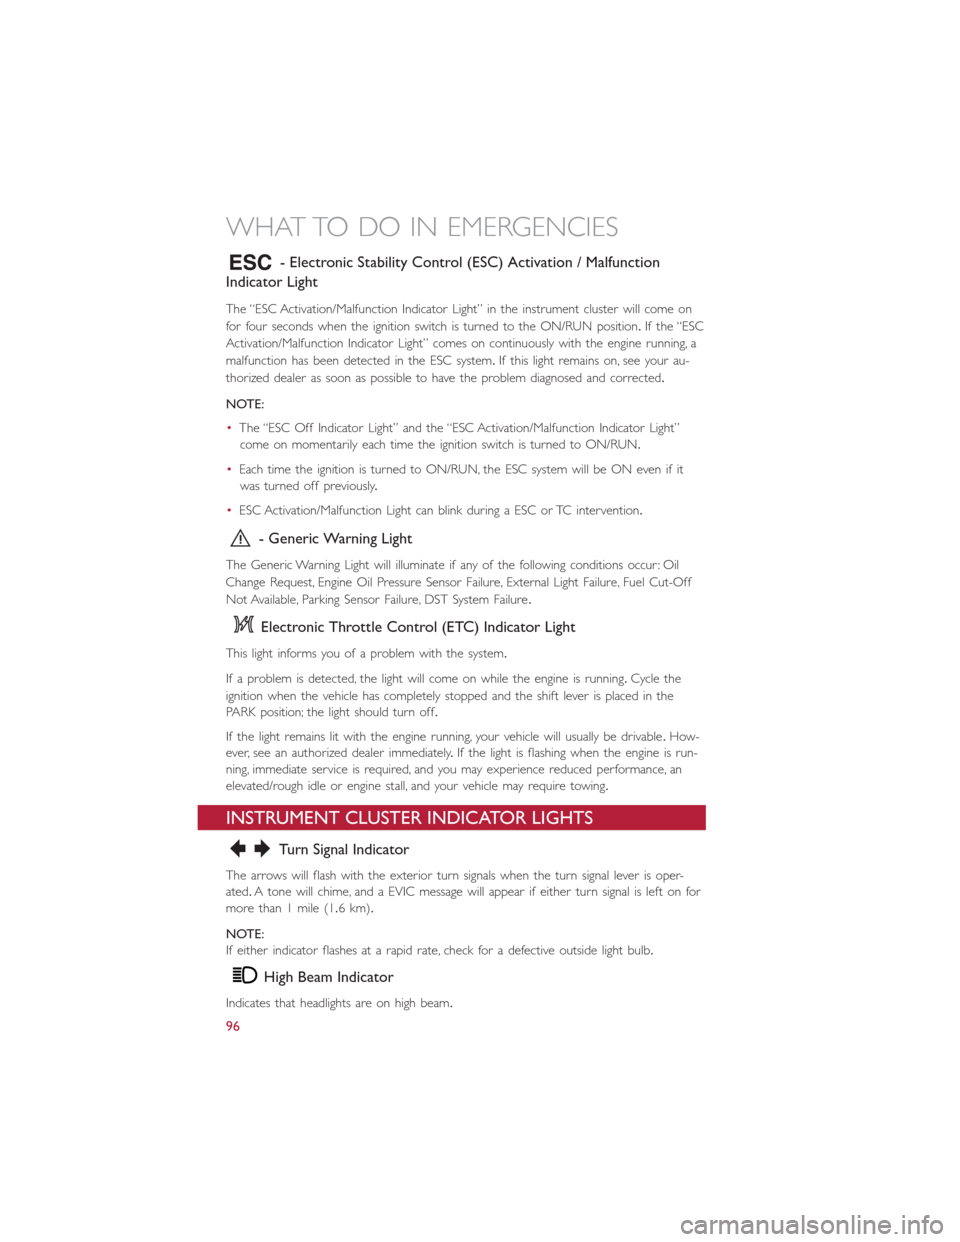
- Electronic Stability Control (ESC) Activation / Malfunction
Indicator Light
The “ESC Activation/Malfunction Indicator Light” in the instrument cluster will come on
for four seconds when the ignition switch is turned to the ON/RUN position.If the “ESC
Activation/Malfunction Indicator Light” comes on continuously with the engine running, a
malfunction has been detected in the ESC system.If this light remains on, see your au-
thorized dealer as soon as possible to have the problem diagnosed and corrected.
NOTE:
•The “ESC Off Indicator Light” and the “ESC Activation/Malfunction Indicator Light”
come on momentarily each time the ignition switch is turned to ON/RUN.
•Each time the ignition is turned to ON/RUN, the ESC system will be ON even if it
was turned off previously.
•ESC Activation/Malfunction Light can blink during a ESC or TC intervention.
- Generic Warning Light
The Generic Warning Light will illuminate if any of the following conditions occur: Oil
Change Request, Engine Oil Pressure Sensor Failure, External Light Failure, Fuel Cut-Off
Not Available, Parking Sensor Failure, DST System Failure.
Electronic Throttle Control (ETC) Indicator Light
This light informs you of a problem with the system.
If a problem is detected, the light will come on while the engine is running.Cycle the
ignition when the vehicle has completely stopped and the shift lever is placed in the
PARK position; the light should turn off.
If the light remains lit with the engine running, your vehicle will usually be drivable.How-
ever, see an authorized dealer immediately.If the light is flashing when the engine is run-
ning, immediate service is required, and you may experience reduced performance, an
elevated/rough idle or engine stall, and your vehicle may require towing.
INSTRUMENT CLUSTER INDICATOR LIGHTS
Turn Signal Indicator
The arrows will flash with the exterior turn signals when the turn signal lever is oper-
ated.A tone will chime, and a EVIC message will appear if either turn signal is left on for
more than 1 mile (1.6 km).
NOTE:
If either indicator flashes at a rapid rate, check for a defective outside light bulb.
High Beam Indicator
Indicates that headlights are on high beam.
WHAT TO DO IN EMERGENCIES
96
Page 100 of 148
Change Engine Oil
•Your vehicle is equipped with an engine oil change indicator system.The “Change En-
gine Oil” message will flash in the EVIC display for approximately 10 seconds after a
single chime has sounded to indicate the next scheduled oil change interval.The engine
oil change indicator system is duty cycle based, which means the engine oil change in-
terval may fluctuate, dependent upon your personal driving style.
•Unless reset, this message will continue to display each time you turn the ignition
switch to the ON/RUN position.To turn off the message temporarily, press and re-
lease theMENUbutton.To reset the oil change indicator system (after performing the
scheduled maintenance), refer to the following procedure:
1.Turn the ignition switch to the ON position.(do not start the engine).
2.Fully depress the accelerator pedal slowly, three times within 10 seconds.
3.Turn the ignition switch to the OFF/LOCK position.
NOTE:
If the indicator message illuminates when you start the vehicle, the oil change indicator
system did not reset.If necessary, repeat this procedure.
IF YOUR ENGINE OVERHEATS
In any of the following situations, you can reduce the potential for overheating by taking
the appropriate action:
•On the highways — slow down.
•In city traffic — while stopped, shift transmission into NEUTRAL, but do not increase
engine idle speed.
NOTE:
There are steps that you can take to slow down an overheat condition:
•If your air conditioner (A/C) is on, turn it off.The A/C system adds heat to the engine
cooling system and turning the A/C off can help remove this heat.
•You can also turn the Temperature control to maximum heat, the Mode control to
floor and the Fan control to high.This allows the heater core to act as a supplement
to the radiator and aids in removing heat from the engine cooling system.
•If the temperature reading does not return to normal, turn the engine off immediately.
•We recommend that you do not operate the vehicle or engine damage will occur.
Have the vehicle serviced immediately.
WHAT TO DO IN EMERGENCIES
98