low oil pressure FIAT 500L 2015 2.G User Guide
[x] Cancel search | Manufacturer: FIAT, Model Year: 2015, Model line: 500L, Model: FIAT 500L 2015 2.GPages: 148, PDF Size: 3.77 MB
Page 94 of 148
ROADSIDE ASSISTANCE
•If your FIAT 500L requires jump start assistance, out of gas/fuel delivery, tire service,
lockout service or towing due to a defect covered under the Basic Limited Warranty,
dial toll-free 1-888-242-6342 or 1-800-363-4869 for Canadian Residents.See your
Warranty booklet for further details.
•Provide your name, vehicle identification number and license plate number.
•Provide your location, including telephone number, from which you are calling.
•Briefly describe the nature of the problem and answer a few simple questions.
•You will be given the name of the service provider and an estimated time of arrival.If
you feel you are in an “unsafe situation,” please let us know.With your consent, we will
contact local police or safety authorities.
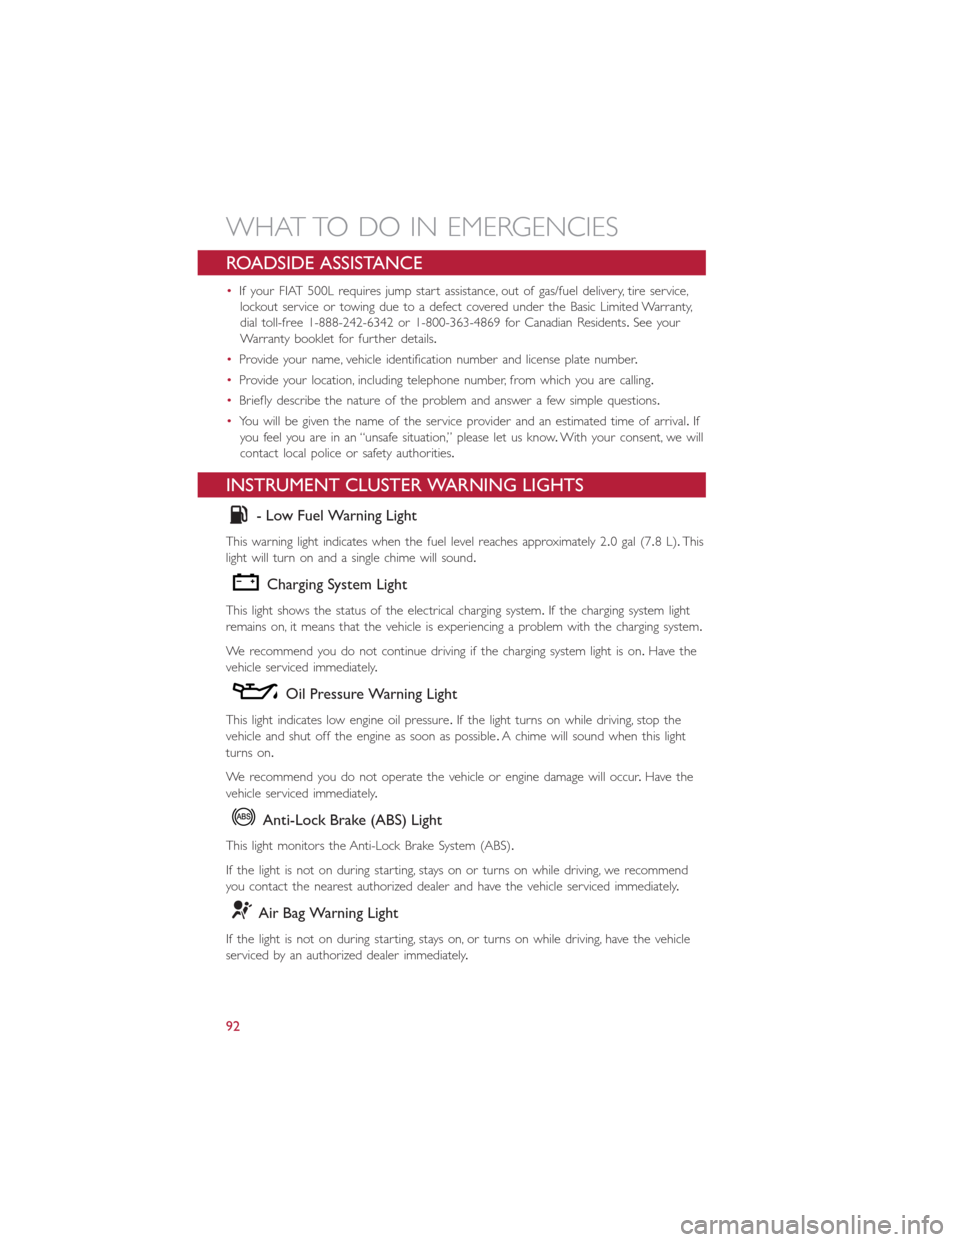
INSTRUMENT CLUSTER WARNING LIGHTS
- Low Fuel Warning Light
This warning light indicates when the fuel level reaches approximately 2.0 gal (7.8 L).This
light will turn on and a single chime will sound.
Charging System Light
This light shows the status of the electrical charging system.If the charging system light
remains on, it means that the vehicle is experiencing a problem with the charging system.
We recommend you do not continue driving if the charging system light is on.Have the
vehicle serviced immediately.
Oil Pressure Warning Light
This light indicates low engine oil pressure.If the light turns on while driving, stop the
vehicle and shut off the engine as soon as possible.A chime will sound when this light
turns on.
We recommend you do not operate the vehicle or engine damage will occur.Have the
vehicle serviced immediately.
Anti-Lock Brake (ABS) Light
This light monitors the Anti-Lock Brake System (ABS).
If the light is not on during starting, stays on or turns on while driving, we recommend
you contact the nearest authorized dealer and have the vehicle serviced immediately.
Air Bag Warning Light
If the light is not on during starting, stays on, or turns on while driving, have the vehicle
serviced by an authorized dealer immediately.
WHAT TO DO IN EMERGENCIES
92
Page 98 of 148
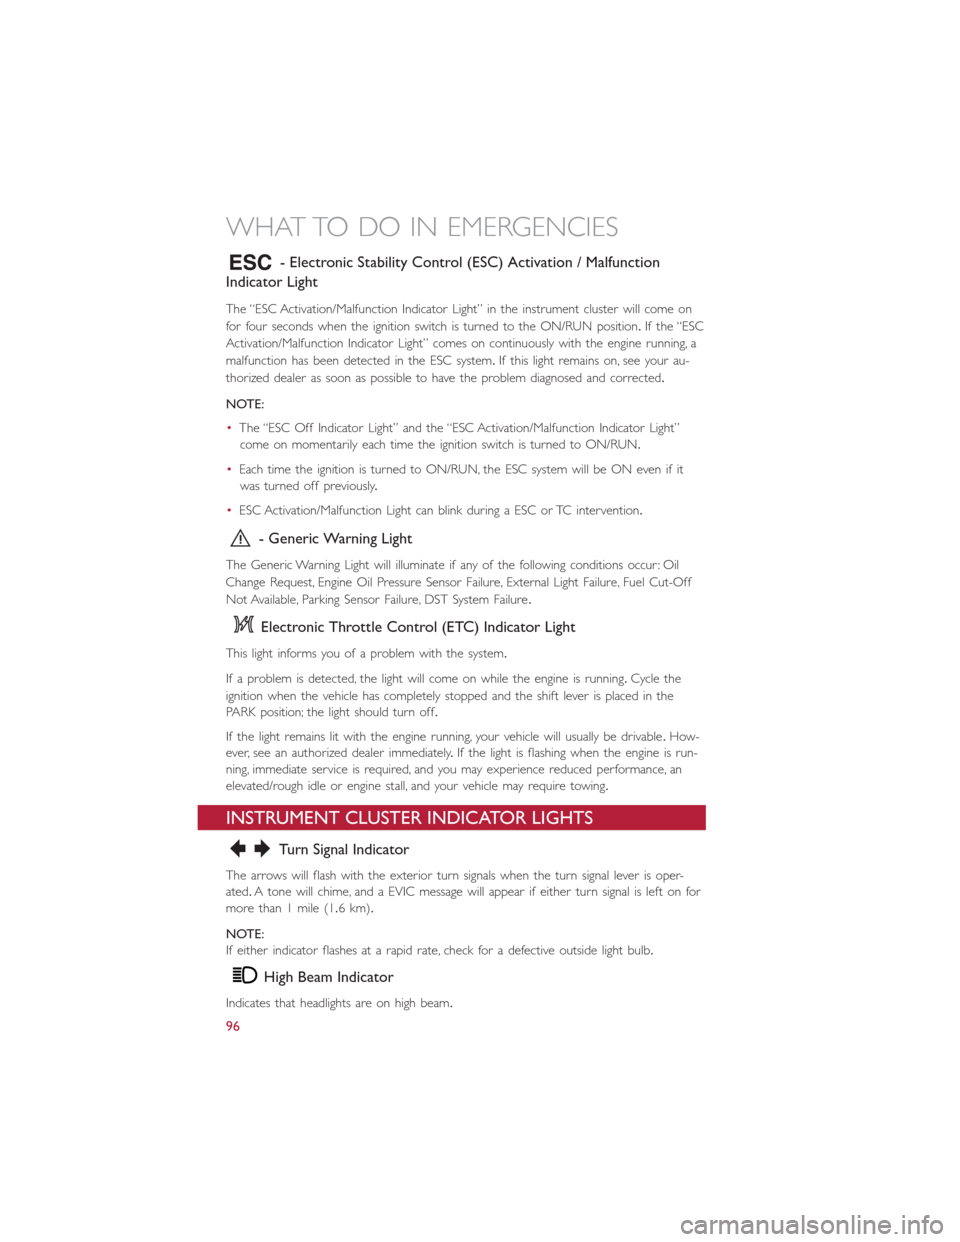
- Electronic Stability Control (ESC) Activation / Malfunction
Indicator Light
The “ESC Activation/Malfunction Indicator Light” in the instrument cluster will come on
for four seconds when the ignition switch is turned to the ON/RUN position.If the “ESC
Activation/Malfunction Indicator Light” comes on continuously with the engine running, a
malfunction has been detected in the ESC system.If this light remains on, see your au-
thorized dealer as soon as possible to have the problem diagnosed and corrected.
NOTE:
•The “ESC Off Indicator Light” and the “ESC Activation/Malfunction Indicator Light”
come on momentarily each time the ignition switch is turned to ON/RUN.
•Each time the ignition is turned to ON/RUN, the ESC system will be ON even if it
was turned off previously.
•ESC Activation/Malfunction Light can blink during a ESC or TC intervention.
- Generic Warning Light
The Generic Warning Light will illuminate if any of the following conditions occur: Oil
Change Request, Engine Oil Pressure Sensor Failure, External Light Failure, Fuel Cut-Off
Not Available, Parking Sensor Failure, DST System Failure.
Electronic Throttle Control (ETC) Indicator Light
This light informs you of a problem with the system.
If a problem is detected, the light will come on while the engine is running.Cycle the
ignition when the vehicle has completely stopped and the shift lever is placed in the
PARK position; the light should turn off.
If the light remains lit with the engine running, your vehicle will usually be drivable.How-
ever, see an authorized dealer immediately.If the light is flashing when the engine is run-
ning, immediate service is required, and you may experience reduced performance, an
elevated/rough idle or engine stall, and your vehicle may require towing.
INSTRUMENT CLUSTER INDICATOR LIGHTS
Turn Signal Indicator
The arrows will flash with the exterior turn signals when the turn signal lever is oper-
ated.A tone will chime, and a EVIC message will appear if either turn signal is left on for
more than 1 mile (1.6 km).
NOTE:
If either indicator flashes at a rapid rate, check for a defective outside light bulb.
High Beam Indicator
Indicates that headlights are on high beam.
WHAT TO DO IN EMERGENCIES
96
Page 111 of 148
5.Uncoil the Power Plug (8) and insert the plug into the vehicle’s 12 Volt power outlet.
6.Do not remove foreign objects (e.g., screws or nails) from the tire.
(C) Injecting Tire Service Kit Sealant Into The Deflated Tire:
Always start the engine before turning ON the Tire Service Kit.
NOTE:
Manual transmission vehicles must have the parking brake engaged and the shift lever in
NEUTRAL.
After pushing the Power Button (4), the sealant (white fluid) will flow from the Sealant
Bottle (1) through the Sealant Hose (6) and into the tire.
NOTE:
Sealant may leak out through the puncture in the tire.
If the sealant (white fluid) does not flow within 0 – 10seconds through the Sealant Hose
(6):
1.Push the Power Button (4) to turn Off the Tire Service Kit.Disconnect the Sealant
Hose (6) from the valve stem.Make sure the valve stem is free of debris.Reconnect
the Sealant Hose (6) to the valve stem.Check that the Mode Select Knob (5) is in
the Sealant Mode position and not Air Mode.Push the Power Button (4) to turn On
the Tire Service Kit.
2.Connect the Power Plug (8) to a different 12 Volt power outlet in your vehicle or
another vehicle, if available.Make sure the engine is running before turning ON the
Tire Service Kit.
3.The Sealant Bottle (1) may be empty due to previous use.Call for assistance.
NOTE:
If the Mode Select Knob (5) is on Air Mode and the pump is operating, air will dispense
from the Air Pump Hose (7) only, not the Sealant Hose (6).
If the sealant (white fluid) does flow through the Sealant Hose (6):
1.Continue to operate the pump until sealant is no longer flowing through the hose
(typically takes 30 - 70 seconds).As the sealant flows through the Sealant Hose (6),
the Pressure Gauge (3) can read as high as 70 psi (4.8 Bar).The Pressure Gauge (3)
will decrease quickly from approximately 70 psi (4.8 Bar) to the actual tire pressure
when the Sealant Bottle (1) is empty.
2.The pump will start to inject air into the tire immediately after the Sealant Bottle (1)
is empty.Continue to operate the pump and inflate the tire to the pressure indicated
on the tire pressure label on the driver-side latch pillar (recommended pressure).
Check the tire pressure by looking at the Pressure Gauge (3).
WHAT TO DO IN EMERGENCIES
109
Page 143 of 148
Adding Engine Coolant (Antifreeze)....126
Adding Fuel.................37
Adding Washer Fluid............126
Air Bag
Advanced Front Air Bag.........12
Advance Front Air Bag.........12
Air Bags.................12
Air Bag Warning Light..........12
Driver Knee Air Bag...........13
Front Air Bag..............12Passenger Knee Air Bag.........13Rollover.................12Side Impacts...............12Air Bag Light.................92Air Bag, Side.................12Air Cleaner, Engine (Engine AirCleaner Filter).............126Air Conditioner Maintenance.......126Air Conditioning Refrigerant........126Air Conditioning System..........126AlarmDisarm The System............9Vehicle Security Alarm..........9Alarm (Security Alarm)..........9, 97Antifreeze (Engine Coolant).....124, 126Capacities...............124Disposal................126Anti-Lock Warning Light...........92Appearance Care.............126Audio Systems (Radio).........41, 45Automatic TransmissionFluid Type...............125
Battery...................126Body Mechanism Lubrication........126Brake Fluid.................125Brakes...................126Brake System................126Master Cylinder............126Warning Light..............94Break-In Recommendations, New Vehicle..26Bulb Replacement.............136Bulbs, Light.................136
Capacities, Antifreeze (Engine Coolant)..124Capacities, Fluid...............124Caps, FillerFuel..................120
Oil (Engine)..............126
Car Washes................126
Changing A Flat Tire.............99
Charging System Light............92
Child Restraint................15
Child Restraints
Center Seat LATCH...........16
Installing Child Restraints Using The
Vehicle Seat Belt.............17
Lower Anchors And Tethers ForChildren.................17Using The Top Tether Anchorage....17CleaningWheels................126Windshield Wiper Blades.......126Climate ControlAutomatic................32Manual..................31Clock....................43Clock Setting................43Cluster Warning/Indicator LightsAnti-Lock Brake (ABS) Light......92Brake Warning Light...........94Charging System Light.........92Electronic Speed Control SETIndicator.................97Electronic Throttle Control (ETC)Indicator Light..............96Engine Temperature Warning Light...94Front Fog Light Indicator........97High Beam Indicator..........96Malfunction Indicator Light (MIL)....95Oil Pressure Warning Light.......92Park/Headlight ON Indicator......97Tire Pressure Monitoring System(TPMS) Light..............93Turn Signal Indicator..........96Vehicle Security Light..........97Clutch...................126Clutch Fluid................126Compact Spare Tire............134Coolant (Antifreeze)............124Cooling System...............126Adding Coolant (Antifreeze).....126Coolant Level.............126Disposal Of Used Coolant......126Drain, Flush, And Refill.........126Inspection...............126
INDEX
141
Page 145 of 148
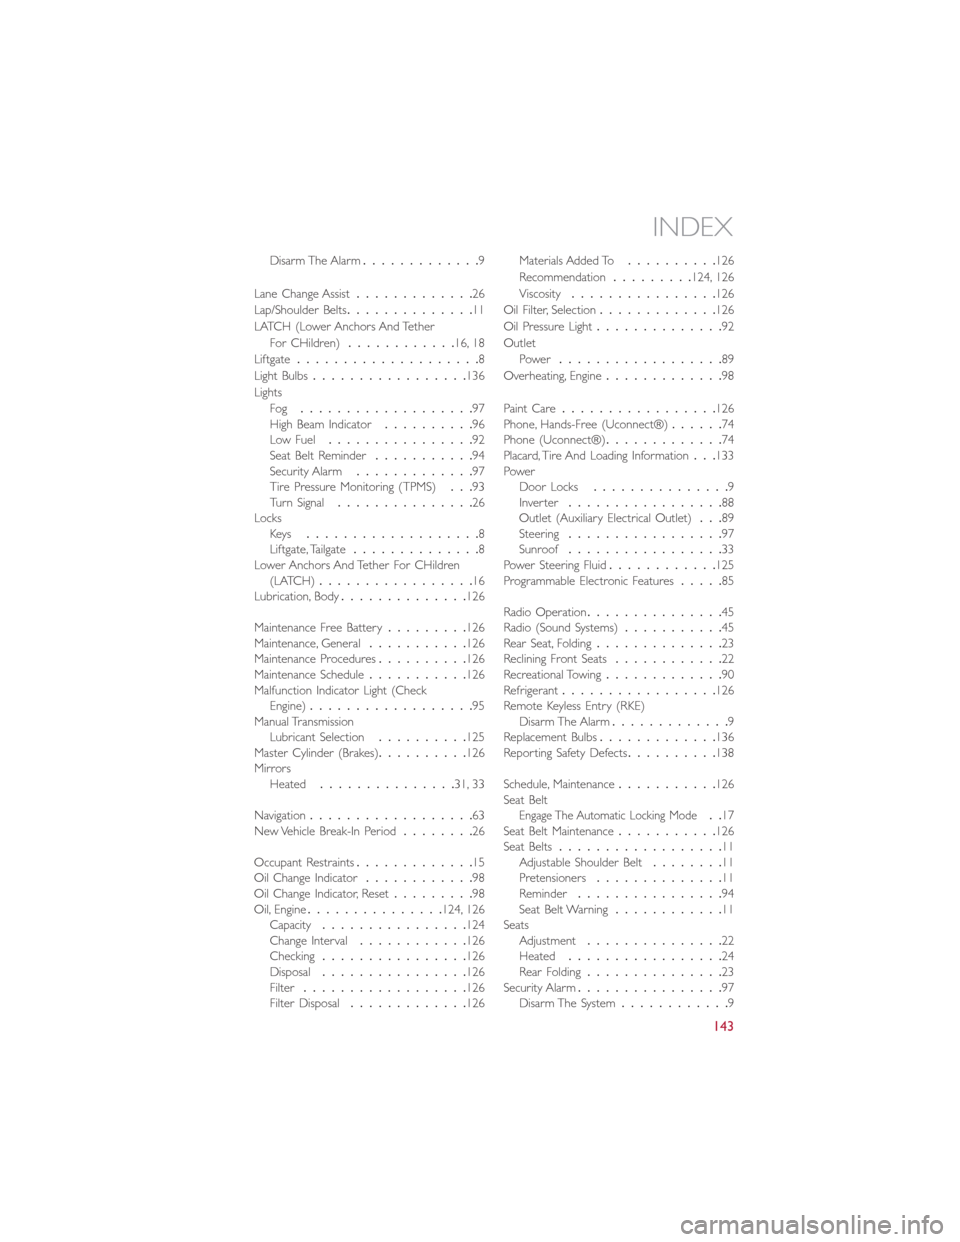
Disarm The Alarm.............9
Lane Change Assist.............26
Lap/Shoulder Belts..............11
LATCH (Lower Anchors And Tether
For CHildren)............16, 18
Liftgate....................8
Light Bulbs.................136
Lights
Fog...................97High Beam Indicator..........96Low Fuel................92Seat Belt Reminder...........94Security Alarm.............97Tire Pressure Monitoring (TPMS)...93Turn Signal...............26LocksKeys...................8Liftgate, Tailgate..............8Lower Anchors And Tether For CHildren(LATCH).................16Lubrication, Body..............126
Maintenance Free Battery.........126Maintenance, General...........126Maintenance Procedures..........126Maintenance Schedule...........126Malfunction Indicator Light (CheckEngine)..................95Manual TransmissionLubricant Selection..........125Master Cylinder (Brakes)..........126MirrorsHeated...............31, 33
Navigation..................63New Vehicle Break-In Period........26
Occupant Restraints.............15Oil Change Indicator............98Oil Change Indicator, Reset.........98Oil, Engine...............124, 126Capacity................124Change Interval............126Checking................126Disposal................126Filter..................126Filter Disposal.............126
Materials Added To..........126
Recommendation.........124, 126
Viscosity................126
Oil Filter, Selection.............126
Oil Pressure Light..............92
Outlet
Power..................89
Overheating, Engine.............98
Paint Care.................126Phone, Hands-Free (Uconnect®)......74Phone (Uconnect®).............74Placard, Tire And Loading Information...133PowerDoor Locks...............9Inverter.................88Outlet (Auxiliary Electrical Outlet)...89Steering.................97Sunroof.................33Power Steering Fluid............125Programmable Electronic Features.....85
Radio Operation...............45Radio (Sound Systems)...........45Rear Seat, Folding..............23Reclining Front Seats............22Recreational Towing.............90Refrigerant.................126Remote Keyless Entry (RKE)Disarm The Alarm.............9Replacement Bulbs.............136Reporting Safety Defects..........138
Schedule, Maintenance...........126Seat BeltEngage The Automatic Locking Mode..17Seat Belt Maintenance...........126Seat Belts..................11Adjustable Shoulder Belt........11Pretensioners..............11Reminder................94Seat Belt Warning............11SeatsAdjustment...............22Heated.................24Rear Folding...............23Security Alarm................97Disarm The System............9
INDEX
143