clutch FIAT 500L LIVING 2015 2.G Owners Manual
[x] Cancel search | Manufacturer: FIAT, Model Year: 2015, Model line: 500L LIVING, Model: FIAT 500L LIVING 2015 2.GPages: 224, PDF Size: 5.92 MB
Page 4 of 224
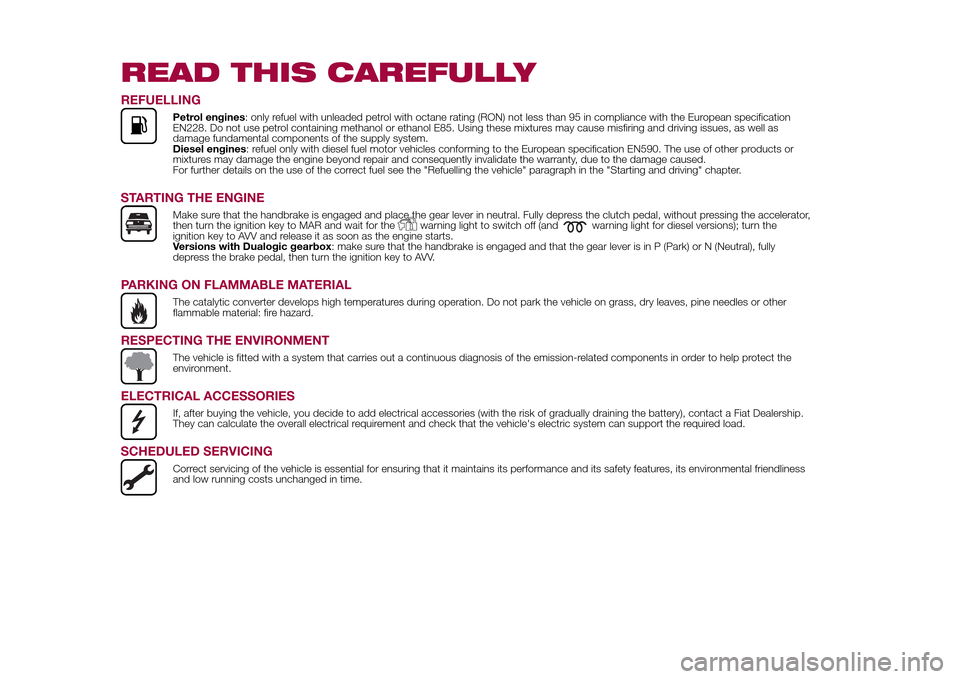
READ THIS CAREFULLYREFUELLING
Petrol engines: only refuel with unleaded petrol with octane rating (RON) not less than 95 in compliance with the European specification
EN228. Do not use petrol containing methanol or ethanol E85. Using these mixtures may cause misfiring and driving issues, as well as
damage fundamental components of the supply system.
Diesel engines: refuel only with diesel fuel motor vehicles conforming to the European specification EN590. The use of other products or
mixtures may damage the engine beyond repair and consequently invalidate the warranty, due to the damage caused.
For further details on the use of the correct fuel see the "Refuelling the vehicle" paragraph in the "Starting and driving" chapter.
STARTING THE ENGINE
Make sure that the handbrake is engaged and place the gear lever in neutral. Fully depress the clutch pedal, without pressing the accelerator,
then turn the ignition key to MAR and wait for the
warning light to switch off (and
warning light for diesel versions); turn the
ignition key to AVV and release it as soon as the engine starts.
Versions with Dualogic gearbox: make sure that the handbrake is engaged and that the gear lever is in P (Park) or N (Neutral), fully
depress the brake pedal, then turn the ignition key to AVV.
PARKING ON FLAMMABLE MATERIAL
The catalytic converter develops high temperatures during operation. Do not park the vehicle on grass, dry leaves, pine needles or other
flammable material: fire hazard.
RESPECTING THE ENVIRONMENT
The vehicle is fitted with a system that carries out a continuous diagnosis of the emission-related components in order to help protect the
environment.
ELECTRICAL ACCESSORIES
If, after buying the vehicle, you decide to add electrical accessories (with the risk of gradually draining the battery), contact a Fiat Dealership.
They can calculate the overall electrical requirement and check that the vehicle's electric system can support the required load.
SCHEDULED SERVICING
Correct servicing of the vehicle is essential for ensuring that it maintains its performance and its safety features, its environmental friendliness
and low running costs unchanged in time.
9-1-2015 12:9 Pagina 2
Page 62 of 224
SYMBOLS AND MESSAGES ON THE DISPLAY
Warning light What it means
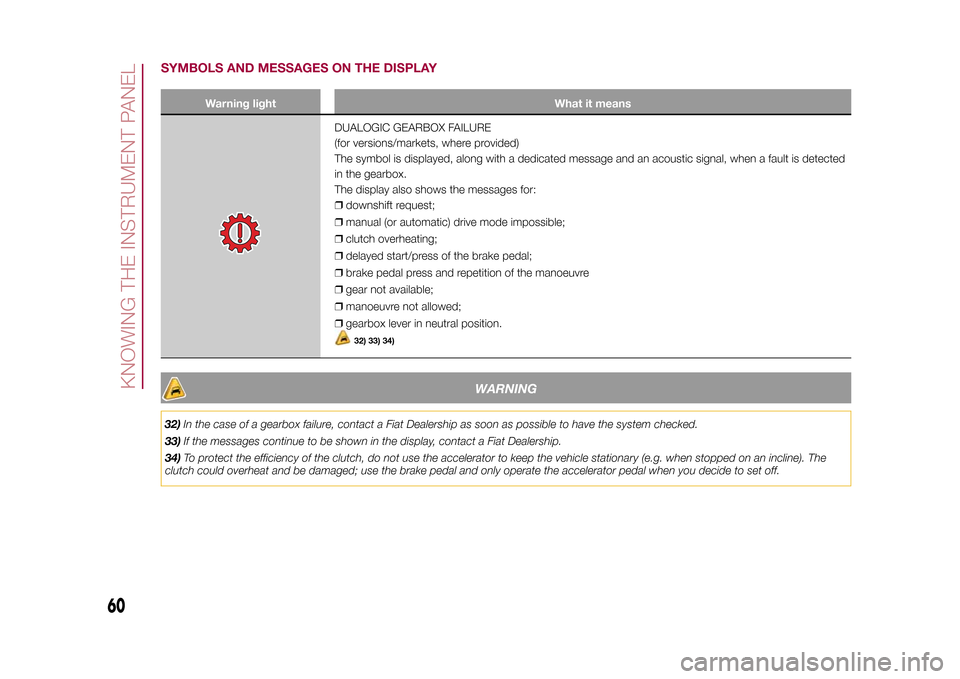
DUALOGIC GEARBOX FAILURE
(for versions/markets, where provided)
The symbol is displayed, along with a dedicated message and an acoustic signal, when a fault is detected
in the gearbox.
The display also shows the messages for:
❒downshift request;
❒manual (or automatic) drive mode impossible;
❒clutch overheating;
❒delayed start/press of the brake pedal;
❒brake pedal press and repetition of the manoeuvre
❒gear not available;
❒manoeuvre not allowed;
❒gearbox lever in neutral position.
32) 33) 34)
WARNING
32)In the case of a gearbox failure, contact a Fiat Dealership as soon as possible to have the system checked.
33)If the messages continue to be shown in the display, contact a Fiat Dealership.
34)To protect the efficiency of the clutch, do not use the accelerator to keep the vehicle stationary (e.g. when stopped on an incline). The
clutch could overheat and be damaged; use the brake pedal and only operate the accelerator pedal when you decide to set off.
60
KNOWING THE INSTRUMENT PANEL
9-1-2015 12:9 Pagina 60
Page 70 of 224
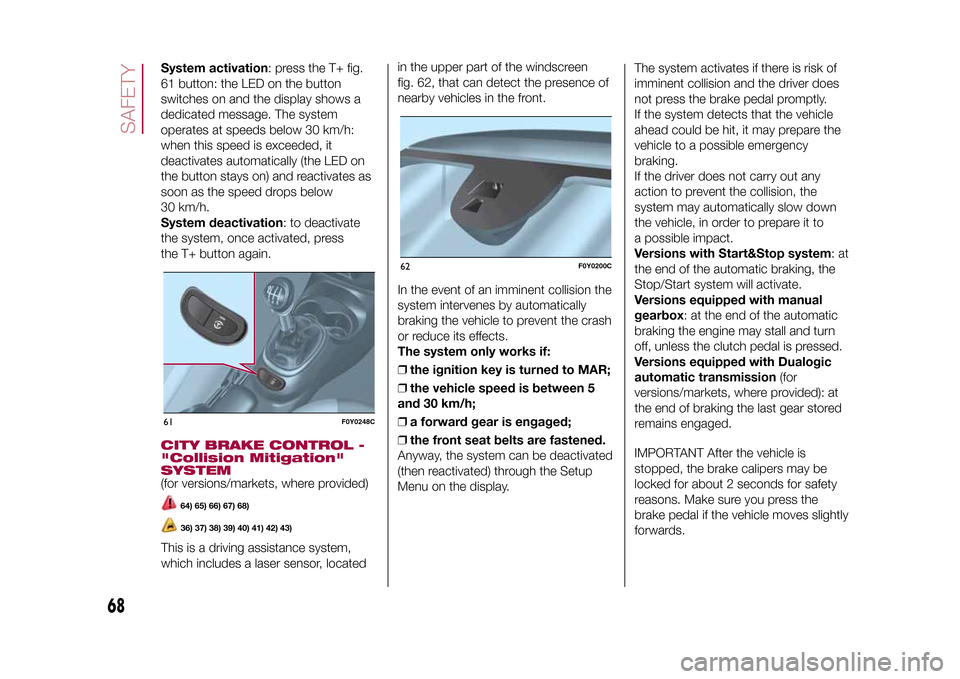
System activation: press the T+ fig.
61 button: the LED on the button
switches on and the display shows a
dedicated message. The system
operates at speeds below 30 km/h:
when this speed is exceeded, it
deactivates automatically (the LED on
the button stays on) and reactivates as
soon as the speed drops below
30 km/h.
System deactivation: to deactivate
the system, once activated, press
the T+ button again.CITY BRAKE CONTROL -
"Collision Mitigation"
SYSTEM(for versions/markets, where provided)
64) 65) 66) 67) 68)36) 37) 38) 39) 40) 41) 42) 43)
This is a driving assistance system,
which includes a laser sensor, locatedin the upper part of the windscreen
fig. 62, that can detect the presence of
nearby vehicles in the front.
In the event of an imminent collision the
system intervenes by automatically
braking the vehicle to prevent the crash
or reduce its effects.
The system only works if:
❒the ignition key is turned to MAR;
❒the vehicle speed is between 5
and 30 km/h;
❒a forward gear is engaged;
❒the front seat belts are fastened.
Anyway, the system can be deactivated
(then reactivated) through the Setup
Menu on the display.The system activates if there is risk of
imminent collision and the driver does
not press the brake pedal promptly.
If the system detects that the vehicle
ahead could be hit, it may prepare the
vehicle to a possible emergency
braking.
If the driver does not carry out any
action to prevent the collision, the
system may automatically slow down
the vehicle, in order to prepare it to
a possible impact.
Versions with Start&Stop system:at
the end of the automatic braking, the
Stop/Start system will activate.
Versions equipped with manual
gearbox: at the end of the automatic
braking the engine may stall and turn
off, unless the clutch pedal is pressed.
Versions equipped with Dualogic
automatic transmission(for
versions/markets, where provided): at
the end of braking the last gear stored
remains engaged.
IMPORTANT After the vehicle is
stopped, the brake calipers may be
locked for about 2 seconds for safety
reasons. Make sure you press the
brake pedal if the vehicle moves slightly
forwards.61
F0Y0248C
62
F0Y0200C
68
SAFETY
9-1-2015 12:9 Pagina 68
Page 95 of 224
STARTING THE
ENGINE
99) 100)
51) 52) 53) 54) 55)
Before starting the engine, adjust the
seat, the interior rear view mirrors,
the door mirrors and fasten the seat
belt correctly.
Never press the accelerator pedal for
starting the engine.VERSIONS WITH MANUAL
GEARBOX
Petrol versionsProceed as follows:
❒engage the handbrake and place the
gear lever in neutral.For 0.9 TwinAir
Turbo 105 HP versionsengage the
handbrake and place the gear lever
in neutral or fully press the clutch pedal
if a gear other than neutral is engaged;
❒for all versions (except 0.9
TwinAir Turbo 105 HP)fully depress
the clutch pedal, without pressing
the accelerator;
❒turn the ignition key to AVV and
release it as soon as the engine starts.
Diesel versionsProceed as follows:
❒engage the handbrake, put the gear
lever into neutral and turn the ignition
key to MAR: the warning lights
and
on the instrument panel
will turn on;
❒wait for the warning lights
and
to turn off and then fully depress
the clutch pedal without pressing the
accelerator;
❒turn the ignition key to AVV as soon
as warning light
switches off.
Release the ignition key as soon as the
engine starts.
IMPORTANT If the engine does not
start at the first attempt, return the
ignition key to STOP before repeating
the procedure. If, with the ignition
key at MAR, the warning lights
and
(only for petrol versions) stay on
in the instrument panel, the ignition key
must be brought back to STOP and
then to MAR again. If the
warning
light stays on, retry with the other
keys provided. Contact a Fiat
Dealership if you still cannot start the
engine.
VERSIONS WITH
DUALOGIC GEARBOX
101)
Engine starting is allowed both with a
gear engaged and with the gearbox
in neutral (N).
However, the brake pedal must always
be pressed first if neutral is not
engaged. It is therefore advisable to
place the gear lever in neutral (N) before
starting the engine.LPG AND NATURAL
POWER VERSIONSThe engine always starts up on petrol
independently of the mode previously
selected.
There must therefore always be an
adequate reserve of petrol in the tank to
protect the petrol pump and to
guarantee temporary switching from
methane or LPG to petrol operation, if
high performance is required.STOPPING THE ENGINETurn the ignition key to STOP while the
engine is idling.
IMPORTANT After a demanding drive,
before turning the engine off you should
allow it to idle to allow the temperature
in the engine compartment to
decrease.
93
9-1-2015 12:9 Pagina 93
Page 97 of 224
WARNING
102)Never leave children unattended in
the vehicle. Always remove the key from
the ignition device when leaving the vehicle
and take it with you.
103)For vehicles equipped with a front
armrest, lift it up to ensure that it does not
interfere with the action of the handbrake.
USING THE MANUAL
GEARBOX
104)
56)
To engage the gears, press the clutch
pedal fully and put the gear lever into
the required position (the diagram
for gear engagement is shown on the
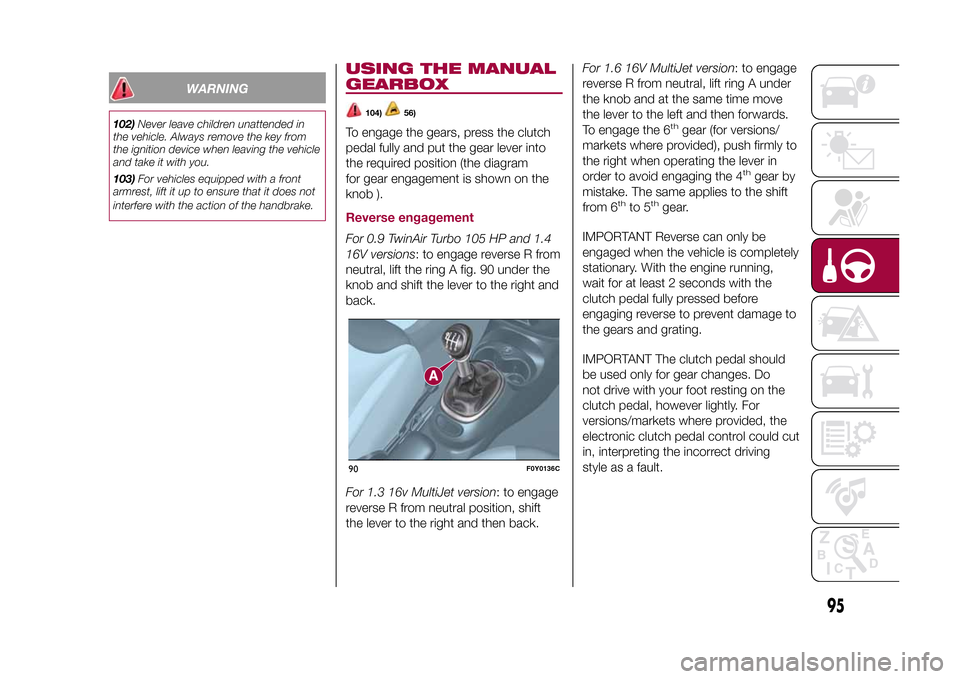
knob ).Reverse engagementFor 0.9 TwinAir Turbo 105 HP and 1.4
16V versions: to engage reverse R from
neutral, lift the ring A fig. 90 under the
knob and shift the lever to the right and
back.
For 1.3 16v MultiJet version: to engage
reverse R from neutral position, shift
the lever to the right and then back.For 1.6 16V MultiJet version: to engage
reverse R from neutral, lift ring A under
the knob and at the same time move
the lever to the left and then forwards.
To engage the 6
th
gear (for versions/
markets where provided), push firmly to
the right when operating the lever in
order to avoid engaging the 4
th
gear by
mistake. The same applies to the shift
from 6
th
to 5
th
gear.
IMPORTANT Reverse can only be
engaged when the vehicle is completely
stationary. With the engine running,
wait for at least 2 seconds with the
clutch pedal fully pressed before
engaging reverse to prevent damage to
the gears and grating.
IMPORTANT The clutch pedal should
be used only for gear changes. Do
not drive with your foot resting on the
clutch pedal, however lightly. For
versions/markets where provided, the
electronic clutch pedal control could cut
in, interpreting the incorrect driving
style as a fault.
90
F0Y0136C
95
9-1-2015 12:9 Pagina 95
Page 98 of 224
WARNING
104)Depress the clutch pedal fully to
change gear correctly. Therefore, the floor
area underneath the pedal unit must not
be obstructed in any way. Ensure that the
floor mat is always laid flat and does not
interfere with use of the pedals.
WARNING
56)Do not drive with your hand resting on
the gear lever as the force exerted, even
if slight, could lead over time to premature
wear of the gearbox internal components.
USING THE
DUALOGIC
GEARBOX(for versions/markets, where provided)
105)
57)
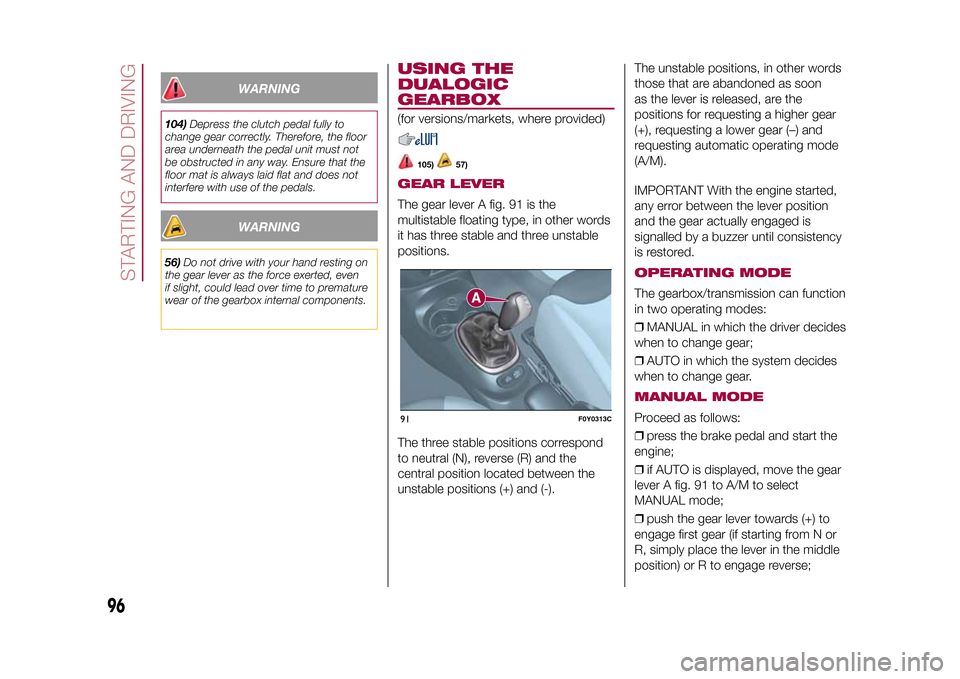
GEAR LEVERThe gear lever A fig. 91 is the
multistable floating type, in other words
it has three stable and three unstable
positions.
The three stable positions correspond
to neutral (N), reverse (R) and the
central position located between the
unstable positions (+) and (-).The unstable positions, in other words
those that are abandoned as soon
as the lever is released, are the
positions for requesting a higher gear
(+), requesting a lower gear (–) and
requesting automatic operating mode
(A/M).
IMPORTANT With the engine started,
any error between the lever position
and the gear actually engaged is
signalled by a buzzer until consistency
is restored.
OPERATING MODEThe gearbox/transmission can function
in two operating modes:
❒MANUAL in which the driver decides
when to change gear;
❒AUTO in which the system decides
when to change gear.MANUAL MODEProceed as follows:
❒press the brake pedal and start the
engine;
❒if AUTO is displayed, move the gear
lever A fig. 91 to A/M to select
MANUAL mode;
❒push the gear lever towards (+) to
engage first gear (if starting from N or
R, simply place the lever in the middle
position) or R to engage reverse;
91
F0Y0313C
96
STARTING AND DRIVING
9-1-2015 12:9 Pagina 96
Page 100 of 224
WARNING
105)If the engine fails to start with a gear
engaged, the potentially dangerous
situation due to the fact that the gearbox is
automatically placed in neutral will be
signalled by an acoustic signal.
WARNING
57)Avoid keeping your hand on this lever
between gear change or AUTO/MANUAL
mode requests.
STOP/START
SYSTEM
106) 107)
58)
The Start&Stop system automatically
stops the engine each time the car
is stationary and starts it again when
the driver wants to move off.
In this way, the efficiency of the car is
increased, by reducing consumption,
emissions of harmful gases and noise
pollution.OPERATING MODE
Engine stopping modeWith the car stopped, the engine stops
with gearbox in neutral and clutch
pedal released.
NoteThe engine can only be stopped
automatically after exceeding a speed
of about 10 km/h, to prevent the engine
from being repeatedly stopped when
driving at walking pace.Restarting the enginePress the clutch pedal to restart the
engine.
MANUAL SYSTEM
ACTIVATION/
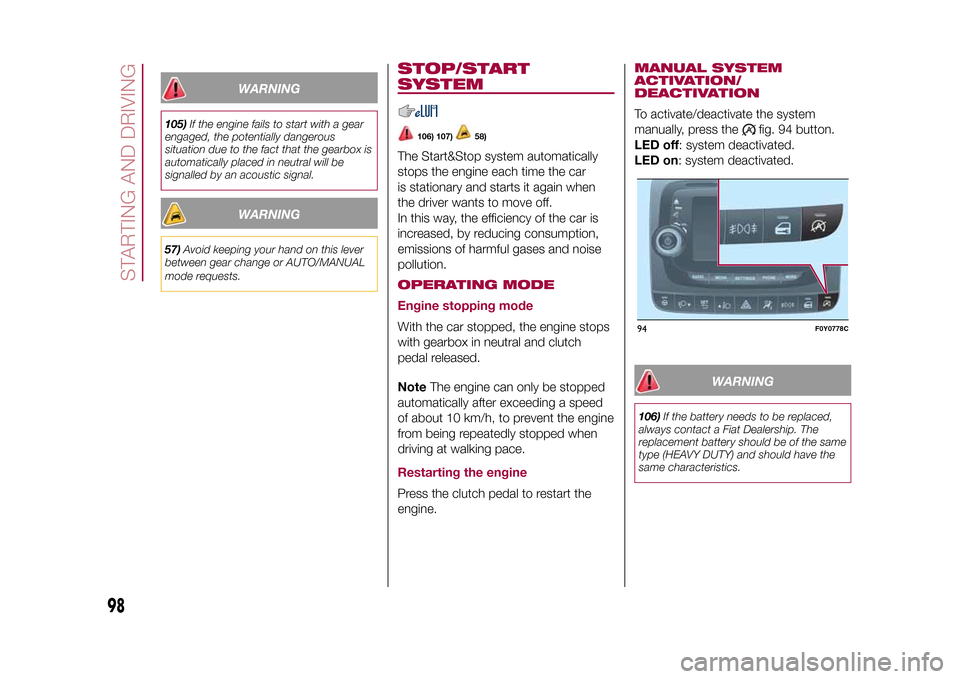
DEACTIVATIONTo activate/deactivate the system
manually, press the
fig. 94 button.
LED off: system deactivated.
LED on: system deactivated.
WARNING
106)If the battery needs to be replaced,
always contact a Fiat Dealership. The
replacement battery should be of the same
type (HEAVY DUTY) and should have the
same characteristics.94
F0Y0778C
98
STARTING AND DRIVING
9-1-2015 12:9 Pagina 98
Page 102 of 224
Restoring the memorised speed:
accelerate gradually until reaching
a speed approaching the memorised
speed, engage the gear selected at the
time of speed memorising and press
the CANC RES button (B fig. 95).INCREASING/
DECREASING
MEMORISED SPEEDSpeed increase: press the accelerator
and memorise the new speed or move
the stalk upwards (+), until reaching
the new speed, which will be
memorised automatically.
Speed decrease: deactivate the
device and memorise the new speed or
move the stalk downwards (-), until
reaching the new speed, which will be
memorised automatically.
Each movement of the stalk
corresponds to an increase/decrease in
speed of about 1 km/h, while keeping
the stalk held upwards will continuously
increase the speed.DEACTIVATING THE
DEVICEThe device can be switched off in the
following ways:
❒turning ring nut A toO;
❒by switching off the engine;❒by pressing the brake pedal, the
clutch or the accelerator; in this last
case the device is not effectively
deactivated, rather it gives priority to
the acceleration request. The device still
remains active, without the need to
press the CANC RES button to return
to the previous conditions once
acceleration is concluded.
Automatic deactivation of the
device: the device deactivates
automatically if the ABS (or ESC)
systems are activated, if the vehicle
speed is below the set limit or in the
case of device failure.
WARNING
108)While travelling with the device
engaged, do not put the gear lever into
neutral.
109)In the case of malfunctioning or if the
device fails, turn ring nut toOand contact
a Fiat Dealership.
SPEED LIMITER(for versions/markets, where provided)DESCRIPTIONThis steering aid device allows the
speed of the vehicle to be limited to
values which can be set by the driver.
The maximum speed can be set both
with vehicle stationary and in motion.
The minimum speed that can be set is
30 km/h.
When the device is active, the vehicle
speed depends on the pressure at
the accelerator pedal, until the set
speed limit is reached. If necessary (in
the event of overtaking for example),
the set speed limit can be exceeded by
fully depressing the accelerator pedal.
By gradually reducing the pressure
on the accelerator pedal, the device will
be reactivated as soon as the car
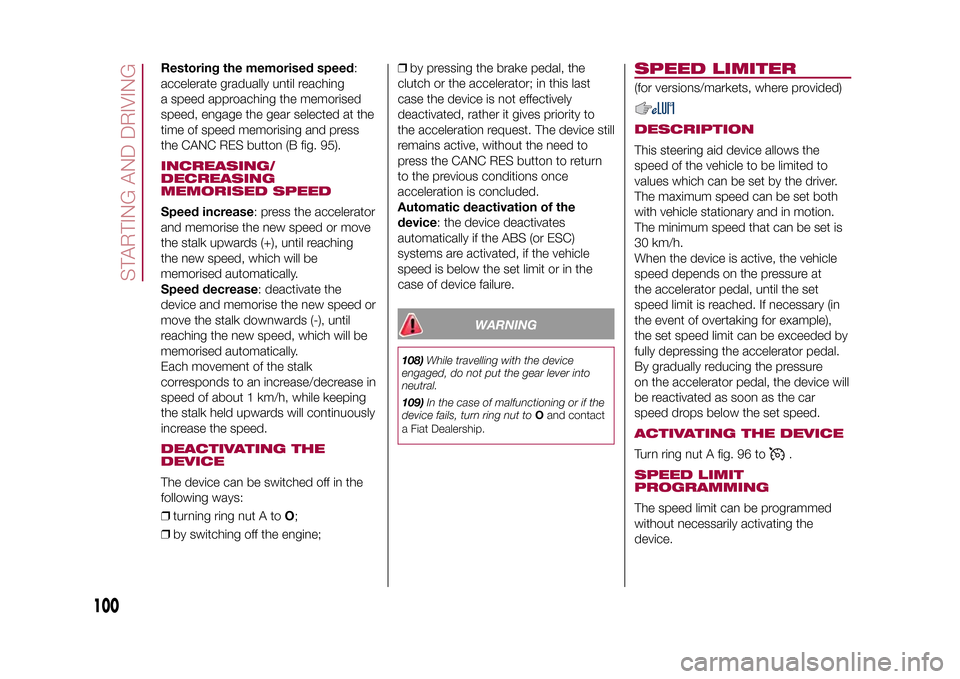
speed drops below the set speed.ACTIVATING THE DEVICETurn ring nut A fig. 96 to
.
SPEED LIMIT
PROGRAMMINGThe speed limit can be programmed
without necessarily activating the
device.
100
STARTING AND DRIVING
9-1-2015 12:9 Pagina 100
Page 136 of 224
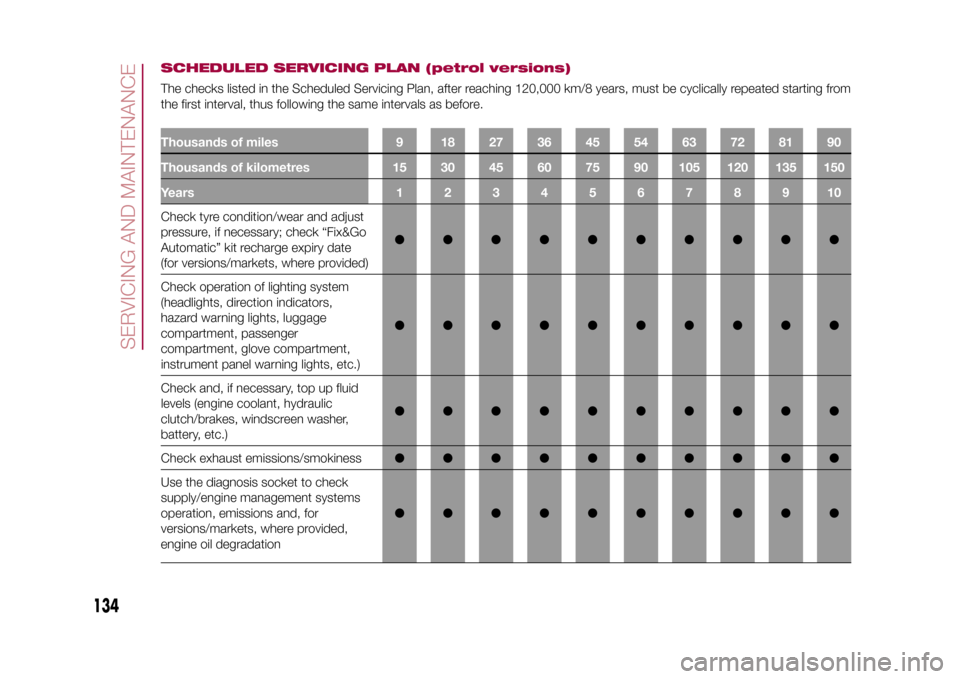
SCHEDULED SERVICING PLAN (petrol versions)The checks listed in the Scheduled Servicing Plan, after reaching 120,000 km/8 years, must be cyclically repeated starting from
the first interval, thus following the same intervals as before.Thousands of miles 9 18 27 36 45 54 63 72 81 90
Thousands of kilometres 15 30 45 60 75 90 105 120 135 150
Years12345678910Check tyre condition/wear and adjust
pressure, if necessary; check “Fix&Go
Automatic” kit recharge expiry date
(for versions/markets, where provided)●●●●●●●●●●
Check operation of lighting system
(headlights, direction indicators,
hazard warning lights, luggage
compartment, passenger
compartment, glove compartment,
instrument panel warning lights, etc.)●●●●●●●●●●
Check and, if necessary, top up fluid
levels (engine coolant, hydraulic
clutch/brakes, windscreen washer,
battery, etc.)●●●●●●●●●●
Check exhaust emissions/smokiness●●●●●●●●●●
Use the diagnosis socket to check
supply/engine management systems
operation, emissions and, for
versions/markets, where provided,
engine oil degradation●●●●●●●●●●
134
SERVICING AND MAINTENANCE
9-1-2015 12:9 Pagina 134
Page 142 of 224
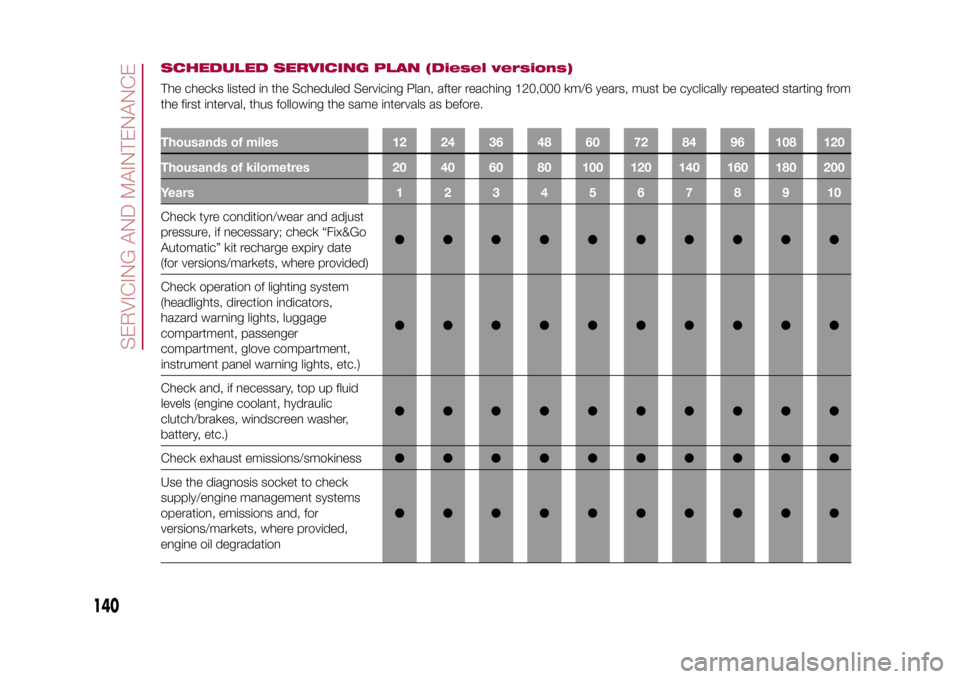
SCHEDULED SERVICING PLAN (Diesel versions)The checks listed in the Scheduled Servicing Plan, after reaching 120,000 km/6 years, must be cyclically repeated starting from
the first interval, thus following the same intervals as before.Thousands of miles 12 24 36 48 60 72 84 96 108 120
Thousands of kilometres 20 40 60 80 100 120 140 160 180 200
Years12345678910Check tyre condition/wear and adjust
pressure, if necessary; check “Fix&Go
Automatic” kit recharge expiry date
(for versions/markets, where provided)●●●●●●●●●●
Check operation of lighting system
(headlights, direction indicators,
hazard warning lights, luggage
compartment, passenger
compartment, glove compartment,
instrument panel warning lights, etc.)●●●●●●●●●●
Check and, if necessary, top up fluid
levels (engine coolant, hydraulic
clutch/brakes, windscreen washer,
battery, etc.)●●●●●●●●●●
Check exhaust emissions/smokiness●●●●●●●●●●
Use the diagnosis socket to check
supply/engine management systems
operation, emissions and, for
versions/markets, where provided,
engine oil degradation●●●●●●●●●●
140
SERVICING AND MAINTENANCE
9-1-2015 12:9 Pagina 140