high beam FIAT 500X 2015 2.G Owners Manual
[x] Cancel search | Manufacturer: FIAT, Model Year: 2015, Model line: 500X, Model: FIAT 500X 2015 2.GPages: 240, PDF Size: 10.72 MB
Page 23 of 240
WARNING
17)As the driver's door mirror is curved, it
may slightly alter the perception of
distance.
EXTERIOR LIGHTSLIGHT SWITCHThe ring nut of light switch A fig. 27,
located on the left side of the
dashboard, controls operation of: side
lights, daytime running lights, dipped
beam headlights, fog lights and
instrument panel indicator and control
button graphic lighting regulation.
With the ignition device turned to MAR,
the instrument panel and the various
controls on the dashboard will be lit up
when the exterior lights are switched
on.
AUTO FUNCTION(Dusk sensor)
(where provided)
This is an infrared LED sensor that
works in conjunction with the rain
sensor and is located on the
windscreen. It is able to detect
variations in outside lighting based on
the light sensitivity set in the display
Menu or theUconnect™system.
The higher the sensitivity, the lower the
amount of external light needed to
automatically switch the external lights
on.Function activationTurn the light switch ring nut to AUTO.
IMPORTANT The function can only
be activated with the ignition device at
MAR.Function deactivationTo deactivate the function, turn the light
switch ring nut to a position other
than AUTO.
26
F1B0340C
27
F1B0036C
21
15-12-2014 8:23 Pagina 21
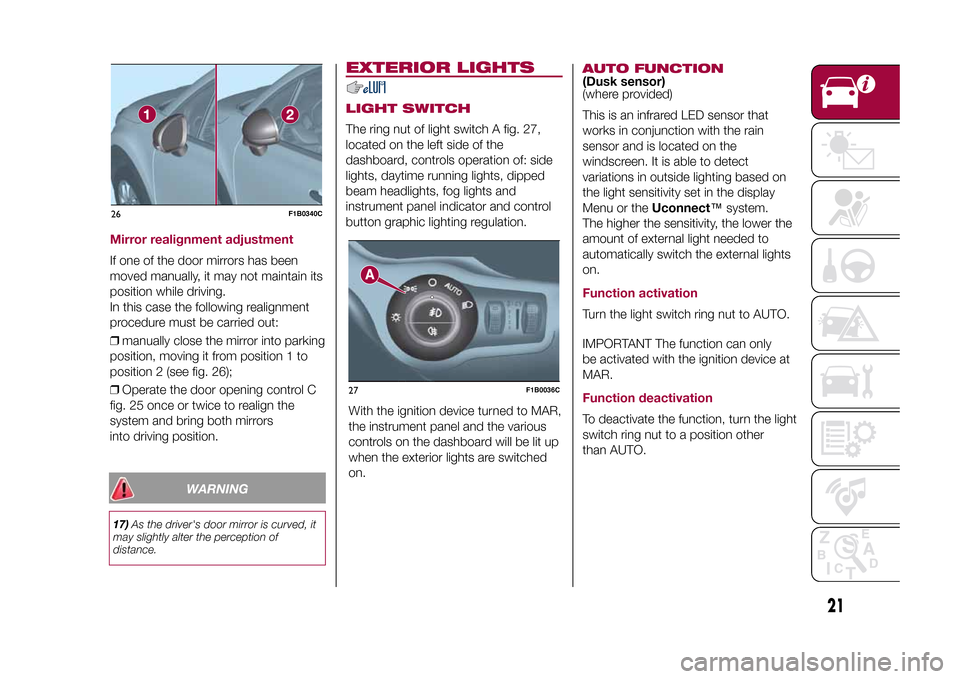
Mirror realignment adjustmentIf one of the door mirrors has been
moved manually, it may not maintain its
position while driving.
In this case the following realignment
procedure must be carried out:
❒manually close the mirror into parking
position, moving it from position 1 to
position 2 (see fig. 26);
❒Operate the door opening control C
fig. 25 once or twice to realign the
system and bring both mirrors
into driving position.
Page 25 of 240
Automatic main beam headlights(where provided)
In order not to disturb other road users,
the main beam headlights are
automatically deactivated when
approaching vehicles travelling in the
opposite direction or when following a
vehicle travelling in the same direction.
This function can be set through the
display menu (see the instructions
in the "Display" paragraph, "Knowing
the instrument panel" chapter); the light
switch ring nut must be turned to
AUTO to activate.
The function is activated by pushing the
stalk toward the dashboard (stable
position); the
warning light comes
on in the instrument panel. The
warning light will also come on in
the instrument panel with main beam
headlights on. If the vehicle is turned off
with the setting described previously,
the automatic main beam headlight
function will need a new resetting: bring
back the stalk in the centre position
and then press it again towards the
instrument panel.
When the speed is higher than 40 km/h
and the function is active, if the stalk
is brought again to the stable central
position the function deactivates and
the main beam headlights turn off.When the speed is lower than 15 km/h
and the function is active, the system
automatically switches the main beam
headlights off.
If the stalk is moved from the stable
central position and pushed again
towards the dashboard in the stable
position, this is interpreted as a request
for fixed main beam headlights: the
warning light comes on in the
instrument panel and the main beam
headlights turn on until vehicle speed
exceeds 40 km/h again. When this
threshold is exceeded the function
activates again automatically and the
warning light comes on again
in the instrument panel.
To deactivate this function, rotate the
light switch ring nut to the
position.
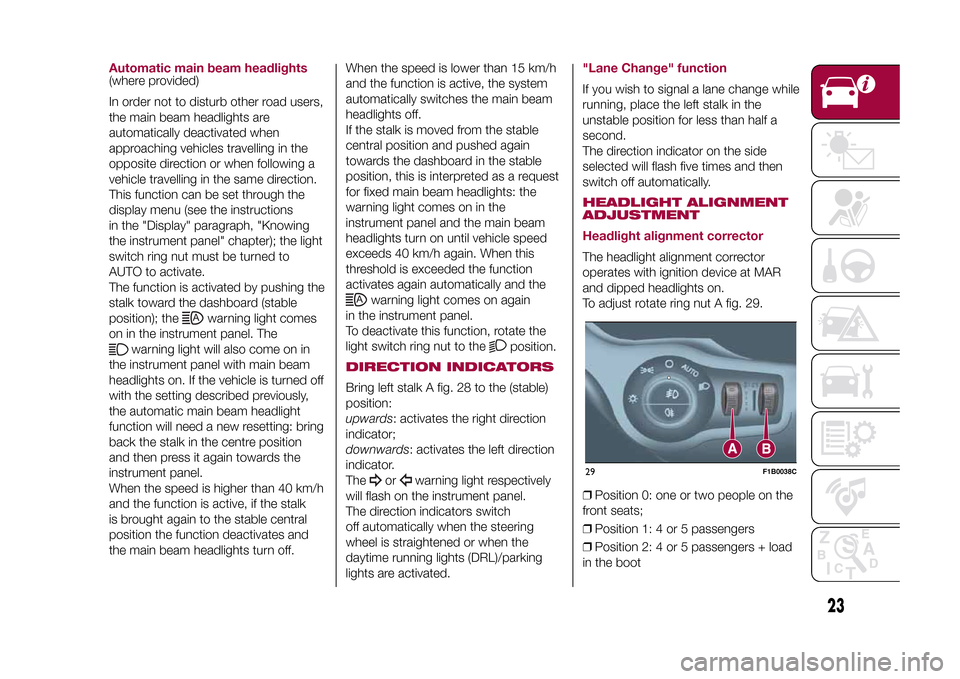
DIRECTION INDICATORSBring left stalk A fig. 28 to the (stable)
position:
upwards: activates the right direction
indicator;
downwards: activates the left direction
indicator.
The
or
warning light respectively
will flash on the instrument panel.
The direction indicators switch
off automatically when the steering
wheel is straightened or when the
daytime running lights (DRL)/parking
lights are activated.
"Lane Change" functionIf you wish to signal a lane change while
running, place the left stalk in the
unstable position for less than half a
second.
The direction indicator on the side
selected will flash five times and then
switch off automatically.HEADLIGHT ALIGNMENT
ADJUSTMENT
Headlight alignment correctorThe headlight alignment corrector
operates with ignition device at MAR
and dipped headlights on.
To adjust rotate ring nut A fig. 29.
❒Position 0: one or two people on the
front seats;
❒Position 1: 4 or 5 passengers
❒Position 2: 4 or 5 passengers + load
in the boot29
F1B0038C
23
15-12-2014 8:23 Pagina 23
Page 26 of 240
❒Position 3: driver + maximum
admissible load stowed only in the
boot.
IMPORTANT Check the headlight
alignment each time the weight of the
load transported changes.INSTRUMENT PANEL AND
CONTROL BUTTON
GRAPHICS BRIGHTNESS
ADJUSTMENTWith side lights or headlights on, turn
ring nut B fig. 29 upwards to increase
light brightness of the instrument panel
and of the control button graphics, or
turn the ring nut downwards to
decrease it.
WARNING
18)The daytime running lights are an
alternative to the dipped beam headlights
for driving in countries where it is
compulsory to have lights on during the
day; where it is not compulsory, the use of
daytime running lights is permitted.
19)Daytime running lights cannot replace
dipped beam headlights when driving at
night or through tunnels. The use of
daytime running lights is governed by the
highway code of the country in which
you are driving. Comply with legal
requirements.
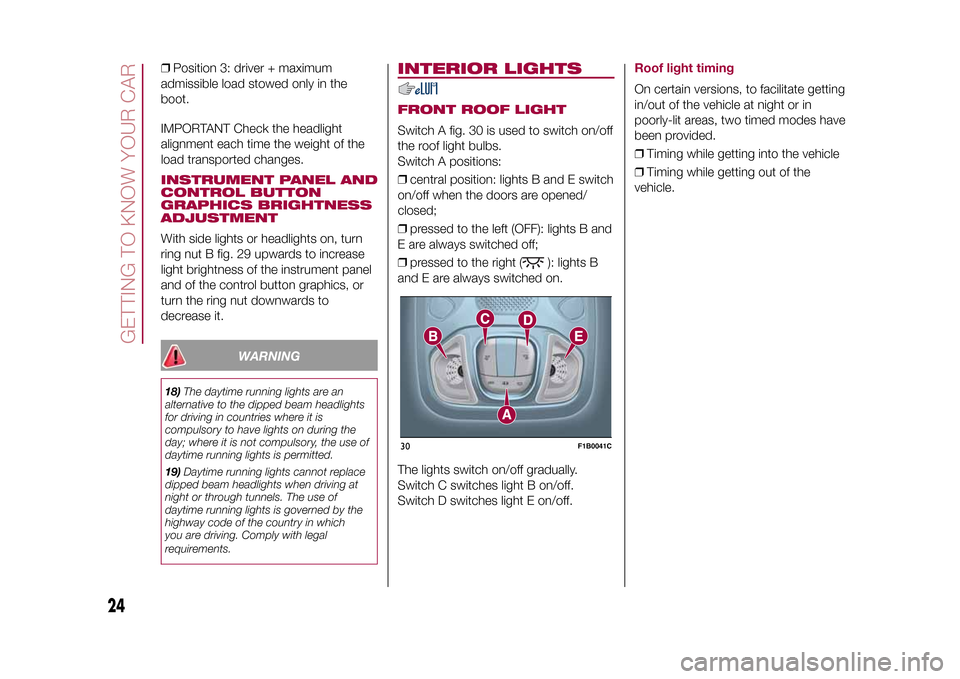
INTERIOR LIGHTSFRONT ROOF LIGHTSwitch A fig. 30 is used to switch on/off
the roof light bulbs.
Switch A positions:
❒central position: lights B and E switch
on/off when the doors are opened/
closed;
❒pressed to the left (OFF): lights B and
E are always switched off;
❒pressed to the right (
): lights B
and E are always switched on.
The lights switch on/off gradually.
Switch C switches light B on/off.
Switch D switches light E on/off.
Roof light timingOn certain versions, to facilitate getting
in/out of the vehicle at night or in
poorly-lit areas, two timed modes have
been provided.
❒Timing while getting into the vehicle
❒Timing while getting out of the
vehicle.
30
F1B0041C
24
GETTING TO KNOW YOUR CAR
15-12-2014 8:23 Pagina 24
Page 44 of 240
MAIN MENUThe Menu includes the following items:
❒TRIP
❒MOOD SELECTOR/GSI
❒VEHICLE INFO
❒DRIVER ASSIST
❒AUDIO
❒PHONE
❒NAVIGATION
❒ALERTS
❒VEHICLE SETUPVehicle setup (Change vehicle
settings)This menu item allows you to change
the settings for:
❒"Display";
❒"Units";
❒"Clock & Date";
❒"Security"
❒"Safety & Assistance";
❒"Lights";
❒"Doors & Locks".DisplayBy selecting item "Display" you can
access the settings/information
regarding: "Language", "See phone",
"See navigation", "Trip B automatic
reset", "Mood Selector repetition".
"Units"Select item "Units" to choose the unit of
measurement between: "Imperial",
"Metric", "Custom"."Clock & Date"Select item "Clock & Date" to make the
following adjustments: "Set time",
"Time format", Set date"."Security"Select item "Security" to make the
following adjustments: "Passenger
AIRBAG", "Speed beep", "Seat belt
buzzer", "Hill Hold Control".
"Passenger AIRBAG" adjustment allows
you to activate/deactivate the
passenger airbag:
❒Passenger's protection active: the
ONLED comes on constantly in
the instrument panel dashboard.
❒Passenger's protection not
active: the
OFFLED comes on
constantly in the instrument panel
dashboard.
"Safety & Assistance"For possible adjustments see the
Uconnect™paragraph in the
dedicated chapter.
"Lights"Select item "Lights" to make the
following adjustments: "Ambient
lighting", "Headlight sensor", "Follow
me", "Headlights while opening", "High
Beams Auto Dim", "Daytime Lights",
"Cornering lights"."Doors & Locks"Select item "Doors & Locks" to make
the following adjustments: "Autoclose",
"Auto unlock on exit", "Flash Lights
w/Lock", "Horn with Lock", "Horn
w/Remote Start", "Remote Unlock",
"Door Unlock" (versions with Keyless
Entry), "Keyless Entry".
42
KNOWING THE INSTRUMENT PANEL
15-12-2014 8:23 Pagina 42
Page 226 of 240
❒"Auto high beams" (where provided):
allows you to deactivate the main
beam headlights when approaching a
vehicle coming from the opposite
direction;
❒"Flash Lights w/Lock" (where
provided): permits the activation of light
flashing when the doors are locked.
MAIN NAVIGATION MENUIMPORTANT Navigation maps are
pre-loaded on the system, therefore no
external support is needed.
To activate the main navigation menu,
press the NAV button on the front
panel, then press one of the following
buttons:
❒"Where to?": it searches or navigates
to the destination;
❒"View map": it displays the map;
❒"Info": it displays all info about
navigation;
❒"Emergency": it searches for
Hospitals or Police Stations located
near the destination. It is also possible
to view your current position on the
display and save, in "Favourites", the
location of the Hospitals or Police
Stations.
VIEW MAPPress the "View Map" button in the
main Navigation Menu to display the
map relative to the current position.
When the display shows the map, the
following options are available:
❒"Menu": press this button to return
to the main Navigation Menu;
❒"+/–": press the "+" or " –" button to
change the dimension of the map (it
is not possible to zoom in on minor
roads);
❒"Time of Arrival/Time to
Destination/Distance"(only during
navigation): press this button at the top
right of the display to view one of the
following options: "Time of Arrival",
"Time to Destination", "Distance".
❒"Turn List"(only during navigation):
press the list of turns along the route
at the middle of the top of the display.
Select a turn through the following
options: "Show on Map" or "Avoid
Street".
❒"Options": press this button to
display the map display options.
224
MULTIMEDIA
15-12-2014 8:23 Pagina 224
Lights (where provided)This function can be used to carry out
the following adjustments:
❒"Interior lights" (where provided):
allows you to select the interior light
brightness;
❒"Headlamp sensor" (where provided):
adjustment of headlamp activation
sensitivity;
❒"Follow me" (where provided):
permits the setting of the headlamp
deactivation delay after switching off
the engine;
❒"Courtesy lights": activation/
deactivation of courtesy lights (where
provided);
❒"Day lights": activation/deactivation of
the daytime running lights (DRLs)
(where provided);