ignition FIAT 500X 2019 Owner handbook (in English)
[x] Cancel search | Manufacturer: FIAT, Model Year: 2019, Model line: 500X, Model: FIAT 500X 2019Pages: 284, PDF Size: 8.33 MB
Page 22 of 284
Backrest angle adjustment
Push switch B forwards or backwards
to adjust the backrest in the
corresponding direction.
Electric lumbar adjustment
Use the joystick C to actuate the
lumbar area device until the maximum
driving comfort is achieved.
IMPORTANT The electrical adjustment
is only allowed when the ignition device
is turned to MAR and for about
20 minutes after it is turned to STOP.
With the ignition device in the STOP
position, the electric adjustment of the
seats is immediately blocked when the
car is locked from the outside.
FRONT SEAT ELECTRIC
HEATING
(where provided)
With ignition device in the MAR
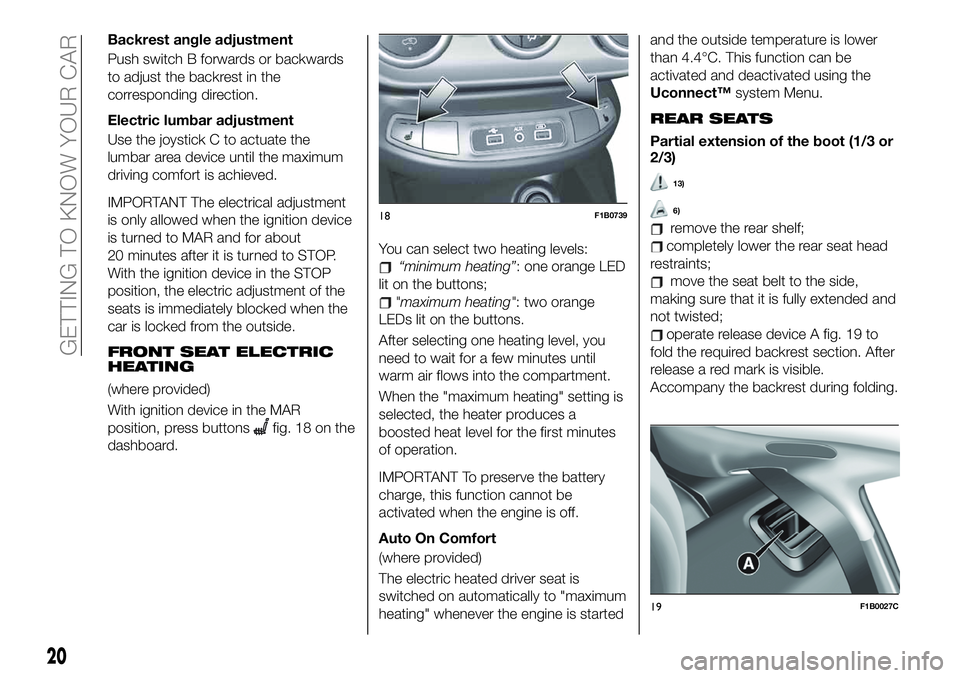
position, press buttons
fig. 18 on the
dashboard.You can select two heating levels:
“minimum heating”: one orange LED
lit on the buttons;
"maximum heating": two orange
LEDs lit on the buttons.
After selecting one heating level, you
need to wait for a few minutes until
warm air flows into the compartment.
When the "maximum heating" setting is
selected, the heater produces a
boosted heat level for the first minutes
of operation.
IMPORTANT To preserve the battery
charge, this function cannot be
activated when the engine is off.
Auto On Comfort
(where provided)
The electric heated driver seat is
switched on automatically to "maximum
heating" whenever the engine is startedand the outside temperature is lower
than 4.4°C. This function can be
activated and deactivated using the
Uconnect™system Menu.
REAR SEATS
Partial extension of the boot (1/3 or
2/3)
13)
6)
remove the rear shelf;
completely lower the rear seat head
restraints;
move the seat belt to the side,
making sure that it is fully extended and
not twisted;
operate release device A fig. 19 to
fold the required backrest section. After
release a red mark is visible.
Accompany the backrest during folding.
18F1B0739
19F1B0027C
20
GETTING TO KNOW YOUR CAR
Page 26 of 284
When reverse gear is engaged, the
mirror is automatically set for daytime
use.
DOOR MIRRORS
Electric adjustment
17)
Adjusting the mirrors is possible with
the ignition device at MAR and for
about 3 minutes after the ignition device
switches to STOP (or also after the
mechanical key has been extracted, for
cars equipped with mechanical key with
remote control). When one of the front
doors is opened this operation is
disabled.
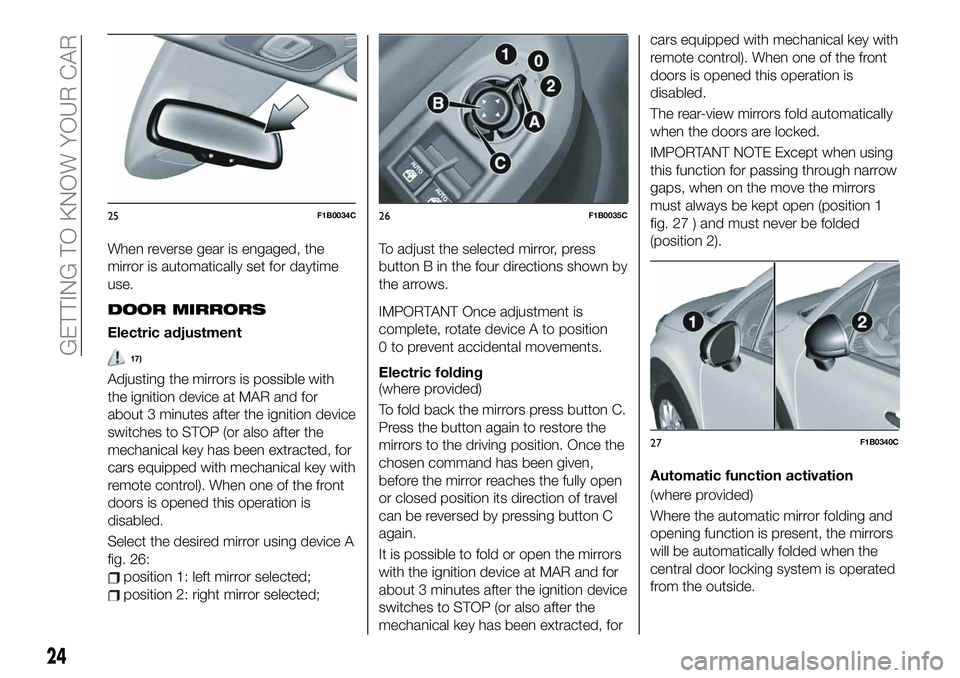
Select the desired mirror using device A
fig. 26:
position 1: left mirror selected;
position 2: right mirror selected;To adjust the selected mirror, press
button B in the four directions shown by
the arrows.
IMPORTANT Once adjustment is
complete, rotate device A to position
0 to prevent accidental movements.
Electric folding
(where provided)
To fold back the mirrors press button C.
Press the button again to restore the
mirrors to the driving position. Once the
chosen command has been given,
before the mirror reaches the fully open
or closed position its direction of travel
can be reversed by pressing button C
again.
It is possible to fold or open the mirrors
with the ignition device at MAR and for
about 3 minutes after the ignition device
switches to STOP (or also after the
mechanical key has been extracted, forcars equipped with mechanical key with
remote control). When one of the front
doors is opened this operation is
disabled.
The rear-view mirrors fold automatically
when the doors are locked.
IMPORTANT NOTE Except when using
this function for passing through narrow
gaps, when on the move the mirrors
must always be kept open (position 1
fig. 27 ) and must never be folded
(position 2).
Automatic function activation
(where provided)
Where the automatic mirror folding and
opening function is present, the mirrors
will be automatically folded when the
central door locking system is operated
from the outside.
25F1B0034C26F1B0035C
27F1B0340C
24
GETTING TO KNOW YOUR CAR
Page 27 of 284
The mirrors will automatically return to
driving position when the doors are
unlocked using the centralised function
from the outside of the car or when
switching the ignition device from the
STOP position to the MAR position.
If the mirrors were folded using device
C fig. 26, they can only be returned to
the driving position using the same
device.
Function activation/deactivation
using the Uconnect™ system
(where provided)
TheUconnect™system menu can be
used to activate/deactivate the electric
mirror folding function (the default
setting for the function is “Active”). For
further information refer to the contents
of the supplements available online.
Mirrors realignment operation
In case one of the door mirrors has
been moved manually it may occur that
the mirror itself does not retain its
position in a stable way while driving.
In that case it is necessary to carry out
the following realignment operation:
manually close the mirror in parking
position, folding it from position 1 to
position 2 (see fig. 27 );
Actuate the mirrors opening control
one or two times C fig. 26 to realign the
system and bring both mirrors in the
driving position.
WARNING
17)As the driver's door mirror is curved, it
may slightly alter the perception of
distance.
EXTERIOR LIGHTS
LIGHT SWITCH
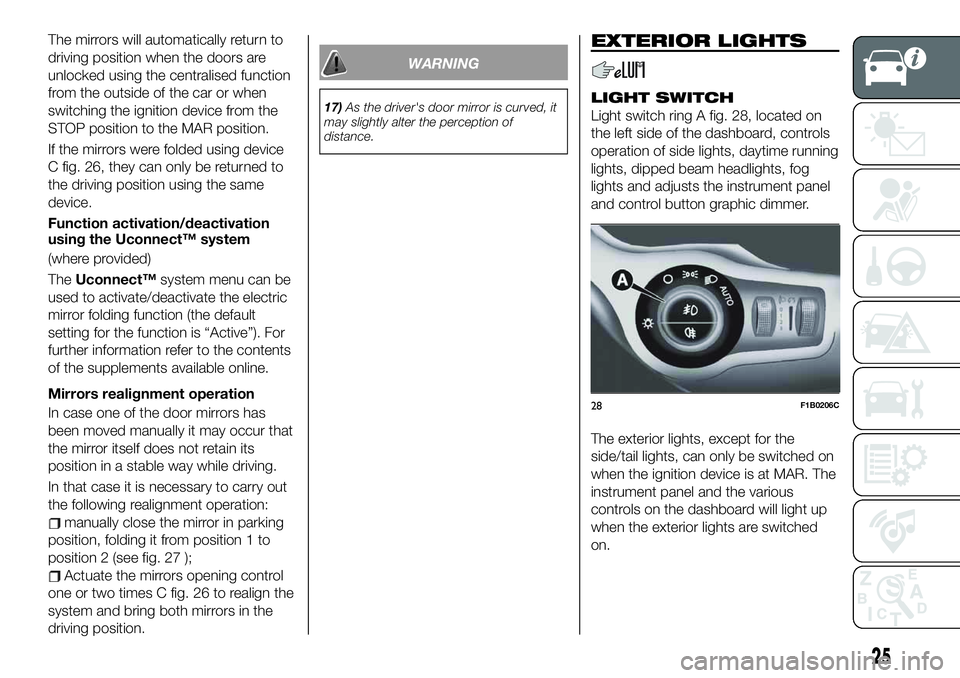
Light switch ring A fig. 28, located on
the left side of the dashboard, controls
operation of side lights, daytime running
lights, dipped beam headlights, fog
lights and adjusts the instrument panel
and control button graphic dimmer.
The exterior lights, except for the
side/tail lights, can only be switched on
when the ignition device is at MAR. The
instrument panel and the various
controls on the dashboard will light up
when the exterior lights are switched
on.
28F1B0206C
25
Page 28 of 284
AUTO FUNCTION(Dusk sensor)
(where provided)
This is an infrared LED sensor that
works in conjunction with the rain
sensor and is located on the
windscreen. It is able to detect
variations in outside lighting based on
the light sensitivity set in the display
Menu or theUconnect™system.
The higher the sensitivity, the lower the
amount of external light needed to
automatically switch the external lights
on.
Function activation
Turn the light switch ring to the AUTO
position.
IMPORTANT The function can only be
activated with the ignition device at
MAR.
For further information see “Headlights
off delay (Follow me home)” section.
Function deactivation
To deactivate the function, turn the light
switch ring to a position other than
AUTO.
DIPPED BEAM
HEADLIGHTS
With the ignition device in MAR
position, turn the light switch ring to
: the position lights, the dipped
beam headlights and the instrumentpanel come on; the
light on the
panel illuminates.
DAYTIME RUNNING
LIGHTS (DRL)
"Daytime Running Lights"
18) 19)
With the ignition device in the MAR
position and the light ring turned to the
Oposition, the daytime running lights
are automatically activated. The other
lights and interior lighting remain off.
The daytime running lights are
temporarily deactivated when the
direction indicators are activated. When
the direction indicators are deactivated,
the daylight running lights are
reactivated.
FOG LIGHTS(where provided)
The fog light button is integrated with
the light switch.
With ignition device in the MAR
position, press button
.
With fog lights on, the
warning light
on the instrument panel will come on at
the same time.
With the ignition device in the MAR
position and the fog lights on, the
position and number plates lights are
on while the daytime running lights are
off.To switch them off, press the button
again or turn the light switch ring toO.
The fog lights (for versions/markets,
where provided) are switched off by
switching on the main beam headlights
or turning the ignition device to the
STOP position.
If the ignition device is turned to the
STOP position with the fog lights on,
they stay on when the key is turned to
the MAR position.
REAR FOG LIGHT(where provided)
The button which turns the rear fog light
on and off is integrated in the light
switch.
With the position and dipped beam
headlights on, press the
button to
switch on the rear fog light.
With rear fog light on, the warning light
on the instrument panel will come
on at the same time.
Press the button again to switch off; the
rear fog light also switches off
automatically by switching off the
dipped beam headlights or the fog
lights or by switching the ignition device
to the STOP position.
26
GETTING TO KNOW YOUR CAR
Page 29 of 284
PARKING LIGHTS
These can be turned on by turning the
light switch ring to the
position.
The
warning light switches on in
the instrument panel.
IMPORTANT NOTE Do not select this
light switch position when the car is
moving, but only to indicate that the car
is parked when prescribed by the
regulations in force in the country where
you are driving (Highway Code).
To turn the lights off, turn the light
switch ring to theOposition
HEADLIGHTS OFF DELAY
(Follow me home)
Activation
With multifunction display and
Uconnect™Radio: turn the ignition
device to STOP. Within 2 minutes, pull
the left stalk to headlight flashing mode:
the headlight off delay is activated for
30 seconds. The function can be
activated for 7 times in sequence, i.e.
up to a total of 210 seconds.
With reconfigurable multifunction
display and/orUconnect™7'': the
headlight off delay can be set (from 0,
30, 60 to 90 seconds) in the Menu.
If the headlight off delay is set to
0 seconds, it is possible to turn on the
lights for a predefined time of
30 seconds using the main beamheadlights stalk within 2 minutes after
stopping the engine. It is possible to
turn on the lights 7 times, for a
maximum of 210 seconds.
If the value set on the Menu is different
from 0, the lights can be switched of for
the predetermined time by taking the
ring from position
(with the engine
running) to positionO(with the engine
off).
The function can be activated
automatically on versions with dusk
sensor: turn the ring to theAUTO
position with the engine running. The
dipped beam headlights will be turned
on if the sensor detects a low level of
light. The headlights off delay is enabled
automatically when the ignition device is
turned to STOP with the low beam
headlights on for the time selected in
the Menu.
Deactivation
If the function is activated by using the
left steering wheel stalk, the function
can be deactivated by holding the left
lever in "main beam flashing" mode for
longer than 2 seconds or by waiting for
the deactivation time shown on the
display.
The function cannot be deactivated if it
is activated using the light line. The
headlights will be switched off at the
end of the set time.Turning the ignition device to the MAR
position will deactivate the function.
MAIN BEAM HEADLIGHTS
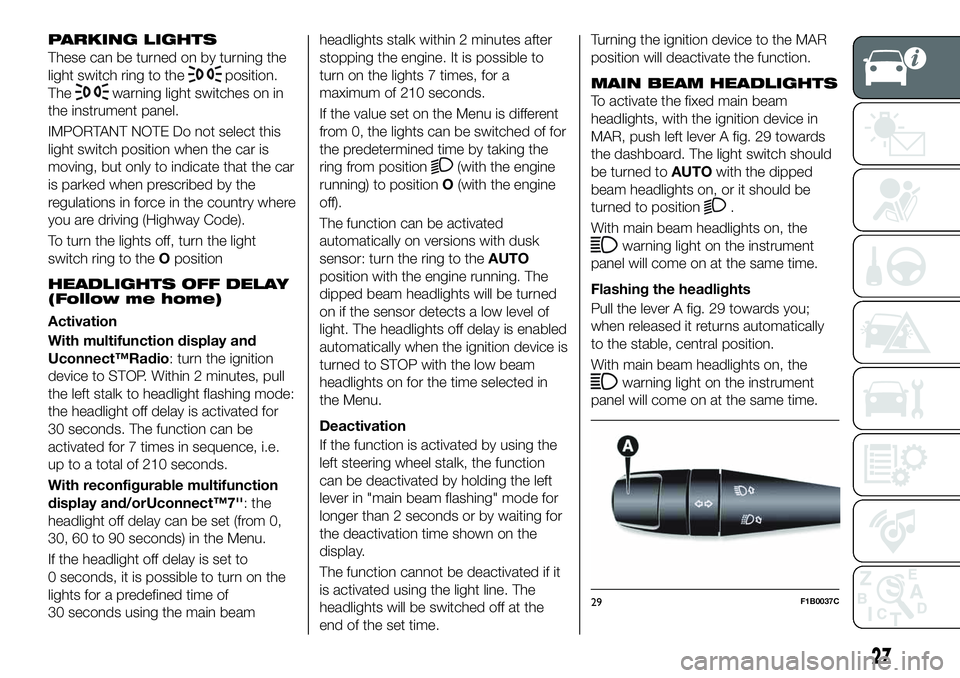
To activate the fixed main beam
headlights, with the ignition device in
MAR, push left lever A fig. 29 towards
the dashboard. The light switch should
be turned toAUTOwith the dipped
beam headlights on, or it should be
turned to position
.
With main beam headlights on, the
warning light on the instrument
panel will come on at the same time.
Flashing the headlights
Pull the lever A fig. 29 towards you;
when released it returns automatically
to the stable, central position.
With main beam headlights on, the
warning light on the instrument
panel will come on at the same time.
29F1B0037C
27
Page 30 of 284
Automatic main beam headlights
(where provided)
In order not to disturb other road users,
the main beam headlights are
automatically turned off when
approaching oncoming vehicles or
when following a vehicle travelling in the
same direction.
This function can be set using the
display Menu (see the instructions in the
"Display" paragraph, "Knowing the
instrument panel" chapter); to activate
it, turn the light switch ring to AUTO.
To activate the function, push the lever
towards the instrument panel (it will
hold this position): the
light
illuminates on the instrument panel. If
the main beam headlights are on, the
light also illuminates. If the car is
stopped with the setting just described,
when it is restarted the automatic main
beam headlight function will have to be
set again: return the lever to the central
position and push it towards the
instrument panel as before.
When the speed is over 40 km/h and
the function is active, returning the lever
to the stable central position
deactivates the function and switches
the main beam headlights off.When the speed is lower than 15 km/h
and the function is active, the system
automatically switches main beam
headlights off.
If the lever is pulled back to the central
stable position and then pushed
towards the instrument panel again and
left there, this is interpreted as a request
for permanent main beam headlights:
the light illuminates on the instrument
panel and the main beam headlights
remain on until the car's speed rises
back above 40 km/h. Above this speed,
the function is automatically reactivated
and the
light illuminates again on
the instrument panel.
To disable the function, turn the light
switch ring to the
position.
DIRECTION INDICATORS
Bring left lever A fig. 29 to the (stable)
position:
upwards: activates the right direction
indicator;
downwards: activates the left direction
indicator.
The
orwarning light respectively
will flash on the instrument panel.
The direction indicators switch off
automatically when the steering wheel
is straightened or when the daytime
running lights (DRL) are switched on."Lane Change" function
To indicate a change of lane with the
car moving, move the left lever to the
non-stable position for less than half a
second.
The direction indicator on the side
selected will be activated for 5 flashes
and then go out automatically.
COURTESY LIGHTS
With the ignition device in the MAR
position, this function can be used to
activate the side/tail lights and the
number plate lights for 25 seconds
whenever the doors are unlocked using
the remote control or the Keyless Entry
function.
The courtesy light function can be
adjusted through the display Menu or
theUconnect™system.
The function is automatically disabled
once the activation time elapses
(25 seconds), or when the car doors
are locked again, or by turning the
ignition device to a position other than
MAR.
28
GETTING TO KNOW YOUR CAR
Page 31 of 284
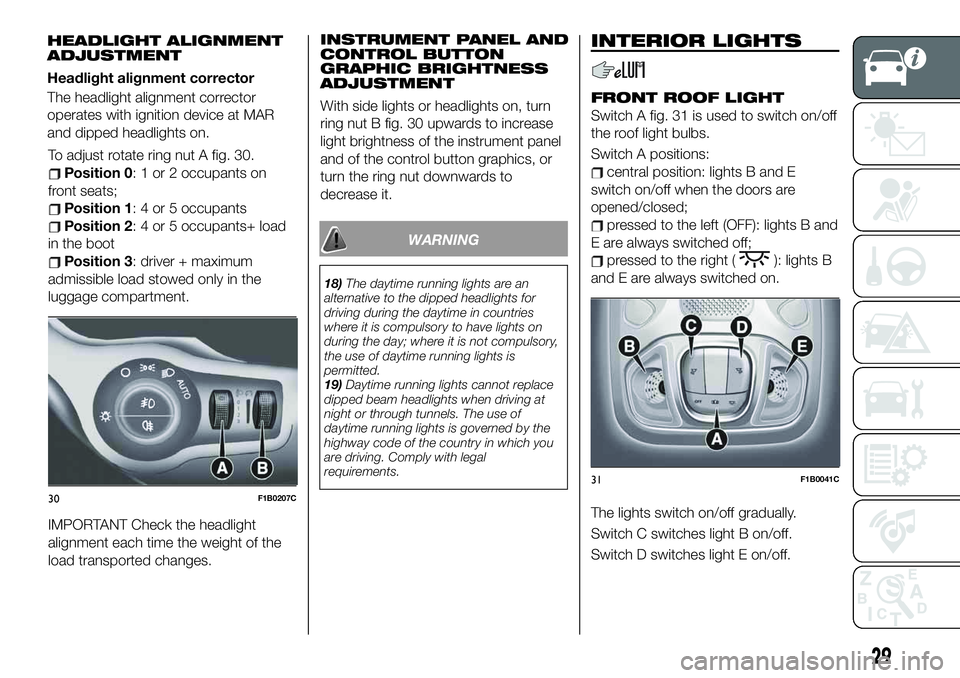
To adjust rotate ring nut A fig. 30.
Position 0: 1 or 2 occupants on
front seats;
Position 1: 4 or 5 occupants
Position 2: 4 or 5 occupants+ load
in the boot
Position 3: driver + maximum
admissible load stowed only in the
luggage compartment.
IMPORTANT Check the headlight
alignment each time the weight of the
load transported changes.INSTRUMENT PANEL AND
CONTROL BUTTON
GRAPHIC BRIGHTNESS
ADJUSTMENT
With side lights or headlights on, turn
ring nut B fig. 30 upwards to increase
light brightness of the instrument panel
and of the control button graphics, or
turn the ring nut downwards to
decrease it.
WARNING
18)The daytime running lights are an
alternative to the dipped headlights for
driving during the daytime in countries
where it is compulsory to have lights on
during the day; where it is not compulsory,
the use of daytime running lights is
permitted.
19)Daytime running lights cannot replace
dipped beam headlights when driving at
night or through tunnels. The use of
daytime running lights is governed by the
highway code of the country in which you
are driving. Comply with legal
requirements.
INTERIOR LIGHTS
FRONT ROOF LIGHT
Switch A fig. 31 is used to switch on/off
the roof light bulbs.
Switch A positions:
central position: lights B and E
switch on/off when the doors are
opened/closed;
pressed to the left (OFF): lights B and
E are always switched off;
pressed to the right (): lights B
and E are always switched on.
The lights switch on/off gradually.
Switch C switches light B on/off.
Switch D switches light E on/off.
30F1B0207C
31F1B0041C
29
HEADLIGHT ALIGNMENT
ADJUSTMENT
Headlight alignment corrector
The headlight alignment corrector
operates with ignition device at MAR
and dipped headlights on.
Page 32 of 284
Roof light timing
On certain versions, to facilitate getting
in/out of the vehicle at night or in
poorly-lit areas, two timed modes have
been provided.
Timing while getting into the vehicle
Timing while getting out of the
vehicle.
WINDSCREEN/REAR
WINDOW WIPER
Operation is only possible with the
ignition device at MAR.
SCREEN WIPER/WASHER
Operation
7) 8)
20)
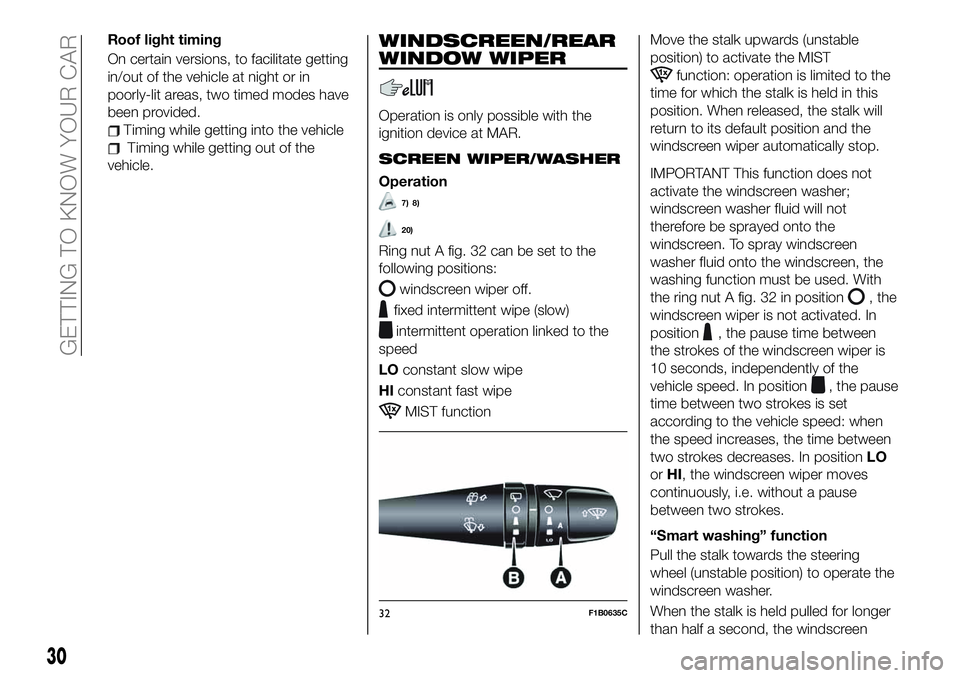
Ring nut A fig. 32 can be set to the
following positions:
windscreen wiper off.
fixed intermittent wipe (slow)
intermittent operation linked to the
speed
LOconstant slow wipe
HIconstant fast wipe
MIST functionMove the stalk upwards (unstable
position) to activate the MIST
function: operation is limited to the
time for which the stalk is held in this
position. When released, the stalk will
return to its default position and the
windscreen wiper automatically stop.
IMPORTANT This function does not
activate the windscreen washer;
windscreen washer fluid will not
therefore be sprayed onto the
windscreen. To spray windscreen
washer fluid onto the windscreen, the
washing function must be used. With
the ring nut A fig. 32 in position
, the
windscreen wiper is not activated. In
position
, the pause time between
the strokes of the windscreen wiper is
10 seconds, independently of the
vehicle speed. In position
, the pause
time between two strokes is set
according to the vehicle speed: when
the speed increases, the time between
two strokes decreases. In positionLO
orHI, the windscreen wiper moves
continuously, i.e. without a pause
between two strokes.
“Smart washing” function
Pull the stalk towards the steering
wheel (unstable position) to operate the
windscreen washer.
When the stalk is held pulled for longer
than half a second, the windscreen
32F1B0635C
30
GETTING TO KNOW YOUR CAR
Page 33 of 284
wiper moves with active control.
Releasing the stalk will activate three
strokes.
With the ring nut A fig. 32 turned to
positionLOorHI, the smart washing
function is not carried out.
IMPORTANT If the stalk is activated for
less than half a second, only the
windscreen washer jet is activated. Do
not prolong the activation of the "Smart
Washing" function for more than
30 seconds. Do not activate the
windscreen washer control when the
reservoir is empty.
RAIN SENSOR
(where provided)
9) 10)
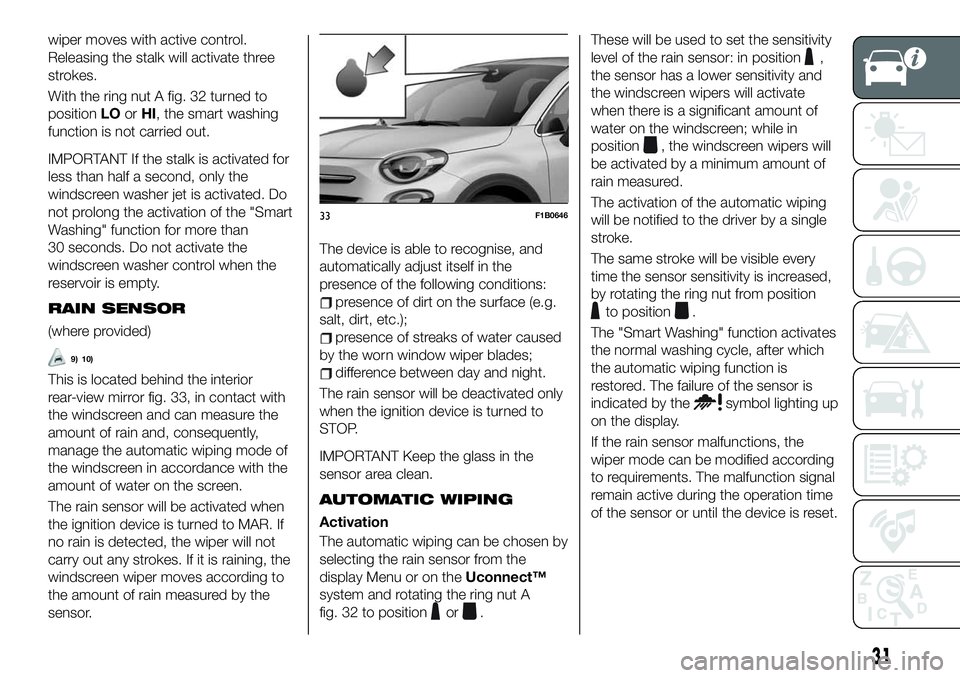
This is located behind the interior
rear-view mirror fig. 33, in contact with
the windscreen and can measure the
amount of rain and, consequently,
manage the automatic wiping mode of
the windscreen in accordance with the
amount of water on the screen.
The rain sensor will be activated when
the ignition device is turned to MAR. If
no rain is detected, the wiper will not
carry out any strokes. If it is raining, the
windscreen wiper moves according to
the amount of rain measured by the
sensor.The device is able to recognise, and
automatically adjust itself in the
presence of the following conditions:
presence of dirt on the surface (e.g.
salt, dirt, etc.);
presence of streaks of water caused
by the worn window wiper blades;
difference between day and night.
The rain sensor will be deactivated only
when the ignition device is turned to
STOP.
IMPORTANT Keep the glass in the
sensor area clean.
AUTOMATIC WIPING
Activation
The automatic wiping can be chosen by
selecting the rain sensor from the
display Menu or on theUconnect™
system and rotating the ring nut A
fig. 32 to position
or.These will be used to set the sensitivity
level of the rain sensor: in position
,
the sensor has a lower sensitivity and
the windscreen wipers will activate
when there is a significant amount of
water on the windscreen; while in
position
, the windscreen wipers will
be activated by a minimum amount of
rain measured.
The activation of the automatic wiping
will be notified to the driver by a single
stroke.
The same stroke will be visible every
time the sensor sensitivity is increased,
by rotating the ring nut from position
to position.
The "Smart Washing" function activates
the normal washing cycle, after which
the automatic wiping function is
restored. The failure of the sensor is
indicated by the
symbol lighting up
on the display.
If the rain sensor malfunctions, the
wiper mode can be modified according
to requirements. The malfunction signal
remain active during the operation time
of the sensor or until the device is reset.
33F1B0646
31
Page 34 of 284
Inhibition
If the ignition device is turned to STOP,
leaving the ring nut A in position
or
, when the engine is next started
(ignition device at MAR), no wiping
cycle occurs for system protection
reasons.
This temporary inhibition prevents
unwanted activation of the wipers when
the car is started (i.e. when the
windscreen is being washed by hand or
the wipers are stuck to the windscreen
by ice).
It is possible to reactivate the automatic
wiping mode in three ways:
by rotating the ring nut to positionO
and then again to position
or
by moving the stalk upwards to
position MIST
upon exceeding the 5 km/h speed
with the rain sensor
When the windscreen wiper is
reactivated using any of the
manoeuvres described above,
reactivation is indicated by a single
stroke of the windscreen wipers,
regardless of the condition of the
windscreen.
IMPORTANT For automatic
transmission vehicles with rain sensor,
engaging the gear N (Neutral) inhibits
the automatic wiping mode.
Deactivation
It is possible to deselect the automatic
wiping through the display Menu or the
Uconnect™system, or by rotating ring
nut A to any non-intermittent position (
or).
Service Position
The function allows the driver to replace
the windscreen wiper blades more
easily, protecting them also from ice
and/or snow.
Activation
To activate this function deactivate the
windscreen wiper (ring nut A fig. 32 in
position
) before setting the ignition
device to STOP. This function can only
be activated within 2 minutes of setting
the ignition device to STOP.
To activate this function, move the lever
upwards (unstable position) for at least
half a second.
Each time the function is activated
correctly, the wiper blades move to
signal the correct reception of the
command. The command can be
repeated up to a maximum of the three
times. The fourth repetition of the
command deactivates the function.
If, after using the function, the ignition
device is set back to MAR with the
blades in a position other than rest
position (at the base of the windscreen),they will only return to rest position
following a command given using the
stalk (stalk upwards, into unstable
position) or when a speed of 5 km/h is
exceeded.
IMPORTANT Before activating the
function, make sure that when the
engine is turned on the windscreen
wiper is free of snow or ice
Deactivation
The function is deactivated if:
2 minutes have passed since the
ignition device was set to STOP;
the ignition device is set to MAR and
the blades are in rest position;
the ignition device is set to MAR and
a wiping command is carried out.
REAR WINDOW WIPER/
WASHER
Turn the ring B fig. 32 to set the
rearscreen wiper to operate in the
following modes:
continuous: when ring is in the
position;
intermittent: when ring is in the
position and the windscreen wiper is
stationary;
synchronous: when the rearscreen
wiper ring is in the
position and the
windscreen wiper is moving or set to
AUTO. In this mode, the rear window
wiper makes one stroke for each two
strokes of the windscreen wiper;
32
GETTING TO KNOW YOUR CAR