ESP FIAT CROMA 2007 2.G Connect NavPlus Manual
[x] Cancel search | Manufacturer: FIAT, Model Year: 2007, Model line: CROMA, Model: FIAT CROMA 2007 2.GPages: 166, PDF Size: 4.82 MB
Page 10 of 166
9
CONNECT Nav+
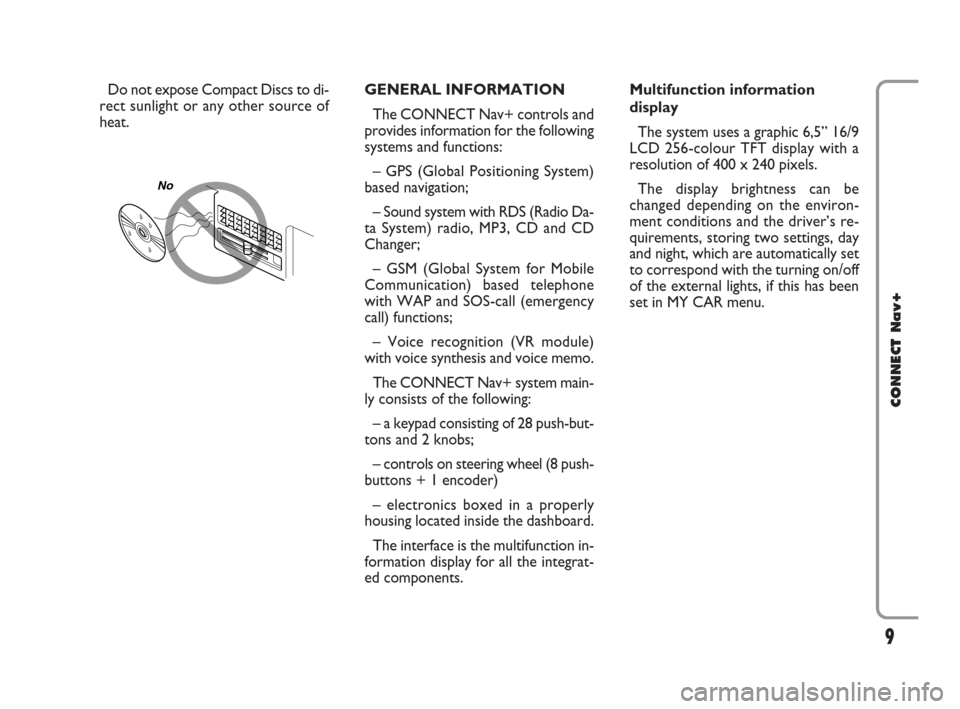
Do not expose Compact Discs to di-
rect sunlight or any other source of
heat.GENERAL INFORMATION
The CONNECT Nav+ controls and
provides information for the following
systems and functions:
– GPS (Global Positioning System)
based navigation;
– Sound system with RDS (Radio Da-
ta System) radio, MP3, CD and CD
Changer;
– GSM (Global System for Mobile
Communication) based telephone
with WAP and SOS-call (emergency
call) functions;
– Voice recognition (VR module)
with voice synthesis and voice memo.
The CONNECT Nav+ system main-
ly consists of the following:
– a keypad consisting of 28 push-but-
tons and 2 knobs;
– controls on steering wheel (8 push-
buttons + 1 encoder)
– electronics boxed in a properly
housing located inside the dashboard.
The interface is the multifunction in-
formation display for all the integrat-
ed components.Multifunction information
display
The system uses a graphic 6,5” 16/9
LCD 256-colour TFT display with a
resolution of 400 x 240 pixels.
The display brightness can be
changed depending on the environ-
ment conditions and the driver’s re-
quirements, storing two settings, day
and night, which are automatically set
to correspond with the turning on/off
of the external lights, if this has been
set in MY CAR menu.
No
001-020 Connect CROMA GB 3-07-2007 8:52 Pagina 9
Page 17 of 166
16
CONNECT Nav+
SYSTEM POWER ON
The CONNECT Nav+ can be
switched on according to two differ-
ent methods:
automatic switching onwith ig-
nition key to ON;
manual switching on:
– by button 17-fig. 1; In carrying out any manoeuvre it is
always necessary to follow the rules of
the road, regardless of the advice giv-
en by the navigation system. If you
leave the suggested route, the naviga-
tion system will calculate a new one
and suggest it to you.
The navigation system
helps the driver while dri-
ving by suggesting, vocally and
graphically, the best route to be
followed to reach the preset des-
tination. The suggestions given by
the navigation system do not ex-
empt the driver from full responsi-
bility due to driving behaviour and
compliance with road and other
traffic regulations. The responsi-
bility for road safety always and
anyway lies with the car’s driver.
WARNING
001-020 Connect CROMA GB 3-07-2007 8:52 Pagina 16
Page 23 of 166
22
CONNECT Nav+
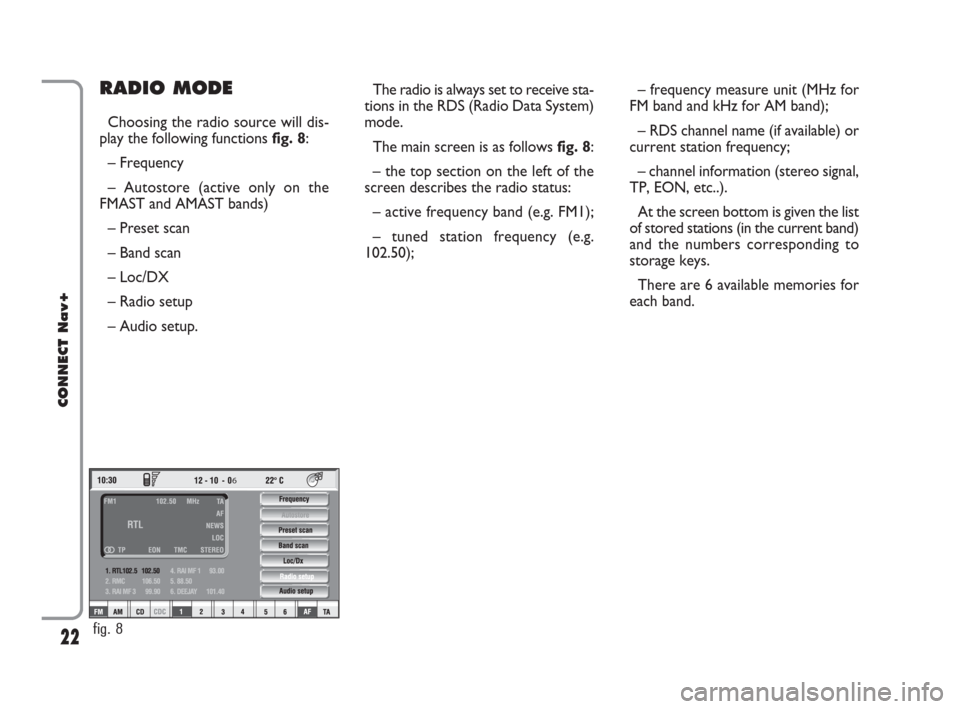
– frequency measure unit (MHz for
FM band and kHz for AM band);
– RDS channel name (if available) or
current station frequency;
– channel information (stereo signal,
TP, EON, etc..).
At the screen bottom is given the list
of stored stations (in the current band)
and the numbers corresponding to
storage keys.
There are 6 available memories for
each band.RADIO MODE
Choosing the radio source will dis-
play the following functions fig. 8:
– Frequency
– Autostore (active only on the
FMAST and AMAST bands)
– Preset scan
– Band scan
– Loc/DX
– Radio setup
– Audio setup.The radio is always set to receive sta-
tions in the RDS (Radio Data System)
mode.
The main screen is as follows fig. 8:
– the top section on the left of the
screen describes the radio status:
– active frequency band (e.g. FM1);
– tuned station frequency (e.g.
102.50);
6
fig. 8
021-059 Connect CROMA GB 2-07-2007 15:39 Pagina 22
Page 24 of 166
23
CONNECT Nav+
At the screen bottom there are the
functions that can be activated by press-
ing the corresponding multifunction
keys 16-fig. 1, on the front panel:
– FMactivates, on successive push-
es FM1, FM2, FM3, FMAST, FM1… ra-
dio bands in a loop.
– AMactivates, on successive push-
es MW, LW, AMAST, MW… radio
bands in a loop
– CD activates CD
– CDCactivates CD Changer
– 1-6buttons (short push), select a
pre-stored station
– 1-6 buttons (long push), store the
currently active station at the select-
ed button
– AFalternative frequency search
on/off
– TAtraffic information on/off.Tuning
This function seeks stations in the
chosen band.
Proceed as follows:
– select the frequency band (FM1,
FM2, FM3, MW, LW) pressing the
“SRC” key repeatedly 2-fig. 1;
– press key “
¯¯” 5-fig. 1or “˙˙”
6-fig. 1to start the search for tuning
the next or previous station that can
be received.
If the “TA” function is on (traffic in-
formation), the tuner only seeks sta-
tions that broadcast traffic bulletins.
If the “PTY” function is on, the tuner
only seeks stations with the selected
PTY program (see paragraph "PTY-
PROG TYPE function”).Manual station storage
The station being heard can be
stored in the range chosen with key-
pad buttons 16-fig. 1numbered from
“1” to “6” at the bottom of the main
screen.
Keep one of these keys pressed un-
til the display shows the number of the
key with which the station has been
stored; a confirmation beep will indi-
cate that the station has been stored.
021-059 Connect CROMA GB 2-07-2007 15:39 Pagina 23
Page 27 of 166
26
CONNECT Nav+
– With AF OFF the radio will not
tune the strongest station automati-
cally and it will have to be found man-
ually using the tuner buttons.
To turn on/off this function, press
briefly one of the keypad keys 16-fig.
1set near the icon key AF.
When the AF function is on, the
display shows “AF” and the wording
on the icon key is darkened.
The RDS channel name (if available)
is still shown on the display.“FREQUENCY” FUNCTION
The “Frequency” function enables to
tune the required radio station by
turning knob 15-fig. 1clockwise or
counter-clockwise.
To turn the “Frequency” function on,
turn knob 15-fig. 1to select the cor-
responding icon key and then press it.
To turn this function off, press again
knob 15-fig. 1. AF - SEEKING ALTERNATIVE
FREQUENCIES
Within the RDS system the radio can
work in two different modes:
– AF ON: alternative frequency
search on;
– AF OFF: alternative frequency
search off.
When the signal of the RDS station
tuned weakens, the following two cas-
es may occur:
– With AF ON the RDS system ac-
tivates automatic tuning of the opti-
mum frequency of the station chosen,
with the stations enabled, therefore
the radio is automatically tuned to the
station with the strongest signal that
is broadcasting the same programme.
During the journey it will thus be pos-
sible to continue listening to the sta-
tion chosen without having to change
the frequency when changing area. Of
course, the station being listened to
must be receivable in the area the car
is crossing.
021-059 Connect CROMA GB 2-07-2007 15:39 Pagina 26
Page 28 of 166
27
CONNECT Nav+
During automatic storage the display
shows “Autostore”.
Stations will be stored automatically
on the preset keys from “1” to “6” of
the keypad16-fig. 1. After storage,
the radio tunes automatically to the
first station of the FMAST band, cor-
responding to the frequency stored on
the preset key “1” of the keypad 16-
fig. 1.
Every station is stored only once, ex-
cept in the case of regional pro-
grammes, which in certain cases might
be stored twice.The behaviour of the set during Au-
tostore is as follows:
– pressing one of the preset keys
from “1” to “6” the automatic storage
process is interrupted and the station
stored with that key is tuned
– changing the audio source (Radio,
CD, CD-Changer) during the auto-
matic storage process, the Autostore
function is interrupted. “Autostore” FUNCTION
(AUTOMATIC STATION
STORAGE)
After selecting the AMAST or
FMAST band, to turn on the Auto-
store function (automatic station stor-
age), select the “AUTOSTORE” icon
with the knob 15-fig. 1then press it
to confirm.
When this function is on, the radio
automatically stores the stations with
the strongest signal:
– 6 FM stations in the FMAST band
or
– 6 AM stations in the AMAST band.
021-059 Connect CROMA GB 2-07-2007 15:39 Pagina 27
Page 29 of 166
28
CONNECT Nav+
IMPORTANTIt may occur that
the Autostore function is unable to
find 6 stations with a strong signal; in
this case only the stations found are
stored.
IMPORTANTActivating the “Au-
tostore” function cancels the stations
stored previously in the FMAST or
AMAST band.“Band Scan” FUNCTION
The “Band scan” function activates
station scanning in the chosen fre-
quency band. Each station frequency
will be displayed for about 10 seconds.
To turn the “Band scan” function on,
select the “Band scan” icon with the
knob 15-fig. 1then press it to con-
firm.
During scanning, the display will
show “Band Scan”.
Scanning will be interrupted by press-
ing knob 15-fig. 1again (by taking care
to be positioned onto the “Preset
Scan” graphic key), or by selecting a
station previously memorized. “Preset Scan” FUNCTION
The “Preset scan” function activates
stored station scanning in the chosen
frequency band. Each stored station
will be played for about 10 seconds.
To turn on the “Preset scan” func-
tion, select the “Preset scan” icon with
the knob 15-fig. 1and then press it to
confirm.
During stations scan, the scanned
one is highlighted in the stored sta-
tions window and corresponding low-
bar button too. During operations the
string “Preset Scan” is displayed in the
main window.
Scanning will be interrupted by press-
ing knob 15-fig. 1again (by taking care
to be positioned onto the “Preset
Scan” graphic key), or by selecting a
station previously memorized.
021-059 Connect CROMA GB 2-07-2007 15:39 Pagina 28
Page 32 of 166
31
CONNECT Nav+
“RDS” FUNCTION
The “RDS” function enables/disables
RDS string (showing the tuned station
name) display.
To turn the “RDS” function on/off,
select the “RDS” function turning the
knob 15-fig. 1and press it.
When the “RDS” function is on, the
display shows the string with tuned
station name and the symbol “✓” is
shown near the corresponding icon.Regional function
This function enables or disables a
RDS regional service.
To turn the “Regional” function
on/off, select the “Regional” function
by turning the knob 15-fig. 1and then
press it to confirm. This function is on-
ly available on FM band. The display
shows
– “DISABLED”
or
– “ENABLED”.OK
Choosing and confirming “OK” with
the knob 15-fig. 1, goes back to the
previous screen storing the adjust-
ments set. Pressing “ESC” 14-fig. 1
goes back to the previous screen re-
suming the settings stored previously.
021-059 Connect CROMA GB 2-07-2007 15:39 Pagina 31
Page 38 of 166
CD MODE
IMPORTANTNever use 8 cm au-
dio or MP3 CDs, even with the spe-
cial adapter, since this format damages
the system.
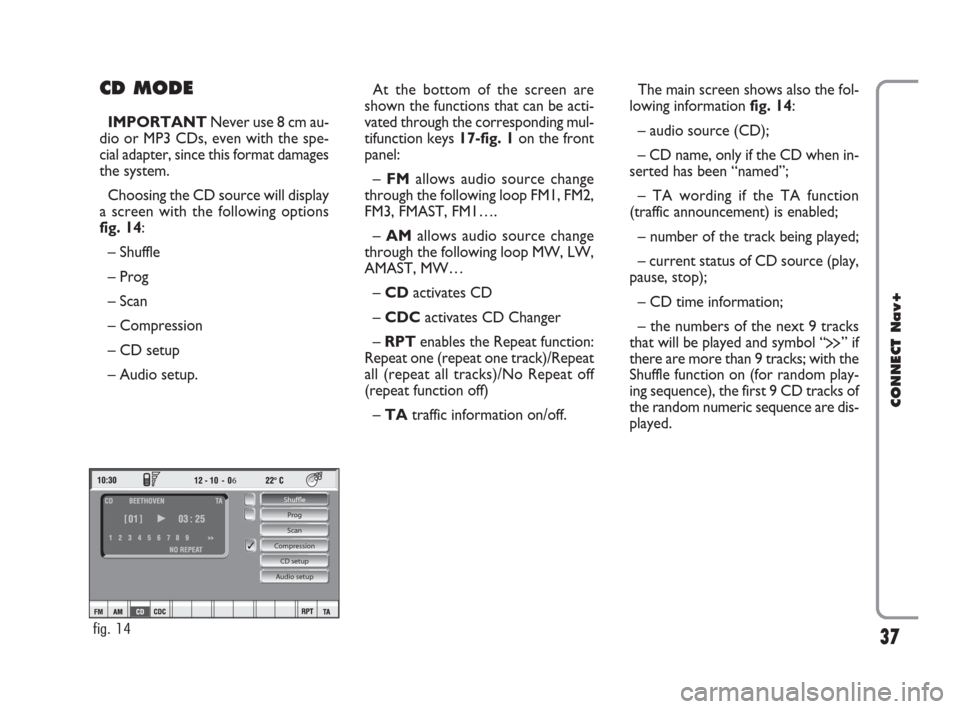
Choosing the CD source will display
a screen with the following options
fig. 14:
– Shuffle
– Prog
– Scan
– Compression
– CD setup
– Audio setup.At the bottom of the screen are
shown the functions that can be acti-
vated through the corresponding mul-
tifunction keys 17-fig. 1on the front
panel:
– FMallows audio source change
through the following loop FM1, FM2,
FM3, FMAST, FM1….
– AMallows audio source change
through the following loop MW, LW,
AMAST, MW…
– CDactivates CD
– CDCactivates CD Changer
– RPTenables the Repeat function:
Repeat one (repeat one track)/Repeat
all (repeat all tracks)/No Repeat off
(repeat function off)
– TAtraffic information on/off.The main screen shows also the fol-
lowing information fig. 14:
– audio source (CD);
– CD name, only if the CD when in-
serted has been “named”;
– TA wording if the TA function
(traffic announcement) is enabled;
– number of the track being played;
– current status of CD source (play,
pause, stop);
– CD time information;
– the numbers of the next 9 tracks
that will be played and symbol “
§” if
there are more than 9 tracks; with the
Shuffle function on (for random play-
ing sequence), the first 9 CD tracks of
the random numeric sequence are dis-
played.
37
CONNECT Nav+
6
Shuffle
Prog
Scan
Compression
CD setup
Audio setup
fig. 14
021-059 Connect CROMA GB 2-07-2007 15:39 Pagina 37
Page 39 of 166
38
CONNECT Nav+
If the CD is not inserted, is illegible
or is not an audio CD, the display will
show the message “No CD” or “No
CD-DA” and all CD/CDC icon keys
are disabled.
Press respectively “
¯¯” 5-fig. 1or
“
˙˙” 6-fig. 1to play the previous or
the next track on the CD.
To stop playing a CD, long press on
key “
˙/I I” 9-fig. 1. To pause a CD,
short press on button “
˙/I I” 9-fig. 1.
To resume playing a CD, repeat the
short press on key “
˙/I I” 9-fig. 1.
To eject the CD from the slot
7-fig. 1press key 8-fig. 1.“Shuffle” FUNCTION
(RANDOM PLAYING)
To turn the “Shuffle” function on/off,
select it by turning the knob
15-fig. 1and then press it to confirm.
When the Shuffle function is on, the
display shows “SHUFFLE” and symbol
“✓” is shown near the corresponding
icon.
With this function on, the CD
tracks are played in random se-
quence. To turn off this function,
press knob 15-fig. 1again. “Prog” FUNCTION
To turn the “Prog” function on/off, ro-
tate knob 15-fig. 1and then press it af-
ter selecting the function. This function
can only be selected with CD or CDC
at STOP.
This function enables or disables
playback of the previously user pro-
grammed track list (see “CD setup”
functions).
“Prog” icon key is disabled if no pro-
grammed list has been entered.
When list has been programmed and
programmed list playing has been cho-
sen, symbol “✓” is shown near the
corresponding icon.
021-059 Connect CROMA GB 2-07-2007 15:39 Pagina 38