climate control FIAT DOBLO COMBI 2015 2.G User Guide
[x] Cancel search | Manufacturer: FIAT, Model Year: 2015, Model line: DOBLO COMBI, Model: FIAT DOBLO COMBI 2015 2.GPages: 323, PDF Size: 46.77 MB
Page 59 of 323
Climate control
compressor
enablement/off button
(F)
Press button
to switch the climate
control compressor off (if on). The
icon on the display will go out.
Press the button when the LED is off
to automatically restore system
control and use of the compressor.
The icon will light up in the display in
this case.
The system will switch recirculation
off when the compressor is
switched off to prevent windows
from misting up. Although the
system is capable of maintaining the
required temperature, the word
FULL will disappear from the display.
If, on the other hand, it is no longer
capable of maintaining the
temperature, the letters flash and
the word AUTO goes out.
IMPORTANT With the compressor
off, it is not possible to introduce air
cooler than ambient temperature
into the passenger compartment.
Furthermore, in certain conditions,
the windows could mist up rapidly
because the air is not dehumidified.The system remembers that the
compressor has been switched off,
even after the engine has stopped.
To restore automatic compressor
control, press thebutton again (in
this case, the system will only work
as a heater) or press the AUTO
button.
With the compressor switched off, if
the outside temperature is higher
than the one set, the system is not
capable of satisfying this request
and signals it by the digits for the
temperature setting flashing after
which the word AUTO goes out.
With the climate control compressor
off, the fan speed can be set to
zero manually (no bar shown).
With the compressor enabled and
the engine started, the fan speed
may be reduced to the minimum
setting (only one bar shown).Button for rapid
window demisting/
defrosting (D)
Pressing this button, the climate
control system will automatically
switch on all the functions required
for fast windscreen and front side
window demisting/defrosting:
❒switches on climate control
compressor when climatic conditions
are suitable;
❒sets air recirculation off;
❒sets maximum air temperature HI in
both areas;
❒sets the fan speed according to the
engine coolant temperature to limit
the flow of air that is not sufficiently
warm to demist the windows;
❒directs air flow to windscreen and
front side windows vents;
❒sets heated rear window on.
IMPORTANT The rapid demisting/
defrosting function for the windows
remains on for about 3 minutes from
when the engine coolant reaches
the appropriate temperature for
a rapid demisting of the windows.
55
Page 60 of 323
When this function is active, the LED
on the corresponding button and
the one on the heated rear window
button switch on. The message
FULL AUTO goes off on the display.
You can only adjust the fan speed
and switch off the heated rear
window manually when this function
is active.
To restore the previous operating
conditions, simply press button B,
air recirculation button G,
compressor button F or AUTO
button A.
Heated rear window
and door mirrors
electric control
demisting/defrosting
button (L)
(for versions/markets, where
provided)
Push this button to activate the
demisting/defrosting of the heated
rear window and electric door
mirrors
When this function is active, the
button LED is on.This function switches off
automatically after about 20 minutes
or when you push the button again,
or when the engine is turned off. It
will not be switched on automatically
when the engine is restarted.
IMPORTANT Do not affix decals to
the inside of the heated rear window
over the heating filaments, to avoid
damage that might cause them
to stop working properly.
Switching the system
OFF (E)
Press button E to switch the climate
control system off. The display will
go out.
With the system off, the climate
control system conditions are as
follows: display off, temperature
setting not display, air recirculation
on thereby insulating the passenger
compartment from the outside
(recirculation LED on), climate
control compressor off, fan off.
Press the AUTO button to switch
the climate control system back on
in full automatic mode.ELECTRIC WINDOWS
FRONT ELECTRIC
WINDOWS
There are buttons on the driver side
door panel which control the
following functions, with the ignition
key turned to MAR:
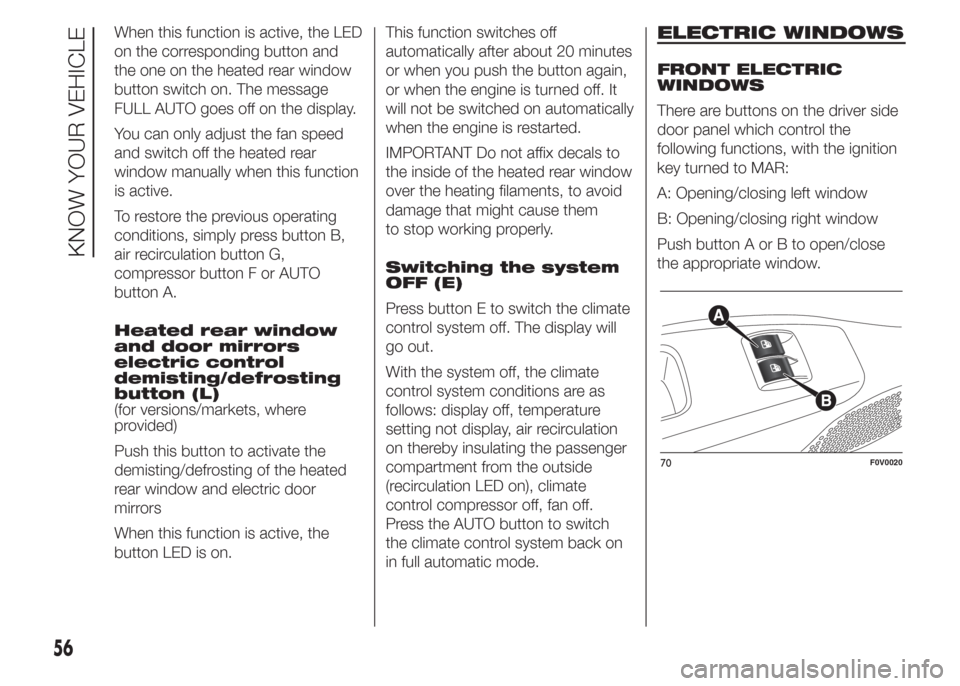
A: Opening/closing left window
B: Opening/closing right window
Push button A or B to open/close
the appropriate window.
70F0V0020
56
KNOW YOUR VEHICLE
Page 80 of 323
SPEEDOMETER
This shows the speed at which the
vehicle is travelling.
REV COUNTER
The rev counter shows the engine
rpm.
IMPORTANT The electronic injection
control system gradually shuts off
the flow of fuel when the engine
is “over-revving” resulting in a
gradual loss of engine power.
When the engine is idling, the rev
counter may indicate a gradual
or sudden increase of the speed.
This behaviour is standard as it
takes place during the activation of
the climate control system or the
fan. It should not be considered as a
fault. In such cases, a slight
increase in engine idle speed helps
to sustain the battery charge.
FUEL LEVEL GAUGE
This shows the amount of fuel left in
the fuel tank.
E tank empty.F tank full (see the instructions
provided in the “Vehicle refuelling”
paragraph).
The warning light on the gauge
comes on to indicate that
approximately 8-10 litres of fuel are
left in the tank.
Do not travel with the fuel tank
almost empty: any gaps in
fuel supply could damage the
catalytic converter.
IMPORTANT The needle will point to
E and warning light A will flash to
indicate a fault in the system.
Contact a Fiat Dealership to have
the system checked.
ENGINE COOLANT
TEMPERATURE
INDICATOR
This shows the temperature of the
engine coolant fluid and starts
working when the fluid temperature
exceeds approx. 50°C.
In normal usage, the needle should
hover around the middle of the
scale.
C Low engine coolant temperature.
H High engine coolant temperature.The warning light on the gauge may
light up (and a message on the
multifunction display may appear on
certain versions) to indicate that
the coolant fluid temperature is too
high; in this case, stop the engine
and contact a Fiat Dealership.
10)
IMPORTANT
10) If the needle for the engine
coolant temperature reaches the
red area, stop the engine
immediately and contact a Fiat
Dealership.
76
KNOWING THE INSTRUMENT PANEL
Page 82 of 323
❒SPEED
❒HOUR
❒UNIT
❒BUZZ
❒BAG P
❒DRL
Selecting a menu option
– briefly press theMENU
button to select the menu
option to set;
– press buttons
and(with
single presses) to select the new
setting;
– press briefly theMENU
button to store the new setting
and go back to the previous menu
option.
Selecting “Set Clock”
– briefly press buttonMENU
to
select the first value to change
(hours);
– press buttons
and(with
single presses) to select the new
setting;– briefly press theMENU
button to store the new setting
and go to the next setup menu
option (minutes);
– after setting the values with the
same procedure, go back to the
previous menu item.
Hold down theMENU
button
– to quit the setup menu if you are in
the menu;
– to quit to the menu if you are
setting an option;
– to save only the settings already
stored (and confirmed by pressing
theMENU
button).
The environment of the Set Up
menu is timed; when the menu is
exited due to expiry of the time
allowed, only the changes already
stored by the user (confirmed
beforehand by a brief press of the
MENU
button) will be saved.Adjusting the vehicle
interior lighting (ILLU)
This function is available, with the
dipped headlamps on and at night,
to adjust the brightness of the
instrument panel, buttons, sound
system display and automatic
climate control display.
During the daytime, and with the
dipped headlamps on, the
instrument panel, buttons and
sound system and automatic
climate control displays are set to
maximum brightness.
❒press theMENUbutton briefly:
the display will show the wording
ILLU;
❒press button
andto set the
required brightness level;
❒press theMENU
button briefly
to return to the menu screen or hold
the button down to return to the
standard screen without storing.
78
KNOWING THE INSTRUMENT PANEL
Page 86 of 323
SET-UP MENU
The menu comprises a series of
functions arranged in a circular way,
which can be selected through the
andbuttons to access the
different selection operations and
settings (setup) given in the following
paragraphs. A submenu is provided
for some items (Clock and Unit of
measurement).
The setup menu is activated by
pressing briefly theMENU
button. Single presses on the
andbuttons will scroll through
the setup menu options. Operating
modes are different according to the
characteristics of the option
selected.
The menu includes the following
functions:
❒LIGHTING
❒SPEED BUZZER
❒TRIP B DATA
❒SET TIME
❒SET DATE
❒SEE RADIO (if present)
❒AUTOCLOSE
❒MEASUREMENT UNIT❒LANGUAGE
❒BUZZER VOLUME
❒BUTTON VOLUME
❒SEAT BELT BUZZER (only if
previously disabled)
❒SERVICE
❒PASSENGER AIRBAG
❒DAYTIME RUNNING LIGHTS
❒EXIT MENU
Selecting an option from the main
menu without a submenu:
– briefly press theMENU
button to select the main menu
option to be set;
– press the
orbuttons (with
single presses) to select the new
setting;
– briefly press theMENU
button to store the new setting
and to go back to the same main
menu option selected previously.Selecting an option from the main
menu with a submenu:
– briefly press theMENU
button to display the first
submenu option;
– press buttons
or(with single
presses) to scroll through all the
submenu options;
– briefly press theMENU
button to select the displayed
submenu option and to open the
relevant setup menu;
– press buttons
or(with single
presses) to select the new setting
for this submenu option;
– briefly press theMENU
button to store the new setting
and to go back to the same
submenu option selected previously.
Adjusting the vehicle
interior lighting
This function is available, with the
dipped headlamps on and at night,
to adjust the brightness of the
instrument panel, buttons, sound
system display and automatic
climate control display.
82
KNOWING THE INSTRUMENT PANEL
Page 87 of 323
During the daytime, and with the
dipped headlamps on, the
instrument panel, buttons and
sound system and automatic
climate control displays are set to
maximum brightness.
Proceed as follows to adjust the
brightness:
– press theMENU
button
briefly to make the display flash the
previously stored level;
– press button
andto set the
required brightness level;
– press theMENU
button
briefly to return to the menu screen
or hold the button down to return
to the standard screen without
storing.
Speed warning
(Speed limit)
This function enables setting of the
vehicle speed limit (km/h or mph).
When this limit is exceeded the
driver is immediately alerted (see
section “Warning lights and
messages”).
To set the desired speed limit,
proceed as follows:– briefly press theMENU
button: the display will show the
words (Speed Beep);
– press the
orbutton to select
speed limit activation (On) or
deactivation (Off);
– if the function is on, press the
or
buttons to select the required
speed limit and then pressMENU
to confirm;
NOTE The speed may be set
anywhere between 30 and 200
km/h or 20 and 125 mph,
depending on the previously chosen
unit (see “Setting the unit of
measurement (Unit)”). The setting
will increase/decrease by 5 units
each time button
/is pressed.
Hold down the
/button to
automatically increase/decrease the
setting rapidly. Complete the
adjustment with single presses of
the button when you approach the
desired value.
– press theMENU
button
briefly to return to the menu screen
or hold the button down to return
to the standard screen without
storing.To cancel the setting, proceed as
follows:
– briefly press buttonMENU
,
(On) will flash on the display;
– press button
, (Off) will flash on
the display;
– press buttonMENU
briefly to
return to the menu screen or hold
the button down to return to the
standard screen without storing.
Trip B data (Activating
Trip B)
This function can be used to
activate (On) or deactivate (Off) the
Trip B display (partial trip).
For more information see the "Trip
computer" section.
Proceed as follows to switch the
function on/off:
– press theMENU
button
briefly to make the display flash On
or Off according to the previous
setting;
– press the
orbutton to select;
83
Page 145 of 323
ENGINE STOPPING
FAILURE CONDITIONS
With the device activated, for
reasons of comfort, limiting
emissions and safety, the engine
does not stop in certain conditions,
including:
❒engine still cold;
❒particularly cold external
temperatures, if the corresponding
indication is provided;
❒battery not sufficiently charged;
❒particulate filter regeneration in
progress (diesel engines only);
❒driver's door not shut;
❒driver's seat belt not fastened;
❒reverse gear engaged (for example,
for parking manoeuvres);❒automatic climate control, if a
suitable thermal comfort level has not
yet been reached or MAX-DEF
function activation;
❒during the first period of use, to
initialise the system.
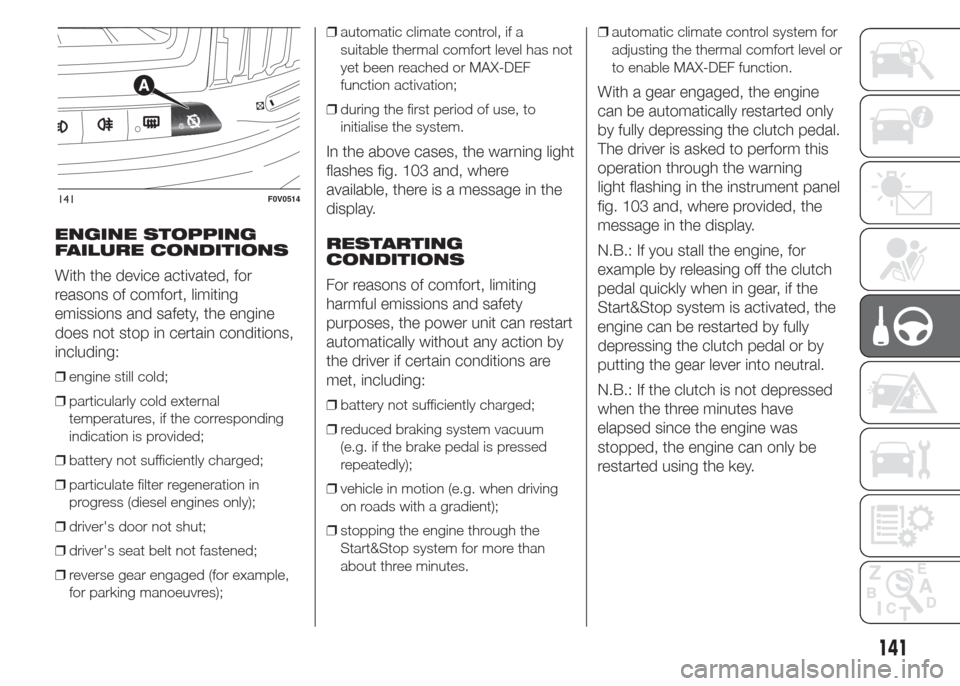
In the above cases, the warning light
flashes fig. 103 and, where
available, there is a message in the
display.
RESTARTING
CONDITIONS
For reasons of comfort, limiting
harmful emissions and safety
purposes, the power unit can restart
automatically without any action by
the driver if certain conditions are
met, including:
❒battery not sufficiently charged;
❒reduced braking system vacuum
(e.g. if the brake pedal is pressed
repeatedly);
❒vehicle in motion (e.g. when driving
on roads with a gradient);
❒stopping the engine through the
Start&Stop system for more than
about three minutes.❒automatic climate control system for
adjusting the thermal comfort level or
to enable MAX-DEF function.
With a gear engaged, the engine
can be automatically restarted only
by fully depressing the clutch pedal.
The driver is asked to perform this
operation through the warning
light flashing in the instrument panel
fig. 103 and, where provided, the
message in the display.
N.B.: If you stall the engine, for
example by releasing off the clutch
pedal quickly when in gear, if the
Start&Stop system is activated, the
engine can be restarted by fully
depressing the clutch pedal or by
putting the gear lever into neutral.
N.B.: If the clutch is not depressed
when the three minutes have
elapsed since the engine was
stopped, the engine can only be
restarted using the key.
141F0V0514
141
Page 148 of 323
84) For vehicles with robotised
gearbox, in the event of automatic
engine stopping with the vehicle
on a slope, the engine should
be restarted by moving the gear
lever towards (+) or (–) without
releasing the brake pedal. For
vehicles with robotised gearbox
and Hill Holder function, in the
event of automatic engine
stopping with the vehicle on a
slope, the engine must be
restarted by moving the gear lever
towards (+) or (–) without
releasing the brake pedal, so that
the Hill Holder function, active
only with the engine running,
becomes available.
85) If climate comfort is to be
favoured, the Start&Stop system
can be disabled, for a continuous
operation of the climate control
system.TPMS (Tyre
Pressure
Monitoring System)
(for versions/markets, where
provided)
86) 87) 88) 89) 90) 91) 92) 93) 94)
DESCRIPTION
The tyre pressure monitoring system
(TPMS) warns the driver of low tyre
pressure on the basis of the cold
inflation pressure prescribed for the
vehicle.
Changes in outside temperature
may cause tyre pressure to vary.
This means that a decrease in the
outside temperature corresponds to
a decrease in the tyre pressure.
Tyre pressure must always be
adjusted according to the cold
inflation pressure. Cold tyre inflation
pressure is the tyre pressure after
letting the vehicle stand for at least
three hours or a travel shorter than
1.6 km after an interval of three
hours.
The cold tyre inflation pressure must
not exceed the maximum inflation
pressure value printed on the side of
the tyre.The tyre pressure also increases
while driving the vehicle: this is
a normal condition and does not
require any adjustment of the
pressure.
NOTE❒The TPMS does not replace the
normal tyre maintenance service and
does not indicate any fault in a tyre.
❒Therefore, the TPMS should not be
used as pressure switch while
adjusting the tyre inflation pressure.
❒Driving with insufficient tyre pressure
causes their overheating and can
result in tyre failure. The low inflation
pressure reduces fuel efficiency
and tyre tread life and may also affect
handling and braking performance
of the vehicle.
❒The TPMS does not replace the
correct tyre maintenance. It is up to
the driver to maintain the correct tyre
pressure level measuring it with a
suitable pressure switch. This is
necessary even if the decrease in the
inflation pressure value does not
cause the tyre pressure control
warning light to switch on.
144
STARTING AND DRIVING
Page 285 of 323
FUEL
CONSUMPTION
The fuel consumption figures given
in the tables below are determined
on the basis of the type-approval
tests laid down by specific European
Directives.
These consumption values refer to
basic vehicles without optionals.
The procedures below are followed
for measuring consumption:
❒urban cycle: begins with cold
starting, followed by driving
simulating the use of the vehicle in
town;
❒extra-urban cycle: driving that
simulates using the vehicle out of
town with frequent acceleration in all
gears; the speed varies from 0 to 120
km/h;
❒combined consumption: calculated
with a weighting of approximately
37% of the urban cycle and 63% of
the extra-urban cycle.
IMPORTANT The type of route,
traffic situations, weather conditions,
driving style, general conditions of
the vehicle, trim level/equipment/
accessories, climate control system,
vehicle load, roof rack, other
situations that affect air drag may
lead to different fuel consumption
levels than those measured.
IMPORTANT
In practice, fuel consumption may
be higher than the values obtained
during the approval tests.
Here are some of the major factors
that can lead to a difference
between test and real consumption.
1) Vehicle condition: inadequate
servicing, use of roof racks, trailers,
heavy loading, high usage of
electrical devices and the
air conditioning.
2) Driving style: frequent cold starts
for short journeys, poor engine
warming technique, gear selection,
high speeds, sudden acceleration
and braking.3) Traffic and road conditions:
driving in traffic, steep hills or
winding roads, road surface
conditions.
4) Atmospheric conditions:
intemperate weather, wind, rain,
snow, high altitude.
5) Proportion of use in towns and
cities, in the country and on
motorways.
PRACTICAL ADVICE
FOR REDUCING FUEL
CONSUMPTION AND
HARMFUL EMISSIONS
Vehicle conditions
1. Have checks and adjustments
carried out in accordance with the
“Scheduled Servicing Plan”.
2. Check tyre pressure regularly, at
least once every four weeks.
Excessively low pressures will
increase consumption because
rolling resistance will be higher. In
addition, this wears the tyre more
quickly and impairs performance.
3. Only use snow tyres when the
weather conditions make them
absolutely necessary. They increase
consumption and noise.
281
Page 319 of 323
INDEX
A
BS .............................................. 110
Accessories purchased by the
owner .......................................... 5
Active safety systems ..................... 110
Advice for preserving the
bodywork..................................... 216
Air cleaner/pollen filter .................... 208
Ashtray .......................................... 67
ASR system ................................... 113
Automatic climate control
system ......................................... 50
Battery .......................................... 208
Battery recharging.......................... 210
Blades ........................................... 212
Bodywork ...................................... 216
Bodywork paint identification
plate............................................. 222
Bodywork version .......................... 224
Bonnet ........................................... 59
Boot............................................... 60
Brake fluid ...................................... 206
Brakes
– specifications ............................ 230
Bump starting ................................ 184
Carrying children safely ................. 120
– child restraint systems ............... 126
Changing a wheel .......................... 175
Chassis marking ............................ 222Child restraint systems
(compliance for use) ..................... 122
Child safety device ......................... 20
Cigar lighter.................................... 67
CO2 emissions............................... 296
Control panel and on-board
instruments .................................. 74
Controls ......................................... 58
Cruise Control ................................ 148
Daytime running lights .................. 34
Dead lock ...................................... 15
Demanding vehicle use .................. 198
Diesel filter ..................................... 208
Diffusers ......................................... 43
Digital display ................................. 77
– Control buttons ......................... 77
– Set-up menu ............................. 77
Dimensions .................................... 240
Dipped headlights .................... 34-163
Direction indicators ................... 35-164
Door mirrors ................................... 33
Doors ............................................. 19
Draining condensation (MultiJet
versions) ...................................... 208
Driver side armrest ......................... 64
Driver's side front airbag ................ 128
Electric windows .......................... 56
– Initialisation................................ 57
Emergency starting ................ 137-183
Engine codes ................................. 224Engine compartment control unit
fuses ............................................ 169
Engine compartment...................... 199
Engine coolant ............................... 205
Engine
– technical specifications.............. 226
Engine marking .............................. 223
Engine oil ....................................... 205
EOBD system ................................ 91
ESC system ................................... 112
Exterior lights ................................. 34
Fastening the tow hook................. 186
Fiat CODE system.......................... 18
Fix&Go automatic quick tyre
repair kit ....................................... 180
Fluids and lubricants ...................... 277
Fog lights ................................. 58-164
Follow Me Home device ................. 35
Follow Me Home ............................ 35
Front airbags .................................. 127
Front bench .................................. 28
Front light clusters .......................... 163
Front roof light ................................ 167
Fuel consumption .......................... 281
Fuel cut-off system......................... 185
Fuses on compartment wired
casing .......................................... 170
Glove compartment ...................... 64
Handbrake.................................... 138