traction FIAT DUCATO 2014 Owner handbook (in English)
[x] Cancel search | Manufacturer: FIAT, Model Year: 2014, Model line: DUCATO, Model: FIAT DUCATO 2014Pages: 367, PDF Size: 20.39 MB
Page 13 of 367
KNOW YOUR VEHICLE
In-depth knowledge of your new vehicle
starts here.
The booklet that you are reading simply
and directly explains how it is made
and how it works.
That’s why we advise you to read it
seated comfortably on board, so that
you can see what is described here for
yourself.SYMBOLS ...................................... 10
THE FIAT CODE SYSTEM ............... 10
THE KEYS....................................... 11
ELECTRONIC ALARM..................... 13
IGNITION SWITCH .......................... 14
SEATS ............................................ 15
HEAD RESTRAINTS ........................ 23
STEERING WHEEL ......................... 24
REAR VIEW MIRRORS .................... 24
HEATING AND VENTILATION.......... 27
DIFFUSERS..................................... 28
HEATING AND VENTILATION
CONTROLS .................................... 28
MANUAL CLIMATE CONTROL
SYSTEM ......................................... 30
AUTOMATIC CLIMATE CONTROL
SYSTEM ......................................... 33
ADDITIONAL HEATER ..................... 38
INDEPENDENT ADDITIONAL
HEATER .......................................... 39
EXTERNAL LIGHTS......................... 44
WINDOW CLEANING ...................... 48
CRUISE CONTROL ......................... 50
ROOF LIGHTS ................................ 53
CONTROLS .................................... 54
FUEL CUT-OFF SWITCH ................ 57
INTERIOR FITTINGS ...................... 58
TACHOGRAPH ............................... 63SPEED BLOCK ............................... 64
SELF-LEVELLING AIR
SUSPENSION ................................. 64
DOORS ........................................... 65
ELECTRIC WINDOWS .................... 70
BONNET ......................................... 71
ROOF RACK/SKI RACK .................. 72
HEADLIGHTS.................................. 73
ABS ................................................ 74
ESC (ELECTRONIC STABILITY
CONTROL) SYSTEM ....................... 75
TRACTION PLUS SYSTEM ............. 79
TPMS (TYRE PRESSURE
MONITORING SYSTEM) ................. 80
DRIVING ADVISOR ......................... 83
REAR CAMERA (PARKVIEW®
REAR BACK UP CAMERA) ............. 89
TRAFFIC SIGN RECOGNITION ....... 90
EOBD SYSTEM............................... 92
PARKING SENSORS....................... 93
START&STOP SYSTEM .................. 95
RADIO............................................. 98
ACCESSORIES PURCHASED BY
THE OWNER................................... 99
REFUELLING THE VEHICLE ...........100
PROTECTING THE
ENVIRONMENT ..............................101
9
Page 48 of 367
WARNING
21) The heater burns fuel in the
same way as the engine, though
to a lesser extent. To prevent
poisoning and asphyxiation, the
additional heater must never
be turned on, not even for short
periods, in closed environments
such as a garage or workshops
without extraction fans for the
exhaust gases.
22) The heater burns fuel in the
same way as the engine, though
to a lesser extent. To prevent
poisoning and asphyxiation, the
supplementary heater must never
be turned on, not even for short
periods, in closed environments
such as a garage or workshops
without extraction fans for the
exhaust gases.
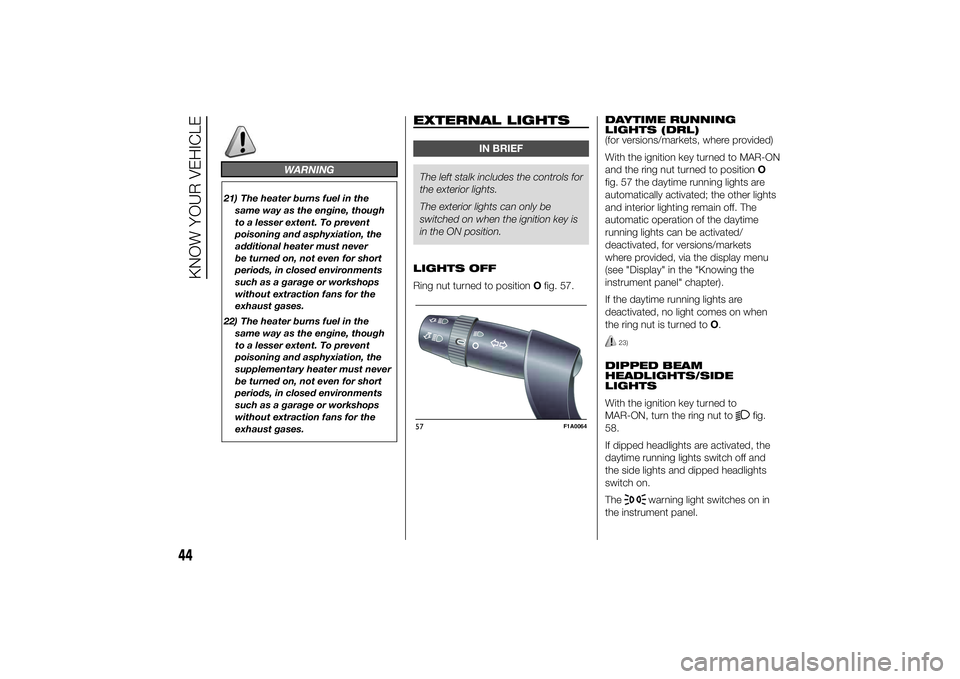
EXTERNAL LIGHTS
IN BRIEF
The left stalk includes the controls for
the exterior lights.
The exterior lights can only be
switched on when the ignition key is
in the ON position.
LIGHTS OFF
Ring nut turned to positionOfig. 57.DAYTIME RUNNING
LIGHTS (DRL)
(for versions/markets, where provided)
With the ignition key turned to MAR-ON
and the ring nut turned to positionO
fig. 57 the daytime running lights are
automatically activated; the other lights
and interior lighting remain off. The
automatic operation of the daytime
running lights can be activated/
deactivated, for versions/markets
where provided, via the display menu
(see "Display" in the "Knowing the
instrument panel" chapter).
If the daytime running lights are
deactivated, no light comes on when
the ring nut is turned toO.
23)
DIPPED BEAM
HEADLIGHTS/SIDE
LIGHTS
With the ignition key turned to
MAR-ON, turn the ring nut to
fig.
58.
If dipped headlights are activated, the
daytime running lights switch off and
the side lights and dipped headlights
switch on.
The
warning light switches on in
the instrument panel.
57
F1A0064
44
KNOW YOUR VEHICLE
Page 81 of 367
On some versions, the intervention of
the system is indicated by a message
shown on the display.
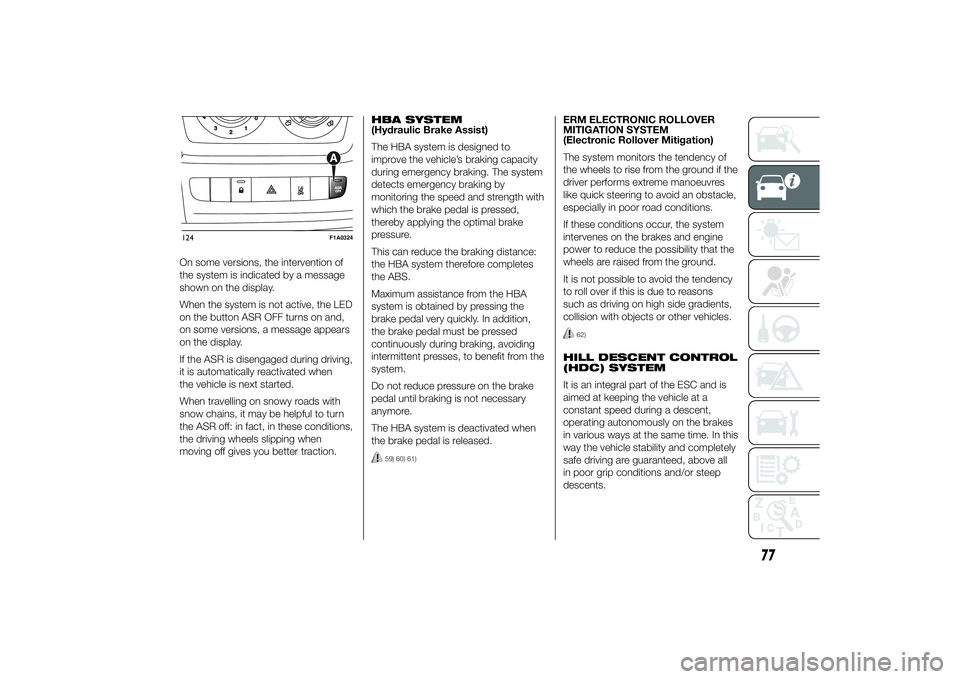
When the system is not active, the LED
on the button ASR OFF turns on and,
on some versions, a message appears
on the display.
If the ASR is disengaged during driving,
it is automatically reactivated when
the vehicle is next started.
When travelling on snowy roads with
snow chains, it may be helpful to turn
the ASR off: in fact, in these conditions,
the driving wheels slipping when
moving off gives you better traction.HBA SYSTEM
(Hydraulic Brake Assist)
The HBA system is designed to
improve the vehicle’s braking capacity
during emergency braking. The system
detects emergency braking by
monitoring the speed and strength with
which the brake pedal is pressed,
thereby applying the optimal brake
pressure.
This can reduce the braking distance:
the HBA system therefore completes
the ABS.
Maximum assistance from the HBA
system is obtained by pressing the
brake pedal very quickly. In addition,
the brake pedal must be pressed
continuously during braking, avoiding
intermittent presses, to benefit from the
system.
Do not reduce pressure on the brake
pedal until braking is not necessary
anymore.
The HBA system is deactivated when
the brake pedal is released.
59) 60) 61)
ERM ELECTRONIC ROLLOVER
MITIGATION SYSTEM
(Electronic Rollover Mitigation)
The system monitors the tendency of
the wheels to rise from the ground if the
driver performs extreme manoeuvres
like quick steering to avoid an obstacle,
especially in poor road conditions.
If these conditions occur, the system
intervenes on the brakes and engine
power to reduce the possibility that the
wheels are raised from the ground.
It is not possible to avoid the tendency
to roll over if this is due to reasons
such as driving on high side gradients,
collision with objects or other vehicles.
62)
HILL DESCENT CONTROL
(HDC) SYSTEM
It is an integral part of the ESC and is
aimed at keeping the vehicle at a
constant speed during a descent,
operating autonomously on the brakes
in various ways at the same time. In this
way the vehicle stability and completely
safe driving are guaranteed, above all
in poor grip conditions and/or steep
descents.
124
F1A0324
77
Page 83 of 367
60) The HBA system cannot prevent
accidents, including those due to
excessive speed on bends,
travelling on low-grip surfaces or
aquaplaning.
61) The HBA system is an aid for the
driver, who must always pay full
attention while driving. The
responsibility always rests with
the driver. The features of the
HBA system must never be tested
in imprudent or dangerous ways,
with the possibility of putting
the safety of the driver, occupants
or other road users at risk.
62) The performance of a vehicle
with ERM must never be tested
in imprudent or dangerous ways,
with the possibility of putting
the safety of the driver or other
people at risk.
IMPORTANT
7) Prolonged use of the system may
overheat the braking system. If
the brakes overheat, the HDC
system, when active, will be
gradually deactivated after
suitably informing the driver (the
LED on the button turns off): it
can be reactivated only when the
brakes have cooled sufficiently.
The distance that can be covered
depends on the temperature of
the brakes and therefore on the
gradient, load and speed of the
vehicle.
TRACTION PLUS
SYSTEM(for versions/markets, where provided)
Traction Plus is a driving aid, useful
for setting off in poor grip conditions on
non-homogeneous road surfaces
(snow/asphalt, ice/asphalt, mud/
asphalt, etc.), which allows the drive
force to be distributed adequately
on the engine axle when one of the two
drive wheels slips.
Traction Plus acts by braking the wheel
with poor grip (or slipping more than
the others), thereby transferring the
drive force to that which has greater
grip on the ground.
This function can be activated manually
by pressing button A on the dashboard
fig. 126 and operates under 50 km/h.
When this speed is exceeded, it is
automatically deactivated (the LED on
the button is still on) and it is
reactivated again when the speed falls
below 30 km/h.
63) 64)
79
Page 84 of 367
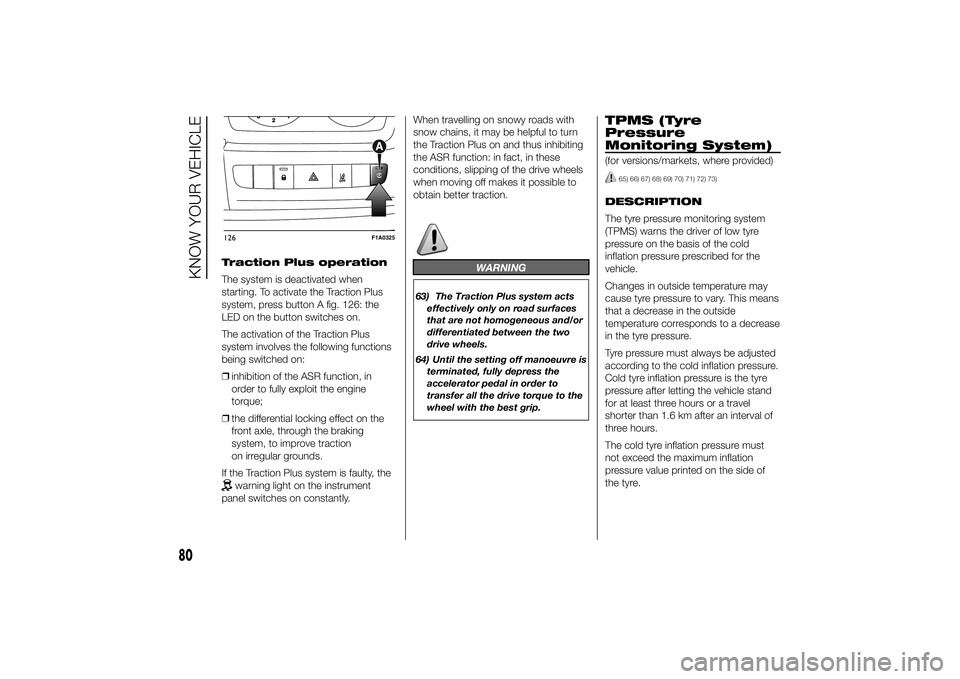
Traction Plus operation
The system is deactivated when
starting. To activate the Traction Plus
system, press button A fig. 126: the
LED on the button switches on.
The activation of the Traction Plus
system involves the following functions
being switched on:
❒inhibition of the ASR function, in
order to fully exploit the engine
torque;
❒the differential locking effect on the
front axle, through the braking
system, to improve traction
on irregular grounds.
If the Traction Plus system is faulty, the
warning light on the instrument
panel switches on constantly.When travelling on snowy roads with
snow chains, it may be helpful to turn
the Traction Plus on and thus inhibiting
the ASR function: in fact, in these
conditions, slipping of the drive wheels
when moving off makes it possible to
obtain better traction.
WARNING
63) The Traction Plus system acts
effectively only on road surfaces
that are not homogeneous and/or
differentiated between the two
drive wheels.
64) Until the setting off manoeuvre is
terminated, fully depress the
accelerator pedal in order to
transfer all the drive torque to the
wheel with the best grip.
TPMS (Tyre
Pressure
Monitoring System)(for versions/markets, where provided)
65) 66) 67) 68) 69) 70) 71) 72) 73)
DESCRIPTION
The tyre pressure monitoring system
(TPMS) warns the driver of low tyre
pressure on the basis of the cold
inflation pressure prescribed for the
vehicle.
Changes in outside temperature may
cause tyre pressure to vary. This means
that a decrease in the outside
temperature corresponds to a decrease
in the tyre pressure.
Tyre pressure must always be adjusted
according to the cold inflation pressure.
Cold tyre inflation pressure is the tyre
pressure after letting the vehicle stand
for at least three hours or a travel
shorter than 1.6 km after an interval of
three hours.
The cold tyre inflation pressure must
not exceed the maximum inflation
pressure value printed on the side of
the tyre.
126
F1A0325
80
KNOW YOUR VEHICLE
Page 89 of 367
If the driver keeps deliberately with the
lane change manoeuvre, the system
interrupts the warning, remaining
enabled if the operating conditions are
not satisfied or active if the operating
conditions are exceeded (see the
dedicated paragraph).
SWITCHING OFF THE
SYSTEM
Manual mode
The system can be switched off by
pressing button A fig. 127 on the
dashboard.
The LED on the button switches on and
a message appears on the display to
confirm that the system has been
switched off.
Automatic mode
If the Start&Stop is active the system
deactivates automatically. The system
will reactivate and check its operating
conditions again after the vehicle has
been started.SYSTEM FAILURE
In the case of malfunction the system
signals the fault to the driver with a
message on the display, an acoustic
warning and switching on of the icon
on the display (for versions/markets,
where provided).
IMPORTANT INFORMATION
The Driving Advisor cannot operate due
to a not perfectly balanced and
excessive load.
The operation of the system can be
adversely affected in some cases
by the morphology of the territory/road
being driven on (e.g. driving over
humps), poor visibility conditions (e.g.
fog, rain, snow), extreme light
conditions (e.g. glare of the sun,
darkness), lack of cleanliness
or damage, even partial, to the
windscreen in the area in front of the
camera.
The Driving Advisor cannot operate
following a malfunction of the following
safety systems: ABS, ESP, ASR and
Traction Plus.The operation of the system can be
adversely affected by poor visibility
conditions (e.g. fog, rain, snow),
extreme light conditions (glare of the
sun, darkness), lack of cleaning or
damage, even partial, to the
windscreen in the area in front the
camera.
The area of the windscreen by the
camera must not be partly or totally
obscured by objects (e.g. stickers,
protective film, etc.).
WARNING
74) If the camera loses its position
due to a load variation, the system
may not work temporarily to allow
the camera to perform an
autocalibration.
75) The Driving Advisor is not an
automatic driving system and
does not replace the driver in
controlling the trajectory of the
car. The driver is personally
responsible for maintaining a
sufficient level of attention to the
traffic and road conditions and
for controlling the trajectory of the
car safely.
85
Page 138 of 367
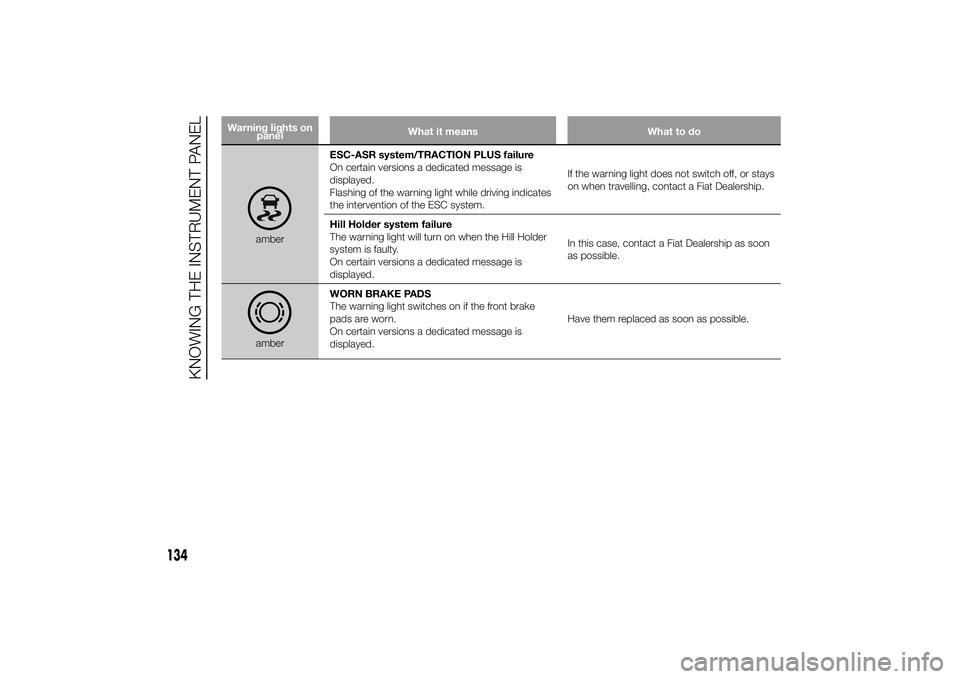
Warning lights on
panelWhat it means What to do
amberESC-ASR system/TRACTION PLUS failure
On certain versions a dedicated message is
displayed.
Flashing of the warning light while driving indicates
the intervention of the ESC system.If the warning light does not switch off, or stays
on when travelling, contact a Fiat Dealership.
Hill Holder system failure
The warning light will turn on when the Hill Holder
system is faulty.
On certain versions a dedicated message is
displayed.In this case, contact a Fiat Dealership as soon
as possible.amberWORN BRAKE PADS
The warning light switches on if the front brake
pads are worn.
On certain versions a dedicated message is
displayed.Have them replaced as soon as possible.
134
KNOWING THE INSTRUMENT PANEL
Page 176 of 367
PARKINGProceed as follows:
❒stop the engine and engage the
handbrake;
❒engage a gear (on a slope, engage
first gear if the car is facing uphill or
reverse if it is facing downhill) and
leave the wheels steered.
If the vehicle is parked on a steep
slope, it is advisable to block the
wheels with a wedge or stone.
Do not leave the key in the ignition as
this drains the battery. Always remove
the key when you leave the car.
126)
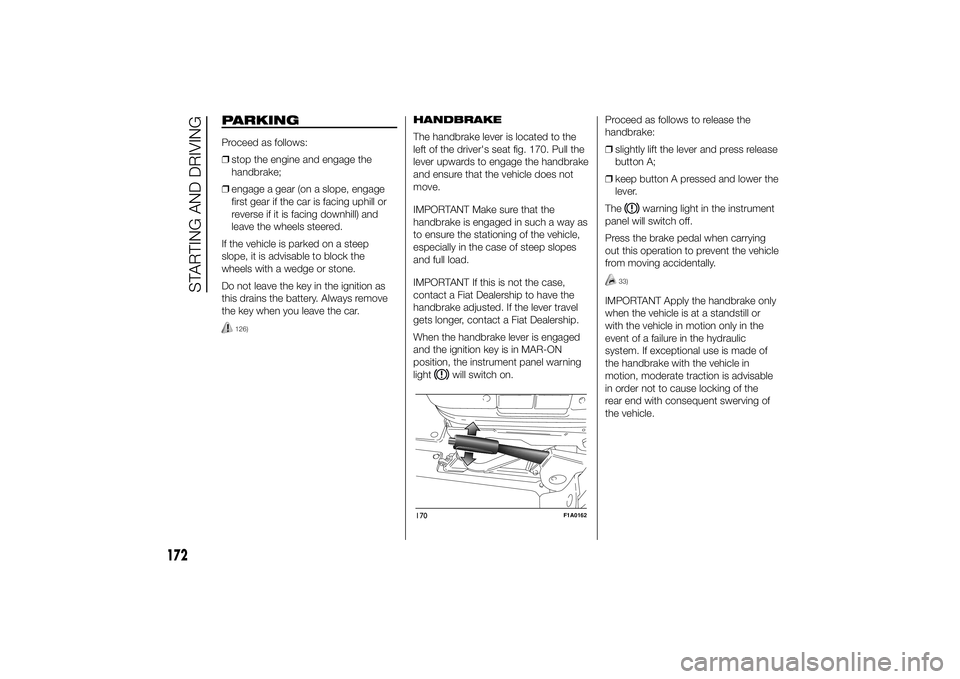
HANDBRAKE
The handbrake lever is located to the
left of the driver's seat fig. 170. Pull the
lever upwards to engage the handbrake
and ensure that the vehicle does not
move.
IMPORTANT Make sure that the
handbrake is engaged in such a way as
to ensure the stationing of the vehicle,
especially in the case of steep slopes
and full load.
IMPORTANT If this is not the case,
contact a Fiat Dealership to have the
handbrake adjusted. If the lever travel
gets longer, contact a Fiat Dealership.
When the handbrake lever is engaged
and the ignition key is in MAR-ON
position, the instrument panel warning
light
will switch on.Proceed as follows to release the
handbrake:
❒slightly lift the lever and press release
button A;
❒keep button A pressed and lower the
lever.
The
warning light in the instrument
panel will switch off.
Press the brake pedal when carrying
out this operation to prevent the vehicle
from moving accidentally.
33)
IMPORTANT Apply the handbrake only
when the vehicle is at a standstill or
with the vehicle in motion only in the
event of a failure in the hydraulic
system. If exceptional use is made of
the handbrake with the vehicle in
motion, moderate traction is advisable
in order not to cause locking of the
rear end with consequent swerving of
the vehicle.
170
F1A0162
172
STARTING AND DRIVING
Page 191 of 367
SNOW CHAINSThe use of snow chains should be in
compliance with local regulations of
each country.
Snow chains can be fitted to the tyres
of the front wheels (drive wheels) only.
Use of Lineaccessori Fiat snow chains
is recommended. Check the tension
of the snow chains after the first few
metres have been driven.
42)
IMPORTANT With snow chains, use the
accelerator with extreme care to
prevent, or to limit as much as possible,
slipping of the drive wheels that could
cause chain breakage, resulting in
damage to the car body or mechanical
components.
IMPORTANT For versions fitted with
225/75 R16 tyre, use snow chains with
max. thickness 16 mm.
When travelling on snowy roads with
snow chains, it may be helpful to turn
the ASR off: in fact, in these conditions,
the driving wheels skidding when
moving off gives you better traction.
IMPORTANT
42) Keep your speed down when
snow chains are fitted; do not
exceed 50 km/h. Avoid potholes,
steps and pavements and avoid
driving for long distances on
roads not covered with snow to
prevent damaging the vehicle and
the roadbed.
PROLONGED
VEHICLE INACTIVITYIf the vehicle needs to be off the road
for longer than one month, the following
precautions must be taken:
❒park the vehicle indoors in a dry and,
if possible, well-ventilated place;
❒engage a gear;
❒check that the handbrake is not
engaged;
❒disconnect the negative battery
terminal; if the vehicle is equipped
with a battery disconnection function
(disconnector), see the description
of the procedure in the "Controls"
paragraph in the "Dashboard and
controls" section;
❒clean and protect the painted parts
using protective wax;
❒clean and protect the shiny metal
parts using special compounds
available commercially;
❒sprinkle talcum powder on the
windscreen and rear window wiper
rubber blades and lift them off the
glass;
❒slightly open the windows;
187
Page 199 of 367
138) The spare wheel supplied (for
versions/markets, where
provided) is specific for your
vehicle. Therefore, it must not be
used on other models. Do not
use spare wheels of other models
on your vehicle. The wheel bolts
are specific for your vehicle: do
not use them on different models
and do not use bolts from other
models on your car.
139) Have the wheel repaired and
refitted as soon as possible. Do
not apply grease to the bolt
threads before fitting: they could
come unscrewed.
140) Use the jack only to replace
wheels on the vehicle with which
it is supplied or on other vehicles
of the same model. Never use
the jack for other purposes, such
as lifting other car models. Never
use the jack to carry out repairs
under the vehicle. Incorrect
positioning of the jack may cause
the lifted vehicle to fall. Do not
use the jack for loads higher than
those shown on the label.
141) Never tamper with the inflation
valve. Never introduce tools of any
kind between rim and tyre. Check
tyre and spare wheel pressure
regularly, referring to the values
shown in the "Technical
specifications" section.142) No tools other than the crank
provided should be used with
the spare wheel lifting device; it
should be operated by hand only.
143) On versions equipped with
self-levelling air suspension, never
introduce the head or hands in
the wheel arch: the vehicle could
raise or lower automatically
depending on possible load or
temperature changes.
144) The device should only be
operated by hand, without using
any type of tool other than the
crank provided, like pneumatic or
electrical screwers.
145) The moving components of the
jack (screw and joints) can also
cause injuries: do not touch them.
If you come into contact with
lubricating grease, clean yourself
thoroughly.146) At the end of the operation of
raising/locking the spare wheel,
after having checked the correct
positioning of the wheel under the
platform (white notch inside the
window on the device), the key
must be extracted, taking care not
to turn it in the wrong direction
to facilitate the extraction of the
key itself, to prevent the
attachment device from being
released and the wheel assembly
not being securely retained fig.
188.
147) Each time the spare wheel is
moved, check that it is correctly
positioned in its housing under
the platform. If it is not correctly
positioned, this could adversely
affect safety.
195