light FIAT DUCATO 244 2002 3.G Connect NavPlus Manual
[x] Cancel search | Manufacturer: FIAT, Model Year: 2002, Model line: DUCATO 244, Model: FIAT DUCATO 244 2002 3.GPages: 246, PDF Size: 3.39 MB
Page 167 of 246
CONNECT Nav+
166
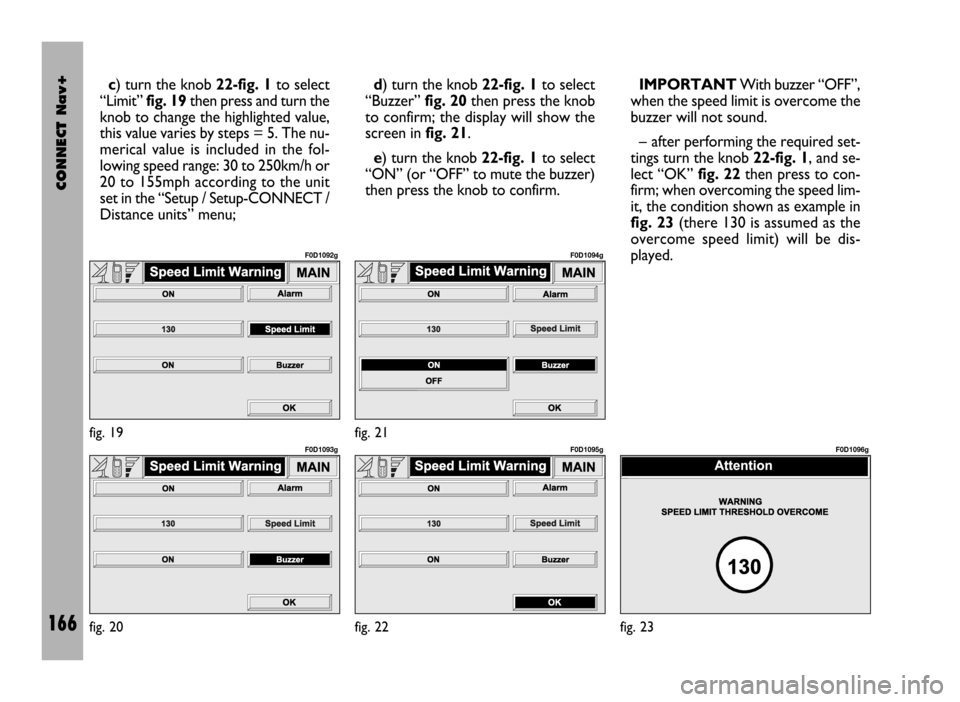
c) turn the knob 22-fig. 1to select
“Limit” fig. 19then press and turn the
knob to change the highlighted value,
this value varies by steps = 5. The nu-
merical value is included in the fol-
lowing speed range: 30 to 250km/h or
20 to 155mph according to the unit
set in the “Setup / Setup-CONNECT /
Distance units” menu;d) turn the knob 22-fig. 1to select
“Buzzer” fig. 20then press the knob
to confirm; the display will show the
screen infig. 21.
e) turn the knob 22-fig. 1to select
“ON” (or “OFF” to mute the buzzer)
then press the knob to confirm.IMPORTANTWith buzzer “OFF”,
when the speed limit is overcome the
buzzer will not sound.
– after performing the required set-
tings turn the knob 22-fig. 1, and se-
lect “OK” fig. 22then press to con-
firm; when overcoming the speed lim-
it, the condition shown as example in
fig. 23(there 130 is assumed as the
overcome speed limit) will be dis-
played.
fig. 20
F0D1093g
fig. 22
F0D1095g
fig. 23
F0D1096gfig. 19
F0D1092g
fig. 21
F0D1094g
Page 171 of 246
CONNECT Nav+
170
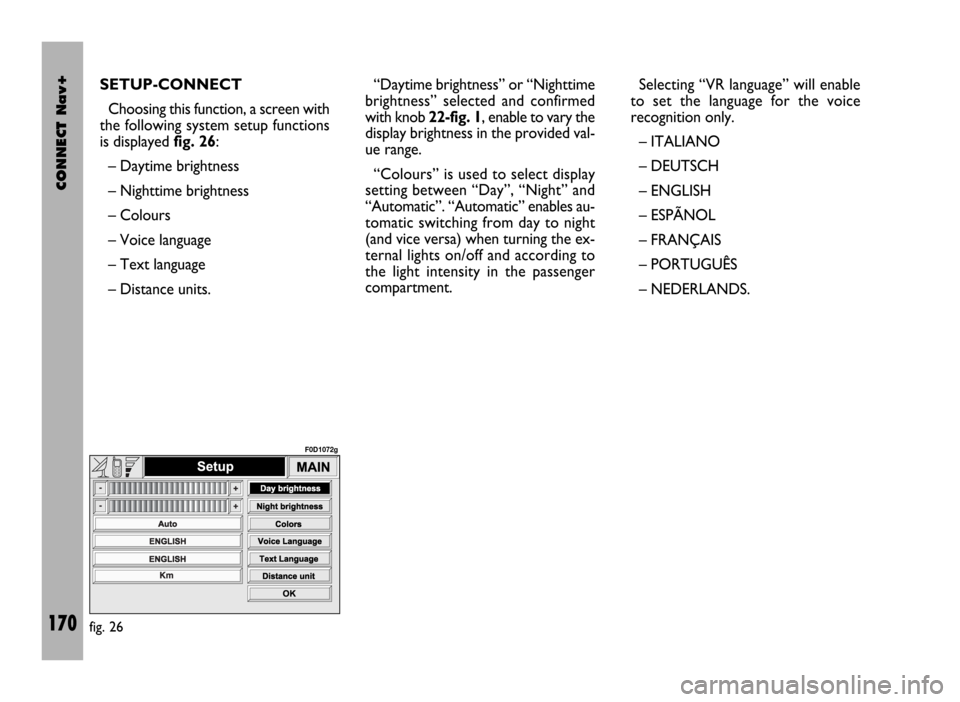
SETUP-CONNECT
Choosing this function, a screen with
the following system setup functions
is displayed fig. 26:
– Daytime brightness
– Nighttime brightness
– Colours
– Voice language
– Text language
– Distance units.“Daytime brightness” or “Nighttime
brightness” selected and confirmed
with knob 22-fig. 1, enable to vary the
display brightness in the provided val-
ue range.
“Colours” is used to select display
setting between “Day”, “Night” and
“Automatic”. “Automatic” enables au-
tomatic switching from day to night
(and vice versa) when turning the ex-
ternal lights on/off and according to
the light intensity in the passenger
compartment.Selecting “VR language” will enable
to set the language for the voice
recognition only.
– ITALIANO
– DEUTSCH
– ENGLISH
– ESPÃNOL
– FRANÇAIS
– PORTUGUÊS
– NEDERLANDS.
fig. 26
F0D1072g
Page 182 of 246

CONNECT Nav+
181
– Rock music
– Easy Listening Music
– Light classical
– Serious classical
– Other music
– Weather
– Finance
– Children’s program
– Social Affairs
– Religion
– Phone in
– Travel
– Leisure
– Jazz music
– Country music
– National music
– Oldies music
– Folk music
– Documentary
– Alarm Test
– Alarm.To change the type of PTY pro-
gramme press keys 11-fig. 1oR 12-
fig. 1or one of the 6 preset keys. If
the display shows the frequency or
station name, pressing keys 11-fig. 1
or 12-fig. 1the type of the current
programme will be shown.
To store the current programme
type on one of the 6 preset keys, press
the required preset key at length (over
2 seconds).
To seek a station with this pro-
gramme, follow the instructions giv-
en in the “Automatic tuning” para-
graph.
If no station is available with this type
of programme, the station selected
previously is returned and for about 2
seconds the display will show “NO-
PTY”.
To exit the screen with the list of PTY
programmes, choose a type of pro-
gramme, or “No PTY” if you do not
wish to set a programme type. “EON” FUNCTION
(ENHANCED OTHER
NETWORK)
In certain countries there are circuits
which group together several stations
enabled to broadcast traffic informa-
tion.
In this case the programme of the
station being heard will be temporar-
ily interrupted to receive the traffic an-
nouncement (only with the TA func-
tion on), every time they are broad-
cast by one of the stations of the same
circuit.
When the station tuned belongs to
an EON circuit the display shows the
initials “EON”.
Page 189 of 246
CONNECT Nav+
188
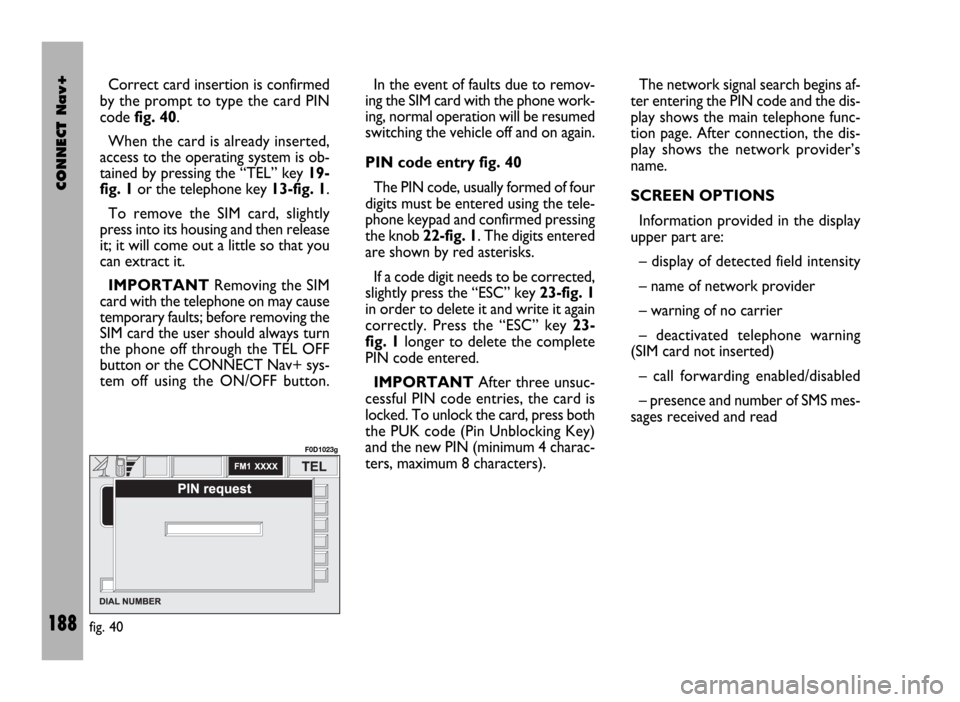
Correct card insertion is confirmed
by the prompt to type the card PIN
code fig. 40.
When the card is already inserted,
access to the operating system is ob-
tained by pressing the “TEL” key 19-
fig. 1or the telephone key 13-fig. 1.
To remove the SIM card, slightly
press into its housing and then release
it; it will come out a little so that you
can extract it.
IMPORTANTRemoving the SIM
card with the telephone on may cause
temporary faults; before removing the
SIM card the user should always turn
the phone off through the TEL OFF
button or the CONNECT Nav+ sys-
tem off using the ON/OFF button.In the event of faults due to remov-
ing the SIM card with the phone work-
ing, normal operation will be resumed
switching the vehicle off and on again.
PIN code entry fig. 40
The PIN code, usually formed of four
digits must be entered using the tele-
phone keypad and confirmed pressing
the knob 22-fig. 1. The digits entered
are shown by red asterisks.
If a code digit needs to be corrected,
slightly press the “ESC” key 23-fig. 1
in order to delete it and write it again
correctly. Press the “ESC” key 23-
fig. 1longer to delete the complete
PIN code entered.
IMPORTANTAfter three unsuc-
cessful PIN code entries, the card is
locked. To unlock the card, press both
the PUK code (Pin Unblocking Key)
and the new PIN (minimum 4 charac-
ters, maximum 8 characters).The network signal search begins af-
ter entering the PIN code and the dis-
play shows the main telephone func-
tion page. After connection, the dis-
play shows the network provider’s
name.
SCREEN OPTIONS
Information provided in the display
upper part are:
– display of detected field intensity
– name of network provider
– warning of no carrier
– deactivated telephone warning
(SIM card not inserted)
– call forwarding enabled/disabled
– presence and number of SMS mes-
sages received and read
fig. 40
F0D1023g
Page 192 of 246
CONNECT Nav+
191
– Messages (SMS – short text mes-
sages)
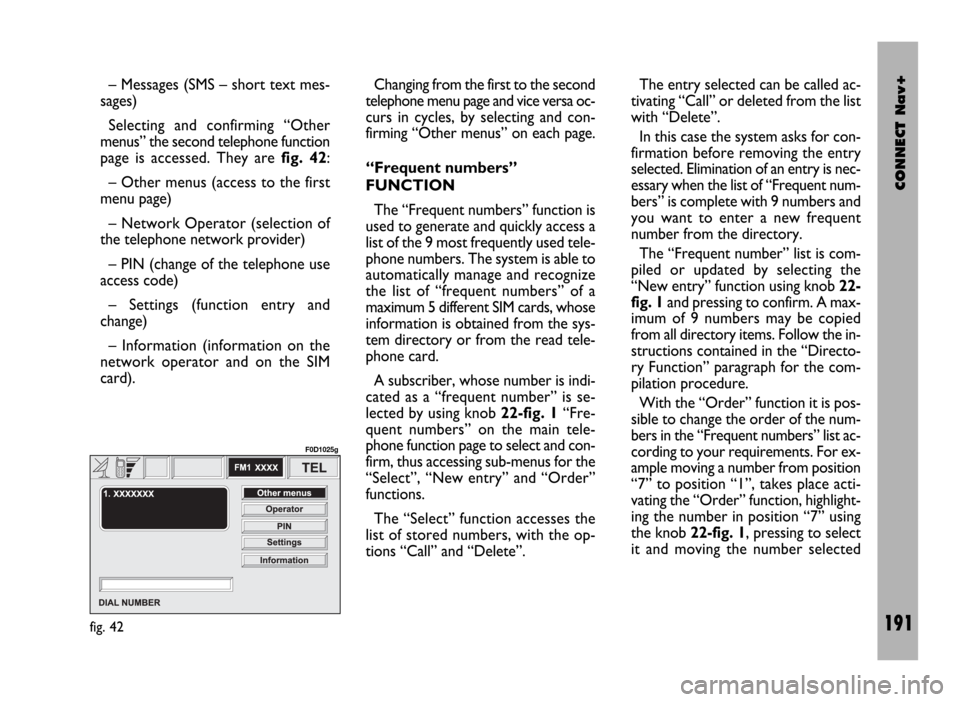
Selecting and confirming “Other
menus” the second telephone function
page is accessed. They are fig. 42:
– Other menus (access to the first
menu page)
– Network Operator (selection of
the telephone network provider)
– PIN (change of the telephone use
access code)
– Settings (function entry and
change)
– Information (information on the
network operator and on the SIM
card).Changing from the first to the second
telephone menu page and vice versa oc-
curs in cycles, by selecting and con-
firming “Other menus” on each page.
“Frequent numbers”
FUNCTION
The “Frequent numbers” function is
used to generate and quickly access a
list of the 9 most frequently used tele-
phone numbers. The system is able to
automatically manage and recognize
the list of “frequent numbers” of a
maximum 5 different SIM cards, whose
information is obtained from the sys-
tem directory or from the read tele-
phone card.
A subscriber, whose number is indi-
cated as a “frequent number” is se-
lected by using knob 22-fig. 1“Fre-
quent numbers” on the main tele-
phone function page to select and con-
firm, thus accessing sub-menus for the
“Select”, “New entry” and “Order”
functions.
The “Select” function accesses the
list of stored numbers, with the op-
tions “Call” and “Delete”. The entry selected can be called ac-
tivating “Call” or deleted from the list
with “Delete”.
In this case the system asks for con-
firmation before removing the entry
selected. Elimination of an entry is nec-
essary when the list of “Frequent num-
bers” is complete with 9 numbers and
you want to enter a new frequent
number from the directory.
The “Frequent number” list is com-
piled or updated by selecting the
“New entry” function using knob 22-
fig. 1and pressing to confirm. A max-
imum of 9 numbers may be copied
from all directory items. Follow the in-
structions contained in the “Directo-
ry Function” paragraph for the com-
pilation procedure.
With the “Order” function it is pos-
sible to change the order of the num-
bers in the “Frequent numbers” list ac-
cording to your requirements. For ex-
ample moving a number from position
“7” to position “1”, takes place acti-
vating the “Order” function, highlight-
ing the number in position “7” using
the knob 22-fig. 1, pressing to select
it and moving the number selected
fig. 42
F0D1025g
Page 194 of 246
CONNECT Nav+
193
Choosing and confirming “Listen to
voice directory” with the knob 22-
fig. 1it is possible to hear the entire
contents of the voice directory; to
stop it press the “ESC” button 23-
fig. 1.
Choosing and confirming “Delete
voice directory” it is possible to delete
the entire contents of the voice di-
rectory: to delete press the knob 22-
fig. 1to go back to the previous
screen press the “ESC” button 23-
fig. 1.
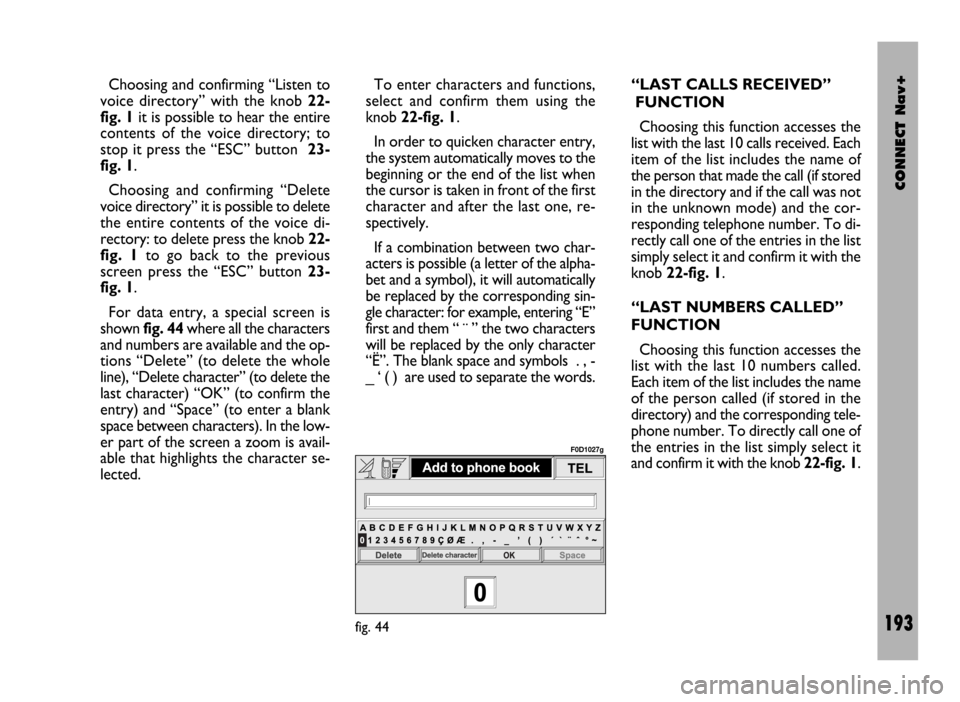
For data entry, a special screen is
shown fig. 44where all the characters
and numbers are available and the op-
tions “Delete” (to delete the whole
line), “Delete character” (to delete the
last character) “OK” (to confirm the
entry) and “Space” (to enter a blank
space between characters). In the low-
er part of the screen a zoom is avail-
able that highlights the character se-
lected.To enter characters and functions,
select and confirm them using the
knob 22-fig. 1.
In order to quicken character entry,
the system automatically moves to the
beginning or the end of the list when
the cursor is taken in front of the first
character and after the last one, re-
spectively.
If a combination between two char-
acters is possible (a letter of the alpha-
bet and a symbol), it will automatically
be replaced by the corresponding sin-
gle character: for example, entering “E”
first and them “ ¨ ” the two characters
will be replaced by the only character
“Ë”. The blank space and symbols . , -
_ ‘ ( ) are used to separate the words.“LAST CALLS RECEIVED”
FUNCTION
Choosing this function accesses the
list with the last 10 calls received. Each
item of the list includes the name of
the person that made the call (if stored
in the directory and if the call was not
in the unknown mode) and the cor-
responding telephone number. To di-
rectly call one of the entries in the list
simply select it and confirm it with the
knob 22-fig. 1.
“LAST NUMBERS CALLED”
FUNCTION
Choosing this function accesses the
list with the last 10 numbers called.
Each item of the list includes the name
of the person called (if stored in the
directory) and the corresponding tele-
phone number. To directly call one of
the entries in the list simply select it
and confirm it with the knob 22-fig. 1.
fig. 44
F0D1027g
Page 195 of 246
CONNECT Nav+
194
“Messages” FUNCTION
This function allows access to the SMS
message page (short text messages),
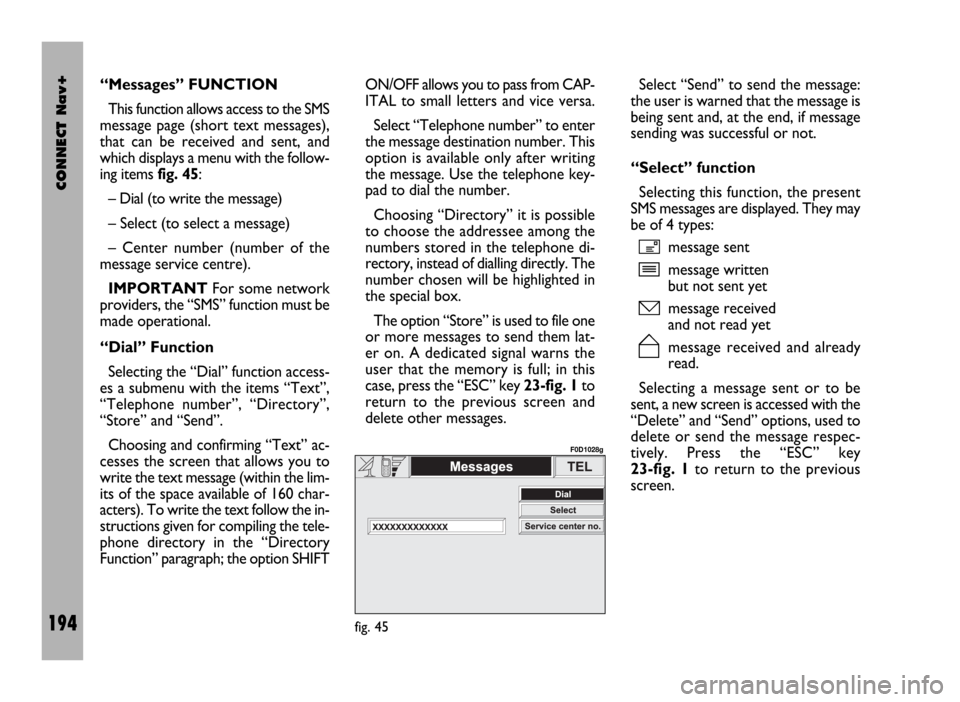
that can be received and sent, and
which displays a menu with the follow-
ing items fig. 45:
– Dial (to write the message)
– Select (to select a message)
– Center number (number of the
message service centre).
IMPORTANTFor some network
providers, the “SMS” function must be
made operational.
“Dial” Function
Selecting the “Dial” function access-
es a submenu with the items “Text”,
“Telephone number”, “Directory”,
“Store” and “Send”.
Choosing and confirming “Text” ac-
cesses the screen that allows you to
write the text message (within the lim-
its of the space available of 160 char-
acters). To write the text follow the in-
structions given for compiling the tele-
phone directory in the “Directory
Function” paragraph; the option SHIFTON/OFF allows you to pass from CAP-
ITAL to small letters and vice versa.
Select “Telephone number” to enter
the message destination number. This
option is available only after writing
the message. Use the telephone key-
pad to dial the number.
Choosing “Directory” it is possible
to choose the addressee among the
numbers stored in the telephone di-
rectory, instead of dialling directly. The
number chosen will be highlighted in
the special box.
The option “Store” is used to file one
or more messages to send them lat-
er on. A dedicated signal warns the
user that the memory is full; in this
case, press the “ESC” key 23-fig. 1to
return to the previous screen and
delete other messages.Select “Send” to send the message:
the user is warned that the message is
being sent and, at the end, if message
sending was successful or not.
“Select” function
Selecting this function, the present
SMS messages are displayed. They may
be of 4 types:
ímessage sent
îmessage written
but not sent yet
ómessage received
and not read yet
ñmessage received and already
read.
Selecting a message sent or to be
sent, a new screen is accessed with the
“Delete” and “Send” options, used to
delete or send the message respec-
tively. Press the “ESC” key
23-fig. 1to return to the previous
screen.
fig. 45
F0D1028g
Page 205 of 246
CONNECT Nav+
204
“Place name”
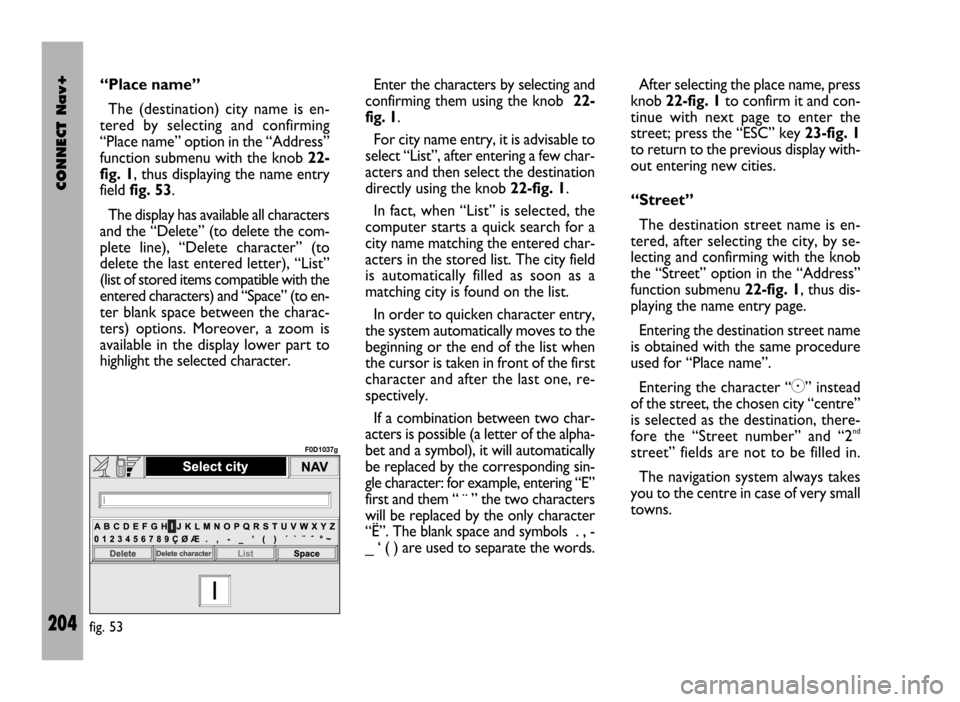
The (destination) city name is en-
tered by selecting and confirming
“Place name” option in the “Address”
function submenu with the knob 22-
fig. 1, thus displaying the name entry
field fig. 53.
The display has available all characters
and the “Delete” (to delete the com-
plete line), “Delete character” (to
delete the last entered letter), “List”
(list of stored items compatible with the
entered characters) and “Space” (to en-
ter blank space between the charac-
ters) options. Moreover, a zoom is
available in the display lower part to
highlight the selected character.Enter the characters by selecting and
confirming them using the knob 22-
fig. 1.
For city name entry, it is advisable to
select “List”, after entering a few char-
acters and then select the destination
directly using the knob 22-fig. 1.
In fact, when “List” is selected, the
computer starts a quick search for a
city name matching the entered char-
acters in the stored list. The city field
is automatically filled as soon as a
matching city is found on the list.
In order to quicken character entry,
the system automatically moves to the
beginning or the end of the list when
the cursor is taken in front of the first
character and after the last one, re-
spectively.
If a combination between two char-
acters is possible (a letter of the alpha-
bet and a symbol), it will automatically
be replaced by the corresponding sin-
gle character: for example, entering “E”
first and them “ ¨ ” the two characters
will be replaced by the only character
“Ë”. The blank space and symbols . , -
_ ‘ ( ) are used to separate the words.After selecting the place name, press
knob 22-fig. 1to confirm it and con-
tinue with next page to enter the
street; press the “ESC” key 23-fig. 1
to return to the previous display with-
out entering new cities.
“Street”
The destination street name is en-
tered, after selecting the city, by se-
lecting and confirming with the knob
the “Street” option in the “Address”
function submenu 22-fig. 1, thus dis-
playing the name entry page.
Entering the destination street name
is obtained with the same procedure
used for “Place name”.
Entering the character “C” instead
of the street, the chosen city “centre”
is selected as the destination, there-
fore the “Street number” and “2
nd
street” fields are not to be filled in.
The navigation system always takes
you to the centre in case of very small
towns.
fig. 53
F0D1037g
Page 206 of 246
CONNECT Nav+
205
After setting the street name, press
knob 22-fig. 1to confirm and contin-
ue with the following page for street
number entry; press the “ESC” key
23-fig. 1to return to the previous
screen without setting the street.
“Street number”
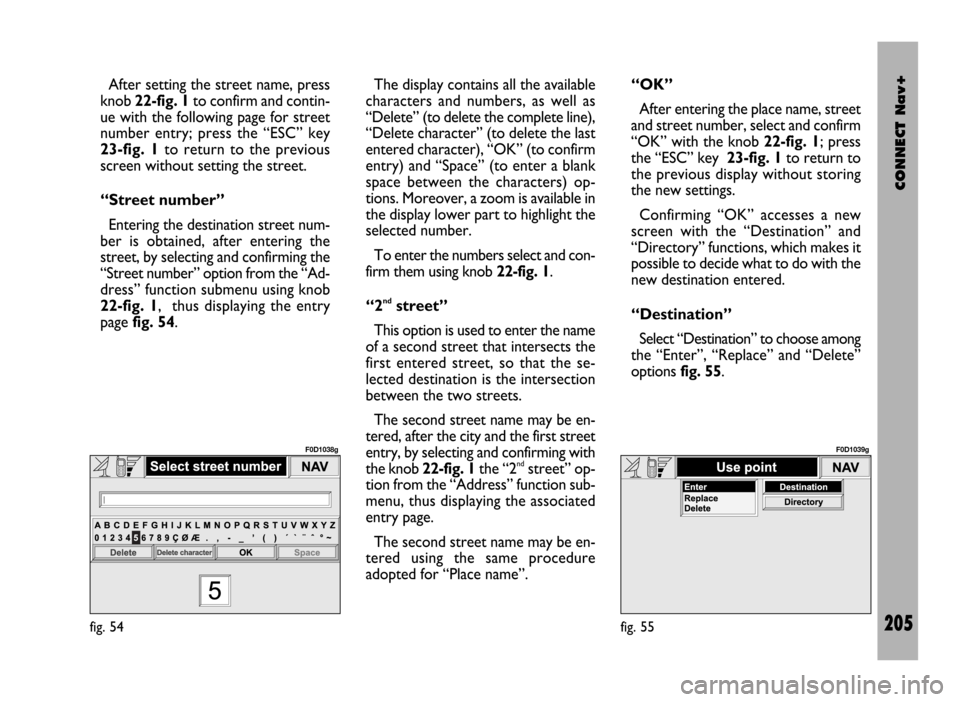
Entering the destination street num-
ber is obtained, after entering the
street, by selecting and confirming the
“Street number” option from the “Ad-
dress” function submenu using knob
22-fig. 1, thus displaying the entry
page fig. 54.The display contains all the available
characters and numbers, as well as
“Delete” (to delete the complete line),
“Delete character” (to delete the last
entered character), “OK” (to confirm
entry) and “Space” (to enter a blank
space between the characters) op-
tions. Moreover, a zoom is available in
the display lower part to highlight the
selected number.
To enter the numbers select and con-
firm them using knob 22-fig. 1.
“2
ndstreet”
This option is used to enter the name
of a second street that intersects the
first entered street, so that the se-
lected destination is the intersection
between the two streets.
The second street name may be en-
tered, after the city and the first street
entry, by selecting and confirming with
the knob 22-fig. 1the “2
ndstreet” op-
tion from the “Address” function sub-
menu, thus displaying the associated
entry page.
The second street name may be en-
tered using the same procedure
adopted for “Place name”. “OK”
After entering the place name, street
and street number, select and confirm
“OK” with the knob 22-fig. 1; press
the “ESC” key 23-fig. 1to return to
the previous display without storing
the new settings.
Confirming “OK” accesses a new
screen with the “Destination” and
“Directory” functions, which makes it
possible to decide what to do with the
new destination entered.
“Destination”
Select “Destination” to choose among
the “Enter”, “Replace” and “Delete”
options fig. 55.
fig. 54
F0D1038g
fig. 55
F0D1039g
Page 207 of 246
CONNECT Nav+
206
The “Enter” function is used to add
a new destination to the list contain-
ing the last 8 destinations entered and
specify its location. The required loca-
tion must be selected and confirmed
using knob 22-fig. 1. If no space is
available in the list, a location may
freed using the “Delete” function.
The “Replace” function is used to
change the new selected destination
with a previous one. After scrolling the
list of destinations and highlighting one
using knob 22-fig. 1, press the knob
and then select the location where the
destination is to be entered and press
the knob again.
IMPORTANT NOTES
– The list is displayed if at least one
destination is present; otherwise, the
new destination is automatically en-
tered in the first destination list loca-
tion.
– When the new destination is en-
tered or replaced with one on the list,
the navigation system informs the user
that route calculation has begun; dur-
ing calculation, the navigation CD-
ROM cannot be removed.The “Delete” function is used to dis-
play up to 8 destinations to be delet-
ed from the navigation memory. Se-
lect the destination to be deleted and
confirm using knob 22-fig. 1.
“Directory”
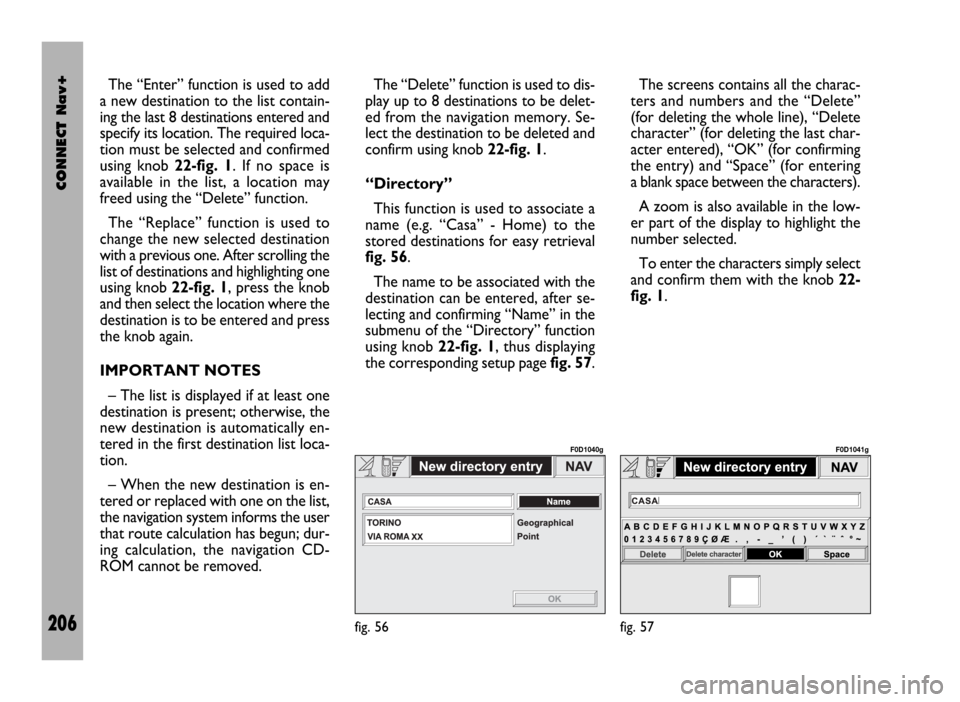
This function is used to associate a
name (e.g. “Casa” - Home) to the
stored destinations for easy retrieval
fig. 56.
The name to be associated with the
destination can be entered, after se-
lecting and confirming “Name” in the
submenu of the “Directory” function
using knob 22-fig. 1, thus displaying
the corresponding setup page fig. 57.The screens contains all the charac-
ters and numbers and the “Delete”
(for deleting the whole line), “Delete
character” (for deleting the last char-
acter entered), “OK” (for confirming
the entry) and “Space” (for entering
a blank space between the characters).
A zoom is also available in the low-
er part of the display to highlight the
number selected.
To enter the characters simply select
and confirm them with the knob 22-
fig. 1.
fig. 56
F0D1040g
fig. 57
F0D1041g