light FIAT DUCATO 244 2002 3.G Connect NavPlus Manual
[x] Cancel search | Manufacturer: FIAT, Model Year: 2002, Model line: DUCATO 244, Model: FIAT DUCATO 244 2002 3.GPages: 246, PDF Size: 3.39 MB
Page 212 of 246

CONNECT Nav+
211
The navigation system is able to han-
dle RDS TMC messages also supplying
the location.Below is the list (continuously up-
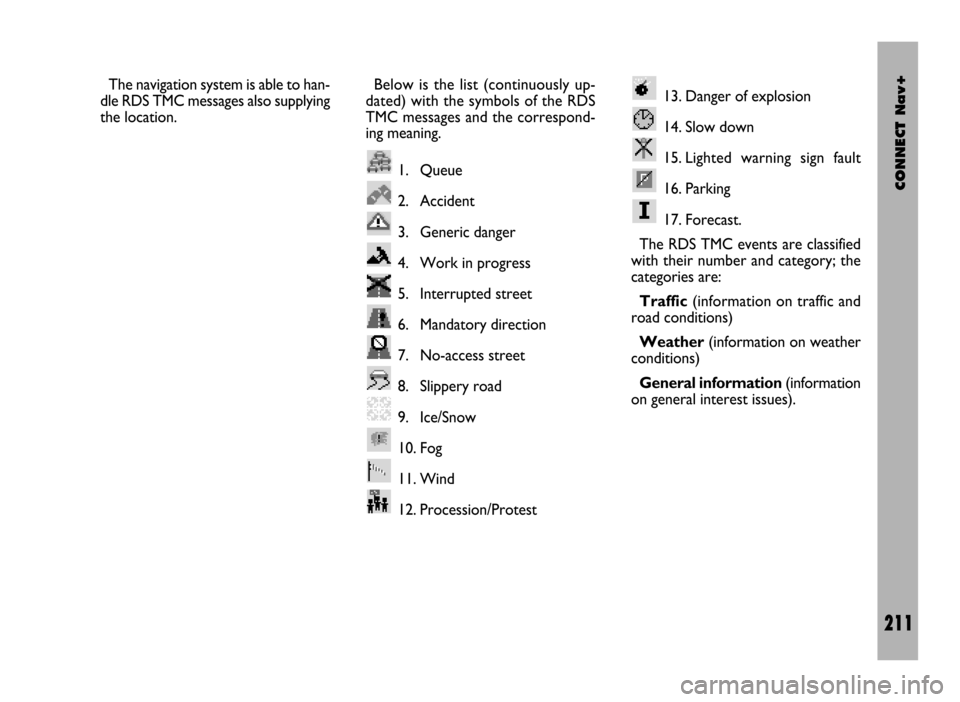
dated) with the symbols of the RDS
TMC messages and the correspond-
ing meaning.
1. Queue
2. Accident
3. Generic danger
4. Work in progress
5. Interrupted street
6. Mandatory direction
7. No-access street
8. Slippery road
9. Ice/Snow
10. Fog
11. Wind
12. Procession/Protest13. Danger of explosion
14. Slow down
15. Lighted warning sign fault
16. Parking
17. Forecast.
The RDS TMC events are classified
with their number and category; the
categories are:
Traffic(information on traffic and
road conditions)
Weather(information on weather
conditions)
General information(information
on general interest issues).
Page 215 of 246

CONNECT Nav+
214
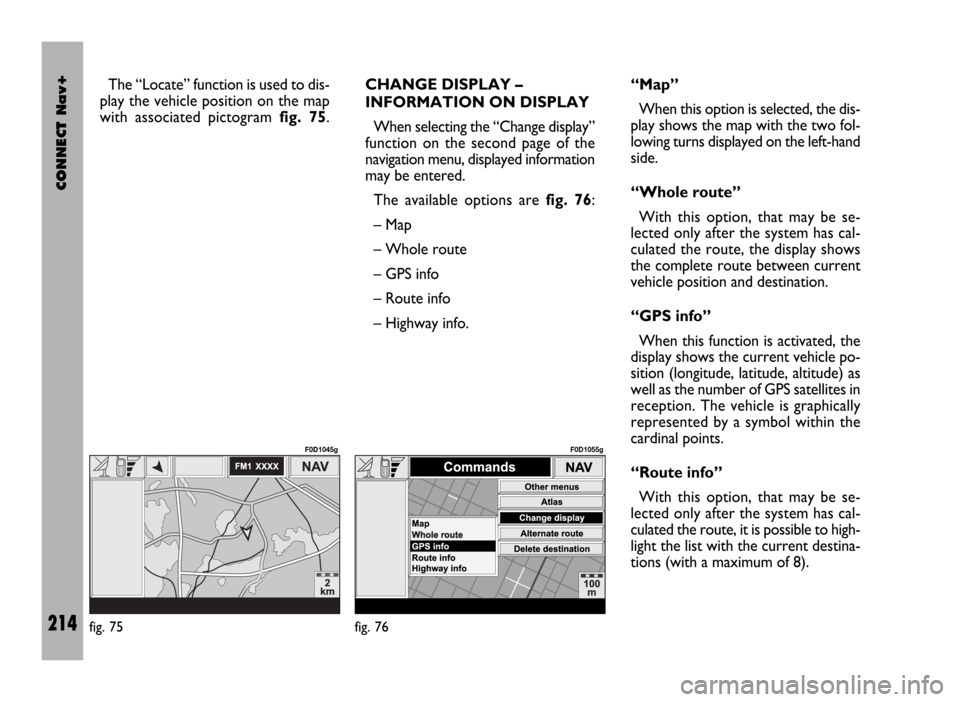
The “Locate” function is used to dis-
play the vehicle position on the map
with associated pictogram fig. 75.CHANGE DISPLAY –
INFORMATION ON DISPLAY
When selecting the “Change display”
function on the second page of the
navigation menu, displayed information
may be entered.
The available options are fig. 76:
– Map
– Whole route
– GPS info
– Route info
– Highway info.“Map”
When this option is selected, the dis-
play shows the map with the two fol-
lowing turns displayed on the left-hand
side.
“Whole route”
With this option, that may be se-
lected only after the system has cal-
culated the route, the display shows
the complete route between current
vehicle position and destination.
“GPS info”
When this function is activated, the
display shows the current vehicle po-
sition (longitude, latitude, altitude) as
well as the number of GPS satellites in
reception. The vehicle is graphically
represented by a symbol within the
cardinal points.
“Route info”
With this option, that may be se-
lected only after the system has cal-
culated the route, it is possible to high-
light the list with the current destina-
tions (with a maximum of 8).
fig. 75
F0D1045g
fig. 76
F0D1055g
Page 235 of 246

CONNECT Nav+
234
“Select”
If they are not deleted, all the mes-
sages received are stored. The list with
all the messages can be seen in the
bottom of the display, in the screen
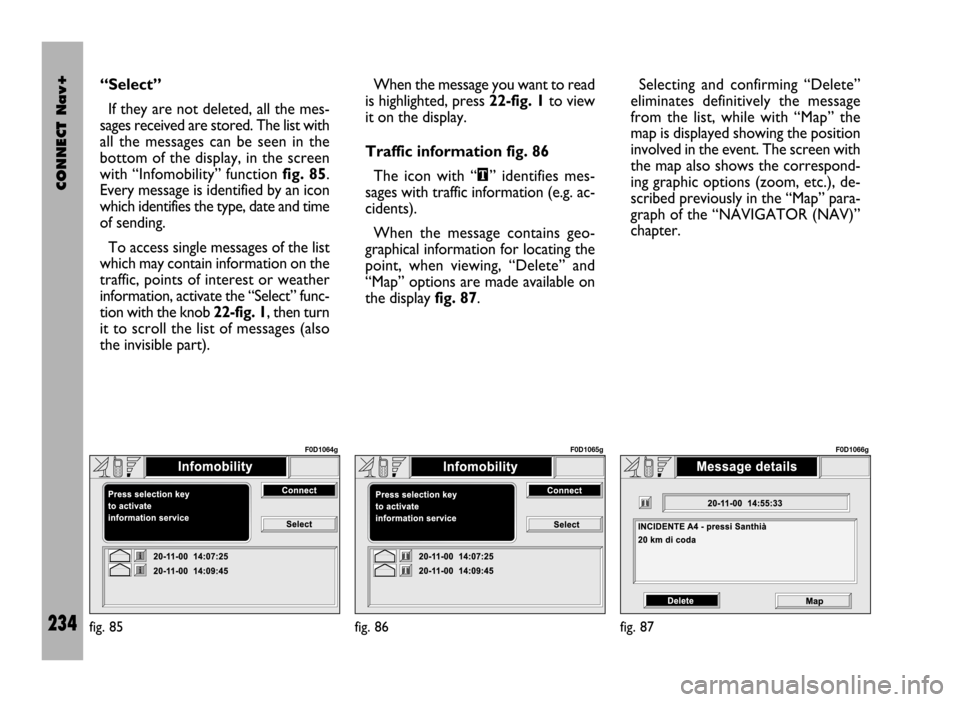
with “Infomobility” function fig. 85.
Every message is identified by an icon
which identifies the type, date and time
of sending.
To access single messages of the list
which may contain information on the
traffic, points of interest or weather
information, activate the “Select” func-
tion with the knob 22-fig. 1, then turn
it to scroll the list of messages (also
the invisible part). When the message you want to read
is highlighted, press 22-fig. 1to view
it on the display.
Traffic information fig. 86
The icon with “\” identifies mes-
sages with traffic information (e.g. ac-
cidents).
When the message contains geo-
graphical information for locating the
point, when viewing, “Delete” and
“Map” options are made available on
the display fig. 87.Selecting and confirming “Delete”
eliminates definitively the message
from the list, while with “Map” the
map is displayed showing the position
involved in the event. The screen with
the map also shows the correspond-
ing graphic options (zoom, etc.), de-
scribed previously in the “Map” para-
graph of the “NAVIGATOR (NAV)”
chapter.
fig. 85
F0D1064g
fig. 86
F0D1065g
fig. 87
F0D1066g
Page 238 of 246

CONNECT Nav+
237
“Emergency 112” FUNCTION
Choosing and activating this function
on the menu main page
•, directly
sends a call to the police force.
IMPORTANT“112” is the emer-
gency call service for all the countries
in which this public service is available.
The “Emergency 112” call can always
be activated, even if the telephone
card is not inserted in the slot 27-
fig. 1.
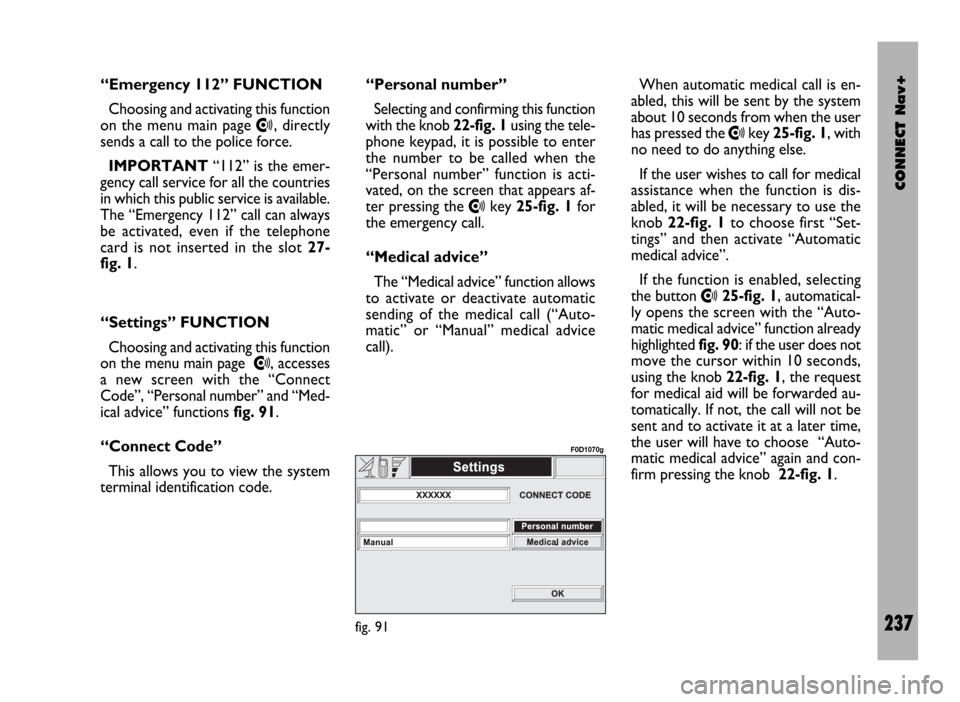
“Settings” FUNCTION
Choosing and activating this function
on the menu main page
•, accesses
a new screen with the “Connect
Code”, “Personal number” and “Med-
ical advice” functions fig. 91.
“Connect Code”
This allows you to view the system
terminal identification code.“Personal number”
Selecting and confirming this function
with the knob 22-fig. 1using the tele-
phone keypad, it is possible to enter
the number to be called when the
“Personal number” function is acti-
vated, on the screen that appears af-
ter pressing the
•key 25-fig. 1for
the emergency call.
“Medical advice”
The “Medical advice” function allows
to activate or deactivate automatic
sending of the medical call (“Auto-
matic” or “Manual” medical advice
call).When automatic medical call is en-
abled, this will be sent by the system
about 10 seconds from when the user
has pressed the
•key 25-fig. 1, with
no need to do anything else.
If the user wishes to call for medical
assistance when the function is dis-
abled, it will be necessary to use the
knob 22-fig. 1to choose first “Set-
tings” and then activate “Automatic
medical advice”.
If the function is enabled, selecting
the button
•25-fig. 1, automatical-
ly opens the screen with the “Auto-
matic medical advice” function already
highlighted fig. 90: if the user does not
move the cursor within 10 seconds,
using the knob 22-fig. 1, the request
for medical aid will be forwarded au-
tomatically. If not, the call will not be
sent and to activate it at a later time,
the user will have to choose “Auto-
matic medical advice” again and con-
firm pressing the knob 22-fig. 1.
fig. 91
F0D1070g