height adjustment FIAT DUCATO 244 2005 3.G Owners Manual
[x] Cancel search | Manufacturer: FIAT, Model Year: 2005, Model line: DUCATO 244, Model: FIAT DUCATO 244 2005 3.GPages: 258, PDF Size: 4.05 MB
Page 19 of 258
Always adjust the height of the seat
belt to fit the person wearing it. This
could greatly reduce the risk of injury
in the case of collision.
The belt is adjusted properly when
the webbing passes approximately
halfway between the edge of the
shoulder and the neck.
5 different adjustments in height are
provided.PRETENSIONERS
Ducato vehicles fitted with airbags
are also fitted with pretensioners to
improve protection.
These devices “feel” that a violent
collision is in progress via a sensor and
pull back a few inches of webbing. In
this way the pretensioners ensure that
the belt is adhering perfectly to the
body before the belt begins to hold
back the wearer.
When the pretensioner has been
triggered the retractor will lock. The
seat belt cannot be drawn back up
even when guiding it manually.
After you have made the
adjustment, always make
sure that the loop is attached firm-
ly in one of the preset positions. To
do this, with the button released,
exert a further pressure to allow
the anchoring device to catch if re-
lease did not take place at one of
the preset positions.
WARNING
18GETTING TO KNOW YOUR VEHICLE
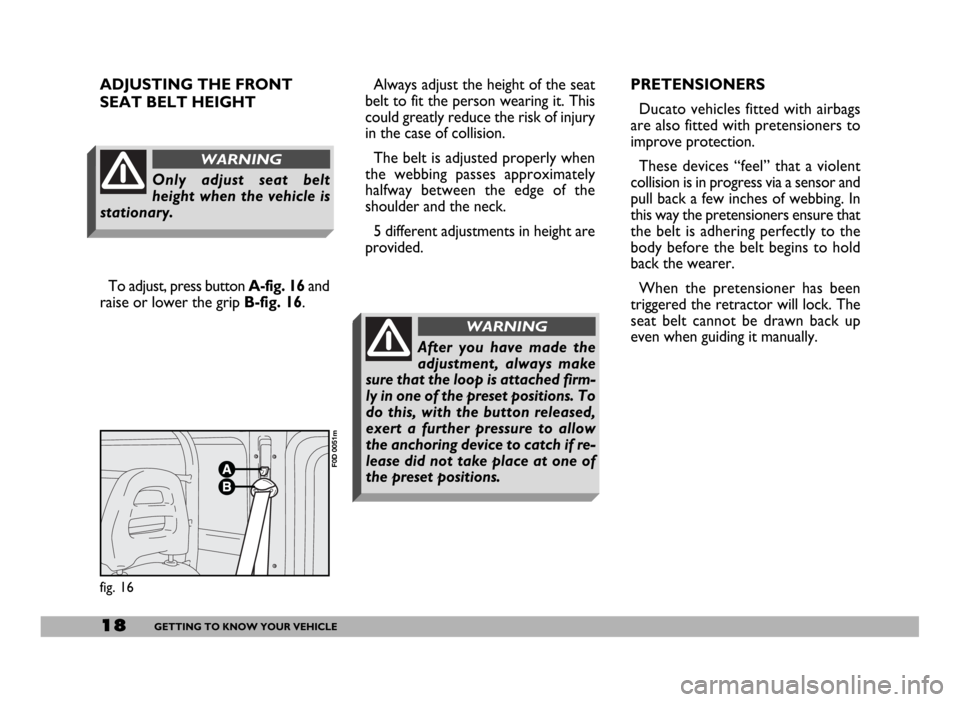
To adjust, press button A-fig. 16and
raise or lower the grip B-fig. 16. ADJUSTING THE FRONT
SEAT BELT HEIGHT
fig. 16
F0D 0051m
Only adjust seat belt
height when the vehicle is
stationary.
WARNING
Page 43 of 258
42GETTING TO KNOW YOUR VEHICLE
Height adjustment
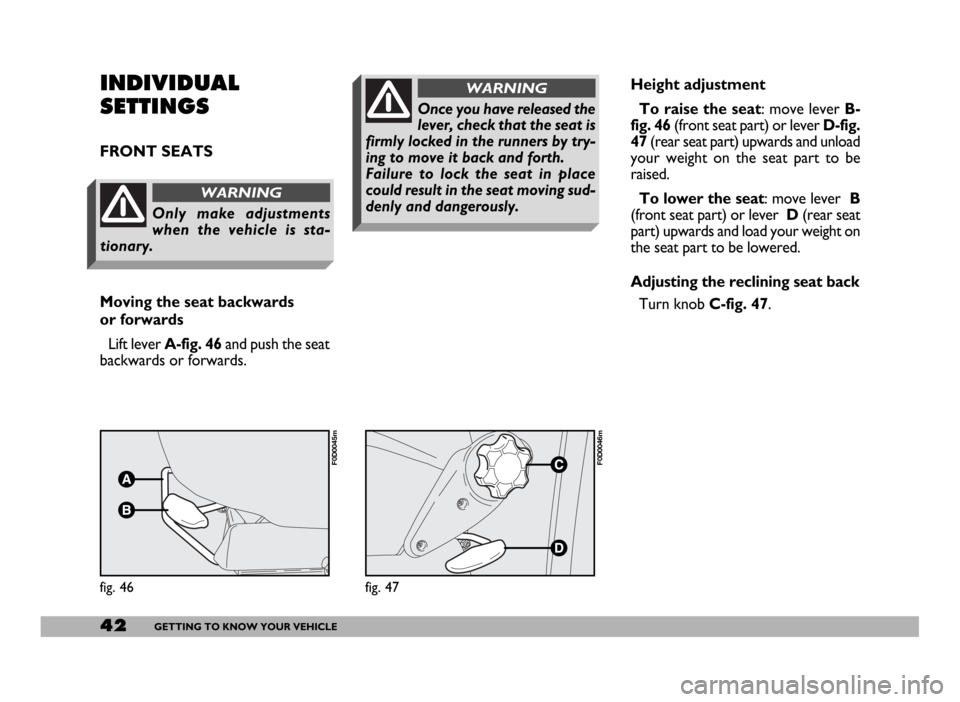
To raise the seat: move lever B-
fig. 46 (front seat part) or lever D-fig.
47(rear seat part) upwards and unload
your weight on the seat part to be
raised.
To lower the seat: move lever B
(front seat part) or lever D(rear seat
part) upwards and load your weight on
the seat part to be lowered.
Adjusting the reclining seat back
Turn knob C-fig. 47.
fig. 47
F0D0046m
INDIVIDUAL
SETTINGS
FRONT SEATS
Moving the seat backwards
or forwards
Lift lever A-fig. 46and push the seat
backwards or forwards.
fig. 46
F0D0045m
Only make adjustments
when the vehicle is sta-
tionary.
WARNING
Once you have released the
lever, check that the seat is
firmly locked in the runners by try-
ing to move it back and forth.
Failure to lock the seat in place
could result in the seat moving sud-
denly and dangerously.
WARNING
Page 44 of 258
43GETTING TO KNOW YOUR VEHICLE
E
fig. 48
F0D0104m
Lumbar adjustment
This feature ensures better back sup-
port.
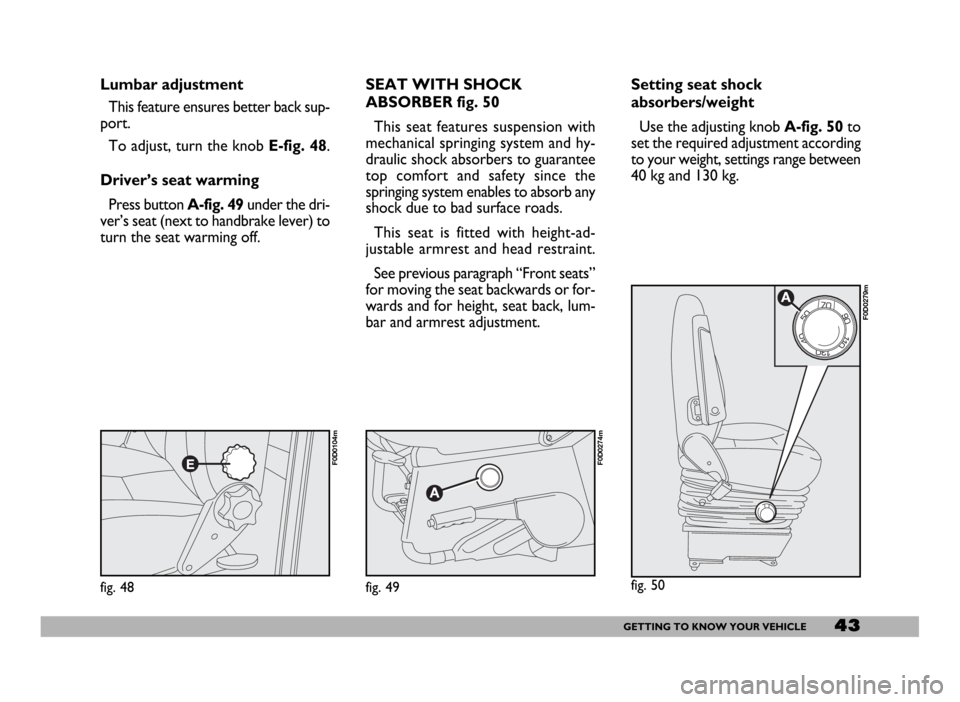
To adjust, turn the knob E-fig. 48.
Driver’s seat warming
Press button A-fig. 49under the dri-
ver’s seat (next to handbrake lever) to
turn the seat warming off.SEAT WITH SHOCK
ABSORBER fig. 50
This seat features suspension with
mechanical springing system and hy-
draulic shock absorbers to guarantee
top comfort and safety since the
springing system enables to absorb any
shock due to bad surface roads.
This seat is fitted with height-ad-
justable armrest and head restraint.
See previous paragraph “Front seats”
for moving the seat backwards or for-
wards and for height, seat back, lum-
bar and armrest adjustment.Setting seat shock
absorbers/weight
Use the adjusting knob A-fig. 50to
set the required adjustment according
to your weight, settings range between
40 kg and 130 kg.
fig. 49
F0D0274m
F0D0279m
fig. 50
Page 46 of 258
45GETTING TO KNOW YOUR VEHICLE
fig. 53
F0D0077m
Tilting the central seat back
(2nd- 3rd)
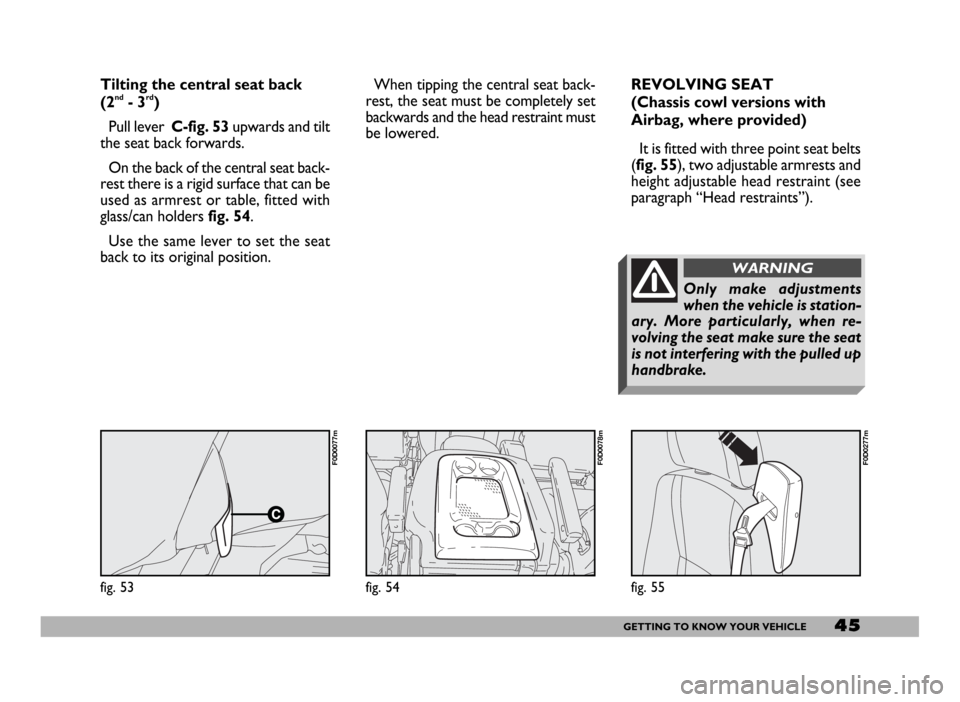
Pull lever C-fig. 53upwards and tilt
the seat back forwards.
On the back of the central seat back-
rest there is a rigid surface that can be
used as armrest or table, fitted with
glass/can holders fig. 54.
Use the same lever to set the seat
back to its original position.
fig. 54
F0D0078m
When tipping the central seat back-
rest, the seat must be completely set
backwards and the head restraint must
be lowered.REVOLVING SEAT
(Chassis cowl versions with
Airbag, where provided)
It is fitted with three point seat belts
(fig. 55), two adjustable armrests and
height adjustable head restraint (see
paragraph “Head restraints”).
Only make adjustments
when the vehicle is station-
ary. More particularly, when re-
volving the seat make sure the seat
is not interfering with the pulled up
handbrake.
WARNING
fig. 55
F0D0277m
Page 47 of 258
46GETTING TO KNOW YOUR VEHICLE
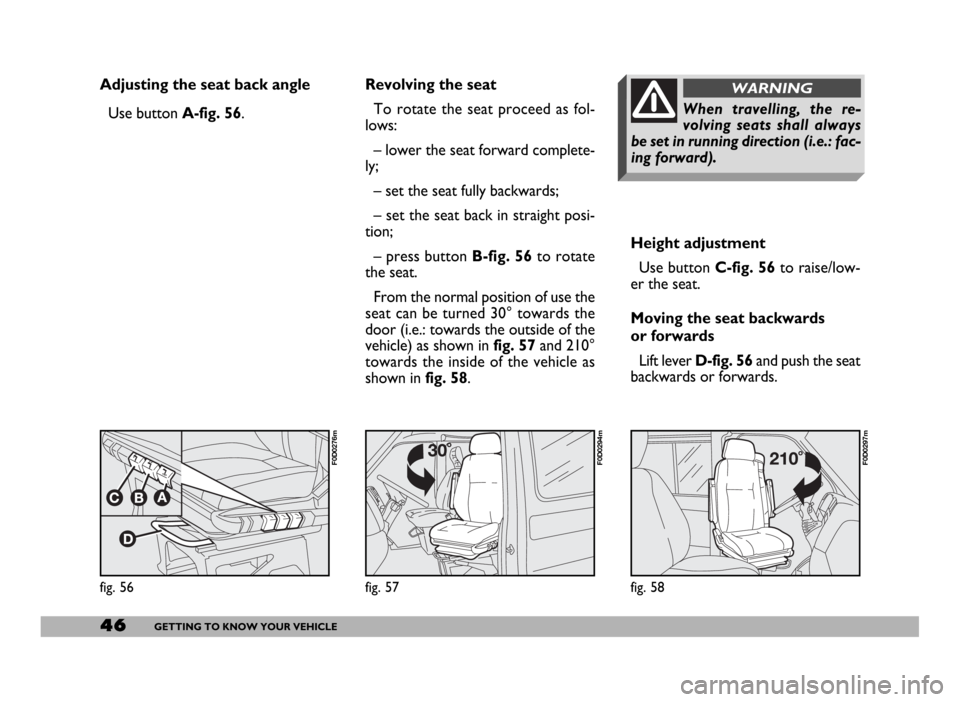
Adjusting the seat back angle
Use button A-fig. 56.
Height adjustment
Use button C-fig. 56to raise/low-
er the seat.
Moving the seat backwards
or forwards
Lift lever D-fig. 56and push the seat
backwards or forwards.
fig. 56
F0D0276m
Revolving the seat
To rotate the seat proceed as fol-
lows:
– lower the seat forward complete-
ly;
– set the seat fully backwards;
– set the seat back in straight posi-
tion;
– press button B-fig. 56to rotate
the seat.
From the normal position of use the
seat can be turned 30° towards the
door (i.e.: towards the outside of the
vehicle) as shown in fig. 57and 210°
towards the inside of the vehicle as
shown in fig. 58.
fig. 57
F0D0294m
fig. 58
F0D0297m
When travelling, the re-
volving seats shall always
be set in running direction (i.e.: fac-
ing forward).
WARNING
Page 52 of 258
51GETTING TO KNOW YOUR VEHICLE
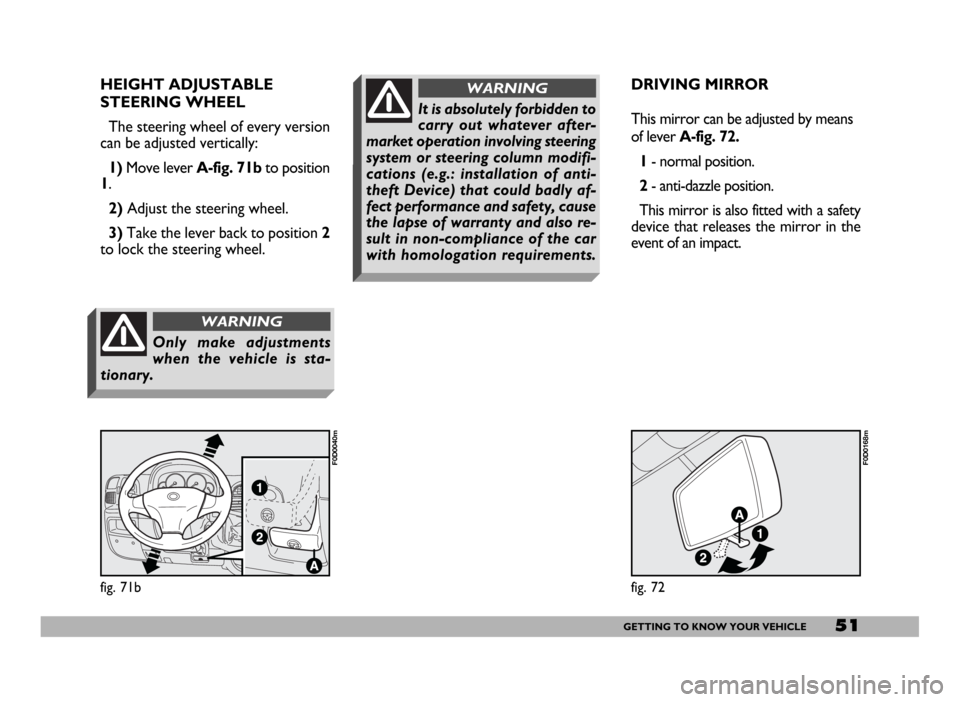
HEIGHT ADJUSTABLE
STEERING WHEEL
The steering wheel of every version
can be adjusted vertically:
1)Move lever A-fig. 71b to position
1.
2)Adjust the steering wheel.
3)Take the lever back to position 2
to lock the steering wheel.
fig. 71b
F0D0040m
Only make adjustments
when the vehicle is sta-
tionary.
WARNING
DRIVING MIRROR
This mirror can be adjusted by means
of lever A-fig. 72.
1- normal position.
2- anti-dazzle position.
This mirror is also fitted with a safety
device that releases the mirror in the
event of an impact.
fig. 72
F0D0168m
It is absolutely forbidden to
carry out whatever after-
market operation involving steering
system or steering column modifi-
cations (e.g.: installation of anti-
theft Device) that could badly af-
fect performance and safety, cause
the lapse of warranty and also re-
sult in non-compliance of the car
with homologation requirements.
WARNING