headlights FIAT DUCATO BASE CAMPER 2014 Owner handbook (in English)
[x] Cancel search | Manufacturer: FIAT, Model Year: 2014, Model line: DUCATO BASE CAMPER, Model: FIAT DUCATO BASE CAMPER 2014Pages: 367, PDF Size: 20.39 MB
Page 9 of 367
GRAPHICAL INDEX
.
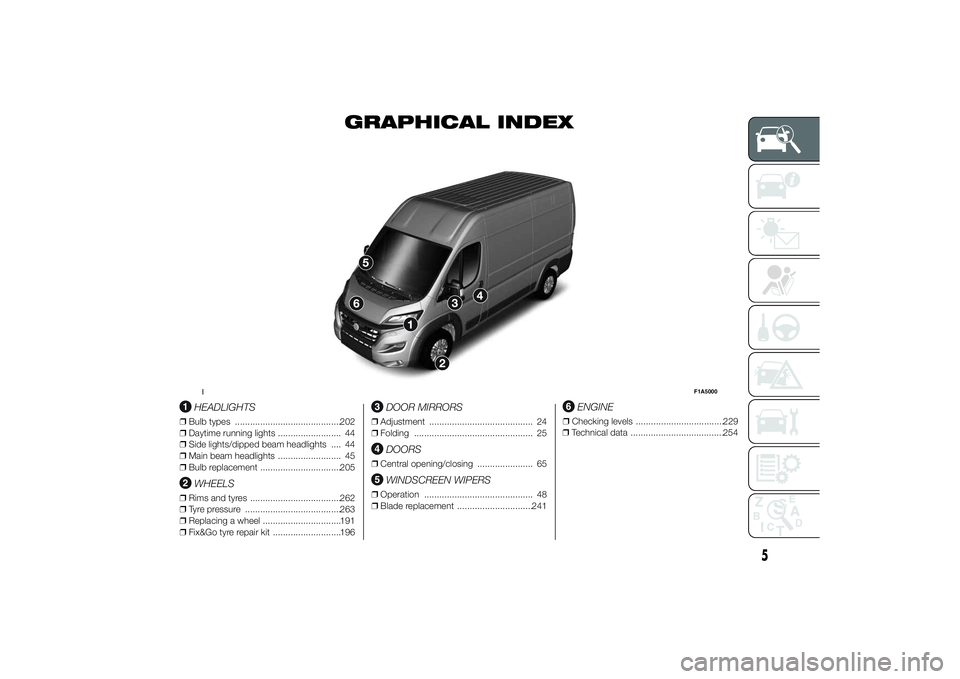
HEADLIGHTS
❒Bulb types ..........................................202
❒Daytime running lights ......................... 44
❒Side lights/dipped beam headlights .... 44
❒Main beam headlights ......................... 45
❒Bulb replacement ................................205
WHEELS
❒Rims and tyres ....................................262
❒Tyre pressure ......................................263
❒Replacing a wheel ...............................191
❒Fix&Go tyre repair kit ...........................196
DOOR MIRRORS
❒Adjustment ......................................... 24
❒Folding ............................................... 25
DOORS
❒Central opening/closing ...................... 65
WINDSCREEN WIPERS
❒Operation ........................................... 48
❒Blade replacement ..............................241
ENGINE
❒Checking levels ...................................229
❒Technical data .....................................254
1
F1A5000
5
Page 13 of 367
KNOW YOUR VEHICLE
In-depth knowledge of your new vehicle
starts here.
The booklet that you are reading simply
and directly explains how it is made
and how it works.
That’s why we advise you to read it
seated comfortably on board, so that
you can see what is described here for
yourself.SYMBOLS ...................................... 10
THE FIAT CODE SYSTEM ............... 10
THE KEYS....................................... 11
ELECTRONIC ALARM..................... 13
IGNITION SWITCH .......................... 14
SEATS ............................................ 15
HEAD RESTRAINTS ........................ 23
STEERING WHEEL ......................... 24
REAR VIEW MIRRORS .................... 24
HEATING AND VENTILATION.......... 27
DIFFUSERS..................................... 28
HEATING AND VENTILATION
CONTROLS .................................... 28
MANUAL CLIMATE CONTROL
SYSTEM ......................................... 30
AUTOMATIC CLIMATE CONTROL
SYSTEM ......................................... 33
ADDITIONAL HEATER ..................... 38
INDEPENDENT ADDITIONAL
HEATER .......................................... 39
EXTERNAL LIGHTS......................... 44
WINDOW CLEANING ...................... 48
CRUISE CONTROL ......................... 50
ROOF LIGHTS ................................ 53
CONTROLS .................................... 54
FUEL CUT-OFF SWITCH ................ 57
INTERIOR FITTINGS ...................... 58
TACHOGRAPH ............................... 63SPEED BLOCK ............................... 64
SELF-LEVELLING AIR
SUSPENSION ................................. 64
DOORS ........................................... 65
ELECTRIC WINDOWS .................... 70
BONNET ......................................... 71
ROOF RACK/SKI RACK .................. 72
HEADLIGHTS.................................. 73
ABS ................................................ 74
ESC (ELECTRONIC STABILITY
CONTROL) SYSTEM ....................... 75
TRACTION PLUS SYSTEM ............. 79
TPMS (TYRE PRESSURE
MONITORING SYSTEM) ................. 80
DRIVING ADVISOR ......................... 83
REAR CAMERA (PARKVIEW®
REAR BACK UP CAMERA) ............. 89
TRAFFIC SIGN RECOGNITION ....... 90
EOBD SYSTEM............................... 92
PARKING SENSORS....................... 93
START&STOP SYSTEM .................. 95
RADIO............................................. 98
ACCESSORIES PURCHASED BY
THE OWNER................................... 99
REFUELLING THE VEHICLE ...........100
PROTECTING THE
ENVIRONMENT ..............................101
9
Page 48 of 367
WARNING
21) The heater burns fuel in the
same way as the engine, though
to a lesser extent. To prevent
poisoning and asphyxiation, the
additional heater must never
be turned on, not even for short
periods, in closed environments
such as a garage or workshops
without extraction fans for the
exhaust gases.
22) The heater burns fuel in the
same way as the engine, though
to a lesser extent. To prevent
poisoning and asphyxiation, the
supplementary heater must never
be turned on, not even for short
periods, in closed environments
such as a garage or workshops
without extraction fans for the
exhaust gases.
EXTERNAL LIGHTS
IN BRIEF
The left stalk includes the controls for
the exterior lights.
The exterior lights can only be
switched on when the ignition key is
in the ON position.
LIGHTS OFF
Ring nut turned to positionOfig. 57.DAYTIME RUNNING
LIGHTS (DRL)
(for versions/markets, where provided)
With the ignition key turned to MAR-ON
and the ring nut turned to positionO
fig. 57 the daytime running lights are
automatically activated; the other lights
and interior lighting remain off. The
automatic operation of the daytime
running lights can be activated/
deactivated, for versions/markets
where provided, via the display menu
(see "Display" in the "Knowing the
instrument panel" chapter).
If the daytime running lights are
deactivated, no light comes on when
the ring nut is turned toO.
23)
DIPPED BEAM
HEADLIGHTS/SIDE
LIGHTS
With the ignition key turned to
MAR-ON, turn the ring nut to
fig.
58.
If dipped headlights are activated, the
daytime running lights switch off and
the side lights and dipped headlights
switch on.
The
warning light switches on in
the instrument panel.
57
F1A0064
44
KNOW YOUR VEHICLE
Page 49 of 367
When the ignition key is turned to
STOP or removed and the ring nut is
turned fromOto
, all the side lights
and the number plate lights come on.
The
warning light will come on
in the instrument panel.
MAIN BEAM HEADLIGHTS
When the ring nut is in position
,
pull the stalk towards the steering
wheel (2nd unstable position) fig. 59.
The
warning light switches on in the
instrument panel.
To turn the main beams off, pull the
stalk towards the steering wheel again
(dipped beams will come back on).FLASHING
Pull the stalk towards the steering
wheel (1st unstable position) fig. 60
regardless of the position of the ring
nut. The
warning light switches on
in the instrument panel.AUTOMATIC MAIN BEAM
HEADLIGHTS
The system is activated with the menu
item and by rotating the light selector to
the AUTO position.
When the main beam headlights are
activated for the first time, pulling the
stalk to turn them on activates the
function and the icon
is displayed;
if the main beam headlights are actually
on, the relevant blue warning light
is displayed as well.
If the driving speed is over 40 km/h and
the function is activated, pulling the
stalk again to the main beam headlight
position deactivates the function.
If the driving speed is below 15 km/h
and the function is activated, the
function switches the main beam
headlights off. Pulling the stalk again to
the main beam headlight position is
interpreted as a request for main beam
headlights constantly on, therefore
the blue warning light
on the panel
switches on and the main beam
headlights are constantly on until the
speed exceeds 40 km/h again. The
function is activated again automatically
when 40 km/h is exceeded
.
58
F1A0065
59
F1A0066
60
F1A0067
45
Page 50 of 367
If the stalk is pulled again in this
condition, to request main beam
headlight deactivation, the function
remains off and the main beam
headlights switch off.
Rotate the ring nut to the position
fig. 58 to deactivate the automatic
function.25) 24)
PARKING LIGHTS
These lights can only be turned on with
ignition key in STOP position or
removed, by moving the left stalk ring
nut first to positionOand then to
position
or
.
The
warning light switches on in
the instrument panel.
DIRECTION INDICATORS
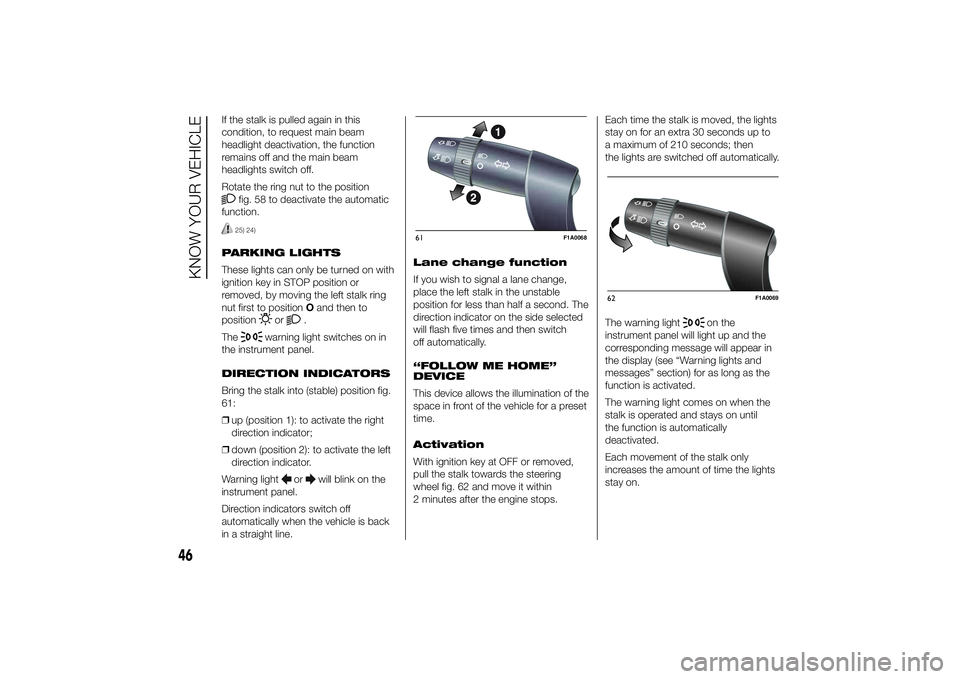
Bring the stalk into (stable) position fig.
61:
❒up (position 1): to activate the right
direction indicator;
❒down (position 2): to activate the left
direction indicator.
Warning light
or
will blink on the
instrument panel.
Direction indicators switch off
automatically when the vehicle is back
in a straight line.Lane change function
If you wish to signal a lane change,
place the left stalk in the unstable
position for less than half a second. The
direction indicator on the side selected
will flash five times and then switch
off automatically.
“FOLLOW ME HOME”
DEVICE
This device allows the illumination of the
space in front of the vehicle for a preset
time.
Activation
With ignition key at OFF or removed,
pull the stalk towards the steering
wheel fig. 62 and move it within
2 minutes after the engine stops.Each time the stalk is moved, the lights
stay on for an extra 30 seconds up to
a maximum of 210 seconds; then
the lights are switched off automatically.
The warning light
on the
instrument panel will light up and the
corresponding message will appear in
the display (see “Warning lights and
messages” section) for as long as the
function is activated.
The warning light comes on when the
stalk is operated and stays on until
the function is automatically
deactivated.
Each movement of the stalk only
increases the amount of time the lights
stay on.
61
F1A0068
62
F1A0069
46
KNOW YOUR VEHICLE
Page 51 of 367
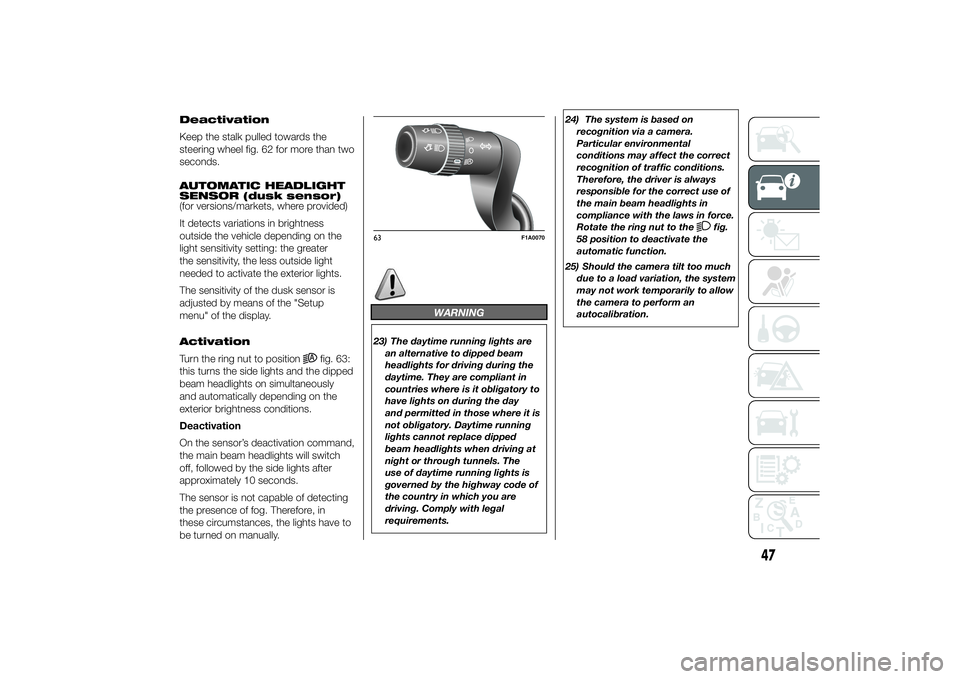
Deactivation
Keep the stalk pulled towards the
steering wheel fig. 62 for more than two
seconds.
AUTOMATIC HEADLIGHT
SENSOR (dusk sensor)
(for versions/markets, where provided)
It detects variations in brightness
outside the vehicle depending on the
light sensitivity setting: the greater
the sensitivity, the less outside light
needed to activate the exterior lights.
The sensitivity of the dusk sensor is
adjusted by means of the "Setup
menu" of the display.
Activation
Turn the ring nut to position
fig. 63:
this turns the side lights and the dipped
beam headlights on simultaneously
and automatically depending on the
exterior brightness conditions.
Deactivation
On the sensor’s deactivation command,
the main beam headlights will switch
off, followed by the side lights after
approximately 10 seconds.
The sensor is not capable of detecting
the presence of fog. Therefore, in
these circumstances, the lights have to
be turned on manually.
WARNING
23) The daytime running lights are
an alternative to dipped beam
headlights for driving during the
daytime. They are compliant in
countries where is it obligatory to
have lights on during the day
and permitted in those where it is
not obligatory. Daytime running
lights cannot replace dipped
beam headlights when driving at
night or through tunnels. The
use of daytime running lights is
governed by the highway code of
the country in which you are
driving. Comply with legal
requirements.24) The system is based on
recognition via a camera.
Particular environmental
conditions may affect the correct
recognition of traffic conditions.
Therefore, the driver is always
responsible for the correct use of
the main beam headlights in
compliance with the laws in force.
Rotate the ring nut to the
fig.
58 position to deactivate the
automatic function.
25) Should the camera tilt too much
due to a load variation, the system
may not work temporarily to allow
the camera to perform an
autocalibration.
63
F1A0070
47
Page 59 of 367
Warning lights
and
are lit up in the
instrument panel when this device is
activated. Press switch A again to turn
the lights off.
IMPORTANT The use of hazard warning
lights is governed by the highway
code of the country you are in. Comply
with legal requirements.
Emergency braking
(for versions/markets, where provided)
In the event of emergency braking
the hazard warning lights come on
automatically, as do theand
warning lights in the panel. The
function switches off automatically
when the nature of the braking
changes. This function complies with
the relevant legislation currently in force.
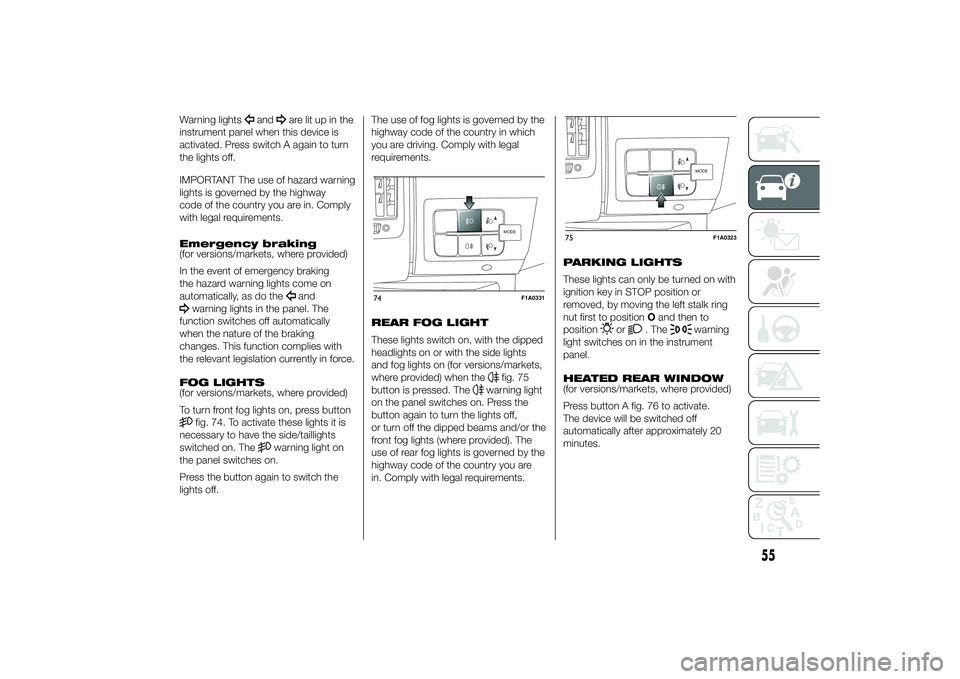
FOG LIGHTS
(for versions/markets, where provided)
To turn front fog lights on, press buttonfig. 74. To activate these lights it is
necessary to have the side/taillights
switched on. The
warning light on
the panel switches on.
Press the button again to switch the
lights off.The use of fog lights is governed by the
highway code of the country in which
you are driving. Comply with legal
requirements.
REAR FOG LIGHT
These lights switch on, with the dipped
headlights on or with the side lights
and fog lights on (for versions/markets,
where provided) when the
fig. 75
button is pressed. The
warning light
on the panel switches on. Press the
button again to turn the lights off,
or turn off the dipped beams and/or the
front fog lights (where provided). The
use of rear fog lights is governed by the
highway code of the country you are
in. Comply with legal requirements.PARKING LIGHTS
These lights can only be turned on with
ignition key in STOP position or
removed, by moving the left stalk ring
nut first to positionOand then to
position
or
. The
warning
light switches on in the instrument
panel.
HEATED REAR WINDOW
(for versions/markets, where provided)
Press button A fig. 76 to activate.
The device will be switched off
automatically after approximately 20
minutes.
MODE
74
F1A0331
MODE
75
F1A0323
55
Page 61 of 367
FUEL CUT-OFF
SWITCHThe vehicle is fitted with a safety switch
that, in the event of a crash, comes
into operation by cutting off the fuel
supply and turning off the engine as a
consequence.When the inertia switch cuts in, it cuts
off the fuel supply and also activates
the hazard warning lights, side lights
and courtesy lights while releasing
all the doors and displaying the relevant
message; they are deactivated by
pressing button A. On some versions,
there is also a safety relay that activates
in the event of impact to cut off the
electrical supply. In this way, fuel is
prevented from escaping if the pipes
are broken and the formation of sparks
or electrical discharges following
damage to the vehicle electrical
components is avoided.
29) 30)
IMPORTANT After an accident,
remember to remove the key from the
ignition device to prevent the battery
from running down. If no fuel leaks
or damage to vehicle's electrical
devices (e.g. headlights) are detected
after the impact and the vehicle is
able to set off again, reactivate the
automatic fuel cut-off switch.Restoring the fuel
cut-off switch
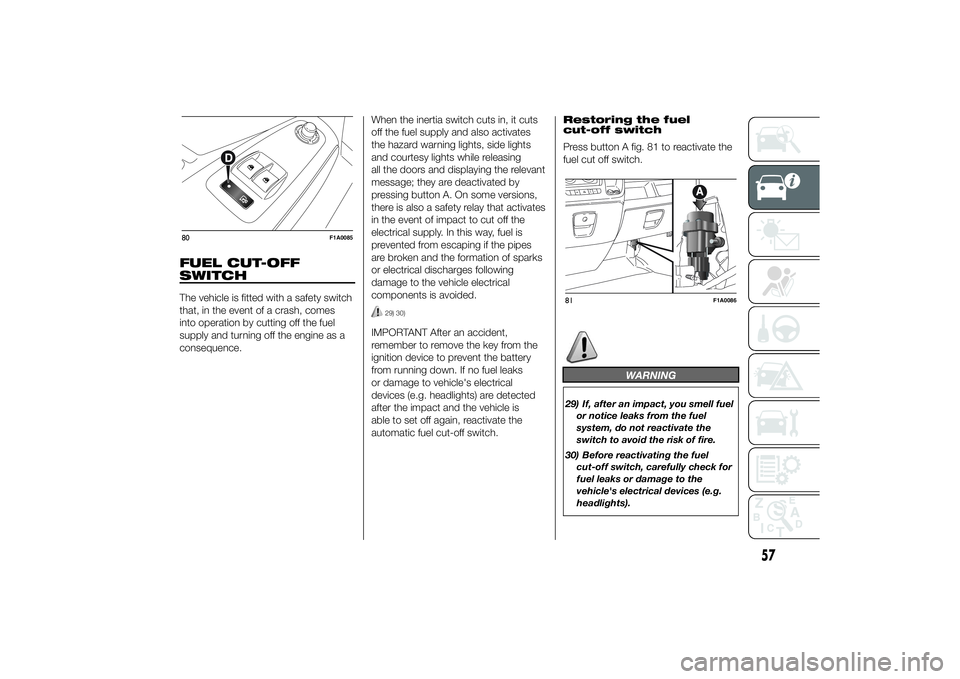
Press button A fig. 81 to reactivate the
fuel cut off switch.
WARNING
29) If, after an impact, you smell fuel
or notice leaks from the fuel
system, do not reactivate the
switch to avoid the risk of fire.
30) Before reactivating the fuel
cut-off switch, carefully check for
fuel leaks or damage to the
vehicle's electrical devices (e.g.
headlights).
80
F1A0085
81
F1A0086
57
Page 77 of 367
WARNING
44) After travelling for a few
kilometres, check to ensure that
the fixing screws for the
attachments are well tightened.
45) Evenly distribute the load and
take into account, when driving,
the increased responsiveness
of the vehicle to side wind.
IMPORTANT
5) The size of the loads you
transport must strictly comply
with currently applicable
regulations.
6) Never exceed the maximum
permitted loads (see “Technical
specifications” section).
HEADLIGHTSLIGHT BEAM ALIGNMENT
The correct alignment of the headlights
is essential for the comfort and safety
of the driver and other road users.
To ensure the best visibility when
travelling with the headlights on, the
headlight alignment must be correct.
Contact a Fiat Dealership to have
the headlights checked and adjusted.
HEADLIGHT ALIGNMENT
CORRECTOR
This device works with the ignition key
in the MAR-ON position and the dipped
beam headlights on.
The vehicle tilts backwards when it is
laden, raising the beam.
The beams must therefore be realigned
in this case.
Headlight alignment
adjustment
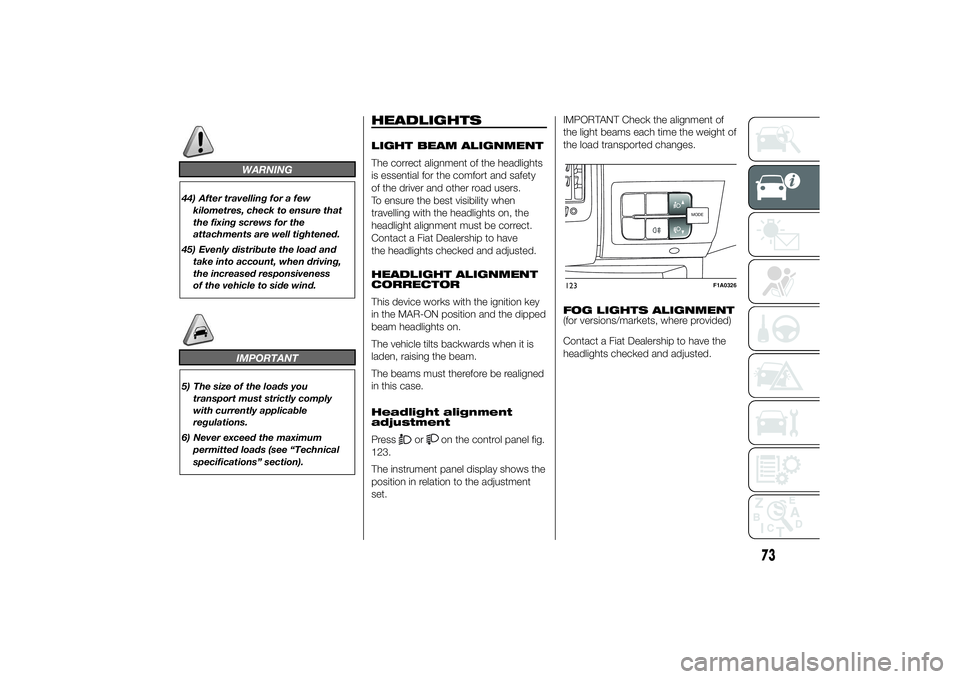
Press
or
on the control panel fig.
123.
The instrument panel display shows the
position in relation to the adjustment
set.IMPORTANT Check the alignment of
the light beams each time the weight of
the load transported changes.
FOG LIGHTS ALIGNMENT
(for versions/markets, where provided)
Contact a Fiat Dealership to have the
headlights checked and adjusted.
MODEMODE
123
F1A0326
73
Page 78 of 367
ADJUSTING THE
HEADLIGHTS WHEN
ABROAD
The dipped beam headlights are
aligned for operation in the country
where the vehicle was originally
purchased. When in countries where
you drive on the other side of the road,
you need to alter the beam direction
by affixing a specially designed
self-adhesive film in order not to dazzle
the vehicles travelling in the opposite
direction. Such film is provided by
Lineaccessori Fiat and is available at
Fiat Dealerships.
ABSThis is an integral part of the braking
system, which prevents one or more
wheels from locking or slipping
regardless of the road surface
conditions and braking intensity,
ensuring control of the vehicle even
during emergency braking.
The system intervenes when braking
and the wheels are about to lock,
typically in emergency braking or
low-grip conditions, when locking may
be more frequent.
The ABS ensures the direction of the
vehicle while braking and optimises the
braking distances at the same time.
The system also improves control and
stability of the car when braking on a
surface where the grip of the left and
right wheels varies, or when braking on
corners.
The system is completed by EBD
(Electronic Braking Force Distribution),
which distributes the braking action
between the front and rear wheels.
IMPORTANT To obtain the maximum
efficiency of the braking system, a
bedding-in period of about 500 km is
needed: during this period it is better to
avoid sharp, repeated and prolonged
braking.
46)
SYSTEM INTERVENTION
The driver can feel that the ABS has
come into action because the brake
pedal pulsates slightly and the system
gets noisier: it means that the car
speed should be altered to suit the type
of road surface.
47) 48) 48) 49) 50) 51) 52) 53)
MSR SYSTEM
(Motor Schleppmoment Regelung)
This system is an integral part of the
ABS and intervenes, if there is sudden
downshifting, restoring torque to the
engine, thereby preventing excessive
drive at the drive wheels which,
especially in poor grip conditions, could
lead to a loss in stability of the vehicle.
WARNING
46) The ABS exploits the grip
available to the full, but it cannot
improve it. Therefore, you should
take great care when driving on
slippery surfaces, without taking
unnecessary risks.
74
KNOW YOUR VEHICLE