overheating FIAT DUCATO BASE CAMPER 2014 Owner handbook (in English)
[x] Cancel search | Manufacturer: FIAT, Model Year: 2014, Model line: DUCATO BASE CAMPER, Model: FIAT DUCATO BASE CAMPER 2014Pages: 367, PDF Size: 20.39 MB
Page 44 of 367

IMPORTANT The heater is equipped
with a thermal limiter that cuts off
combustion in the case of overheating
due to insufficient coolant/coolant
leaks. In this case, after repairing the
fault in the cooling system and/or
topping up the fluid, press the program
selection button before turning the
heater back on.
The heater can turn off spontaneously
due to misfiring after start-up or
because the flame goes out during
operation. In this case, carry out the
turning off procedure and try to turn the
heater back on. If it still does not work,
consult a Fiat Dealership.
Activation of the heating
system
When an automatic climate control
system is present, the control unit sets
the air temperature and distribution
when the heater is turned on from the
park position. When a manual
heater/climate control is present, to
obtain maximum heater efficiency,
check that the passenger compartment
heating/ventilation temperature
adjustment knob is in the 'hot air'
position.
To prioritise passenger compartment
pre-heating, set the air distribution knob
to the
position.To prioritise windscreen demisting, set
the air distribution knob to
position.
To obtain both functions, set the air
distribution knob to
position.
Digital timer fig. 54
1) Time/timer display
2) Ventilation warning light
3) Time "forward" adjustment button
4) Program selection button
5) Clock preselection recall number
6) Activation button for immediate
heating
7) Time adjustment/reading warning
light
8) Time "backward" adjustment button
9) Heater cycle warning lightHeating turned on
immediately
To switch the system on manually,
press the button 6 of the timer: the
display and warning light 9 will light up
and remain on the entire time the
system is working.
Switching on time will disappear after
10 seconds.
Programmed activation
of heating
Before programming system activation,
it is essential to set the time.
Setting the current time
❒Keep button 4 pressed: the display
and warning light 7 will switch on;
❒At the same time, within 10 seconds,
press buttons 3 or 8 to select the
exact time;
❒Release button 4.
When the display goes off, the current
time is stored.
Continuing to press the buttons 3 or 8
will move the digits on the clock
forwards or backwards faster.
Time setting is not possible when the
heating or ventilation functions are
active.
54
F1A0057
40
KNOW YOUR VEHICLE
Page 82 of 367
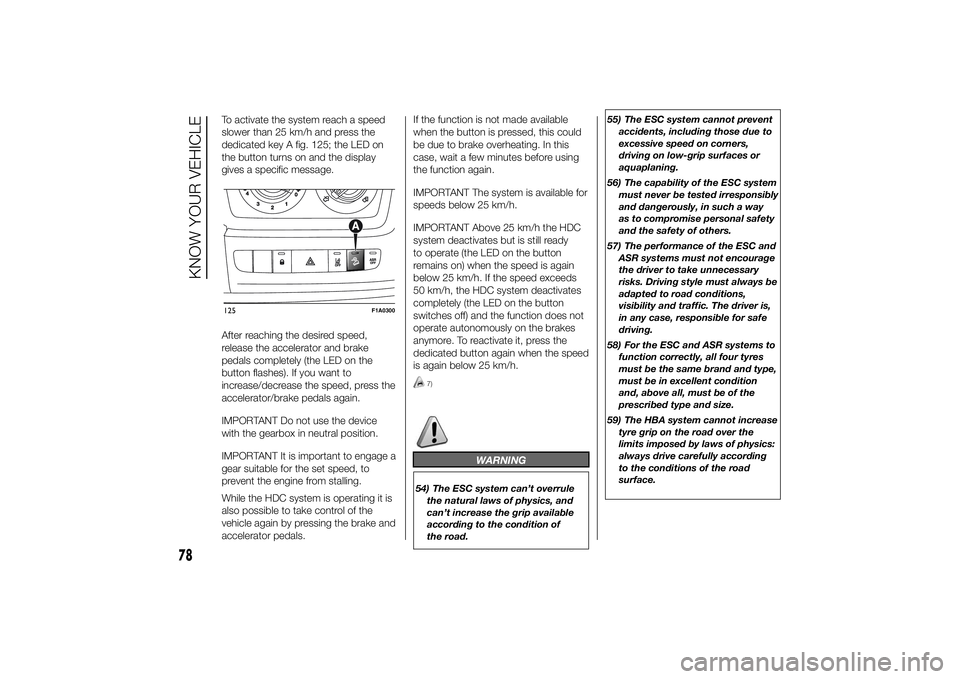
To activate the system reach a speed
slower than 25 km/h and press the
dedicated key A fig. 125; the LED on
the button turns on and the display
gives a specific message.
After reaching the desired speed,
release the accelerator and brake
pedals completely (the LED on the
button flashes). If you want to
increase/decrease the speed, press the
accelerator/brake pedals again.
IMPORTANT Do not use the device
with the gearbox in neutral position.
IMPORTANT It is important to engage a
gear suitable for the set speed, to
prevent the engine from stalling.
While the HDC system is operating it is
also possible to take control of the
vehicle again by pressing the brake and
accelerator pedals.If the function is not made available
when the button is pressed, this could
be due to brake overheating. In this
case, wait a few minutes before using
the function again.
IMPORTANT The system is available for
speeds below 25 km/h.
IMPORTANT Above 25 km/h the HDC
system deactivates but is still ready
to operate (the LED on the button
remains on) when the speed is again
below 25 km/h. If the speed exceeds
50 km/h, the HDC system deactivates
completely (the LED on the button
switches off) and the function does not
operate autonomously on the brakes
anymore. To reactivate it, press the
dedicated button again when the speed
is again below 25 km/h.
7)
WARNING
54) The ESC system can’t overrule
the natural laws of physics, and
can’t increase the grip available
according to the condition of
the road.55) The ESC system cannot prevent
accidents, including those due to
excessive speed on corners,
driving on low-grip surfaces or
aquaplaning.
56) The capability of the ESC system
must never be tested irresponsibly
and dangerously, in such a way
as to compromise personal safety
and the safety of others.
57) The performance of the ESC and
ASR systems must not encourage
the driver to take unnecessary
risks. Driving style must always be
adapted to road conditions,
visibility and traffic. The driver is,
in any case, responsible for safe
driving.
58) For the ESC and ASR systems to
function correctly, all four tyres
must be the same brand and type,
must be in excellent condition
and, above all, must be of the
prescribed type and size.
59) The HBA system cannot increase
tyre grip on the road over the
limits imposed by laws of physics:
always drive carefully according
to the conditions of the road
surface.
125
F1A0300
78
KNOW YOUR VEHICLE
Page 85 of 367
The tyre pressure also increases while
driving the vehicle: this is a normal
condition and does not require any
adjustment of the pressure.
The TPMS continues to advise the
driver of the low tyre pressure condition
until this is corrected; the warning
continues until the pressure
corresponds or exceeds the pressure
prescribed for the cold tyres. When the
tyre low pressure control warning
light
switches on constantly, the
inflation pressure must be adjusted until
it reaches the pressure prescribed for
cold tyres. After the automatic update
of the system, the tyre pressure control
warning light switches off. You may
need to drive the vehicle for about 20
minutes at a speed higher than 20
km/h to allow the TPMS to receive this
information.
NOTE
❒The TPMS does not replace the
normal tyre maintenance service and
does not indicate any fault in a tyre.
❒Therefore, the TPMS should not be
used as pressure switch while
adjusting the tyre inflation pressure.❒Driving with insufficient tyre pressure
causes their overheating and can
result in tyre failure. The low inflation
pressure reduces fuel efficiency
and tyre tread life and may also affect
handling and braking performance
of the vehicle.
❒The TPMS does not replace the
correct tyre maintenance. It is up to
the driver to maintain the correct tyre
pressure level measuring it with a
suitable pressure switch. This is
necessary even if the decrease in the
inflation pressure value does not
cause the tyre pressure control
warning light to switch on.
❒The TPMS warns the driver of any
condition of insufficient tyre pressure
If this drops below the insufficient
pressure limit for any reason including
low temperature and normal
pressure loss of the tyre.
❒The seasonal temperature changes
affect tyre pressure.
The TPMS uses wireless devices with
electronic sensors mounted on the
wheel rims to constantly monitor the
value of tyre pressure. The sensors
mounted on each wheel as part of the
valve stem transmit various information
of the tyres to the receiver module, in
order to calculate the pressure.WARNING Monitoring and maintaining
the correct pressure in all four tyres
are particularly important.
Tyre pressure
monitoring system low
pressure warnings
The system warns the driver if one or
more tyres are flat by switching on
the warning light
on the instrument
panel (together with a warning message
and an acoustic signal).
In this case, stop the vehicle as soon as
possible, check the inflation pressure
of each tyre and inflate to the cold tyre
pressure value prescribed for the
vehicle. The system will automatically
update and after receiving the tyre
pressure update the tyre pressure
control warning light switches off. You
may need to drive the vehicle for about
20 minutes at a speed higher than 20
km/h to allow the system to receive this
information.
TPMS operation faults
The system fault is indicated by
warning light
which first flashes for
75 seconds and then stays on steadily.
This can occur in any of the following
situations:
81
Page 108 of 367
CONTROL PANEL AND INSTRUMENTS
.
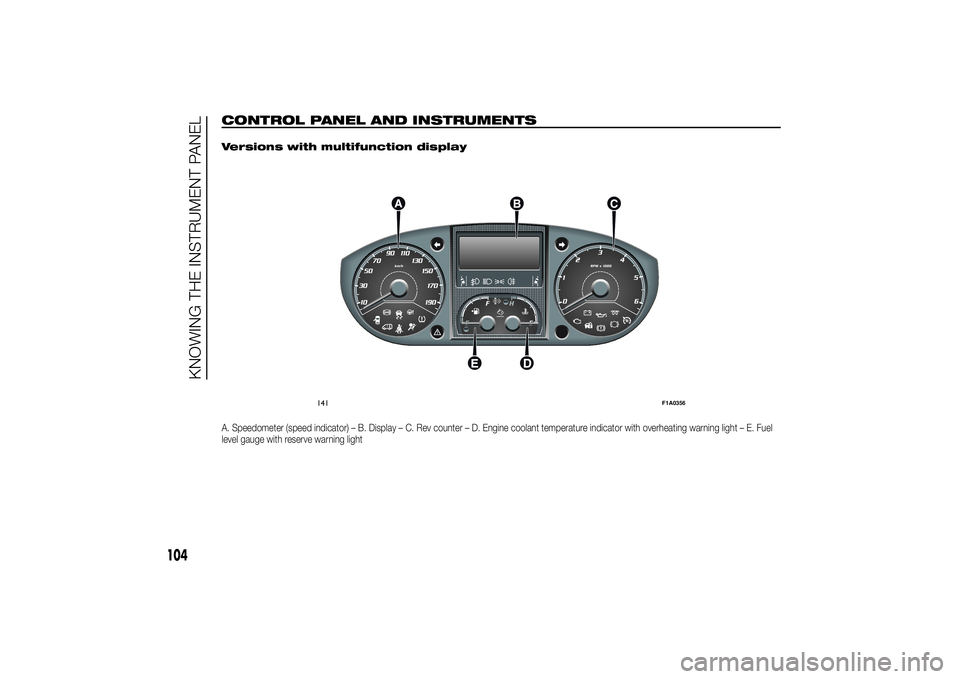
Versions with multifunction displayA. Speedometer (speed indicator) – B. Display – C. Rev counter – D. Engine coolant temperature indicator with overheating warning light – E. Fuel
level gauge with reserve warning light
141
F1A0356
104
KNOWING THE INSTRUMENT PANEL
Page 109 of 367
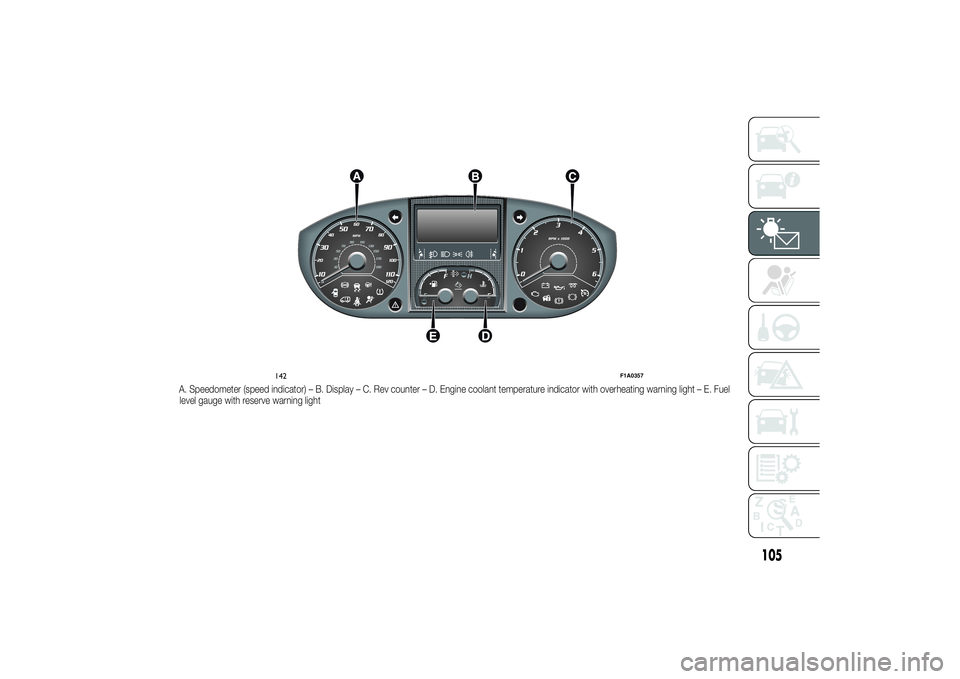
A. Speedometer (speed indicator) – B. Display – C. Rev counter – D. Engine coolant temperature indicator with overheating warning light – E. Fuel
level gauge with reserve warning light
142
F1A0357
105
Page 110 of 367
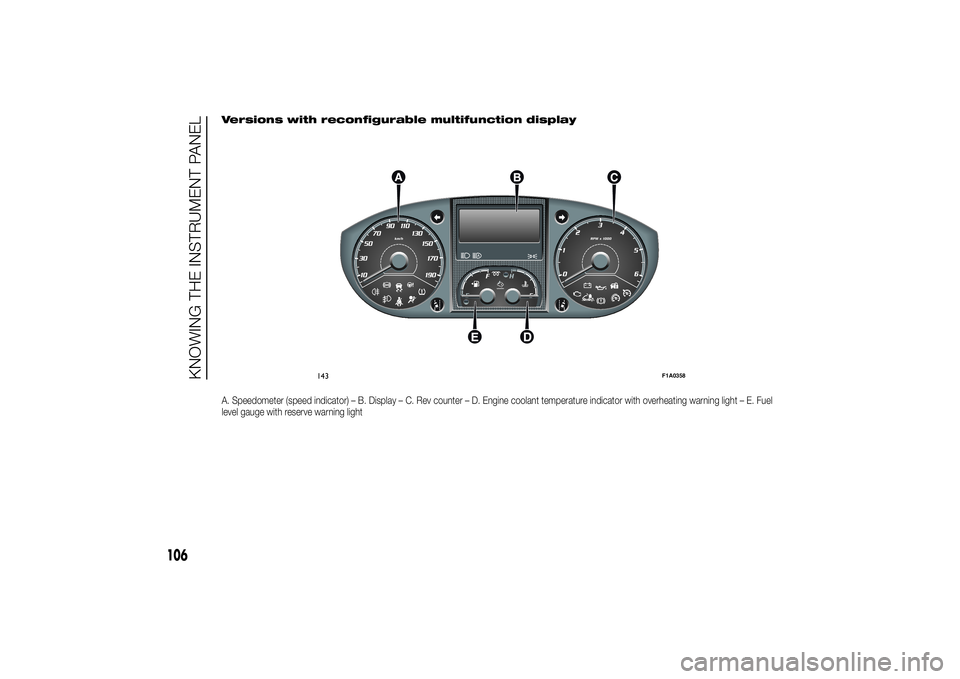
Versions with reconfigurable multifunction displayA. Speedometer (speed indicator) – B. Display – C. Rev counter – D. Engine coolant temperature indicator with overheating warning light – E. Fuel
level gauge with reserve warning light
143
F1A0358
106
KNOWING THE INSTRUMENT PANEL
Page 111 of 367
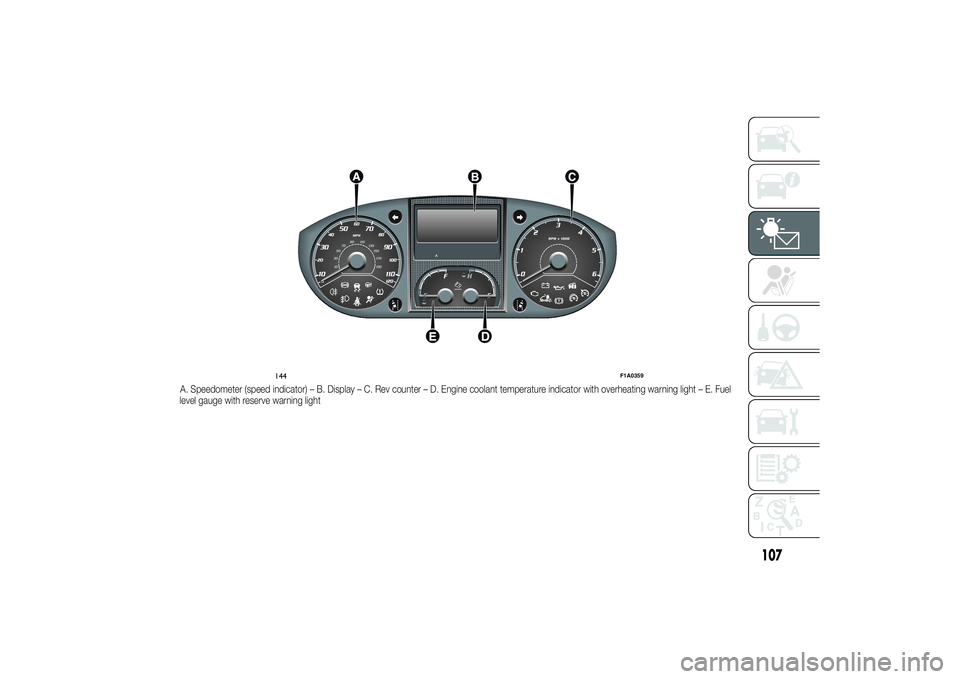
A. Speedometer (speed indicator) – B. Display – C. Rev counter – D. Engine coolant temperature indicator with overheating warning light – E. Fuel
level gauge with reserve warning light
144
F1A0359
107
Page 203 of 367
WARNING
148) Give the instruction booklet to
the tyre repair workshop
personnel.
149) Punctures on the sides of the
tyre cannot be repaired. Do not
use the quick tyre repair kit if the
damage is due to running with flat
tyre.
150) If the wheel rim has been
damaged (bent so as to cause air
to leak), the wheel cannot be
repaired. Do not remove the
foreign body (screws or nails)
from the tyre.
151) Do not use the compressor for
more than 20 consecutive
minutes. Risk of overheating.
Tyres repaired with the quick tyre
repair kit must only be used
temporarily, as the kit is not
suitable for a definitive repair.152) The bottle contains ethylene
glycol. It contains latex that might
cause allergic reactions. It is
harmful if swallowed. It is irritant
for the eyes. It may cause
sensitisation if inhaled or on
contact. Avoid contact with eyes,
skin and clothes. In the event of
contact, wash immediately with
plenty of water. Do not induce
vomiting if swallowed. Rinse your
mouth and drink plenty of water.
Call a doctor immediately. Keep
out of the reach of children. The
product must not be used by
asthmatics. Do not breathe in the
vapours during insertion and
suction. Call a doctor immediately
if allergic reactions are noted.
Store the bottle in its proper
compartment, away from sources
of heat. The sealant has an expiry
date. Replace the bottle if the
sealant has expired.
153) Wear the protective gloves
provided together with the quick
tyre repair kit.
154) affix the adhesive label in an
easy-to-see position for the driver
as a reminder that the tyre has
been treated with the quick tyre
repair kit. Drive carefully,
particularly on bends. Do not
exceed 80 km/h. Do not
accelerate or brake suddenly.155) If the pressure falls below 3
bars, do not drive any further: the
Fix & Go automatic quick tyre
repair kit cannot guarantee proper
hold because the tyre is too much
damaged. Contact a Fiat
Dealership.
156) You must inform the dealership
that the tyre has been repaired
using the quick tyre repair kit.
Give the booklet to the personnel
who will be handling the tyre
treated with the repair kit.
157) If different tyres from the ones
supplied with the vehicle are
used, it may not be possible to
carry out the repair. If the tyres
are replaced, it is advisable to use
those approved by the
manufacturer. Consult a Fiat
Dealership.
199
Page 245 of 367
WARNING
188) Remember that the road
holding qualities of your vehicle
also depend on the correct
inflation pressure of the tyres.
189) If the pressure is too low, the
tyre will overheat and could be
seriously damaged.
190) Avoid switching the tyres from
the right side of the vehicle to the
left side and vice versa.
191) Never submit alloy rims to
repainting treatments requiring
the use of temperatures
exceeding 150°C. The mechanical
properties of the wheels could
be impaired.
RUBBER HOSESAs far as the brake system and fuel
supply system rubber hoses are
concerned, follow the "Scheduled
Servicing Plan" in this chapter carefully.
Ozone, high temperatures and
prolonged lack of fluid in the system
may cause hardening and cracking of
the hoses, with possible leaks. Careful
checking is therefore necessary.
WINDSCREEN
WIPERBLADES
Periodically clean the rubber part using
special products; TUTELA
PROFESSIONAL SC 35 is
recommended.
Replace the blades if the rubber edge is
deformed or worn. In any case, it is
advisable to replace them
approximately once a year.
A few simple precautions can reduce
the possibility of damage to the blades:
❒if the temperature falls below zero,
make sure that ice has not frozen
the rubber against the glass. Use a
de-icing product to release it if
required;
❒remove any snow from the glass: in
addition to protecting the blades,
this prevents effort on the motor and
overheating;
❒do not operate the windscreen and
rear window wipers on dry glass.
192)
241