window FIAT DUCATO BASE CAMPER 2015 Owner handbook (in English)
[x] Cancel search | Manufacturer: FIAT, Model Year: 2015, Model line: DUCATO BASE CAMPER, Model: FIAT DUCATO BASE CAMPER 2015Pages: 367, PDF Size: 19.73 MB
Page 41 of 367
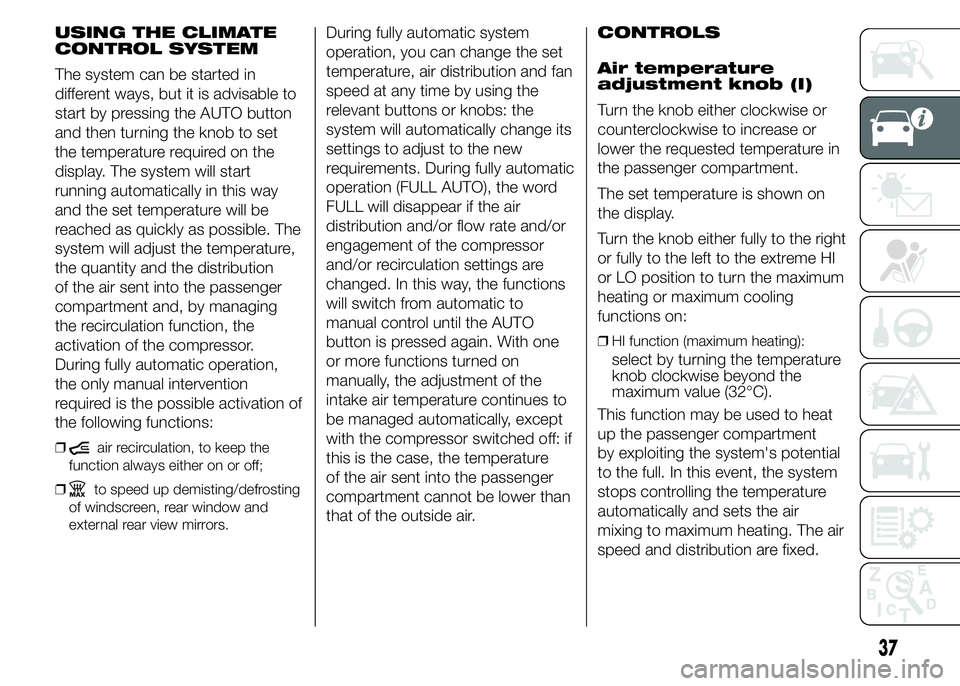
USING THE CLIMATE
CONTROL SYSTEM
The system can be started in
different ways, but it is advisable to
start by pressing the AUTO button
and then turning the knob to set
the temperature required on the
display. The system will start
running automatically in this way
and the set temperature will be
reached as quickly as possible. The
system will adjust the temperature,
the quantity and the distribution
of the air sent into the passenger
compartment and, by managing
the recirculation function, the
activation of the compressor.
During fully automatic operation,
the only manual intervention
required is the possible activation of
the following functions:
❒air recirculation, to keep the
function always either on or off;
❒
to speed up demisting/defrosting
of windscreen, rear window and
external rear view mirrors.
During fully automatic system
operation, you can change the set
temperature, air distribution and fan
speed at any time by using the
relevant buttons or knobs: the
system will automatically change its
settings to adjust to the new
requirements. During fully automatic
operation (FULL AUTO), the word
FULL will disappear if the air
distribution and/or flow rate and/or
engagement of the compressor
and/or recirculation settings are
changed. In this way, the functions
will switch from automatic to
manual control until the AUTO
button is pressed again. With one
or more functions turned on
manually, the adjustment of the
intake air temperature continues to
be managed automatically, except
with the compressor switched off: if
this is the case, the temperature
of the air sent into the passenger
compartment cannot be lower than
that of the outside air.CONTROLS
Air temperature
adjustment knob (I)
Turn the knob either clockwise or
counterclockwise to increase or
lower the requested temperature in
the passenger compartment.
The set temperature is shown on
the display.
Turn the knob either fully to the right
or fully to the left to the extreme HI
or LO position to turn the maximum
heating or maximum cooling
functions on:
❒HI function (maximum heating):
select by turning the temperature
knob clockwise beyond the
maximum value (32°C).
This function may be used to heat
up the passenger compartment
by exploiting the system's potential
to the full. In this event, the system
stops controlling the temperature
automatically and sets the air
mixing to maximum heating. The air
speed and distribution are fixed.
37
Page 42 of 367
In particular, if the heating fluid is
not sufficiently hot, the maximum
fan speed does not come on
straight away in order to limit the
intake of insufficiently hot air to the
passenger compartment.
All manual settings will be allowed
when this function is on.
To switch the function off, simply
turn the temperature knob
anticlockwise and set the required
temperature.
❒LO function (maximum cooling):
select by turning the temperature
knob anticlockwise beyond the
minimum value (16°C).
This function may be used to cool
down the passenger compartment
by exploiting the system's potential
to the full. In this event, the system
stops controlling the temperature
automatically and sets the air
mixing to maximum cooling. The air
speed and distribution are fixed.
All manual settings will be allowed
when this function is on.
To switch the function off, simply
turn the temperature knob
anticlockwise and set the required
temperature.Air distribution
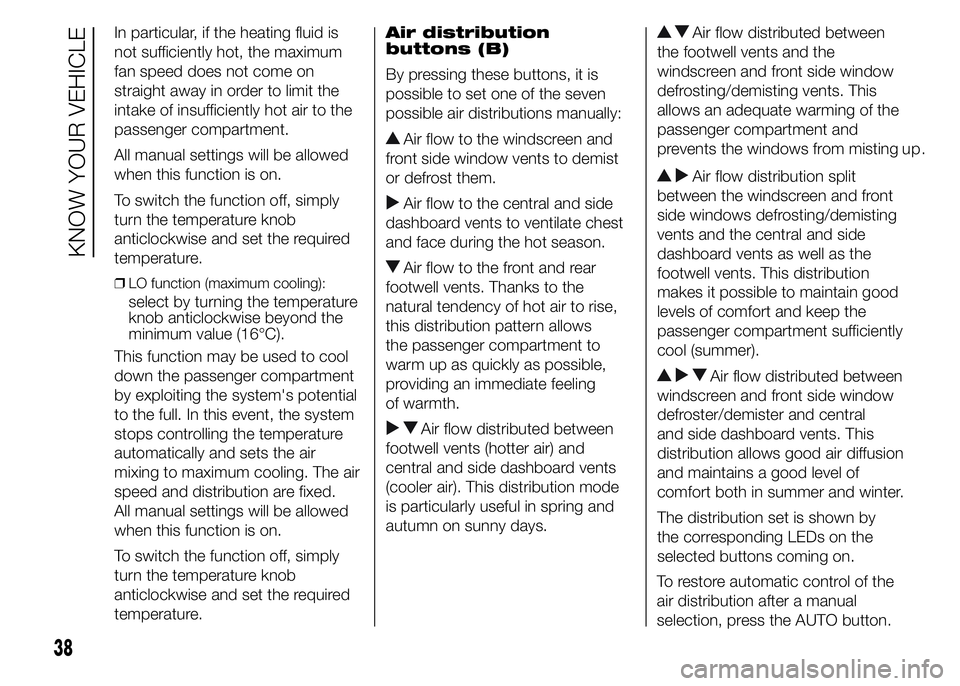
buttons (B)
By pressing these buttons, it is
possible to set one of the seven
possible air distributions manually:
Air flow to the windscreen and
front side window vents to demist
or defrost them.
Air flow to the central and side
dashboard vents to ventilate chest
and face during the hot season.
Air flow to the front and rear
footwell vents. Thanks to the
natural tendency of hot air to rise,
this distribution pattern allows
the passenger compartment to
warm up as quickly as possible,
providing an immediate feeling
of warmth.
Air flow distributed between
footwell vents (hotter air) and
central and side dashboard vents
(cooler air). This distribution mode
is particularly useful in spring and
autumn on sunny days.
Air flow distributed between
the footwell vents and the
windscreen and front side window
defrosting/demisting vents. This
allows an adequate warming of the
passenger compartment and
prevents the windows from misting up.
Air flow distribution split
between the windscreen and front
side windows defrosting/demisting
vents and the central and side
dashboard vents as well as the
footwell vents. This distribution
makes it possible to maintain good
levels of comfort and keep the
passenger compartment sufficiently
cool (summer).
Air flow distributed between
windscreen and front side window
defroster/demister and central
and side dashboard vents. This
distribution allows good air diffusion
and maintains a good level of
comfort both in summer and winter.
The distribution set is shown by
the corresponding LEDs on the
selected buttons coming on.
38
KNOW YOUR VEHICLE
To restore automatic control of the
air distribution after a manual
selection, press the AUTO button.
Page 44 of 367
These operating conditions are
obtained by pressing air
recirculation button G in sequence.
IMPORTANT The engagement of
the air recirculation system makes it
possible to reach the required
heating or cooling conditions faster.
It is however inadvisable to use it
on rainy/cold days as it would
considerably increase the possibility
of the windows misting inside,
especially if the climate control
compressor is off.
To prevent the windows from
misting up, the recirculation is
forced off (i.e. air is drawn in from
the outside) when the outside
temperature is cold.
It is advisable not to use the air
recirculation function when the
outside temperature is low to
prevent the windows from rapidly
misting up.Climate control
compressor
enablement/off button
(F)
Press button
to switch the
climate control compressor off (if
on). The icon on the display will go
out.
Press the button when the LED is
off to restore automatic system
control of compressor activation.
The icon will light up on the display.
The system will switch recirculation
off when the compressor is
switched off to prevent windows
from misting up. Although the
system is capable of maintaining
the required temperature, the word
FULL will disappear from the
display. If, on the other hand, it is
no longer capable of maintaining
the temperature, the letters flash
and the word AUTO goes out.
IMPORTANT With the compressor
off, it is not possible to introduce air
cooler than ambient temperature
into the passenger compartment.
Furthermore, in certain conditions,
the windows could mist up rapidly
because the air is not dehumidified.The system remembers that the
compressor has been switched off,
even after the engine has stopped.
To restore automatic compressor
control, press thebutton again
(in this case, the system will only
work as a heater) or press the
AUTO button.
With the compressor switched off,
if the outside temperature is higher
than the one set, the system is
not capable of satisfying this
request. This is signalled by the
target temperature flashing, after
which the word AUTO goes out.
With the climate control
compressor off, the fan speed can
be set to zero manually (no bar
shown).
With the compressor enabled and
the engine started, the fan speed
may be reduced to the minimum
setting (only one bar shown).
40
KNOW YOUR VEHICLE
Page 45 of 367
Button for rapid
window demisting/
defrosting (D)
Press this button and the climate
control system will automatically
switch on all the functions required
for fast windscreen and side
window demisting/defrosting:
❒switches on climate control
compressor when climatic conditions
are suitable;
❒switches air recirculation off;
❒maximum air temperature HI in both
areas;
❒sets the fan speed according to the
engine coolant temperature to limit
the flow of air that is not sufficiently
warm to demist the windows;
❒directs air flow to windscreen and
front side windows vents;
❒heated rear window on.
IMPORTANT The rapid demisting/
defrosting function for the windows
remains on for about 3 minutes
from when the engine coolant
reaches the appropriate
temperature for a rapid demisting of
the windows.When this function is active, the
LED on the corresponding button
and the one on the heated rear
window button switch on. The
message FULL AUTO goes off on
the display.
You can only adjust the fan speed
and switch off the heated rear
window manually when this
function is active.
To restore the previous operating
conditions, simply press button B,
air recirculation button G,
compressor button F or AUTO
button A.
NoteTo guarantee rapid demisting/
defrosting, if an additional heater/air
conditioner is present (under the front
or rear seat on Panorama and Combi
versions), if activated, deactivate it
using button F (LED off) located
in control panel F fig. 55.
Switching the system
OFF (E)
Press button E to switch the
climate control system off. The
display will go out.
The following climate control
conditions will be present when the
system is off:
❒display off;
❒temperature setting not displayed;
❒air recirculation on, thereby insulating
the passenger compartment from the
outside (recirculation LED on);
❒climate control compressor off;
❒fan off.
Press the AUTO button to switch
the climate control system back on
in full automatic mode.
41
Page 46 of 367
ADDITIONAL
HEATER
(for versions/markets, where
provided)
On some versions, an additional
heater is also present beneath the
driver's seat. The fan for this heater
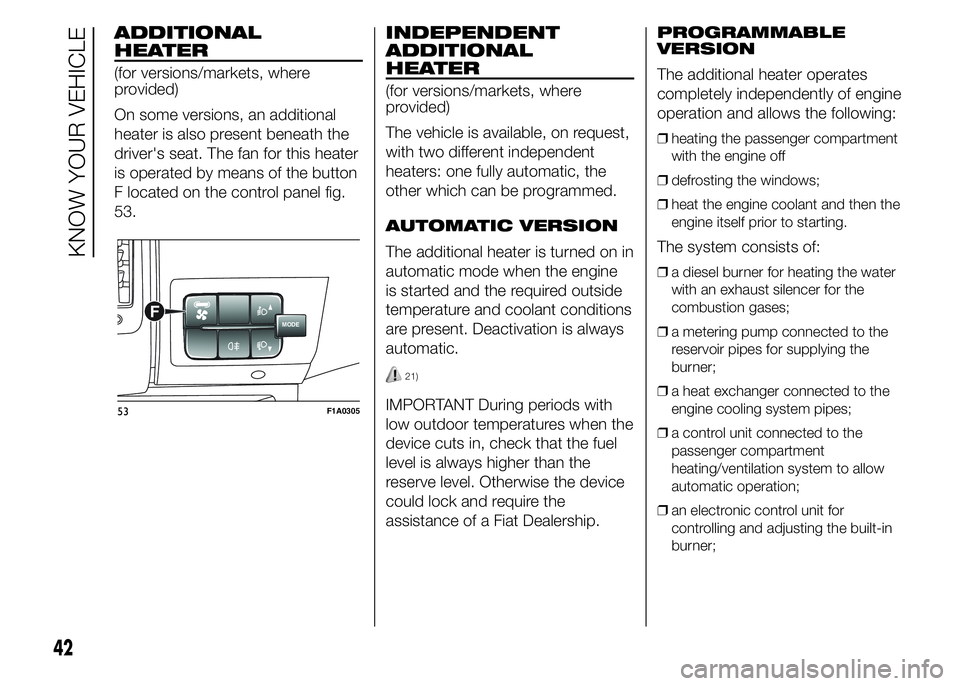
is operated by means of the button
F located on the control panel fig.
53.
INDEPENDENT
ADDITIONAL
HEATER
(for versions/markets, where
provided)
The vehicle is available, on request,
with two different independent
heaters: one fully automatic, the
other which can be programmed.
AUTOMATIC VERSION
The additional heater is turned on in
automatic mode when the engine
is started and the required outside
temperature and coolant conditions
are present. Deactivation is always
automatic.
21)
IMPORTANT During periods with
low outdoor temperatures when the
device cuts in, check that the fuel
level is always higher than the
reserve level. Otherwise the device
could lock and require the
assistance of a Fiat Dealership.PROGRAMMABLE
VERSION
The additional heater operates
completely independently of engine
operation and allows the following:
❒heating the passenger compartment
with the engine off
❒defrosting the windows;
❒heat the engine coolant and then the
engine itself prior to starting.
The system consists of:
❒a diesel burner for heating the water
with an exhaust silencer for the
combustion gases;
❒a metering pump connected to the
reservoir pipes for supplying the
burner;
❒a heat exchanger connected to the
engine cooling system pipes;
❒a control unit connected to the
passenger compartment
heating/ventilation system to allow
automatic operation;
❒an electronic control unit for
controlling and adjusting the built-in
burner;
MODEF
53F1A0305
42
KNOW YOUR VEHICLE
Page 57 of 367
WINDOW CLEANING
IN BRIEF
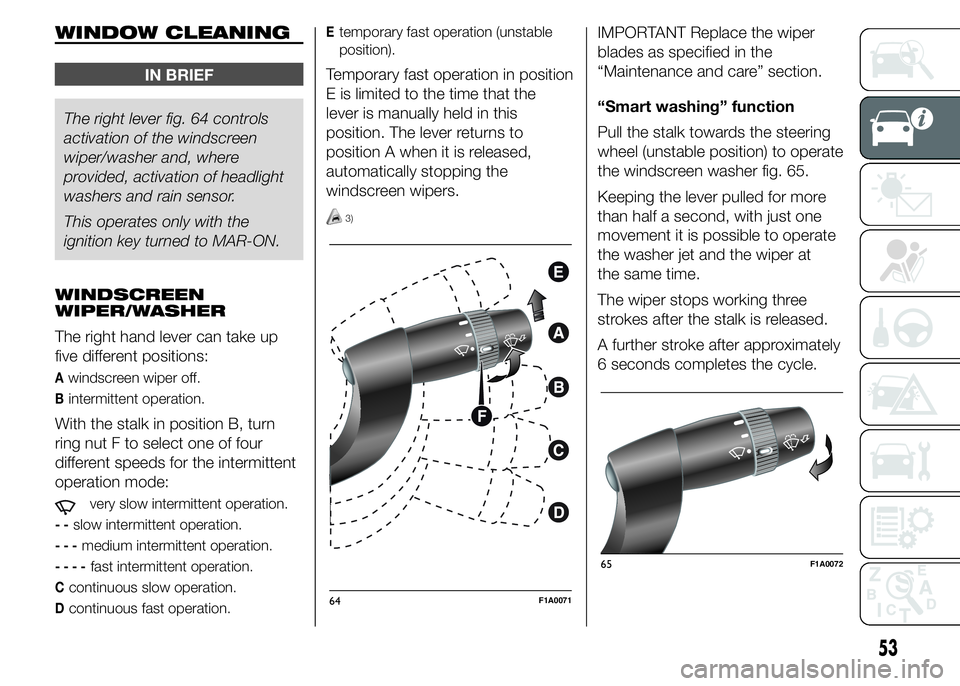
The right lever fig. 64 controls
activation of the windscreen
wiper/washer and, where
provided, activation of headlight
washers and rain sensor.
This operates only with the
ignition key turned to MAR-ON.
WINDSCREEN
WIPER/WASHER
The right hand lever can take up
five different positions:
Awindscreen wiper off.
Bintermittent operation.
With the stalk in position B, turn
ring nut F to select one of four
different speeds for the intermittent
operation mode:
very slow intermittent operation.
--slow intermittent operation.
---medium intermittent operation.
----fast intermittent operation.
Ccontinuous slow operation.
Dcontinuous fast operation.
Etemporary fast operation (unstable
position).
Temporary fast operation in position
E is limited to the time that the
lever is manually held in this
position. The lever returns to
position A when it is released,
automatically stopping the
windscreen wipers.
3)
IMPORTANT Replace the wiper
blades as specified in the
“Maintenance and care” section.
“Smart washing” function
Pull the stalk towards the steering
wheel (unstable position) to operate
the windscreen washer fig. 65.
Keeping the lever pulled for more
than half a second, with just one
movement it is possible to operate
the washer jet and the wiper at
the same time.
The wiper stops working three
strokes after the stalk is released.
A further stroke after approximately
6 seconds completes the cycle.
64F1A0071
65F1A0072
53
Page 65 of 367
Emergency braking
(for versions/markets, where
provided)
In the event of emergency braking
the hazard warning lights come
on automatically, as do the
and
warning lights in the panel.
The function switches off
automatically when the nature of
the braking changes. This function
complies with the relevant
legislation currently in force.
FOG LIGHTS
(for versions/markets, where
provided)
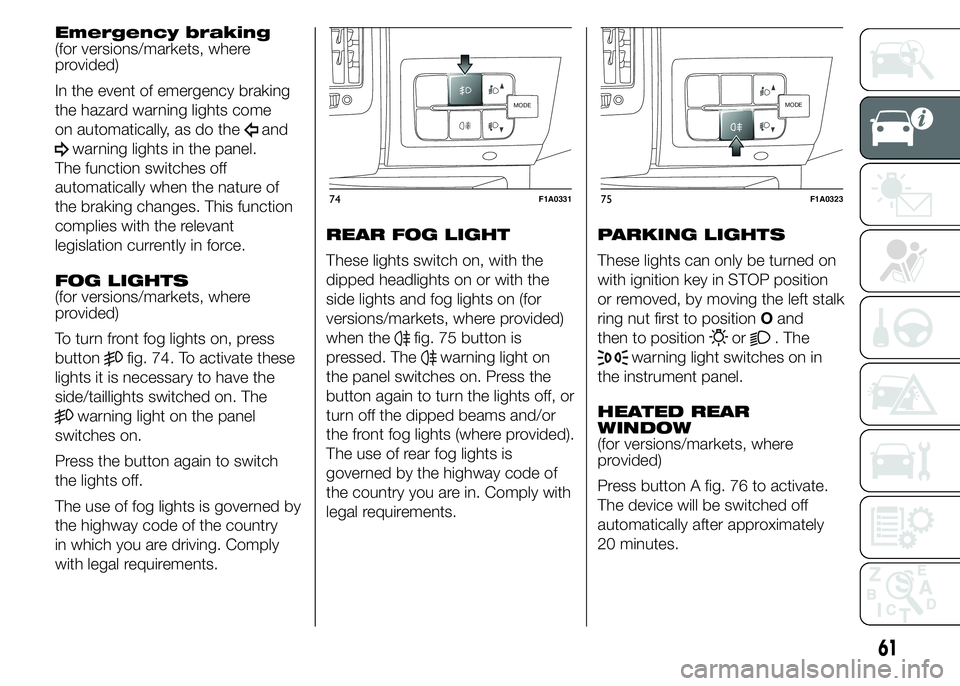
To turn front fog lights on, press
button
fig. 74. To activate these
lights it is necessary to have the
side/taillights switched on. The
warning light on the panel
switches on.
Press the button again to switch
the lights off.
The use of fog lights is governed by
the highway code of the country
in which you are driving. Comply
with legal requirements.REAR FOG LIGHT
These lights switch on, with the
dipped headlights on or with the
side lights and fog lights on (for
versions/markets, where provided)
when the
fig. 75 button is
pressed. The
warning light on
the panel switches on. Press the
button again to turn the lights off, or
turn off the dipped beams and/or
the front fog lights (where provided).
The use of rear fog lights is
governed by the highway code of
the country you are in. Comply with
legal requirements.PARKING LIGHTS
These lights can only be turned on
with ignition key in STOP position
or removed, by moving the left stalk
ring nut first to positionOand
then to position
or. The
warning light switches on in
the instrument panel.
HEATED REAR
WINDOW
(for versions/markets, where
provided)
Press button A fig. 76 to activate.
The device will be switched off
automatically after approximately
20 minutes.
MODE
74F1A0331
MODE
75F1A0323
61
Page 66 of 367
BATTERY
DISCONNECTION
FUNCTION
(DISCONNECTOR)
(for versions/markets, where
provided)
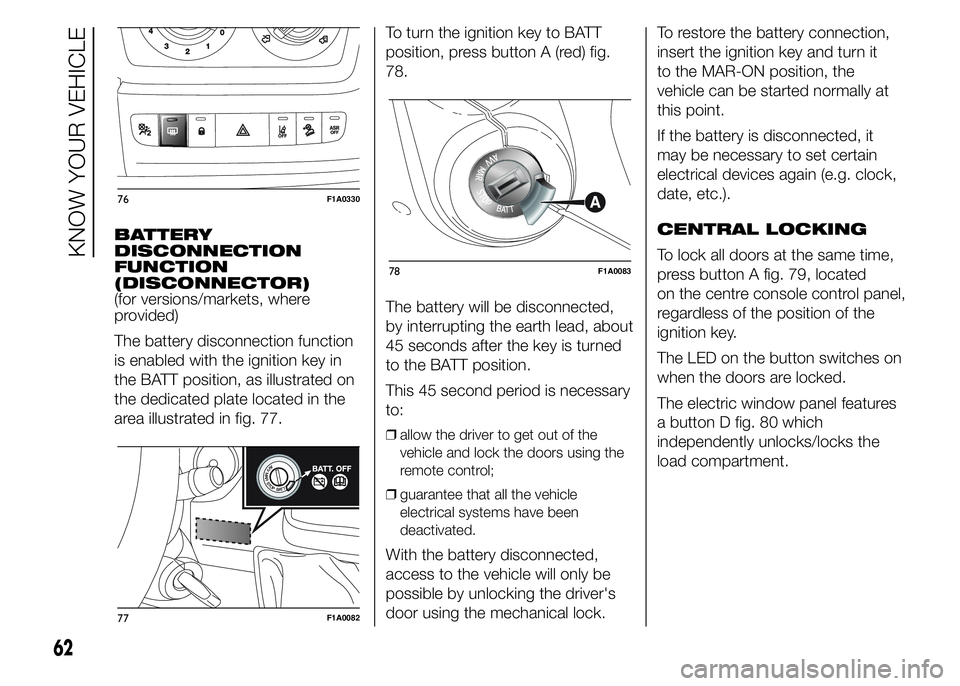
The battery disconnection function
is enabled with the ignition key in
the BATT position, as illustrated on
the dedicated plate located in the
area illustrated in fig. 77.To turn the ignition key to BATT
position, press button A (red) fig.
78.
The battery will be disconnected,
by interrupting the earth lead, about
45 seconds after the key is turned
to the BATT position.
This 45 second period is necessary
to:
❒allow the driver to get out of the
vehicle and lock the doors using the
remote control;
❒guarantee that all the vehicle
electrical systems have been
deactivated.
With the battery disconnected,
access to the vehicle will only be
possible by unlocking the driver's
door using the mechanical lock.To restore the battery connection,
insert the ignition key and turn it
to the MAR-ON position, the
vehicle can be started normally at
this point.
If the battery is disconnected, it
may be necessary to set certain
electrical devices again (e.g. clock,
date, etc.).
CENTRAL LOCKING
To lock all doors at the same time,
press button A fig. 79, located
on the centre console control panel,
regardless of the position of the
ignition key.
The LED on the button switches on
when the doors are locked.
The electric window panel features
a button D fig. 80 which
independently unlocks/locks the
load compartment.
76F1A0330
77F1A0082
78F1A0083
62
KNOW YOUR VEHICLE
Page 70 of 367
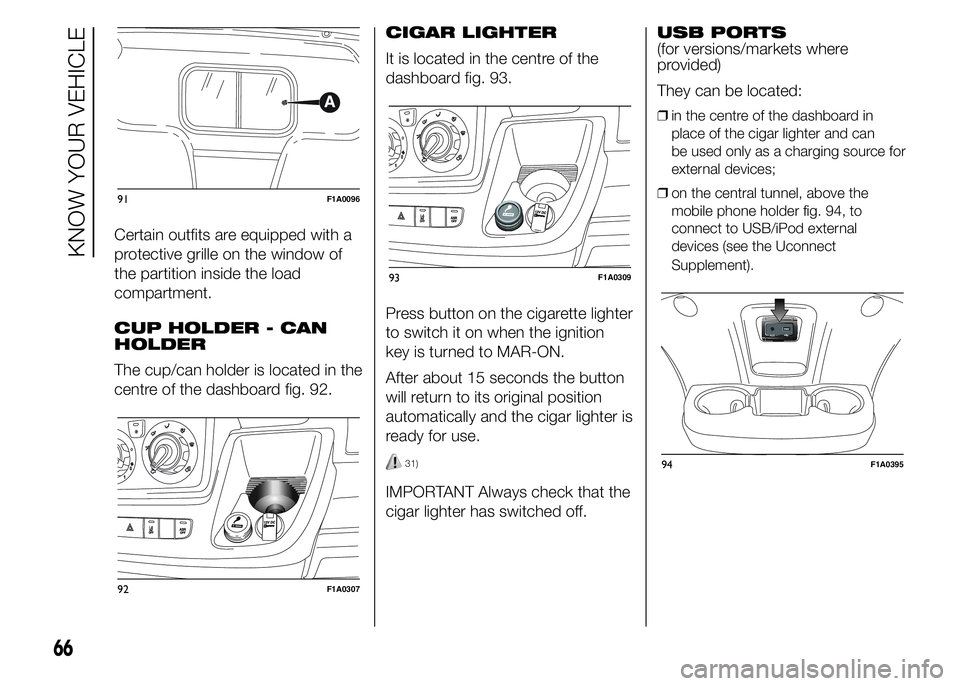
Certain outfits are equipped with a
protective grille on the window of
the partition inside the load
compartment.
CUP HOLDER - CAN
HOLDER
The cup/can holder is located in the
centre of the dashboard fig. 92.CIGAR LIGHTER
It is located in the centre of the
dashboard fig. 93.
Press button on the cigarette lighter
to switch it on when the ignition
key is turned to MAR-ON.
After about 15 seconds the button
will return to its original position
automatically and the cigar lighter is
ready for use.
31)
IMPORTANT Always check that the
cigar lighter has switched off.USB PORTS
(for versions/markets where
provided)
They can be located:
❒in the centre of the dashboard in
place of the cigar lighter and can
be used only as a charging source for
external devices;
❒on the central tunnel, above the
mobile phone holder fig. 94, to
connect to USB/iPod external
devices (see the Uconnect
Supplement).
91F1A0096
92F1A0307
93F1A0309
66
KNOW YOUR VEHICLE
94F1A0395
Page 77 of 367
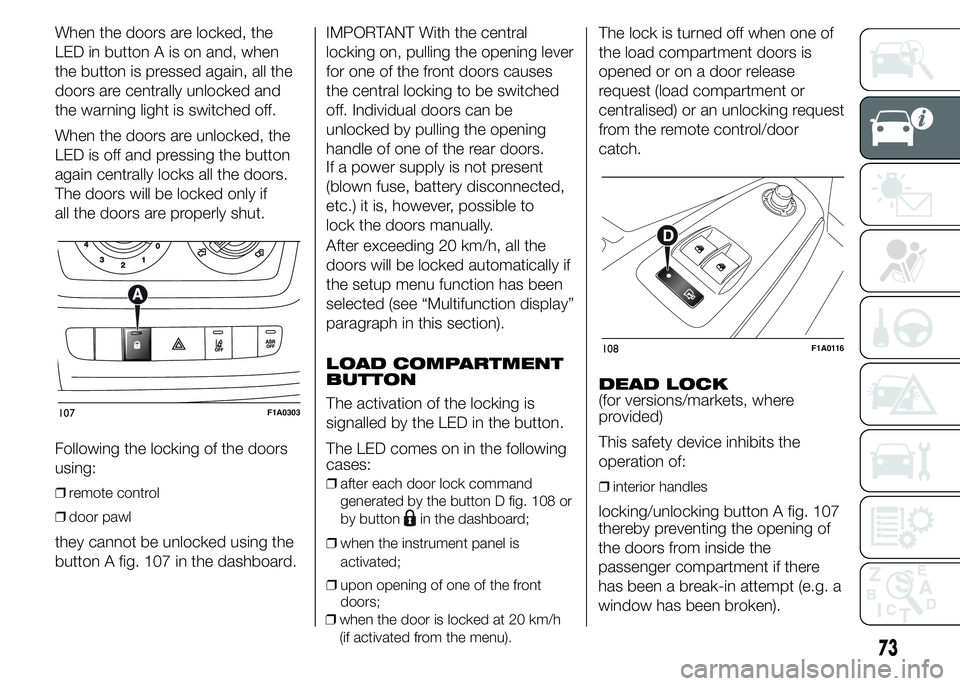
When the doors are locked, the
LED in button A is on and, when
the button is pressed again, all the
doors are centrally unlocked and
the warning light is switched off.
When the doors are unlocked, the
LED is off and pressing the button
again centrally locks all the doors.
The doors will be locked only if
all the doors are properly shut.
Following the locking of the doors
using:
❒remote control
❒door pawl
they cannot be unlocked using the
button A fig. 107 in the dashboard.IMPORTANT With the central
locking on, pulling the opening lever
for one of the front doors causes
the central locking to be switched
off. Individual doors can be
unlocked by pulling the opening
handle of one of the rear doors.
If a power supply is not present
(blown fuse, battery disconnected,
etc.) it is, however, possible to
lock the doors manually.
After exceeding 20 km/h, all the
doors will be locked automatically if
the setup menu function has been
selected (see “Multifunction display”
paragraph in this section).
LOAD COMPARTMENT
BUTTON
The activation of the locking is
signalled by the LED in the button.
The LED comes on in the following
cases:
❒after each door lock command
generated by the button D fig. 108 or
by button
in the dashboard;
❒when the instrument panel is
activated;
❒upon opening of one of the front
doors;
❒when the door is locked at 20 km/h
(if activated from the menu).
The lock is turned off when one of
the load compartment doors is
opened or on a door release
request (load compartment or
centralised) or an unlocking request
from the remote control/door
catch.
DEAD LOCK
(for versions/markets, where
provided)
This safety device inhibits the
operation of:
❒interior handles
locking/unlocking button A fig. 107
107F1A0303
108F1A0116
73
thereby preventing the opening of
the doors from inside the
passenger compartment if there
has been a break-in attempt (e.g. a
window has been broken).