stop start FIAT DUCATO BASE CAMPER 2018 Owner handbook (in English)
[x] Cancel search | Manufacturer: FIAT, Model Year: 2018, Model line: DUCATO BASE CAMPER, Model: FIAT DUCATO BASE CAMPER 2018Pages: 304, PDF Size: 14.93 MB
Page 10 of 304
SYMBOLS
Some vehicle components have
coloured labels whose symbols indicate
precautions to be observed when
using this component. Under the
bonnet there is also a label that
summarises all the symbols.
VEHICLE
MODIFICATIONS/
ALTERATIONS
IMPORTANT Any change or alteration
of the vehicle might seriously affect
its safety and road holding, thus
causing accidents, in which the
occupants could even be fatally injured.THE FIAT CODE
SYSTEM
IN BRIEF
This is an electrical engine locking
system which increases protection
against attempted theft of the vehicle.
It is automatically activated when
the key is removed from the ignition
device.
Each key contains an electronic
device which modulates the signal
emitted during ignition by an antenna
built into the ignition device. The
signal, which changes each time the
engine is started, is the “password”,
by means of which the control unit
recognises the key and enables
starting.
1)
Operation
Each time the vehicle is started turning
the ignition key toMAR-ON, the Fiat
CODE system control unit sends a
recognition code to the Powertrain
Control Module to deactivate the
immobiliser.The code is sent only if the Fiat CODE
system control unit has recognised
the code transmitted from the key.
Each time the ignition key is turned to
STOP, the Fiat CODE system
deactivates the functions of the engine
control module.
Irregular operation
If the code has not been recognised
correctly during starting, the
warning light on the instrument
panel turns on accompanied by the
corresponding message on the display
(see the “Warning lights and messages”
chapter).
In this case, turn the key toSTOPand
then back toMAR; if the lock
continues, try with the other keys
provided with the vehicle. Contact a
Fiat Dealership if you still cannot start
the engine.
IMPORTANT Each key has its own
code which must be stored by the
system's control unit. Contact a Fiat
Dealership to have new keys (up to 8)
stored with a code.
8
KNOWING YOUR VEHICLE
Page 12 of 304
WARNING
1)Used batteries are harmful to the
environment. You can dispose of them
either in the correct containers as specified
by law or by taking them to a Fiat
Dealership, which will deal with their
disposal.
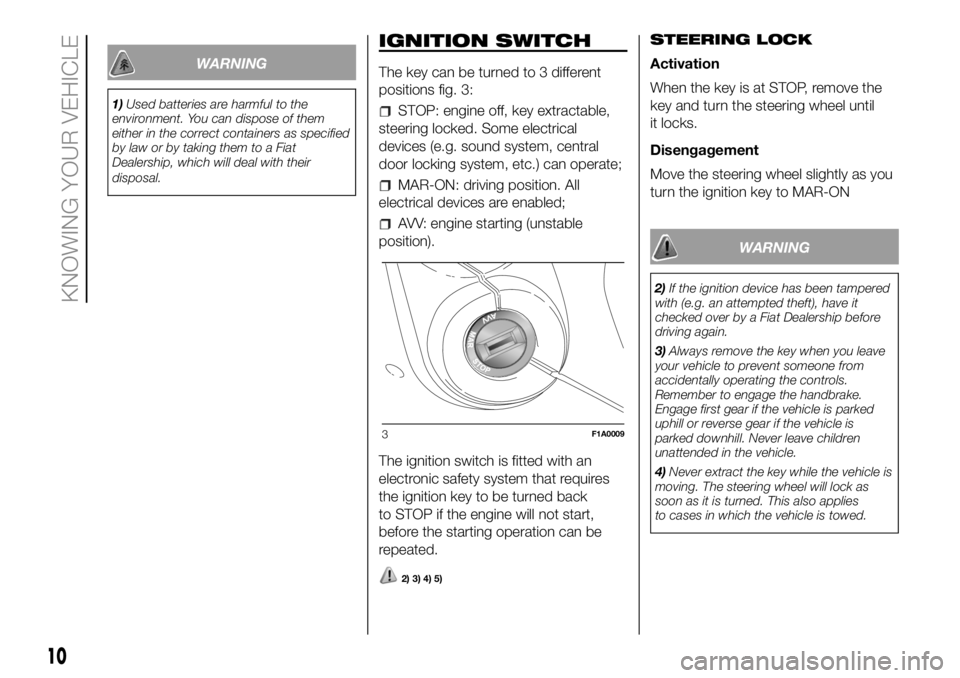
IGNITION SWITCH
The key can be turned to 3 different
positions fig. 3:
STOP: engine off, key extractable,
steering locked. Some electrical
devices (e.g. sound system, central
door locking system, etc.) can operate;
MAR-ON: driving position. All
electrical devices are enabled;
AVV: engine starting (unstable
position).
The ignition switch is fitted with an
electronic safety system that requires
the ignition key to be turned back
to STOP if the engine will not start,
before the starting operation can be
repeated.
2) 3) 4) 5)
STEERING LOCK
Activation
When the key is at STOP, remove the
key and turn the steering wheel until
it locks.
Disengagement
Move the steering wheel slightly as you
turn the ignition key to MAR-ON
WARNING
2)If the ignition device has been tampered
with (e.g. an attempted theft), have it
checked over by a Fiat Dealership before
driving again.
3)Always remove the key when you leave
your vehicle to prevent someone from
accidentally operating the controls.
Remember to engage the handbrake.
Engage first gear if the vehicle is parked
uphill or reverse gear if the vehicle is
parked downhill. Never leave children
unattended in the vehicle.
4)Never extract the key while the vehicle is
moving. The steering wheel will lock as
soon as it is turned. This also applies
to cases in which the vehicle is towed.
3F1A0009
10
KNOWING YOUR VEHICLE
Page 35 of 304
PARKING LIGHTS
These lights can only be turned on with
ignition key in the STOP position or
removed by moving the left stalk ring
first to theOposition and then to the
orposition. Thewarning
light switches on in the instrument
panel.
ECO FUNCTION
(For versions/markets, where provided)
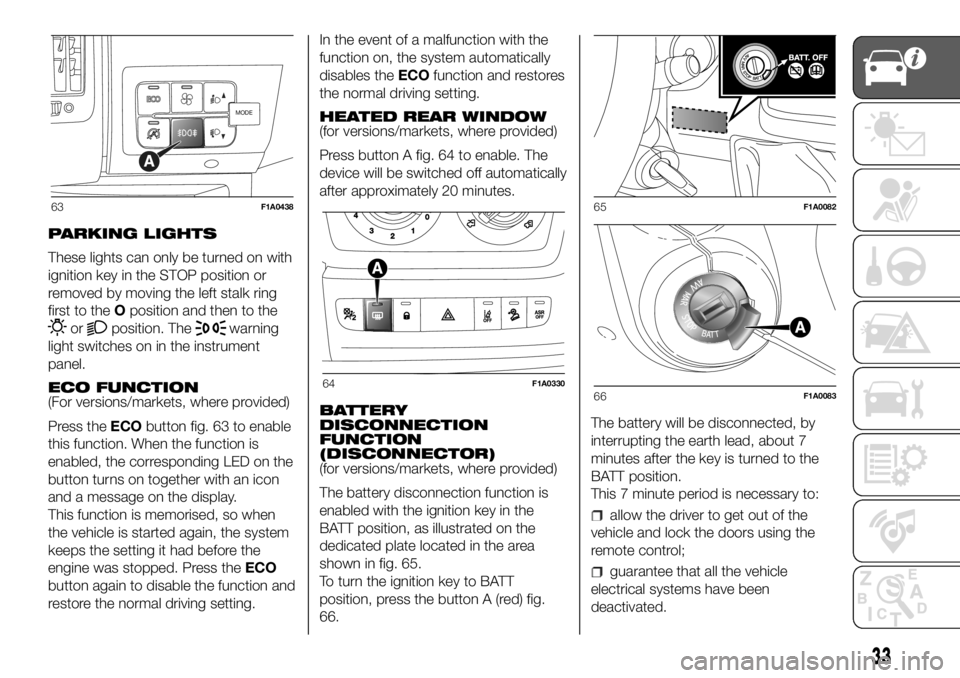
Press theECObutton fig. 63 to enable
this function. When the function is
enabled, the corresponding LED on the
button turns on together with an icon
and a message on the display.
This function is memorised, so when
the vehicle is started again, the system
keeps the setting it had before the
engine was stopped. Press theECO
button again to disable the function and
restore the normal driving setting.In the event of a malfunction with the
function on, the system automatically
disables theECOfunction and restores
the normal driving setting.
HEATED REAR WINDOW
(for versions/markets, where provided)
Press button A fig. 64 to enable. The
device will be switched off automatically
after approximately 20 minutes.
BATTERY
DISCONNECTION
FUNCTION
(DISCONNECTOR)
(for versions/markets, where provided)
The battery disconnection function is
enabled with the ignition key in the
BATT position, as illustrated on the
dedicated plate located in the area
shown in fig. 65.
To turn the ignition key to BATT
position, press the button A (red) fig.
66.The battery will be disconnected, by
interrupting the earth lead, about 7
minutes after the key is turned to the
BATT position.
This 7 minute period is necessary to:
allow the driver to get out of the
vehicle and lock the doors using the
remote control;
guarantee that all the vehicle
electrical systems have been
deactivated.
MODE
63F1A0438
64F1A0330
65F1A0082
66F1A0083
33
Page 37 of 304

Temporary fast operation in position E
is limited to the time that the lever is
manually held in this position. The lever
returns to position A when it is
released, automatically stopping the
windscreen wipers.
4)
IMPORTANT We recommend replacing
the blades once a year.“Smart washing” function
Pulling the stalk towards the steering
wheel (unstable position) operates
the windscreen washer fig. 70.
Keeping the stalk pulled for more than
half a second, with just one movement
it is possible to operate the washer
jet and the wiper at the same time.
The windscreen wiper stops working
three strokes after the stalk is released.
A further stroke after approx. 6 seconds
completes the wiping cycle.
RAIN SENSOR
(for versions/markets, where provided)
The rain sensor is located behind the
driving mirror in contact with the
windscreen and has the purpose of
automatically adjust, during the
intermittent operation, the frequency of
the windscreen wiper strokes as to
the rain intensity.IMPORTANT Keep the glass in the
sensor area clean.
Activation fig. 69
Move the right lever down by one click
(position B).
The activation of the sensor is signalled
by a "stroke" to show that the
command has been acquired.
Turn the control F to increase the rain
sensor sensitivity.
The increasing of the rain sensor
sensitivity is signalled by a "stroke" to
show that the command has been
acquired.
If the windscreen washer is used with
the rain sensor activated, the normal
washing cycle is performed, after which
the rain sensor resumes its normal
automatic operation.
Deactivation fig. 69
Move the lever from position B or turn
the ignition key to OFF. The next time
the vehicle is started (ignition key in ON
position), the sensor is not reactivated
even if the lever is still in position B.
To activate the sensor, move the lever
to position A or C and then back to
position B or turn the ring nut for
adjusting the sensitivity. Rain sensor
activation will be indicated by at least
one wiper “stroke” even if the
windscreen is dry.
69F1A0071
70F1A0072
35
Page 53 of 304
KNOWING THE INSTRUMENT PANEL
This section of the booklet gives you all
the information you need to
understand, interpret and use the
instrument panel correctly.CONTROL PANEL AND
ON-BOARD INSTRUMENTS ........... 52
DISPLAY ........................................ 56
TRIP COMPUTER ........................... 58
WARNING LIGHTS AND
MESSAGES .................................... 60
-LOW BRAKE FLUID/HANDBRAKE
ENGAGED........................................... 60
-EBD FAILURE .................................... 61
-AIR BAG FAILURE .............................. 61
-SEAT BELTS REMINDER.................... 62
-ENGINE COOLANT TEMPERATURE
TOO HIGH........................................... 63
-LOW BATTERY CHARGE ................... 63
-LOW ENGINE OIL PRESSURE ........... 64
-ENGINE OIL DETERIORATED ............ 64
-INCOMPLETE DOOR/LOAD
COMPARTMENT CLOSURE................ 65
-POWER STEERING FAILURE ............. 65
-SELF-LEVELLING SUSPENSION
FAILURE .............................................. 65
-INJECTION/EOBD SYSTEM
FAILURE .............................................. 67
-UREA INJECTION SYSTEM FAILURE. 68
-ABS FAILURE..................................... 68
-FUEL RESERVE ................................. 68
-GLOW PLUG PREHEATING / GLOW
PLUG PREHEATING FAILURE ............. 69
-LOW DIESEL EMISSIONS ADDITIVE
(UREA) LEVEL WARNING .................... 69
-VEHICLE PROTECTION SYSTEM
FAILURE - FIAT CODE ......................... 70
-REAR FOG LIGHTS............................ 70
-GENERAL FAILURE INDICATION ....... 71
-DPF (PARTICULATE FILTER)
CLEANING UNDERWAY ...................... 72
-BRAKE PAD WEAR ............................ 72
-DRIVING ADVISOR ............................ 73-TPMS SYSTEM .................................. 74
-DIPPED BEAM HEADLIGHTS ............ 75
-FOLLOW ME HOME .......................... 75
-LEFT DIRECTION INDICATOR ............ 75
-RIGHT DIRECTION INDICATOR ......... 75
-FOG LIGHTS ...................................... 75
-CRUISE CONTROL ............................ 76
-SPEED LIMITER ................................. 76
-AUTOMATIC MAIN BEAM
HEADLIGHTS ...................................... 76
-MAIN BEAM HEADLIGHTS ................ 76
-"UP" FUNCTION ................................ 77
-EXTERIOR LIGHTS FAILURE .............. 78
-LOW ENGINE OIL PRESSURE
WARNING LIGHT FAILURE ................. 78
-BRAKE LIGHT FAILURE ..................... 78
-MAIN BEAM AUTOMATISM FAULT .... 78
-POSSIBLE ICE ON ROAD .................. 79
-SPEED LIMIT EXCEEDED .................. 79
-SCHEDULED SERVICING .................. 79
-FUEL CUT-OFF DEVICE INERTIA
SWITCH TRIPPED ............................... 80
-COMFORT-MATIC SYSTEM FAILURE
INDICATION ........................................ 80
-PARKING SENSOR FAILURE ............. 80
-DRIVING ADVISOR SYSTEM
FAILURE .............................................. 80
-TRAFFIC SIGN RECOGNITION
FAILURE .............................................. 80
-LIMITED RANGE ................................ 80
-START&STOP SYSTEM
ACTIVATION/DEACTIVATION............... 81
-START&STOP FAILURE ..................... 81
-LOW DIESEL EMISSIONS ADDITIVE
(UREA) LEVEL WARNING .................... 82
-WATER IN DIESEL FILTER (Diesel
versions) .............................................. 82
51
Page 65 of 304
What it means What to do
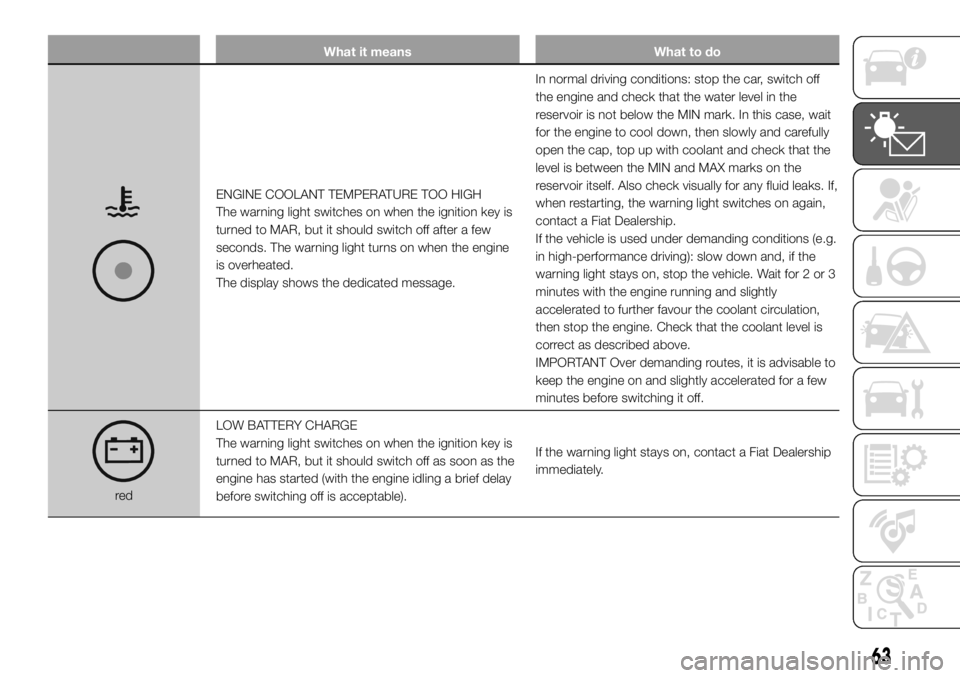
ENGINE COOLANT TEMPERATURE TOO HIGH
The warning light switches on when the ignition key is
turned to MAR, but it should switch off after a few
seconds. The warning light turns on when the engine
is overheated.
The display shows the dedicated message.In normal driving conditions: stop the car, switch off
the engine and check that the water level in the
reservoir is not below the MIN mark. In this case, wait
for the engine to cool down, then slowly and carefully
open the cap, top up with coolant and check that the
level is between the MIN and MAX marks on the
reservoir itself. Also check visually for any fluid leaks. If,
when restarting, the warning light switches on again,
contact a Fiat Dealership.
If the vehicle is used under demanding conditions (e.g.
in high-performance driving): slow down and, if the
warning light stays on, stop the vehicle. Wait for 2 or 3
minutes with the engine running and slightly
accelerated to further favour the coolant circulation,
then stop the engine. Check that the coolant level is
correct as described above.
IMPORTANT Over demanding routes, it is advisable to
keep the engine on and slightly accelerated for a few
minutes before switching it off.
redLOW BATTERY CHARGE
The warning light switches on when the ignition key is
turned to MAR, but it should switch off as soon as the
engine has started (with the engine idling a brief delay
before switching off is acceptable).If the warning light stays on, contact a Fiat Dealership
immediately.
63
Page 83 of 304
What it means What to do
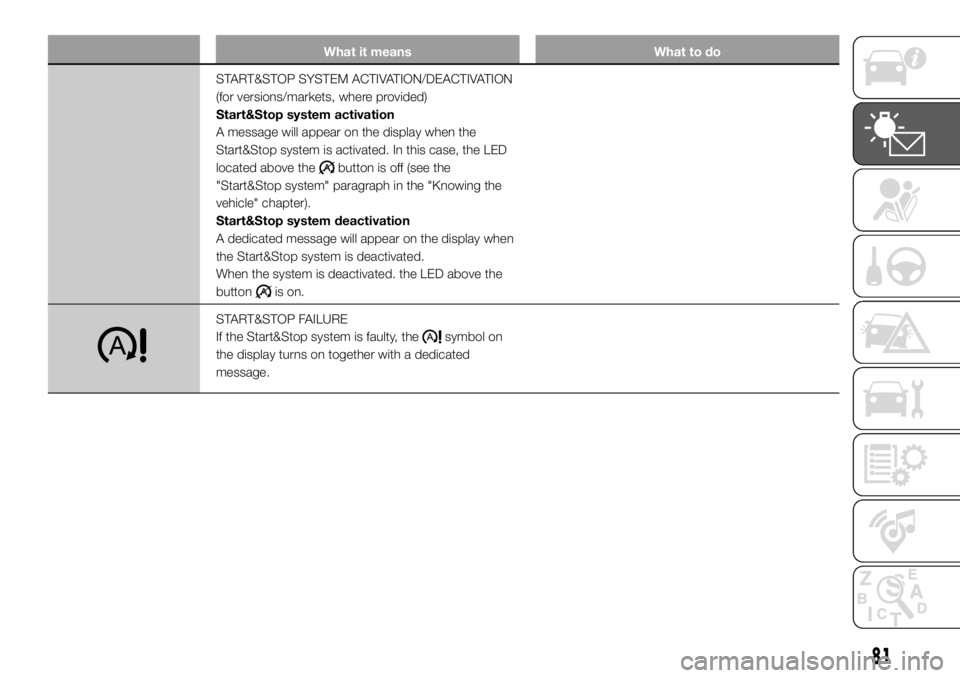
START&STOP SYSTEM ACTIVATION/DEACTIVATION
(for versions/markets, where provided)
Start&Stop system activation
A message will appear on the display when the
Start&Stop system is activated. In this case, the LED
located above the
button is off (see the
"Start&Stop system" paragraph in the "Knowing the
vehicle" chapter).
Start&Stop system deactivation
A dedicated message will appear on the display when
the Start&Stop system is deactivated.
When the system is deactivated. the LED above the
button
is on.
START&STOP FAILURE
If the Start&Stop system is faulty, the
symbol on
the display turns on together with a dedicated
message.
81
Page 85 of 304
What it means What to do
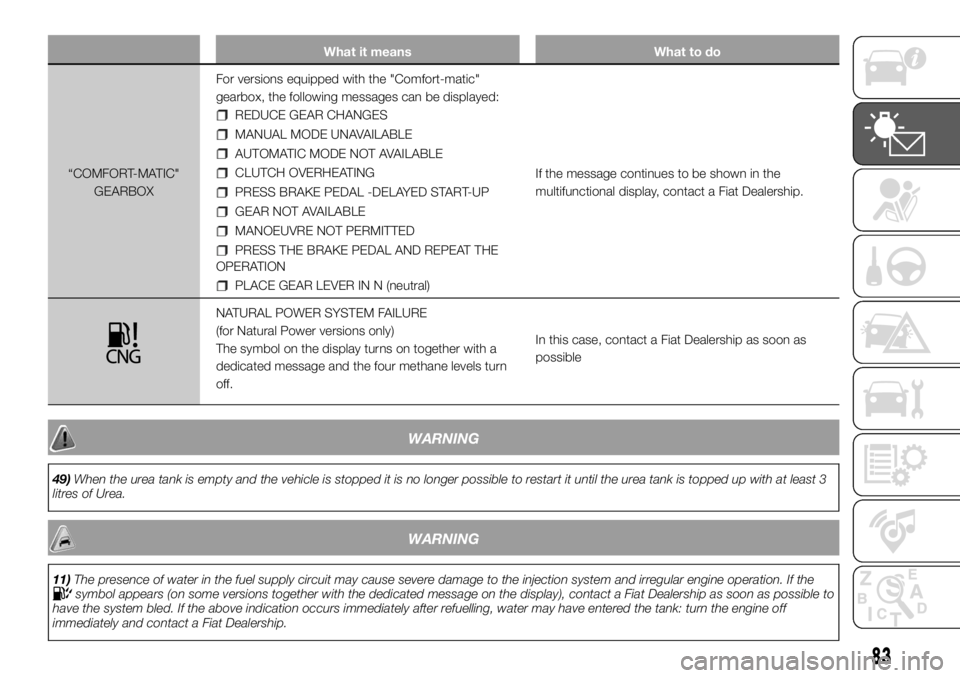
“COMFORT-MATIC"
GEARBOXFor versions equipped with the "Comfort-matic"
gearbox, the following messages can be displayed:
REDUCE GEAR CHANGES
MANUAL MODE UNAVAILABLE
AUTOMATIC MODE NOT AVAILABLE
CLUTCH OVERHEATING
PRESS BRAKE PEDAL -DELAYED START-UP
GEAR NOT AVAILABLE
MANOEUVRE NOT PERMITTED
PRESS THE BRAKE PEDAL AND REPEAT THE
OPERATION
PLACE GEAR LEVER IN N (neutral)If the message continues to be shown in the
multifunctional display, contact a Fiat Dealership.
NATURAL POWER SYSTEM FAILURE
(for Natural Power versions only)
The symbol on the display turns on together with a
dedicated message and the four methane levels turn
off.In this case, contact a Fiat Dealership as soon as
possible
WARNING
49)When the urea tank is empty and the vehicle is stopped it is no longer possible to restart it until the urea tank is topped up with at least 3
litres of Urea.
WARNING
11)The presence of water in the fuel supply circuit may cause severe damage to the injection system and irregular engine operation. If thesymbol appears (on some versions together with the dedicated message on the display), contact a Fiat Dealership as soon as possible to
have the system bled. If the above indication occurs immediately after refuelling, water may have entered the tank: turn the engine off
immediately and contact a Fiat Dealership.
83
Page 94 of 304
Presence of snow or ice on the
wheels or the wheel arches.
Use of snow chains.
Use of wheels/tyres not equipped
with TPMS sensors.
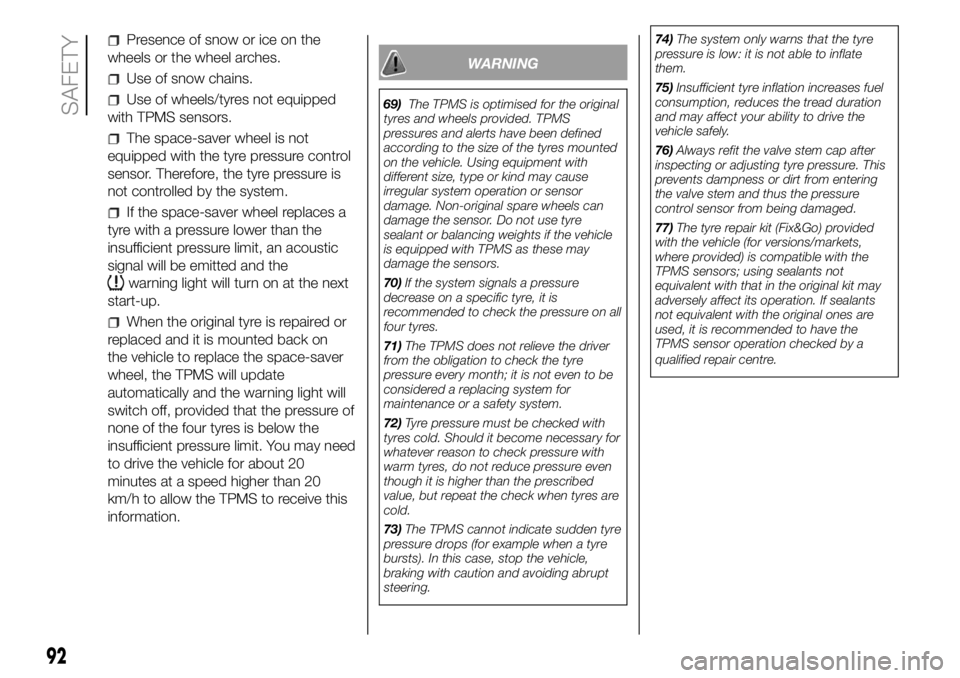
The space-saver wheel is not
equipped with the tyre pressure control
sensor. Therefore, the tyre pressure is
not controlled by the system.
If the space-saver wheel replaces a
tyre with a pressure lower than the
insufficient pressure limit, an acoustic
signal will be emitted and the
warning light will turn on at the next
start-up.
When the original tyre is repaired or
replaced and it is mounted back on
the vehicle to replace the space-saver
wheel, the TPMS will update
automatically and the warning light will
switch off, provided that the pressure of
none of the four tyres is below the
insufficient pressure limit. You may need
to drive the vehicle for about 20
minutes at a speed higher than 20
km/h to allow the TPMS to receive this
information.
WARNING
69)The TPMS is optimised for the original
tyres and wheels provided. TPMS
pressures and alerts have been defined
according to the size of the tyres mounted
on the vehicle. Using equipment with
different size, type or kind may cause
irregular system operation or sensor
damage. Non-original spare wheels can
damage the sensor. Do not use tyre
sealant or balancing weights if the vehicle
is equipped with TPMS as these may
damage the sensors.
70)If the system signals a pressure
decrease on a specific tyre, it is
recommended to check the pressure on all
four tyres.
71)The TPMS does not relieve the driver
from the obligation to check the tyre
pressure every month; it is not even to be
considered a replacing system for
maintenance or a safety system.
72)Tyre pressure must be checked with
tyres cold. Should it become necessary for
whatever reason to check pressure with
warm tyres, do not reduce pressure even
though it is higher than the prescribed
value, but repeat the check when tyres are
cold.
73)The TPMS cannot indicate sudden tyre
pressure drops (for example when a tyre
bursts). In this case, stop the vehicle,
braking with caution and avoiding abrupt
steering.74)The system only warns that the tyre
pressure is low: it is not able to inflate
them.
75)Insufficient tyre inflation increases fuel
consumption, reduces the tread duration
and may affect your ability to drive the
vehicle safely.
76)Always refit the valve stem cap after
inspecting or adjusting tyre pressure. This
prevents dampness or dirt from entering
the valve stem and thus the pressure
control sensor from being damaged.
77)The tyre repair kit (Fix&Go) provided
with the vehicle (for versions/markets,
where provided) is compatible with the
TPMS sensors; using sealants not
equivalent with that in the original kit may
adversely affect its operation. If sealants
not equivalent with the original ones are
used, it is recommended to have the
TPMS sensor operation checked by a
qualified repair centre.
92
SAFETY
Page 96 of 304

vehicle direction getting constantly
closer to the lane demarcation lines (the
vehicle trajectory is within the lane
demarcation lines);
vehicle not constantly next to the
lane demarcation line.
ACTIVATING/
DEACTIVATING THE
SYSTEM
When the system is active, if the vehicle
gets close to one of the side
demarcation lines or one of the two
lane demarcation lines, the driver is
warned with an acoustic signal (coming
from the crossed line side if the vehicle
is equipped with the radio navigation
system) along with the corresponding
direction warning light (
or) lighting
up.
If the driver turns on the direction
indicator in order to change lanes or for
overtaking, then the system will switch
off the driver warning.
If the driver keeps deliberately with the
lane change manoeuvre, the system
interrupts the warning, remaining
enabled if the operating conditions are
not satisfied or active if the operating
conditions are exceeded (see the
dedicated paragraph).SWITCHING OFF THE
SYSTEM
Manual mode
The system can be switched off by
pressing button A fig. 104 on the
dashboard.
The LED on the button switches on and
a message appears on the display to
confirm that the system has been
switched off.
Automatic mode
If the Start&Stop is active the system
deactivates automatically. The system
will reactivate and check its operating
conditions again after the vehicle has
been started.
SYSTEM FAILURE
In the event of malfunction, the system
signals the fault to the driver with a
message on the display, an acoustic
warning and by turning on the
icon
on the display (for versions/markets,
where provided).
IMPORTANT NOTES
The Driving Advisor cannot operate due
to a not perfectly balanced and
excessive load.The operation of the system can be
adversely affected in some cases
by the morphology of the territory/road
being driven on (e.g. driving over
humps), poor visibility conditions (e.g.
fog, rain, snow), extreme light
conditions (e.g. glare of the sun,
darkness), lack of cleanliness
or damage, even partial, to the
windscreen in the area in front of the
camera.
The Driving Advisor cannot operate
following a malfunction of the following
safety systems: ABS, ESC, ASR and
Traction Plus.
The operation of the system can be
adversely affected by poor visibility
conditions (e.g. fog, rain, snow),
extreme light conditions (glare of the
sun, darkness), lack of cleaning or
damage, even partial, to the
windscreen in the area in front the
camera.
The area of the windscreen by the
camera must not be partly or totally
obscured by objects (e.g. stickers,
protective film, etc.).
94
SAFETY