instrument cluster FIAT FREEMONT 2015 1.G User Guide
[x] Cancel search | Manufacturer: FIAT, Model Year: 2015, Model line: FREEMONT, Model: FIAT FREEMONT 2015 1.GPages: 412, PDF Size: 3.37 MB
Page 249 of 412
Automatic Transmission
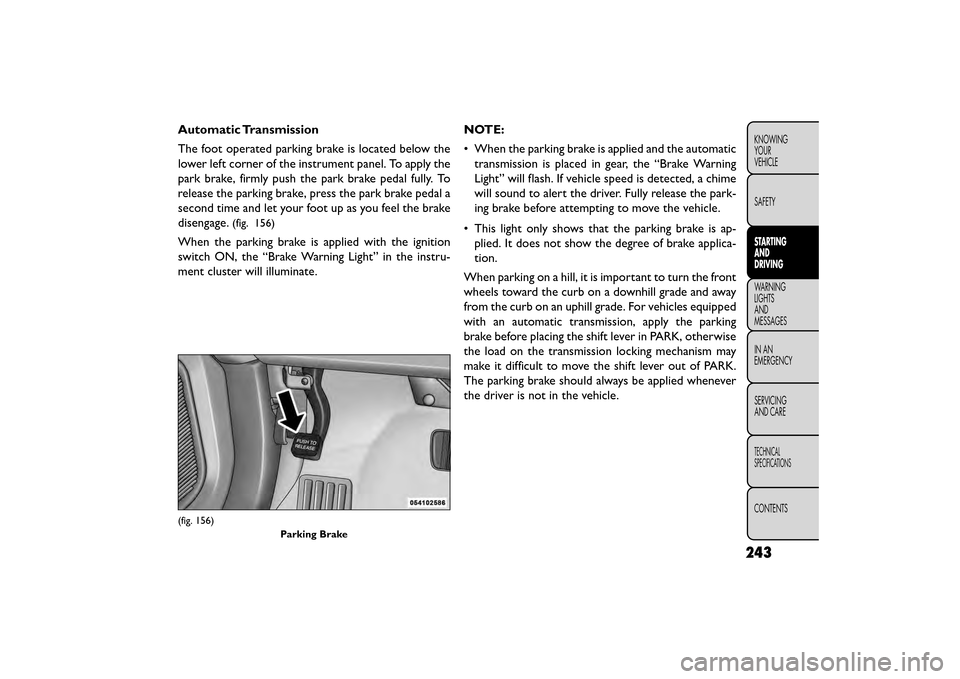
The foot operated parking brake is located below the
lower left corner of the instrument panel. To apply the
park brake, firmly push the park brake pedal fully. To
release the parking brake, press the park brake pedal a
second time and let your foot up as you feel the brake
disengage.
(fig. 156)
When the parking brake is applied with the ignition
switch ON, the “Brake Warning Light” in the instru-
ment cluster will illuminate.NOTE:
• When the parking brake is applied and the automatic
transmission is placed in gear, the “Brake Warning
Light” will flash. If vehicle speed is detected, a chime
will sound to alert the driver. Fully release the park-
ing brake before attempting to move the vehicle.
• This light only shows that the parking brake is ap- plied. It does not show the degree of brake applica-
tion.
When parking on a hill, it is important to turn the front
wheels toward the curb on a downhill grade and away
from the curb on an uphill grade. For vehicles equipped
with an automatic transmission, apply the parking
brake before placing the shift lever in PARK, otherwise
the load on the transmission locking mechanism may
make it difficult to move the shift lever out of PARK.
The parking brake should always be applied whenever
the driver is not in the vehicle.
(fig. 156) Parking Brake
243
KNOWING
YOUR
VEHICLE
SAFETY
STARTING
AND
DRIVING
WARNING
LIGHTS
AND
MESSAGES
INAN
EMERGENC
Y
SERVICING
AND CARE
TECHNICAL
SPECIFICATIONS
CONTENTS
Page 254 of 412
Brake/Transmission Shift Interlock System
This vehicle is equipped with a Brake Transmission Shift
Interlock System (BTSI) that holds the shift lever in
PARK unless the brakes are applied. To shift the trans-
mission out of PARK, the ignition switch must be
turned to the ON/RUN position (engine running or
not) and the brake pedal must be pressed.
Four-Speed Or Six-Speed Automatic
Transmission
The transmission gear position display (located in the
instrument cluster) indicates the transmission gear
range. You must press the brake pedal to move the shift
lever out of PARK (refer to “Brake/Transmission Shift
Interlock System” in this section). To drive, move the
shift lever from PARK or NEUTRAL to the DRIVE
position.The electronically-controlled transmission provides a
precise shift schedule. The transmission electronics are
self-calibrating; therefore, the first few shifts on a new
vehicle may be somewhat abrupt. This is a normal
condition, and precision shifts will develop within a few
hundred kilometers.
The electronically-controlled transmission provides a
precise shift schedule. The transmission electronics are
self-calibrating; therefore, the first few shifts on a new
vehicle may be somewhat abrupt. This is a normal
condition, and precision shifts will develop within a few
hundred kilometers.
Only shift from DRIVE to PARK or REVERSE when the
accelerator pedal is released and the vehicle is stopped.
Be sure to keep your foot on the brake pedal when
shifting between these gears.
248
KNOWING
YOUR
VEHICLE
SAFETY
STARTING AND
DRIVING
WARNING LIGHTSAND
MESSAGES
INAN
EMERGENC
Y
SERVICING AND CARE
TECHNICAL
SPECIFICATIONS
CONTENTS
Page 278 of 412

WARNING LIGHTS AND MESSAGES
INSTRUMENT CLUSTER
(fig. 166)
(fig. 166)
272
KNOWINGYOUR
VEHICLE
SAFETY
STARTING AND
DRIVING
WARNING LIGHTSAND
MESSAGES
INAN
EMERGENC
Y
SERVICING AND
CARE
TECHNICAL
SPECIFICATIONS
CONTENTS
Page 279 of 412
INSTRUMENT CLUSTER
DESCRIPTIONS
1. Air Bag Warning LightThis light will turn on for four to eight sec-
onds as a bulb check when the ignition switch
is first turned to ON/RUN. If the light is
either not on during starting, stays on, or
turns on while driving, have the system inspected at an
authorized dealer as soon as possible. Refer to “Occu-
pant Restraints” in “Safety” for further information.
2. Malfunction Indicator Light (MIL) The Malfunction Indicator Light (MIL) is part of
an onboard diagnostic system, called OBD, that
monitors engine and transmission control sys-
tems. The light will illuminate when the key is in the
ON/RUN position, before engine start. If the bulb does
not come on when turning the key from OFF to
ON/RUN, have the condition checked promptly. Certain conditions, such as a loose or missing gas cap,
poor fuel quality, etc., may illuminate the MIL after
engine start. The vehicle should be serviced if the MIL
stays on through several of your typical driving cycles.
In most situations, the vehicle will drive normally and
will not require towing.
Prolonged driving with the Malfunction
Indicator Light (MIL) on could cause
damage to the engine control system. It
also could affect fuel economy and driveability. If
the MIL is flashing, severe catalytic converter
damage and power loss will soon occur. Immedi-
ate service is required.
WARNING!
A malfunctioning catalytic converter, as
referen c
ed above, can reach higher tem-
peratures than in normal operating conditions.
This can cause a fire if you drive slowly or park
over flammable substances such as dry plants,
wood, cardboard, etc .This could result in death or
serious injury to the driver, occupants or others.
273
KNOWING
YOUR
VEHICLE
SAFETY
STARTING
AND
DRIVING
WARNING
LIGHTS
AND
MESSAGES
IN AN
EMERGENC
Y
SERVICING
AND
CARE
TECHNICAL
SPECIFICATIONS
CONTENTS
Page 280 of 412
3. Electronic Stability Control (ESC) Activation/
Malfunction Indicator Light (for versions/markets,
where provided)The “ESC Activation/Malfunction Indicator
Light” in the instrument cluster will come on
when the ignition switch is turned to the
ON/RUN position. It should go out with the
engine running. If the “ESC Activation/Malfunction In-
dicator Light” comes on continuously with the engine
running, a malfunction has been detected in the ESC
system. If this light remains on after several ignition
cycles, and the vehicle has been driven several kilome-
ters at speeds greater than 48 km/h, see your autho-
rized dealer as soon as possible to have the problem
diagnosed and corrected.
NOTE:
The “ESC Off Indicator Light” and the “ESC
Activation/Malfunction Indicator Light” come on mo-
mentarily each time the ignition switch is turned to
ON/RUN.
Each time the ignition is turned to ON/RUN, the ESC
system will be ON, even if it was turned off previously.
The ESC system will make buzzing or clicking sounds
when it is active. This is normal; the sounds will stop
when ESC becomes inactive following the maneuver
that caused the ESC activation. 4. Turn Signal Indicator Light
The left or right arrow will flash in unison
with the corresponding front and rear turn
signal lights when the turn signal switch is
operated. (Refer to “Lights” in “Knowing
Your Vehicle” for further information).
NOTE:
A chime will sound if the vehicle is driven more than
1.6 km with either turn signal on.
Check for an inoperative outside light bulb if either
indicator flashes at a rapid rate.
5. High Beam Indicator This light shows that the high beam headlights
are on. Pull the multifunction lever on the left
side of the steering column toward you to switch to
low beam. (Refer to “Lights” in “Knowing Your Vehicle”
for further information).
6. Front Fog Light Indicator (for versions/markets,
where provided) This indicator will illuminate when the front fog
lights are on. (Refer to “Lights” in “Knowing
Your Vehicle” for further information).
274
KNOWING YOUR
VEHICLE
SAFETY
STARTING AND
DRIVING
WARNING LIGHTSAND
MESSAGES
INAN
EMERGENC
Y
SERVICING AND
CARE
TECHNICAL
SPECIFICATIONS
CONTENTS
Page 281 of 412

7. Odometer Display / Electronic Vehicle Informa-
tion Center (EVIC) Display
Odometer
The odometer display shows the total distance the
vehicle has been driven.
Electronic Vehicle Information Center (EVIC) Dis-
play
The Electronic Vehicle Information Center (EVIC) fea-
tures a driver-interactive display that is located in the
instrument cluster. For further information, refer to
“Electronic Vehicle Information Center (EVIC)” in
“Knowing Your Vehicle”.
8. Park/Headlight ON IndicatorThis indicator will illuminate when the park
lights or headlights are turned on. (Refer to
“Lights” in “Knowing Your Vehicle” for fur-
ther information).
9. Tire Pressure Monitoring Telltale Light Each tire, including the spare (if provided),
should be checked monthly when cold and
inflated to the inflation pressure recom-
mended by the vehicle manufacturer on the
vehicle placard or tire inflation pressure label. As an added safety feature, your vehicle has been
equipped with a tire pressure monitoring system
(TPMS) that illuminates a low tire pressure telltale
when one or more of your tires is significantly under-
inflated. Accordingly, when the low tire pressure tell-
tale light illuminates, you should stop and check your
tires as soon as possible, and inflate them to the proper
pressure. Driving on a significantly under-inflated tire
causes the tire to overheat and can lead to tire failure.
Under-inflation also reduces fuel efficiency and tire
tread life, and may affect the vehicle’s handling and
stopping ability.
Please note that the TPMS is not a substitute for
proper tire maintenance, and it is the driver’s respon-
sibility to maintain correct tire pressure, even if under-
inflation has not reached the level to trigger illumina-
tion of the TPMS low tire pressure telltale.
Your vehicle has also been equipped with a TPMS
malfunction indicator to indicate when the system is
not operating properly. The TPMS malfunction indica-
tor is combined with the low tire pressure telltale.
When the system detects a malfunction, the telltale
will flash for approximately one minute and then re-
main continuously illuminated. This sequence will con-
tinue upon subsequent vehicle start-ups as long as the
malfunction exists. When the malfunction indicator is
illuminated, the system may not be able to detect or
275
KNOWING
YOUR
VEHICLE
SAFETY
STARTING
AND
DRIVING
WARNING
LIGHTS
AND
MESSAGES
IN
AN
EMERGENC
Y
SERVICING
AND
CARE
TECHNICAL
SPECIFICATIONS
CONTENTS
Page 364 of 412

Glass Surfaces
All glass surfaces should be cleaned on a regular basis
with any commercial household-type glass cleaner.
Never use an abrasive type cleaner. Use caution when
cleaning the inside rear window equipped with an
electric defroster. Do not use scrapers or other sharp
instruments that may scratch the elements.
When cleaning the rear view mirror, spray cleaner on
the towel or rag that you are using. Do not spray
cleaner directly on the mirror.
Cleaning Plastic Instrument Cluster Lenses
The lenses in front of the instruments in this vehicle are
molded in clear plastic. When cleaning the lenses, care
must be taken to avoid scratching the plastic.
1. Clean with a wet soft rag. A mild soap solution maybe used, but do not use high alcohol content or
abrasive cleaners. If soap is used, wipe clean with a
clean damp rag.
2. Dry with a soft cloth. Seat Belt Maintenance
Do not bleach, dye or clean the belts with chemical
solvents or abrasive cleaners. This will weaken the
fabric. Sun damage can also weaken the fabric.
If the belts need cleaning, use a mild soap solution or
lukewarm water. Do not remove the belts from the car
to wash them. Dry with a soft cloth.
Replace the belts if they appear frayed or worn or if the
buckles do not work properly.
WARNING!
A frayed or torn belt could rip apart in a
collisi on
and leave you with no protec-
tion. Inspect the belt system periodically, check-
ing for cuts, frays, or loose parts. Damaged parts
must be replaced immediately. Do not disas-
semble or modify the system. Seat belt assem-
blies must be replaced after a collision if they
have been damaged (i.e., bent retractor, torn
webbing, etc .).
CLEANING THE CUP HOLDERS
Clean with a damp cloth or towel using a mild deter-
gent.
358
KNOWING YOUR
VEHICLE
SAFETY
STARTING AND
DRIVING
WARNING LIGHTSAND
MESSAGES
IN AN
EMERGENCY
SERVICINGAND C ARE
TECHNICAL
SPECIFICATIONS
CONTENTS
Page 401 of 412

Requirements......................... .379
Saver Mode ............................29
Specifications . . . . . .................... .385
Tank Capacity . . . . . . . . . . . ...............384
Fuel, Flexible . . . . . . . . . . . . . ................381
Fueling . . . . . . . . ........................ .190
Fuel Optimizer ............................29
Fuel Saver ................................29
Fuel System Caution . ...................... .191
Fuses . ................................ .307
Gas Cap (Fuel Filler Cap) .................... .190
Gas Gauge (Fuel Gauge) .......................7
Gasoline, Clean Air ....................... .380
Gasoline (Fuel) .......................... .379
Conserving ............................29
Gauges Coolant Temperature . .....................8
Fuel . . ................................7
Speedometer ............................7
Tachometer .............................7
Gear Ranges . . . . . . . . . . . . . . . . . ............249
Gear Select Lever Override . . . . . . . ............313
General Information . . . . . . . . . . . . . ........12, 158
General Maintenance ...................... .335
Glass Cleaning . . ......................... .358
Gross Axle Weight Rating . . . . . . . .............259
Gross Vehicle Weight Rating . . . . . . . ...........258
Hazard Driving Through Flowing, Rising, or Shallow Standing
Water .............................. .257
Hazard Warning Flasher . ................... .107Headlights
Automatic .............................92
Bulb Replacement ...................... .301
Cleaning ............................ .357
Delay ................................93
High Beam ........................... .301
High Beam/Low Beam Select Switch ............95
Leveling ...............................92
Lights On Reminder ......................94
On With Wipers .................... .93, 100
Passing ...............................95
Switch ................................92
Time Dela y............................
93
Washers ............................ .100
Headlight Washers ........................ .100
Head Restraints ............................54
Heated Mirrors ............................69
Heated Seats ..............................50
High Beam Indicator ....................... .274
High Beam/Low Beam Select (Dimmer) Switch .......95
Hill Start Assist .......................... .147
Holder, Coin ............................ .108
Holder, Cup ............................ .115
Hood Release ........................... .136
Ignition Key ..................................8
Illuminated Entry ...........................97
Immobilizer (Sentry Key) ......................11
Inflation Pressure Tires ..................... .275
Information Center, Vehicle ....................20
Inside Rearview Mirror .......................66
Instrument Cluster ........................ .273
395
KNOWING
YOUR
VEHICLE
SAFETY
STARTING
AND
DRIVING
WARNING
LIGHTS
AND
MESSAGES
IN AN
EMERGENCY
SERVICING
AND CARE
TECHNICAL
SPECIFICATIONS
CONTENTS
Page 402 of 412

Instrument Panel and Controls..................6
Instrument Panel Cover . . . ..................357
Instrument Panel Lens Cleaning ................358
Interior Appearance Care . . . .................357
Interior Fuses . . . . . . . . . . ..................308
Interior Lights .............................96
Intermittent Wipers (Delay Wipers) ..............98
Intervention Regeneration Strategy ..............344
Introduction ...............................1
Jacking Instructions . . ...................... .286
Jack Location ........................ .283, 284
Jack Operation . . . . . . . . ...................286
Jump Starting . . . . . . . ..................... .279
Key Fo b Programming Additional Key Fobs ..............14
Programming Additional Transmitters ...........14
Key-In Reminder . . . . . . . . ...................10
Keyless Enter-N-Go .................... .123, 238
Keyless Entry System . . . . . . ..................13
Keyless Go ................................8
Key, Programming . . . . . . . ...................12
Key, Replacement . . . . . . . . . ..................12
Keys....................................8
Key, Sentry (Immobilizer) . . ...................11
Lane Change and Turn Signals ..................95
Lane Change Assist . . . . . . ...................95
Lap/Shoulder Belts ........................ .194
Latches. ............................... .236
Hood .............................. .136
Lead Free Gasoline ........................ .379Leaks, Fluid
............................. .236
Leveling, Headlight ..........................92
LifeofTires..............................376
Liftgate.................................130
Liftgate Window Wiper/Washer ................101
Light Bulbs .......................... .236, 300
Lights .............................. .92, 236
Airbag ....................... .213, 235, 273
Anti-Lock ........................... .143
Anti-Lock Warning ..................... .278
Automatic Headlights .....................92
Back-Up ............................ .305
Brake Assist
Warning .................... .147
Brake Warning ........................ .276
Bulb Replacement ...................... .301
Courtesy/Reading ........................96
Dimmer Switch, Headlight ..................95
Electronic Stability Program (ESP) Indicator ......147
Exterior ............................. .236
Fog .......................... .94, 274, 302
Hazard Warning Flasher .................. .107
Headlight Leveling ........................92
Headlights ......................... .92, 301
Headlights On Reminder ...................94
Headlights On With Wipers .............93, 100
Headlight Switch .........................92
High Beam ..................... .95, 274, 301
High Beam Indicator .................... .274
High Beam/Low Beam Select .................95
Illuminated Entry ........................97
Instrument Cluster ................... .92, 273
Intensity Control ........................96
Interior ...............................96
396
KNOWING
YOUR
VEHICLE
SAFETY
STARTING AND
DRIVING
WARNING LIGHTSAND
MESSAGES
IN AN
EMERGENCY
SERVICINGAND CARE
TECHNICAL
SPECIFICATIONS
CONTENTS
Page 403 of 412
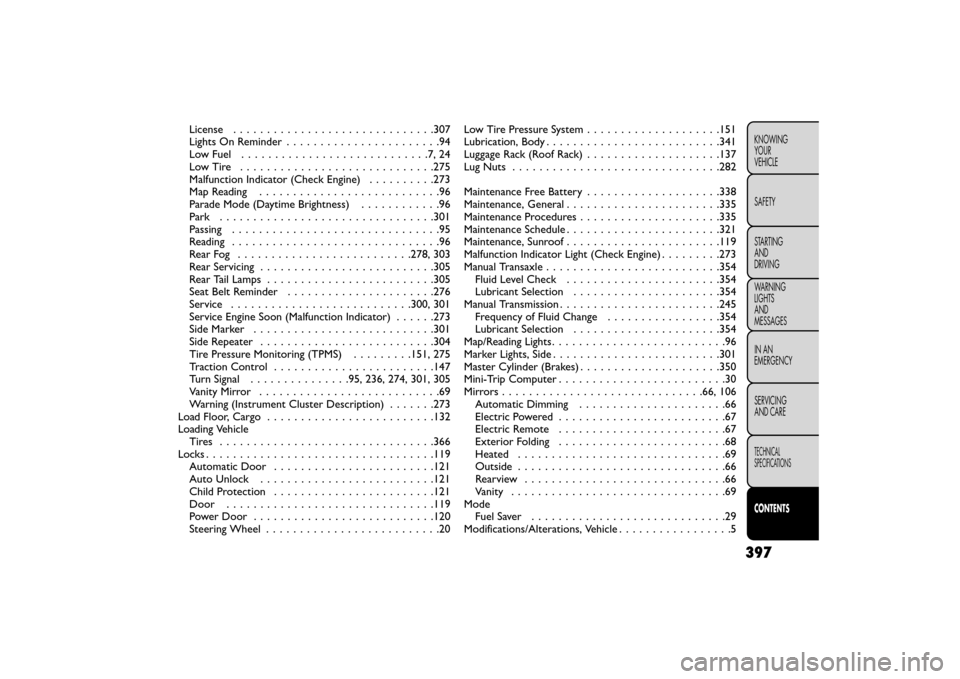
License . . . . . . . . . . . . ..................307
Lights On Reminder . . . . . . . . . . . ............94
Low Fuel ............................7,24
LowTire .............................275
Malfunction Indicator (Check Engine) ..........273
Map Reading . . . . . . . . . . . . ...............96
Parade Mode (Daytime Brightness) ............96
Park ............................... .301
Passing ...............................95
Reading ...............................96
RearFog ..........................278, 303
Rear Servicing . ........................ .305
Rear Tail Lamps ........................ .305
Seat Belt Reminder ..................... .276
Service .......................... .300, 301
Service Engine Soon (Malfunction Indicator) ......273
Side Marker .......................... .301
Side Repeater . . . ...................... .304
Tire Pressure Monitoring (TPMS) .........151, 275
Traction Control . . . .................... .147
Turn Signal ...............95, 236, 274, 301, 305
Vanity Mirror ...........................69
Warning (Instrument Cluster Description) .......273
Load Floor, Cargo ........................ .132
Loading Vehicle Tires ................................366
Locks . ................................ .119
Automatic Door . . . . . . . .................121
Auto Unlock ......................... .121
Child Protection . . . . . . ..................121
Door .............................. .119
Power Door . . . . . . . . . ..................120
Steering Wheel ..........................20 Low Tire Pressure System
................... .151
Lubrication, Body ......................... .341
LuggageRack(RoofRack)................... .137
Lug Nuts .............................. .282
Maintenance Free Battery ................... .338
Maintenance, General ...................... .335
Maintenance Pr
ocedures .................... .335
Maintenance Schedule . . . ................... .321
Maintenance, Sunroof ...................... .119
Malfunction Indicator Light (Check Engine) .........273
Manual Transaxle ......................... .354
Fluid Level Check ...................... .354
Lubricant Selection ..................... .354
Manual Transmission ....................... .245
Frequency of Fluid Change .................354
Lubricant Selection ..................... .354
Map/Reading Lights ..........................96
Marker Lights, Side ........................ .301
Master Cylinder (Brakes) .................... .350
Mini-Trip Computer .........................30
Mirrors............................. .66, 106
Automatic Dimming ......................66
Electric Powered .........................67
Electric Remote .........................67
Exterior Folding .........................68
Heated ...............................69
Outside ...............................66
Rearview ..............................66
Vanity ................................69
Mode Fuel Saver .............................29
Modifications/Alterations, Vehicle .................5
397
KNOWING
YOUR
VEHICLE
SAFETY
STARTING
AND
DRIVING
WARNING
LIGHTS
AND
MESSAGES
IN AN
EMERGENCY
SERVICING
AND CARE
TECHNICAL
SPECIFICATIONS
CONTENTS