recommended oil FIAT FREEMONT 2016 1.G Owners Manual
[x] Cancel search | Manufacturer: FIAT, Model Year: 2016, Model line: FREEMONT, Model: FIAT FREEMONT 2016 1.GPages: 412, PDF Size: 3.36 MB
Page 243 of 412
STARTING AND DRIVING
ENGINE BREAK-IN
RECOMMENDATIONS
A long break-in period is not required for the engine
and drivetrain (transmission and axle) in your vehicle.
Drive moderately during the first 500 km. After the
initial 100 km, speeds up to 80 or 90 km/h are desirable.
While cruising, brief full-throttle acceleration, within
the limits of local traffic laws contributes to a good
break-in. Wide-open throttle acceleration in low gear
can be detrimental and should be avoided.
The engine oil installed in the engine at the factory is a
high-quality energy-conserving type lubricant. Oil
changes should be consistent with anticipated climate
conditions under which vehicle operations will occur.
For the recommended viscosity and quality grades,
refer to “Maintenance Procedures” in “Servicing And
Care”. NON-DETERGENT OR STRAIGHT MINERAL
OILS MUST NEVER BE USED.
A new engine may consume some oil during its first few
thousand kilometers of operation. This should be con-
sidered a normal part of the break-in and not inter-
preted as an indication of difficulty.
STARTING PROCEDURES
Before starting your vehicle, adjust your seat, adjust the
inside and outside mirrors, fasten your seat belt, and if
present, instruct all other occupants to buckle their
seat belts.
WARNING!
• Before exiting a vehicle, always apply
t h
e parking brake, shift the transmission
into PARK, and remove the Key Fob from the
ignition. When leaving the vehicle, always lock
your vehicle.
• Never leave children alone in a vehicle, or with
access to an unlocked vehicle.
• Allowing children to be in a vehicle unattended
is dangerous for a number of reasons. A child or
others could be seriously or fatally injured. Chil-
dren should be warned not to touch the parking
brake, brake pedal or the shift lever.
(Continued)
237
KNOWING
YOUR
VEHICLE
SAFETY
STARTING
AND
DRIVING
WARNING
LIGHTS
AND
MESSAGES
INAN
EMERGENC
Y
SERVICING
AND CARE
TECHNICAL
SPECIFICATIONS
CONTENTS
Page 288 of 412
WHEEL AND TIRE TORQUE
SPECIFICATIONS
Proper lug nut/bolt torque is very important to ensure
that the wheel is properly mounted to the vehicle. Any
time a wheel has been removed and reinstalled on the
vehicle the lug nuts/bolts should be torqued using a
properly calibrated torque wrench.
TORQUE SPECIFICATIONS
Lug Nut/Bolt Torque **LugNut/BoltSize Lug
Nut/ Bolt
Socket Size
135 N·m M12 x 1.25 19 mm
**Use only FIAT recommended lug nuts/bolts and clean
or remove any dirt or oil before tightening. Inspect the wheel mounting surface prior to mounting
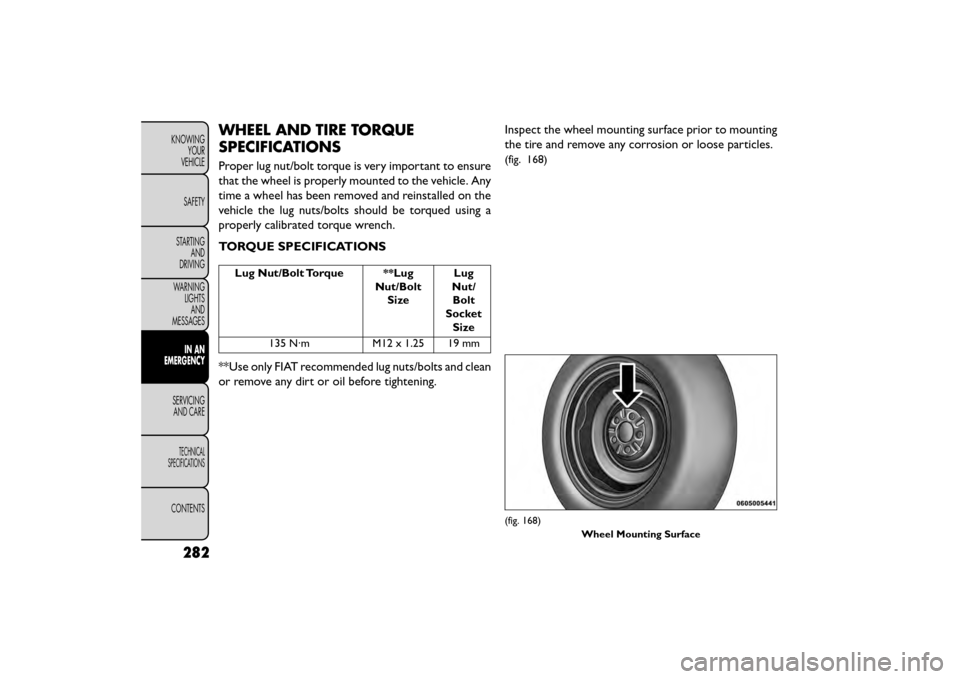
the tire and remove any corrosion or loose particles.
(fig. 168)
(fig. 168)
Wheel Mounting Surface
282
KNOWINGYOUR
VEHICLE
SAFETY
STARTING AND
DRIVING
WARNING LIGHTSAND
MESSAGES
IN AN
EMERGENCY
SER VICING
AND
CARE
TECHNICAL
SPECIFICATIONS
CONTENTS
Page 305 of 412
(E) After Driving:
Pull over to a safe location. Refer to “Whenever You
Stop to Use Tire Service Kit” before continuing.
1. Turn the Mode Select Knob (5) to the Air Modeposition.
2. Uncoil the power plug and insert the plug into the vehicle's 12 Volt power outlet.
3. Uncoil the Air Pump Hose (7) (black in color) and screw the fitting at the end of hose (7) onto the
valve stem.
4. Check the pressure in the tire by reading the Pres- sure Gauge (3).
If tire pressure is less than 1.3 Bar, the tire is too
badly damaged. Do not attempt to drive the vehicle
further. Call for assistance.
If the tire pressure is 1.3 bar or higher:
1. Press the Power Button (4) to turn on Tire Service Kit and inflate the tire to the pressure indicated on
the tire and loading information label on the driver-
side door opening. NOTE:
If the tire becomes over-inflated, press the
Deflation Button to reduce the tire pressure to the
recommended inflation pressure before continuing.
2. Disconnect the Tire Service Kit from the valve stem, reinstall the cap on the valve stem and unplug
from 12 Volt outlet.
3. Place the Tire Service Kit in its proper storage area in the vehicle.
4. Have the tire inspected and repaired or replaced at the earliest opportunity at an authorized dealer or
tire service center.
5. Replace the Sealant Bottle (1) and Sealant Hose (6) assembly at your authorized dealer as soon as pos-
sible. Refer to “(F) Sealant Bottle and Hose Replace-
ment.”
NOTE: When having the tire serviced, advise the
authorized dealer or service center that the tire has
been sealed using the Tire Service Kit.
299
KNOWING
YOUR
VEHICLE
SAFETY
STARTING
AND
DRIVING
WARNING
LIGHTS
AND
MESSAGES
IN AN
EMERGENCY
SER VICING
AND
CARE
TECHNICAL
SPECIFICATIONS
CONTENTS
Page 343 of 412
Car maintenance should be done at a
FIAT Dealership. For routine and minor
maintenance operations you wish to
carry out yourself, we do recommend you have
the proper equipment , genuine FIAT spare parts
and the necessary fluids; do not however carry out
these operations if you have no experience.
Change Engine Oil — Gasoline Engine
Refer to the “Maintenance Schedule” for the proper
maintenance intervals.
Change Engine Oil — Diesel Engine
Refer to the “Maintenance Schedule” for the proper
maintenance intervals.
Engine Oil Viscosity — 2.4L And 3.6L Gasoline
Engine
SAE Grade 5W-20 SELENIA K POWER fully synthetic
engine oil that meets FIAT Qualification 9.55535-CR1
API SN, ILSAC GF-5 or equivalent.
The engine oil filler cap also shows the recommended
engine oil viscosity for your vehicle. For information on
engine oil filler cap location, refer to “Engine Compart-
ment” in “Servicing And Care” for further information. NOTE:
SAE Grade 5W-30 SELENIA K POWER fully
synthetic engine oil that meets FIAT Qualification
9.55535-CR1 API SN, ILSAC GF-5 may be used when
SAE 5W-20 engine oil meeting Fiat 9.55535-CR1 is not
available.
Engine Oil Viscosity — 2.0L Diesel Engine
SAE Grade 5W-30 SELENIA WR P.E. fully synthetic
engine oil that meets FIAT Qualification 9.55535–S1,
ACEA C2 or equivalent.
The engine oil filler cap also shows the recommended
engine oil viscosity for your engine. For information on
engine oil filler cap location, refer to “Engine Compart-
ment” in “Servicing and Care” for further information.
Change Engine Oil — Diesel Engine
Refer to the “Maintenance Schedule” for the proper
maintenance intervals.
Materials Added To Engine Oil
Do not add any supplemental materials, other than leak
detection dyes, to the engine oil. Engine oil is an
engineered product and its performance may be im-
paired by supplemental additives.
337
KNOWING
YOUR
VEHICLE
SAFETY
STARTING
AND
DRIVING
WARNING
LIGHTS
AND
MESSAGES
IN AN
EMERGENCY
SERVICING
AND C ARE
TECHNICAL
SPECIFICATIONS
CONTENTS
Page 357 of 412
WARNING! (Continued)
• To avoid contamination from foreign matter or
moisture, use only new brake fluid or fluid that
has been in a tightly closed container. Keep the
master cylinder reservoir cap secured at all
times. Brake fluid in a open container absorbs
moisture from the air resulting in a lower boiling
point . This may cause it to boil unexpectedly
during hard or prolonged braking, resulting in
sudden brake failure. This could result in a acci-
dent .
• Overfilling the brake fluid reservoir can result
in spilling brake fluid on hot engine parts, causing
the brake fluid to catch fire. Brake fluid can also
damage painted and vinyl surfaces, care should
be taken to avoid its contact with these surfaces.
• Do not allow petroleum based fluid to con-
taminate the brake fluid. Brake seal components
could be damaged, causing partial or complete
brake failure.This could result in an accident . AUTOMATIC TRANSMISSION (for
versions/markets, where provided)
Selection Of Lubricant
It is important to use the proper transmission fluid to
ensure optimum transmission performance and life.
Use only the manufacturer’s specified transmission
fluid. Refer to “Fluids, Lubricants, and Genuine Parts”
in “Technical Specifications” for fluid specifications. It is
important to maintain the transmission fluid at the
correct level using the recommended fluid. No chemi-
cal flushes should be used in any transmission; only the
approved lubricant should be used.
Using a transmission fluid other than the
manufacturer ’s recommended fluid may
cause deterioration in transmission shift
quality and/or torque converter shudder, and will
require more frequent fluid and filter changes.
Refer to “Fluids, Lubricants, and Genuine Parts” in
"Technical Specifications" for fluid specifica-
tions.
351
KNOWING
YOUR
VEHICLE
SAFETY
STARTING
AND
DRIVING
WARNING
LIGHTS
AND
MESSAGES
IN AN
EMERGENCY
SERVICING
AND C ARE
TECHNICAL
SPECIFICATIONS
CONTENTS
Page 359 of 412
4. Place the shift lever momentarily into each gearposition (allowing time for the transmission to fully
engage in each position), ending with the transmis-
sion in PARK.
5. Wipe the area around the dipstick clean to prevent dirt from entering the transmission.
6. Remove the dipstick and determine if the fluid is hot or cold. Hot fluid is approximately 82° C, which
is the normal operating temperature after the ve-
hicle is driven at least 24 km. Hot fluid cannot be
held comfortably between the fingertips. Cold fluid
is at a temperature of approximately 27° C.
7. Wipe the dipstick clean and reinsert it until seated. Then, remove the dipstick and note the fluid level
on both sides. The fluid level reading is only valid if
there is a solid coating of oil on both sides of the
dipstick. Note that the holes in the dipstick will be
full of fluid if the actual level is at or above the hole.
• If the fluid is hot, the fluid level should be in the crosshatched area marked “HOT” (between the up-
per two holes in the dipstick).
• If the fluid is cold, the fluid level should be between the lower two holes in the area marked “COLD.” • If the fluid level is low, add fluid through the dipstick
tube to bring it to the proper level. Do not overfill.
After adding any quantity of oil through the dipstick
tube, wait at least two minutes for the oil to fully
drain into the transmission before rechecking the
fluid level.
8. Check for leaks. Release the parking brake.
To prevent dirt and water from entering the transmis-
sion after checking or replenishing fluid, make sure that
the dipstick cap is properly re-seated.
• Using a transmission fluid other than
the manufacturer ’s recommended fluid
may cause deterioration in transmission
shift quality and/or torque converter shudder, and
will require more frequent fluid and filter
changes. Refer to “Fluids, Lubricants, and Genuine
Parts” in "Technical Specifications" for fluid
specifications.
• Dirt and water in the transmission can cause
serious damage. To prevent dirt and water from
entering the transmission after checking or re-
plenishing fluid, make sure that the dipstick cap is
re-seated properly.
353
KNOWING
YOUR
VEHICLE
SAFETY
STARTING
AND
DRIVING
WARNING
LIGHTS
AND
MESSAGES
IN AN
EMERGENCY
SERVICING
AND C ARE
TECHNICAL
SPECIFICATIONS
CONTENTS
Page 360 of 412
Fluid And Filter Changes
Refer to the “Maintenance Schedule” for the proper
maintenance intervals.
In addition, change the fluid and filter if the fluid
becomes contaminated (with water, etc.), or if the
transmission is disassembled for any reason.
MANUAL TRANSMISSION (for versions/
markets, where provided)
Lubricant Selection
Use only manufacturers recommended transmission
fluid. Do not add any materials (other than leak detec-
tion dyes). Refer to “Fluids, Lubricants, and Genuine
Parts” in “Technical Specifications” for further informa-
tion.
Frequency Of Fluid Change
Change the manual transmission fluid at the intervals
shown in the “Maintenance Schedule” in this manual.
REAR DRIVE ASSEMBLY (RDA) – AWD
MODELS ONLY
Lubricant Selection
Use only the manufacturer's recommended fluid. Refer
to “Fluids, Lubricants, and Genuine Parts” in “Technical
Specifications” for further information.Fluid Level Check
Visually inspect the unit at each oil change for leakage.
If leakage is detected, check the fluid level by removing
the fill plug. The fluid level should be maintained be-
tween the bottom of the fill hole to 4 mm below the fill
hole.
Add fluid, if necessary, to maintain the proper level.
Frequency Of Fluid Change
Refer to the “Maintenance Schedule” for the proper
maintenance intervals.
POWER TRANSFER UNIT (PTU) – AWD
MODELS ONLY
Lubricant Selection
Use only the manufacturer's recommended fluid. Refer
to “Fluids, Lubricants, and Genuine Parts” in “Technical
Specifications” for further information.
Fluid Level Check
Visually inspect the unit at each oil change for leakage.
If leakage is detected, Check the fluid level by removing
the fill plug. The fluid level should be maintained be-
tween the bottom of the fill hole to 4 mm below the fill
hole.
Add fluid, if necessary, to maintain the proper level.
354
KNOWING
YOUR
VEHICLE
SAFETY
STARTING AND
DRIVING
WARNING LIGHTSAND
MESSAGES
IN AN
EMERGENCY
SERVICINGAND C ARE
TECHNICAL
SPECIFICATIONS
CONTENTS
Page 382 of 412
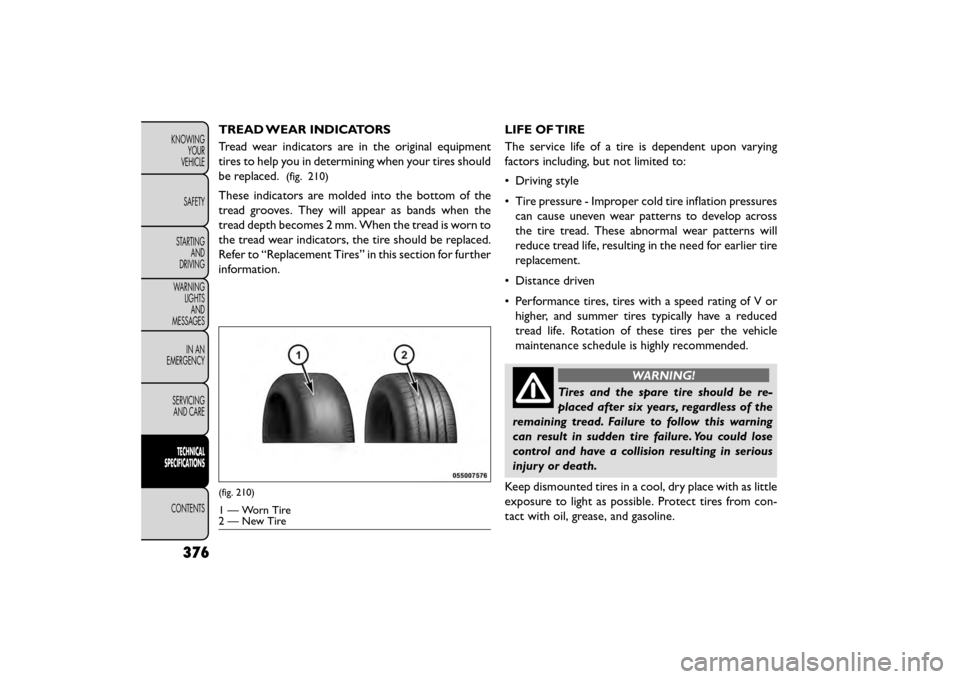
TREAD WEAR INDICATORS
Tread wear indicators are in the original equipment
tires to help you in determining when your tires should
be replaced.
(fig. 210)
These indicators are molded into the bottom of the
tread grooves. They will appear as bands when the
tread depth becomes 2 mm. When the tread is worn to
the tread wear indicators, the tire should be replaced.
Refer to “Replacement Tires” in this section for further
information.LIFE OF TIRE
The service life of a tire is dependent upon varying
factors including, but not limited to:
• Driving style
• Tire pressure - Improper cold tire inflation pressures
can cause uneven wear patterns to develop across
the tire tread. These abnormal wear patterns will
reduce tread life, resulting in the need for earlier tire
replacement.
• Distance driven
• Performance tires, tires with a speed rating of V or higher, and summer tires typically have a reduced
tread life. Rotation of these tires per the vehicle
maintenance schedule is highly recommended.
WARNING!
Tires and the spare tire should be re-
placed af
ter six years, regardless of the
remaining tread. Failure to follow this warning
can result in sudden tire failure. You could lose
control and have a collision resulting in serious
injury or death.
Keep dismounted tires in a cool, dry place with as little
exposure to light as possible. Protect tires from con-
tact with oil, grease, and gasoline.
(fig. 210)
1 — Worn Tire
2 — New Tire
376
KNOWING YOUR
VEHICLE
SAFETY
STARTING AND
DRIVING
WARNING LIGHTSAND
MESSAGES
IN AN
EMERGENCY
SERVICINGAND CARE
TECHNICAL
SPECIFICATIONS
CONTENTS
Page 390 of 412
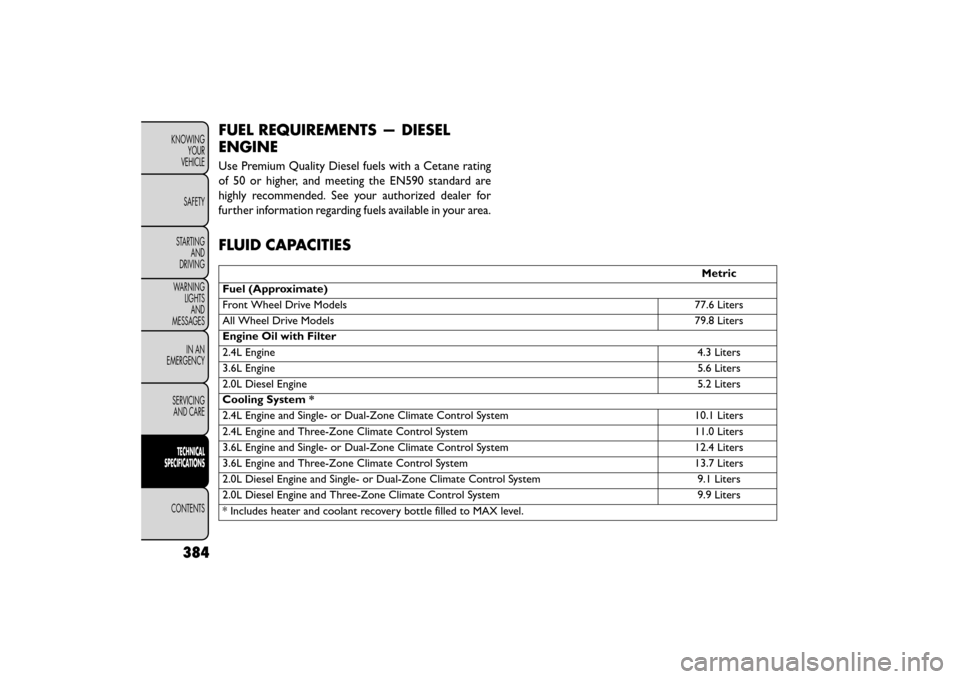
FUEL REQUIREMENTS — DIESEL
ENGINE
Use Premium Quality Diesel fuels with a Cetane rating
of 50 or higher, and meeting the EN590 standard are
highly recommended. See your authorized dealer for
further information regarding fuels available in your area.
FLUID CAPACITIES
Metric
Fuel (Approximate)
Front Wheel Drive Models 77.6 Liters
All Wheel Drive Models 79.8 Liters
Engine Oil with Filter
2.4L Engine 4.3 Liters
3.6L Engine 5.6 Liters
2.0L Diesel Engine 5.2 Liters
Cooling System *
2.4L Engine and Single- or Dual-Zone Climate Control System 10.1 Liters
2.4L Engine and Three-Zone Climate Control System 11.0 Liters
3.6L Engine and Single- or Dual-Zone Climate Control System 12.4 Liters
3.6L Engine and Three-Zone Climate Control System 13.7 Liters
2.0L Diesel Engine and Single- or Dual-Zone Climate Control System 9.1 Liters
2.0L Diesel Engine and Three-Zone Climate Control System 9.9 Liters
* Includes heater and coolant recovery bottle filled to MAX level.
384
KNOWING YOUR
VEHICLE
SAFETY
STARTING AND
DRIVING
WARNING LIGHTSAND
MESSAGES
IN AN
EMERGENCY
SERVICINGAND CARE
TECHNICAL
SPECIFICATIONS
CONTENTS